The Client Inquiries (Client) list page displays inquiries specific to the selected client in the Client Search box.
- For information on this list page see: Client Inquiries (Client) List Page – 2023 CalMHSA
- For more information how to document inquires see: How to Document Phone Calls – 2023 CalMHSA
This article is intended to provide more information on the fields within the client inquiry screen.
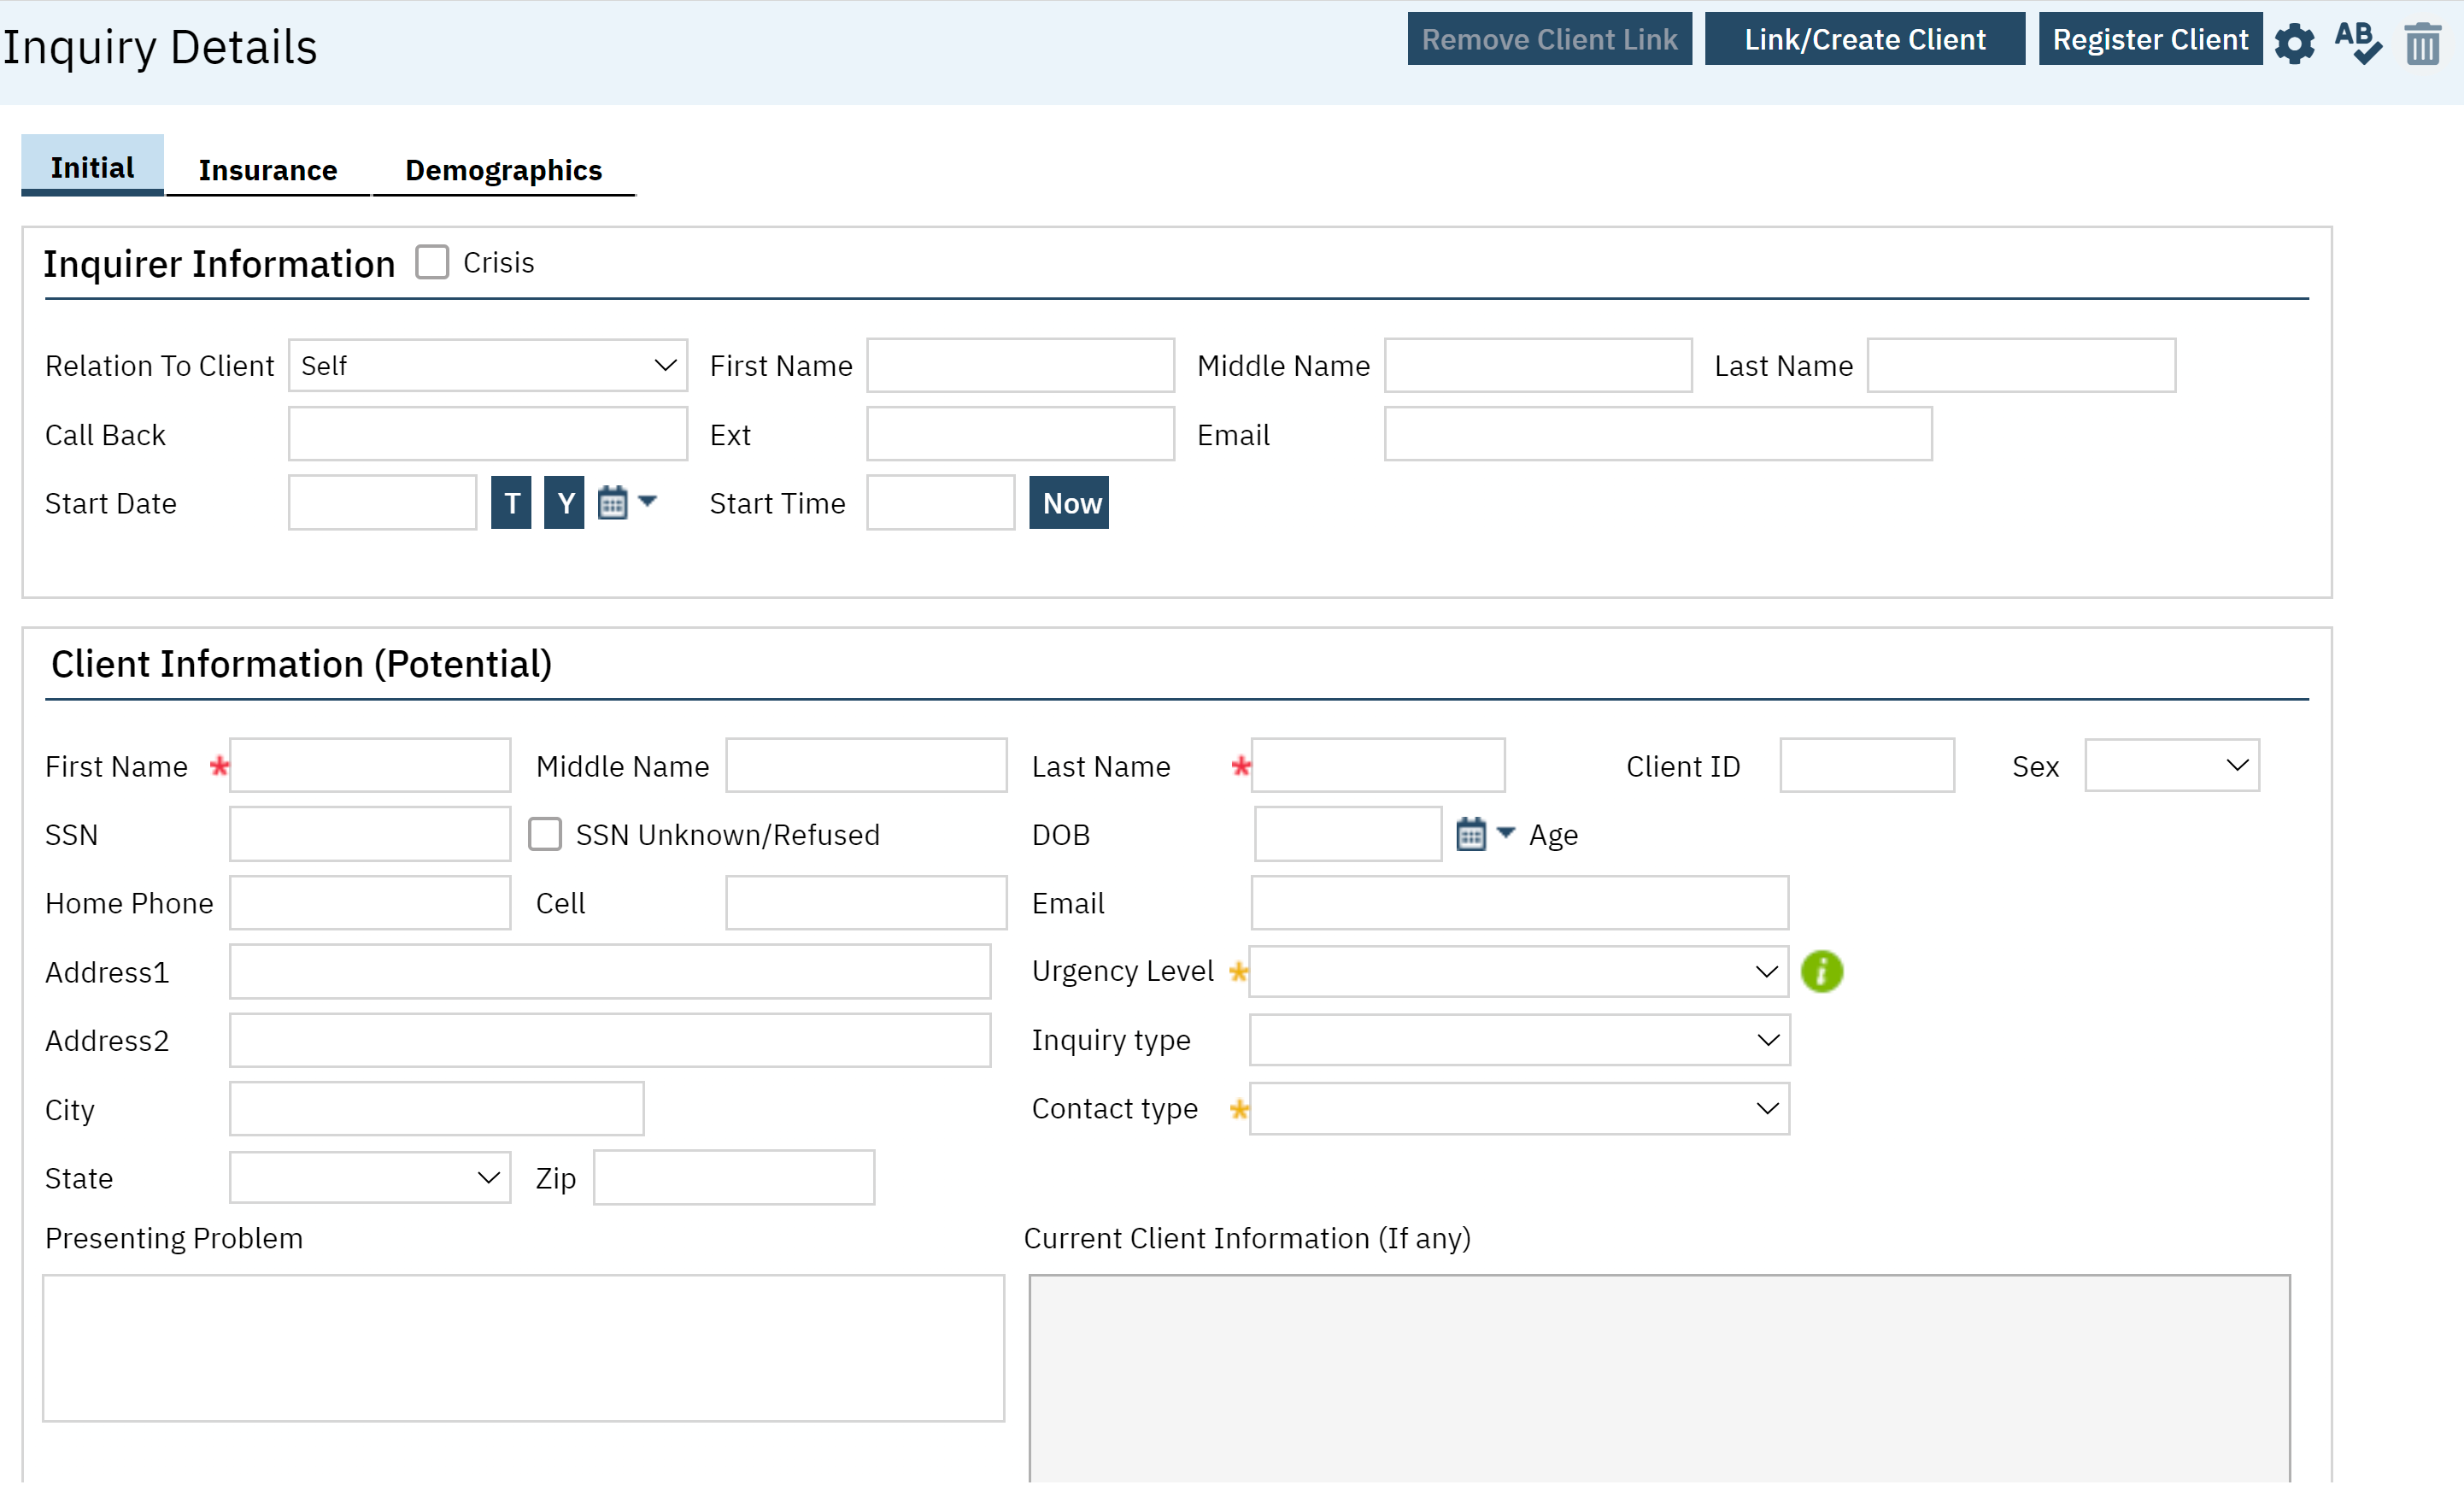
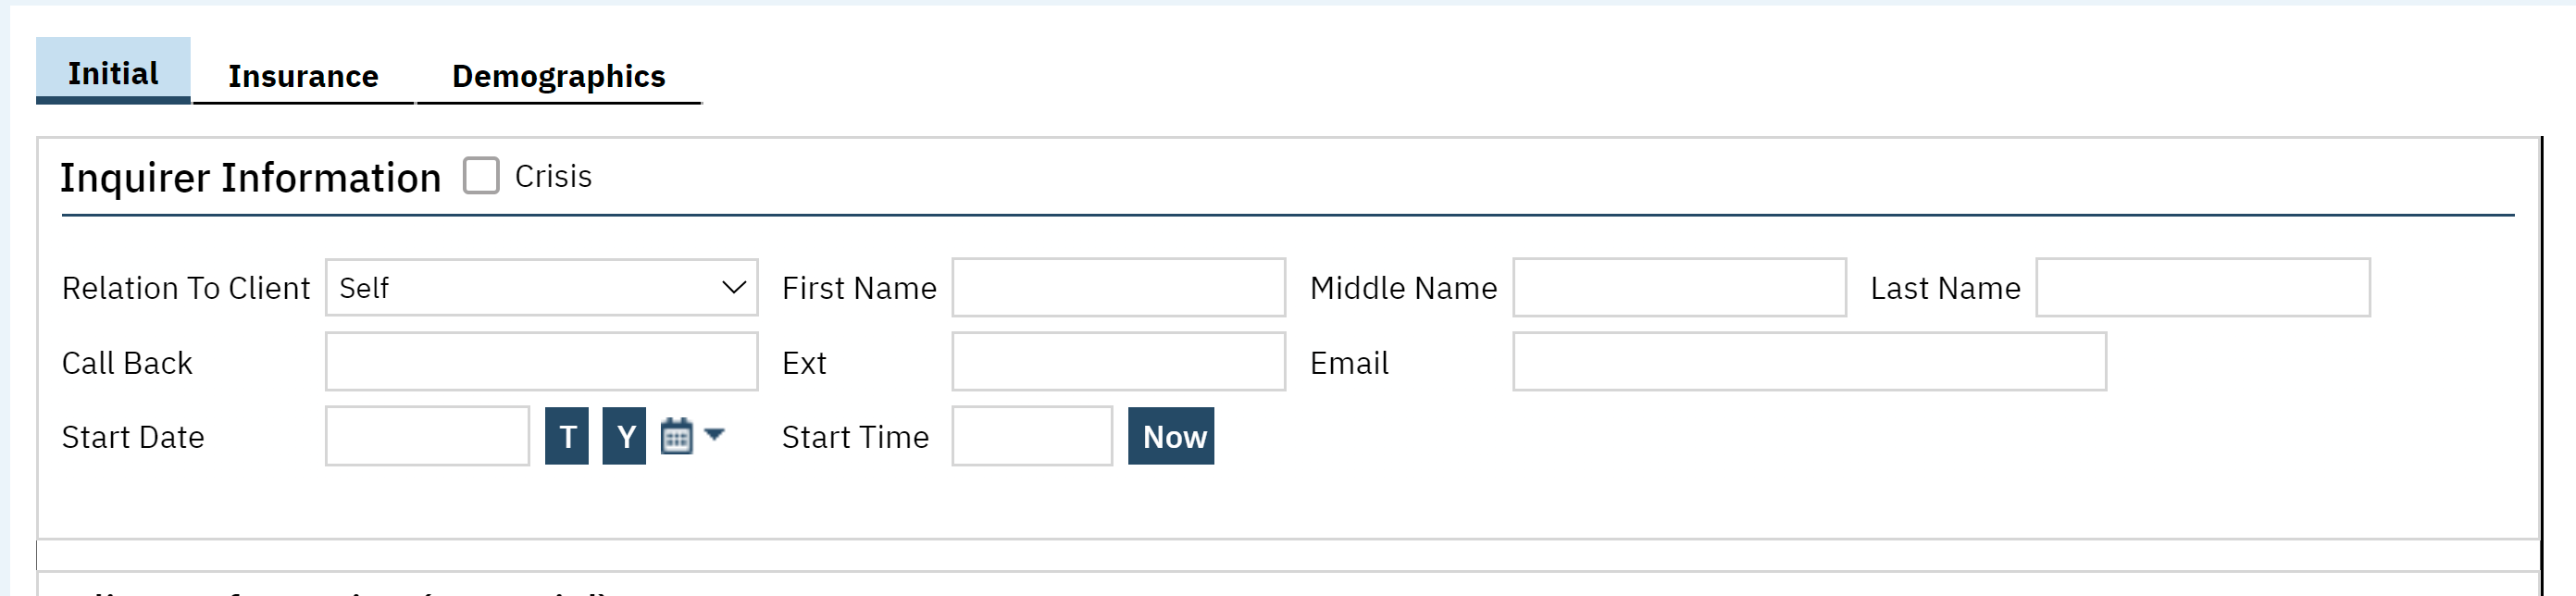
Field Definitions: Inquirer Information
- Crisis Checkbox: Select this checkbox to display the Crisis tab.
- Relation to Client: Indicates whether the potential client contacted your organization or if someone did so on the client’s behalf. If the client made the contact, the information from the client search will also pull into the Client Information (Potential) section discussed below. Select the relationship between the potential client and the inquirer.
- First Name, Middle Name, Last Name: Enter the first, middle, and last name of the inquirer. If Self is selected in the Relation To Client field, this information populates from the Client Search window.
- Call Back: Enter the phone number to call the inquirer back should the call be ended prior to gathering all information. If Relation to Client = Self, this information will also pull into the Home Phone field in the Client Information (Potential) section of the Initial tab
- Ext: Pairs with the Call Back field to document an extension, if applicable
- Email: Enter an email address for the inquirer. If Relation to Client = Self, this information will also pull into the Email field in the Client Information (Potential) section of the Initial tab.
- Start Date: Enter the date that the Inquiry occurred.
- This field also has paired buttons, T and Y, for today and yesterday, respectively. Click the T button to set the date to today. Click the Y button to set the date to yesterday.
- Enter the date in the mm/dd/yyyy format or click the calendar icon to select the date.
- Click the double caret (<< or >>) to navigate backward or forward by one year. Click the single caret (< or >) to navigate backward or forward by one month.
- For pre-set dates, click the applicable hyperlink in the Streamline Date/Time Language section at the bottom of the pop-up calendar. Click <<More>> to display a menu of shortcuts.
- Start Time: Time that the Inquiry began. Next to the Start Time field is a Now button. Clicking this button sets the Start Time to the current time. You can also manually enter the start time and include AM or PM. If you do not enter a time, the system defaults to 12:00 AM.
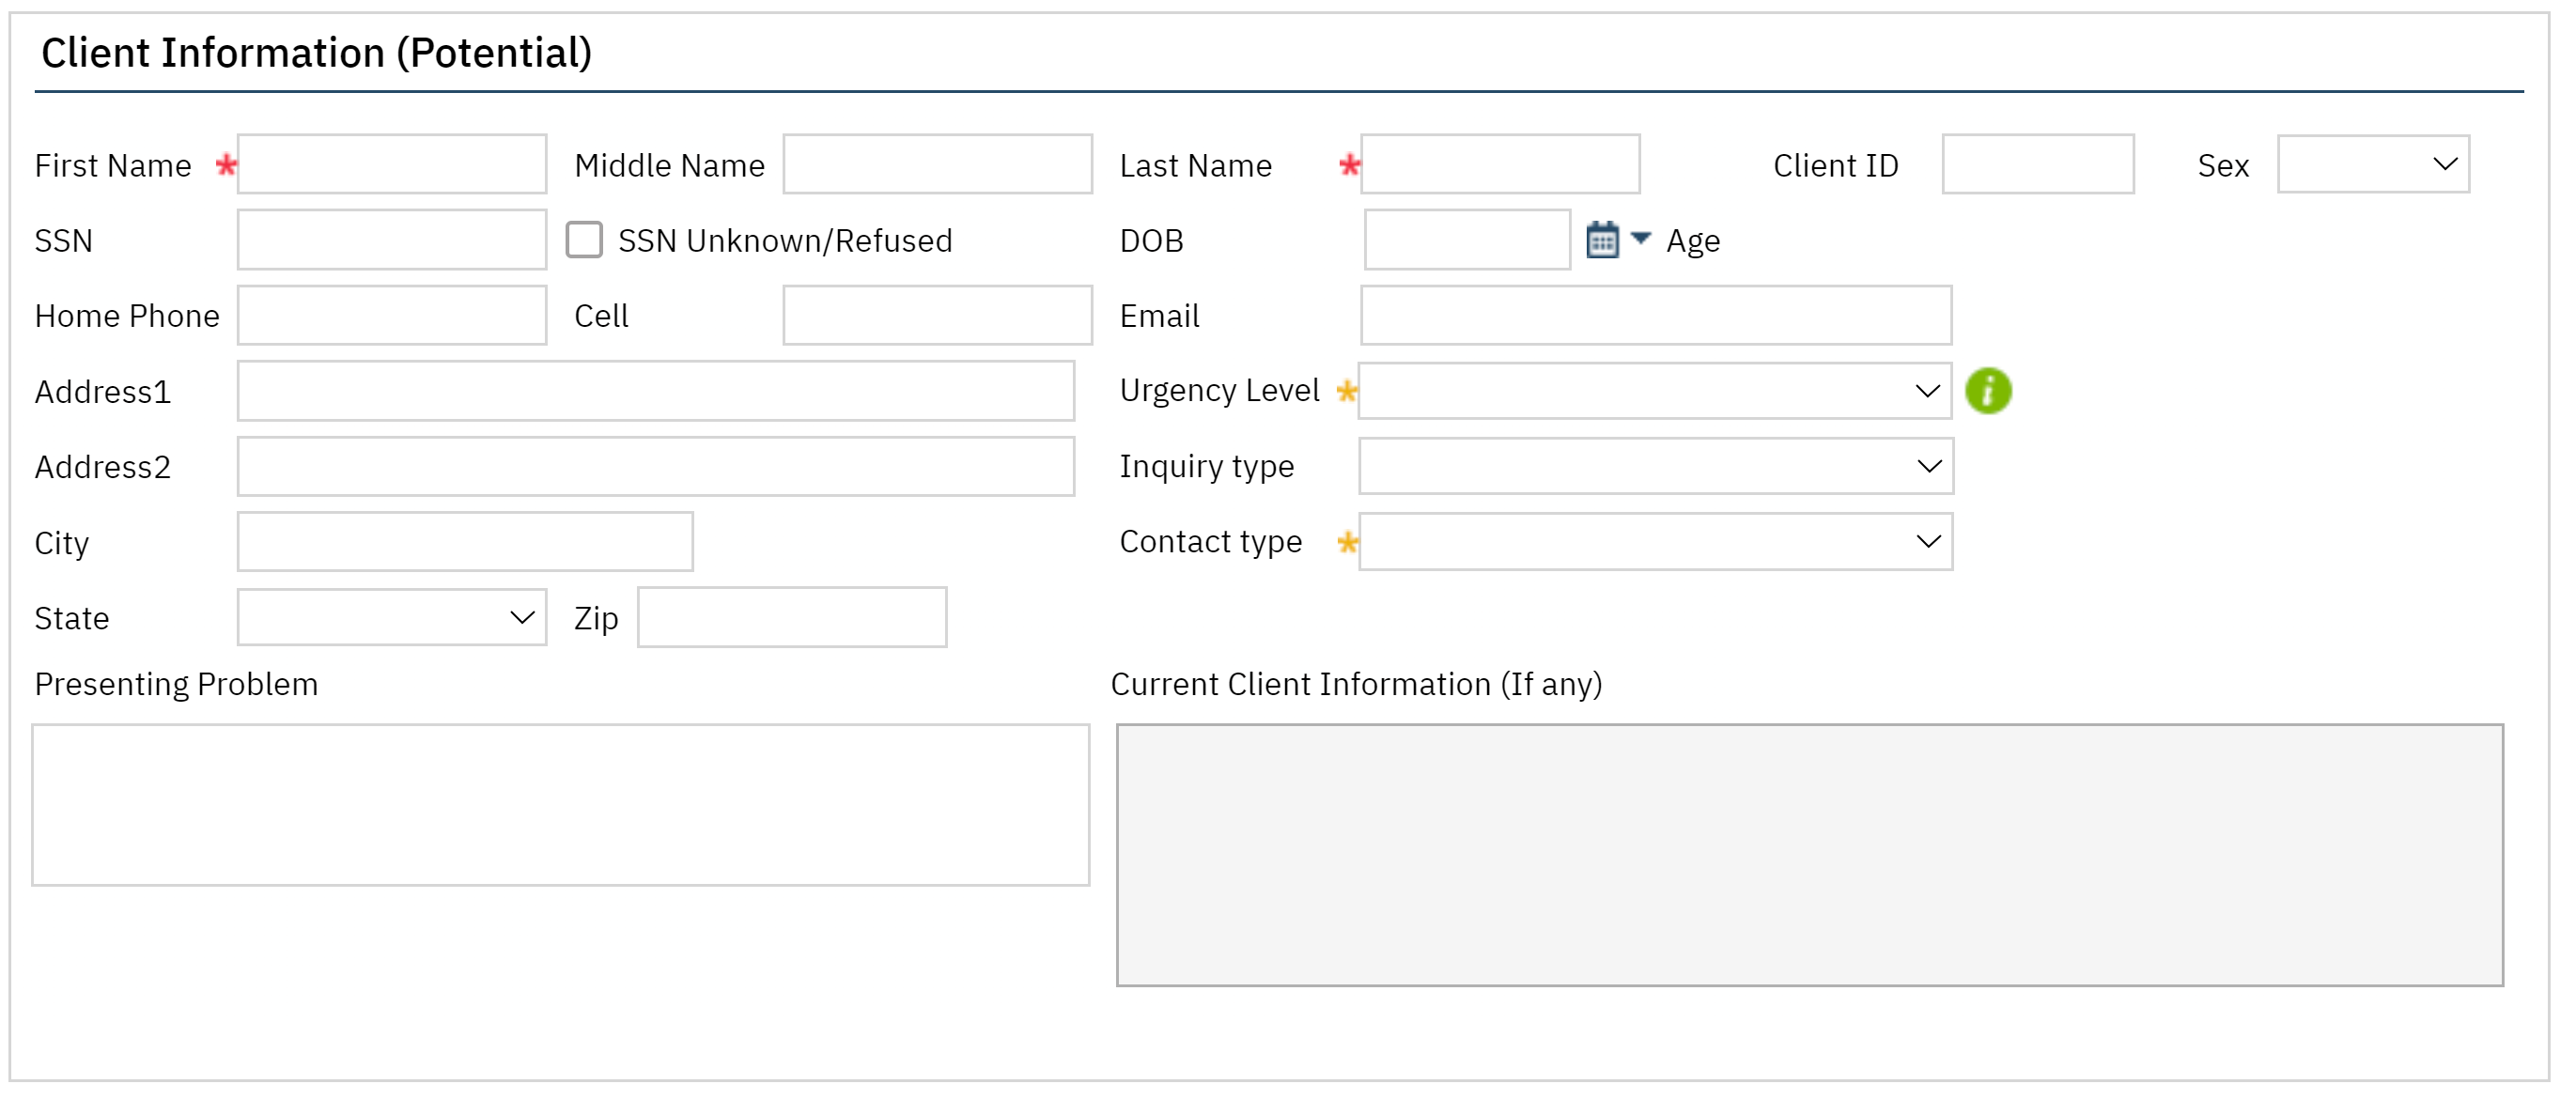
Field Definitions: Client Information (Potential)
- First Name, Middle Name, Last Name: If information exists in the client record for these fields, the data initializes and is not editable. If there is no information in the client’s record to initialize and the field was not created via the client search, data can be entered into the field.
- Client ID: If the client is pre-existing, an ID displays here as a hyperlink that can be used to navigate to the client record. If there is no pre-existing information, this field remains empty until the potential client becomes a client.
- Sex: If information exists in the client record for this field, the data initializes. If there is no information in the client’s record to initialize, a value can be selected from the dropdown. This pertains to the legal gender for billing insurance.
- SSN: Select this checkbox to indicate a lack of documentable SSN for the client. If applicable, selecting this checkbox fulfills the requirement for a SSN. If the SSN Unknown/Refused checkbox is selected, the field remains empty until the Inquiry is saved and then the field is populated with the value 999-99-9999.
- DOB: If information exists in the client record for this field, the data initializes. If there is no information in the client’s record to initialize, a value can be entered.
- Age: This field is populated after the DOB field is populated.
- Medicaid ID: This field contains the Medicaid Id for the client. This field initializes and is not editable if the client currently has a coverage plan in the record where Medicaid = Y.
- Home Phone, Cell: If information exists in the client record for these fields, the data initializes. If there is no information in the client’s record to initialize, a value can be entered.
- Email: Enter an email address for the client.
- Address, City, State, Zip: If information exists in the client record for these fields, the data initializes. If there is no information in the client’s record to initialize, a value can be entered.
- Urgency: Select a value related to the client’s urgency need relative to their request.
- Inquiry Type: Select a value to categorize the type of Inquiry.
- Contact Type: Select a value to describe the mode of contact used by the client.
- Current Client Information (If any): If the client for whom an Inquiry is being documented has previously been a client with the organization, the following information, if it is in the client’s record, initializes here:
- Client ID
- Last Inquiry Date
- Coverage History
- Episode Number from Episodes tab of client information
- Registration Date from Episodes tab of client information
- Discharge Date from Episodes tab of client information
- Client Can Legall Sign – Radio Button: This is informational only if the selection is “Yes”. If the client is not able to legally sign and you select “No”, a pop-up window prompts you for information about the client’s guardian. Note: If the Same as Caller checkbox is selected, the information from the Inquirer Information section populates here. Creation of this record creates a contact for the client where Guardian = Y. If you select the DPOA (Durable Power of Attorney) checkbox, “This client has DPOA” is displayed in the Comment field.
- Client Homeless Status: Select the applicable radio button to record the client’s homelessness status.
- Priority Population: Vulnerable populations or populations that need to be seen quickly or within a specific timeframe. For example, client is pregnant, client is injecting drugs, client has a parent that is a drug user, etc.
- County of Residence: Begin entering the name of the county in the searchable text field. Matching items appear in a dropdown list.
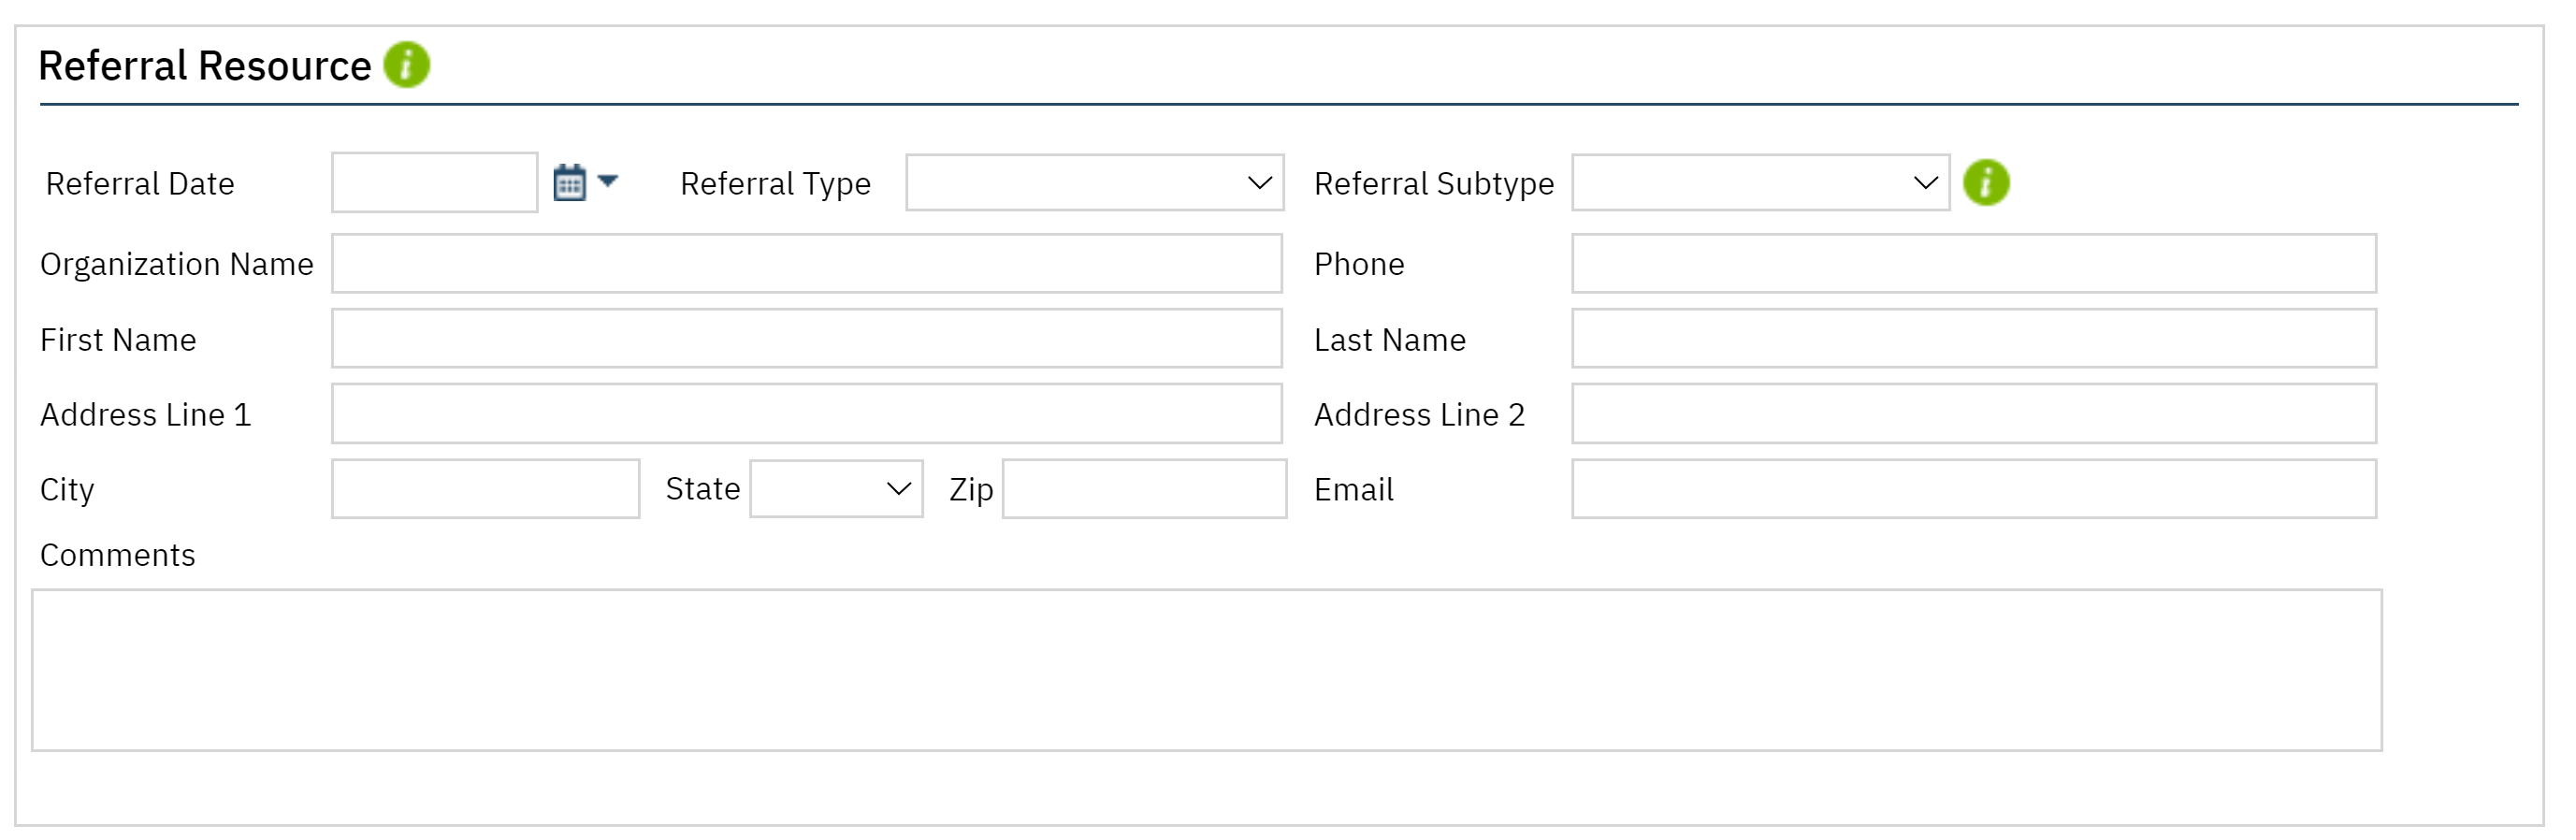
Field Definitions: Referral Resource
- Referral Date: Enter the date of referral in the mm/dd/yyyy format or click the calendar icon to select the date.
- Referral Type: Select the entity that referred the client for services.
- Referral SubType: Select the subtype related to the Referral Type. Not all Referral Types have subtypes.
- Organization Name: Enter the name of the organization referring the client for services.
- Phone: Enter the phone number of the person/ entity referring the client for services
- First Name, Last Name: Enter the first and last name of the person referring the client for services.
- Address, City, Zip: Enter the address of the person/ entity referring the client for services.
- Email: Enter the email of the person/entity referring the client for services
- Comments: Enter any applicable comments
Field Definitions: Inquiry Handled By
- Recorded: Defaults to the logged in user and cannot be edited.
- Information Gathered By: Select which staff member gathered the information from the client. This is usually the same as Recorded By. However, if an Inquiry is received by one person and logged by another, this field is available.
- Program: Select which program information or services were being inquired about or by which program the Inquiry was handled.
- Gathered By Other: Enter text to note if the Inquiry was gathered by someone other than a staff member, such as a community partner.
- Location: Select where the client was calling from.
- Assigned to: Select to whom the Inquiry is assigned.

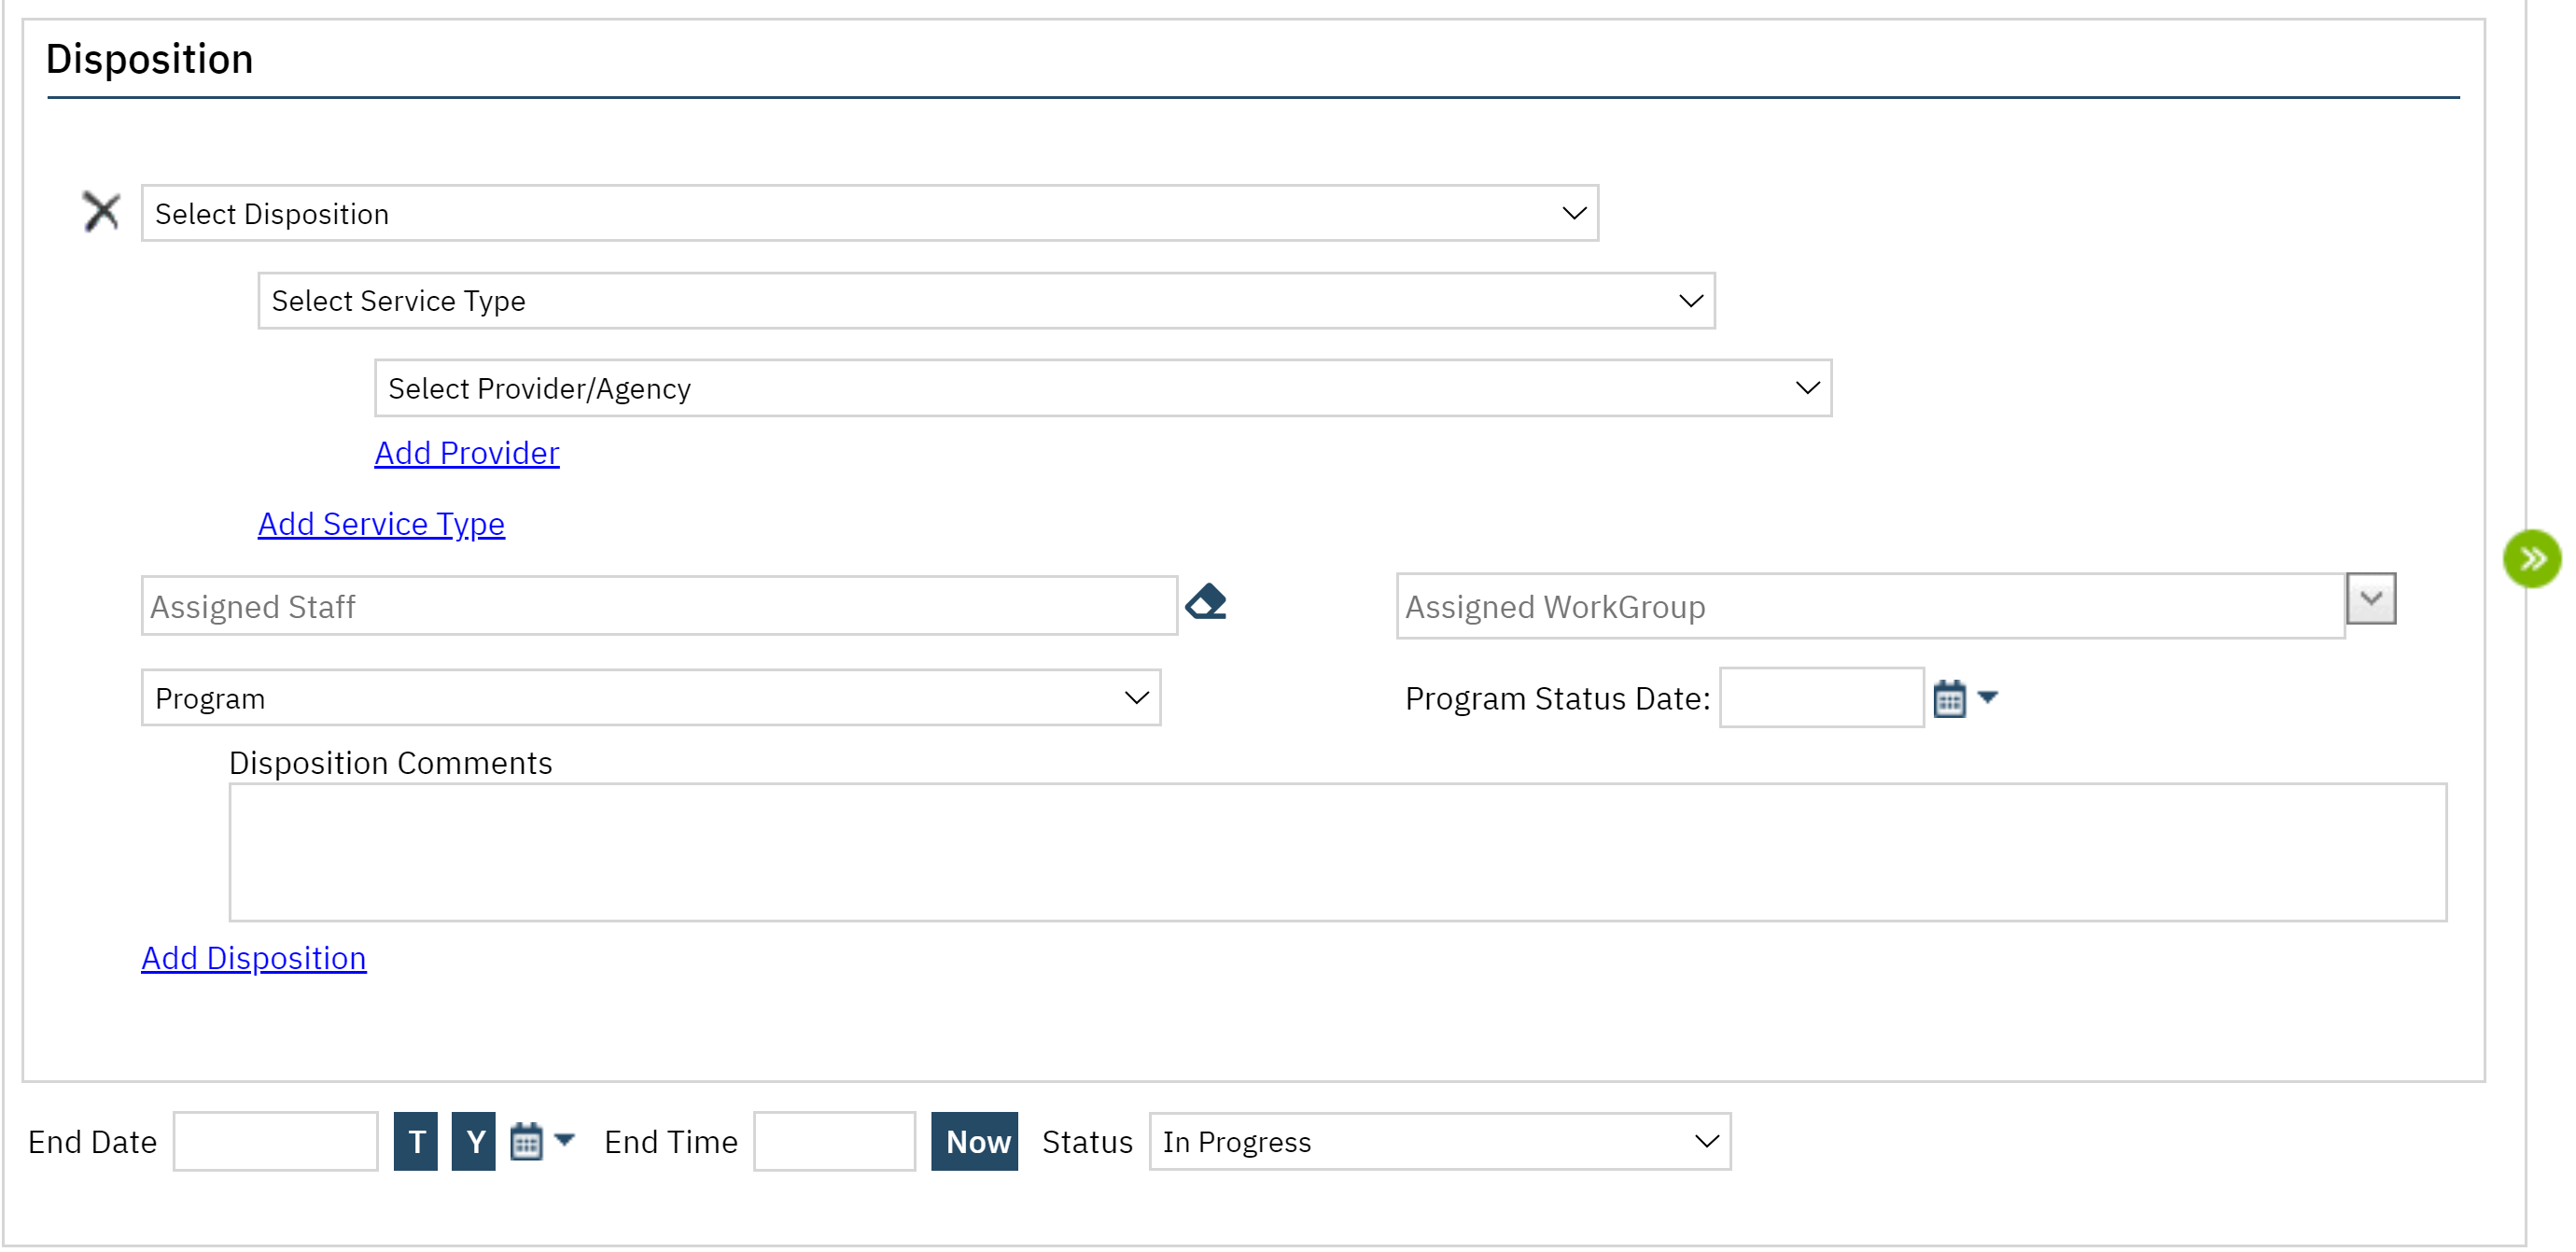
Field Definitions: Disposition
- Disposition: The current determination while awaiting next steps or final determination of the Inquiry. This field is required.
- Service Type: Values are defined and built by your organization. The available options will change based on the Disposition selected.
- Provider / Agency: Values are defined in the ProviderOrAgency Global Code.
- Referral Details: This field is populated with the screen name of the next screen you should go to when using Care Coordination.
- Add Provider: adds an additional provider/agency selection to the existing disposition.
- Add Service Type: If Add Service Type is selected, it will only add an additional Service Type and Provider/Agency field.
- Add Disposition: adds the fields for a new service type and provider/agency.
- Assigned Staff: Begin entering the name of the assigned staff in the searchable text field. Matching items appear in a dropdown list.
- Assigned WorkGroup: Select the applicable workgroup.
- Disposition Comments: Enter any applicable details.
- Screening Comment: Enter applicable information regarding the screening of the client.
- Additional Waitlist Information: If the client was added to a waitlist, information such as why, what data is still needed, or other pertinent text can be added here.
- End Date: Enter the date on which the Inquiry was ended.
- End Time: The time that the Inquiry ended. Click the Now button to set the End Time to the current time. You can also manually enter the standard time and include AM or PM.
- Status: The current stage of the Inquiry. If the status is Complete, the Disposition, End Date, and End Time are also required.