To create a new program, follow the steps below:
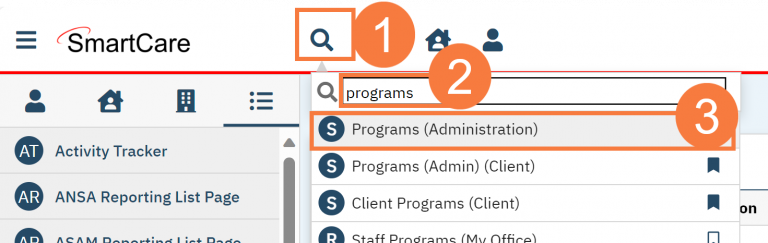
- Click the Search icon.
- Type “Programs” into the search bar.
- Select “Programs (Administration)” from the search results.
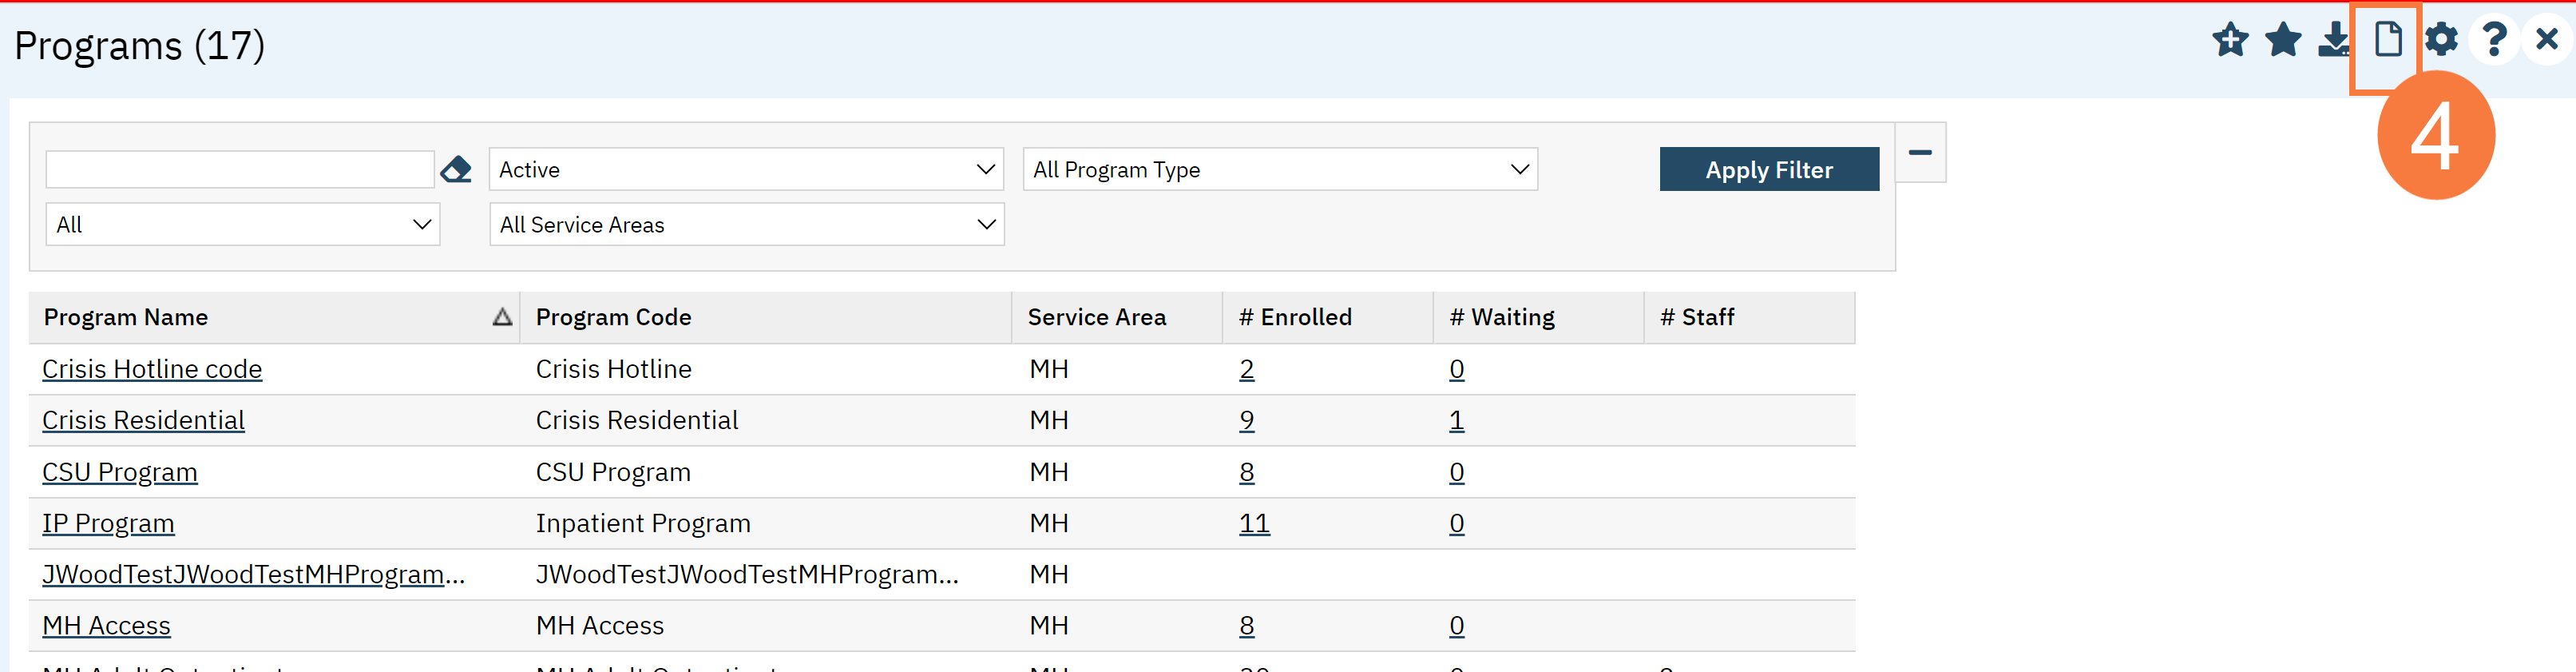
- This brings you to the Programs list page. Click the New icon.
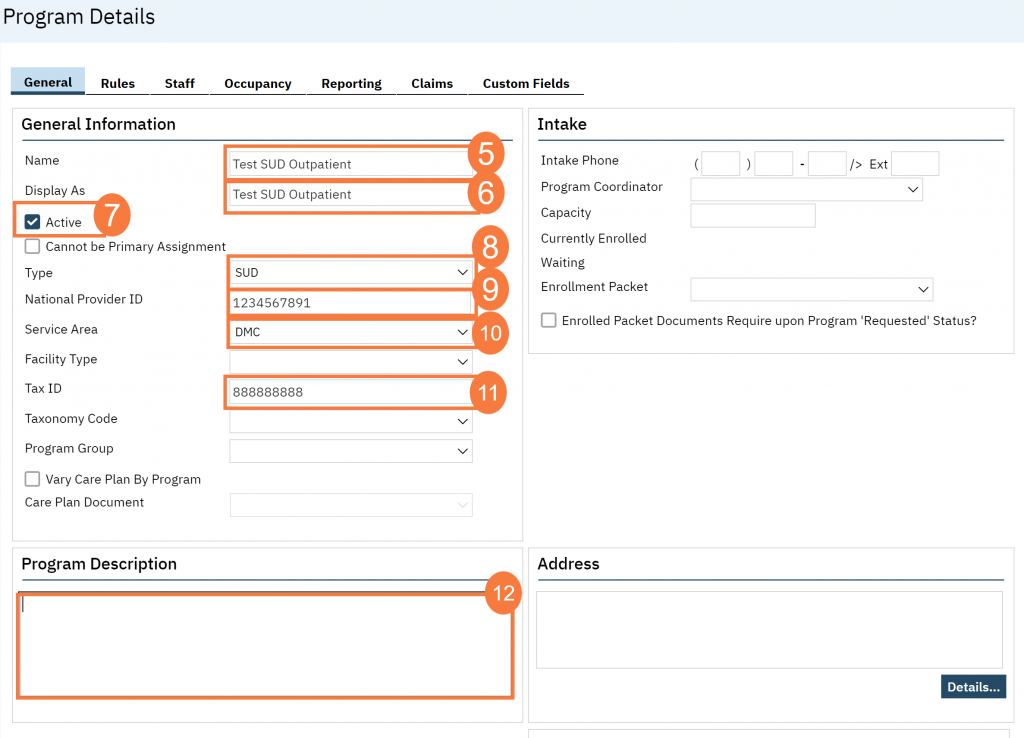
- This will bring you to the Programs Details page. On the General tab and General Information section, enter the program name in the corresponding field.
- NOTE: DO NOT USE commas, colons, semi colons or pipes in program names. This will cause issues with state reporting.
- This will auto-populate the “Display As”. You can change this if This is what the end user will see when selecting the program from dropdown menus.
- Ensure the Active checkbox is selected.
- Click the Type drop-down arrow to select the program type. Program type does not have any logic and is simply a basic categorization.
- EXCEPTION: “No Episode” program type has specific functionality in the system. This type of program will allow a user to create a service note in this program without first being enrolled in the program. However, you cannot associate any other documents with this type of program. This program type should only be used for very specific programs, such as a crisis line program.
- Enter the NPI Number.
- Click the Service Area drop-down arrow and select the area. This is generally either mental health (MH) or substance use disorder (SUD) services.
- Enter the Tax ID number.
- Enter the Program Description (optional). This is a narrative description of the program.
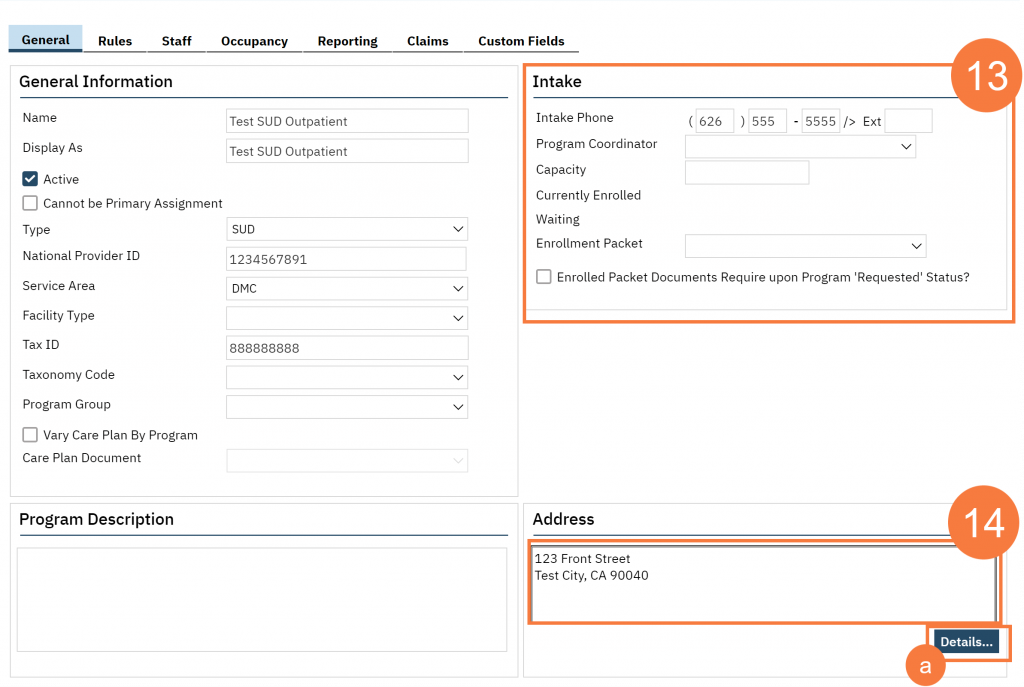
- Enter the Phone Number. You can also enter additional information, such as the Program Coordinator or if there is maximum capacity for your Let the Enrollment Packet fields blank.
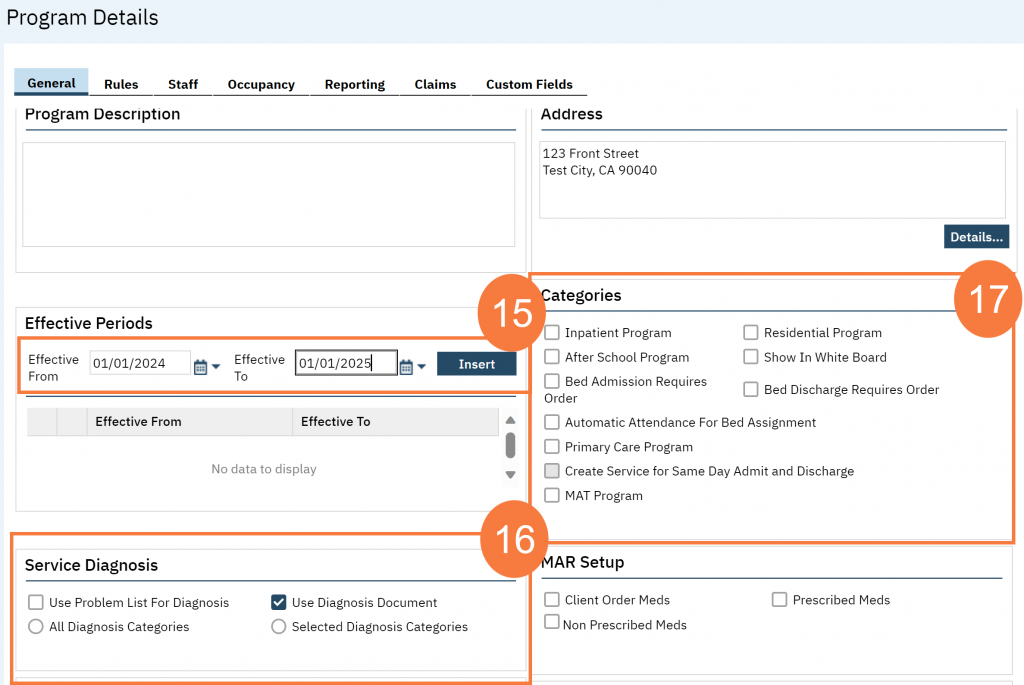
- Enter the Address. For programs that bill Medi-Cal, this should be the address of the Medi-Cal certified site. NOTE: You must have a nine-digit zip code in the address field.
- You can also click on the Details button. This will bring up a popup with distinct fields for street, city, state, and zip code. Click OK to save the information.
- If your program has start and end dates, such as a grant-funded program that is only funded for a year, enter the effective dates and click Insert. A user will not be able to select this program in documents such as service notes, nor enroll a client in the program, outside of these effective dates.
- In the Service Diagnosis section, make sure to check “Use Diagnosis Document” and select “All Diagnosis Categories”.
- In the Categories section and MAR Setup section, leave all boxes unchecked.
- EXCEPTION: For inpatient or residential programs, there are some selections that are required. See the Inpatient/Residential SysAdmin User Guide for more information.
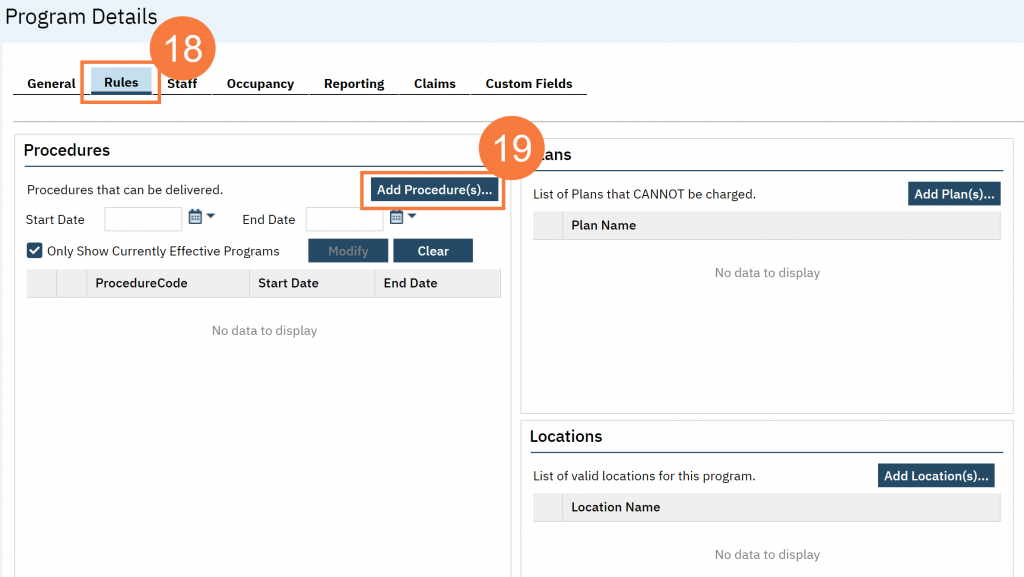
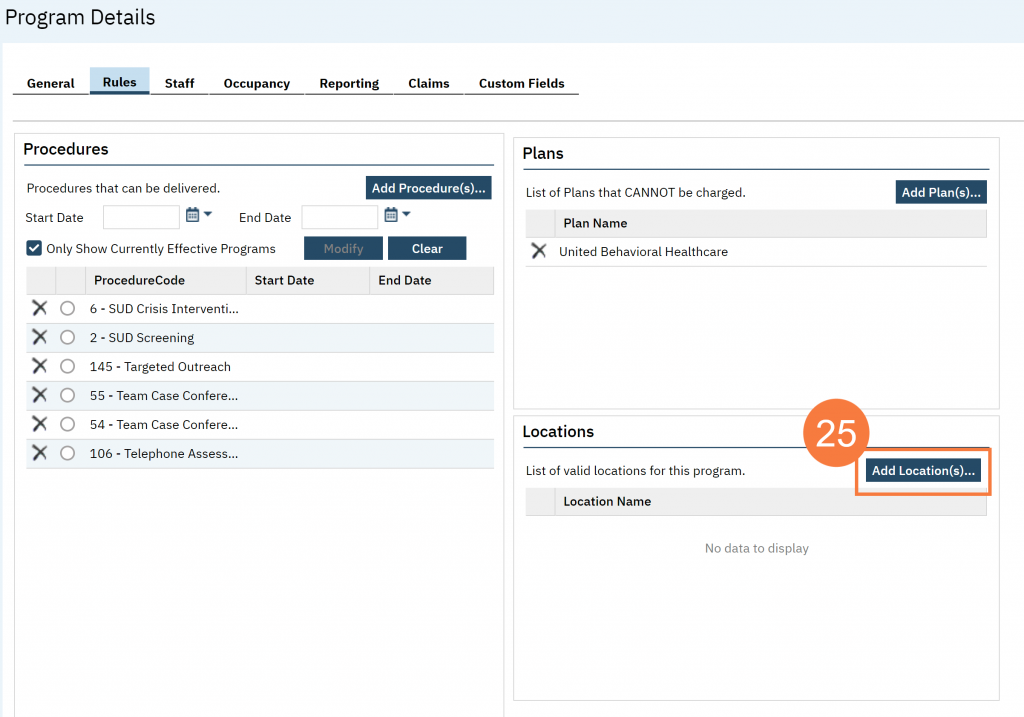
- Click the Rules tab.
- Click the Add Procedure(s) button to add procedures to your new program.
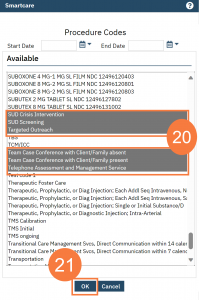
- This will bring up a popup of available procedure codes within the service area you selected for the program in step 9. Procedures that have already been added to your program will not show up in the popup window. Select the procedure codes you want to add to this program, then click to select more than one procedure at a time, use the shift and/or control keys. Use the Start Date and End Date fields is a procedure code is only available during a specific time frame for this program. A user will not be able to select this procedure code in a service note outside of this time frame.
- Click OK.
- Click on the Add Plan(s) button to denote any coverage plans that this program CANNOT bill to. If there are no limitations on your program, leave this section blank.

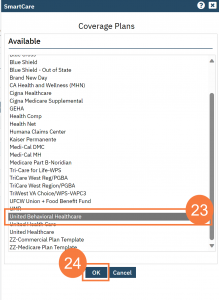
- This brings up a popup window of all plans in your system that have not already been added. Click to select the plans to be excluded. To select more than one plan at a time, use the shift and/or control keys.
- Click OK.
- Click on Add Location(s) button to add billing locations to your program.
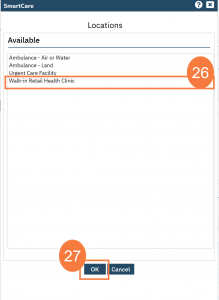
- This brings up a popup window of all locations in your system that have not already been added. Click to select the location. To select more than one at a time, use the shift and/or control keys.
- Click OK.
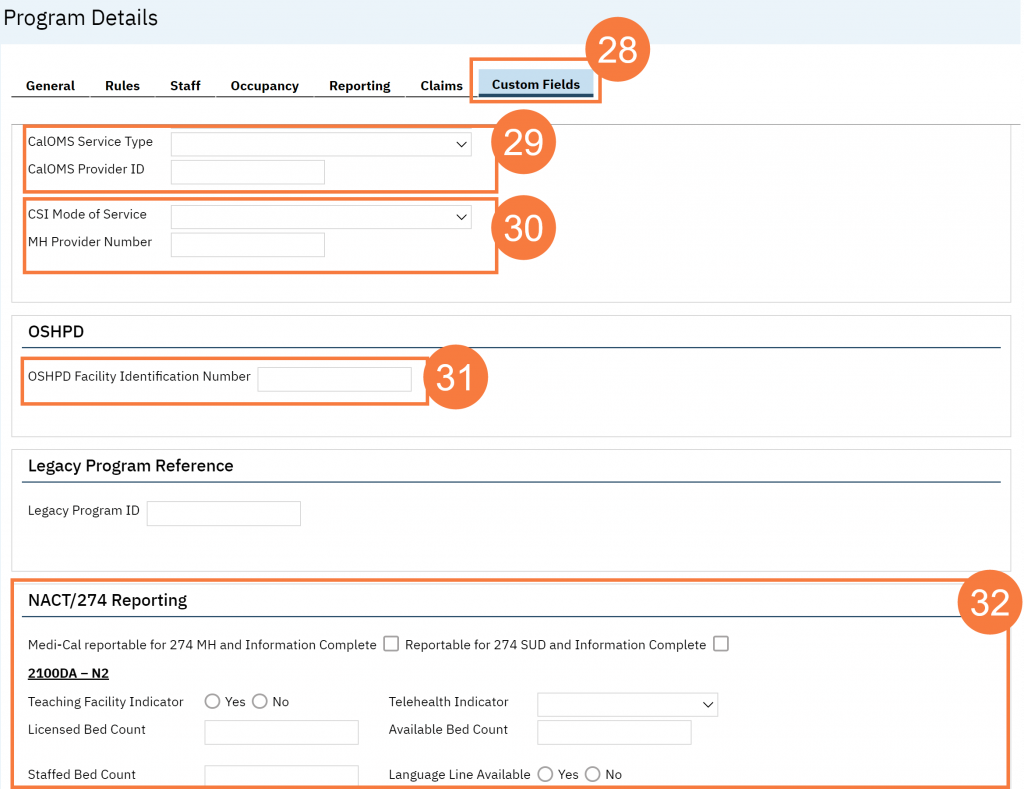
- Click on the Custom Fields tab.
- Select the CalOMS Service Type and enter the program’s CalOMS Provider ID if your program is a Medi-Cal billing SUD This information is related to CalOMS state reporting.
- Select the CSI Mode of Service and enter the program’s MH Provider Number if your program is a Medi-Cal billing MH program.
- Leave the OSHPD Facility Identification Number blank.
- EXCEPTION: For inpatient or residential programs, this may be required. See the Inpatient/Residential SysAdmin User Guide for more information.
- Enter the NACT SUD Reporting information if your program is a Medi-Cal billing SUD program. This information is related to the NACT reporting.
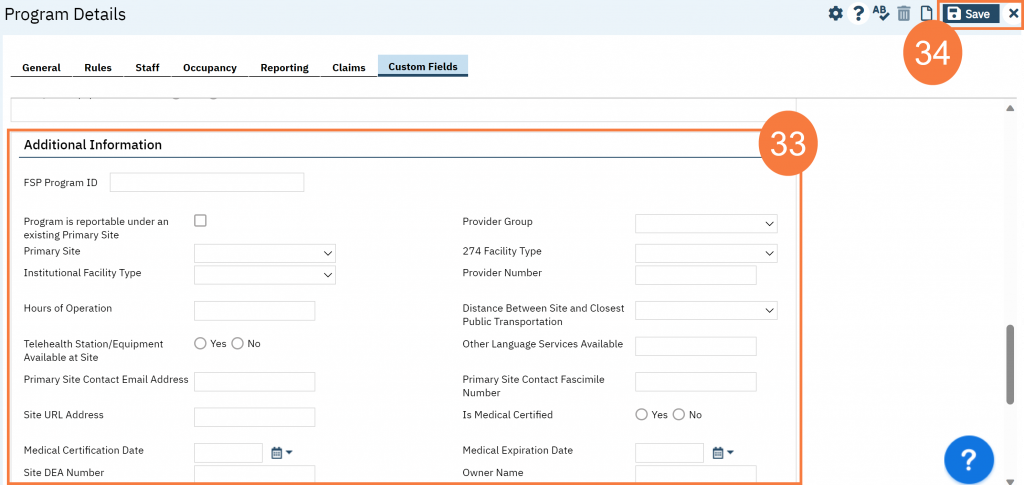
- Enter the FSP Program ID if your program is a Mental Health program that provides Full-Service Partnership services.
- Click Save and close.
Updated: 1/24/24