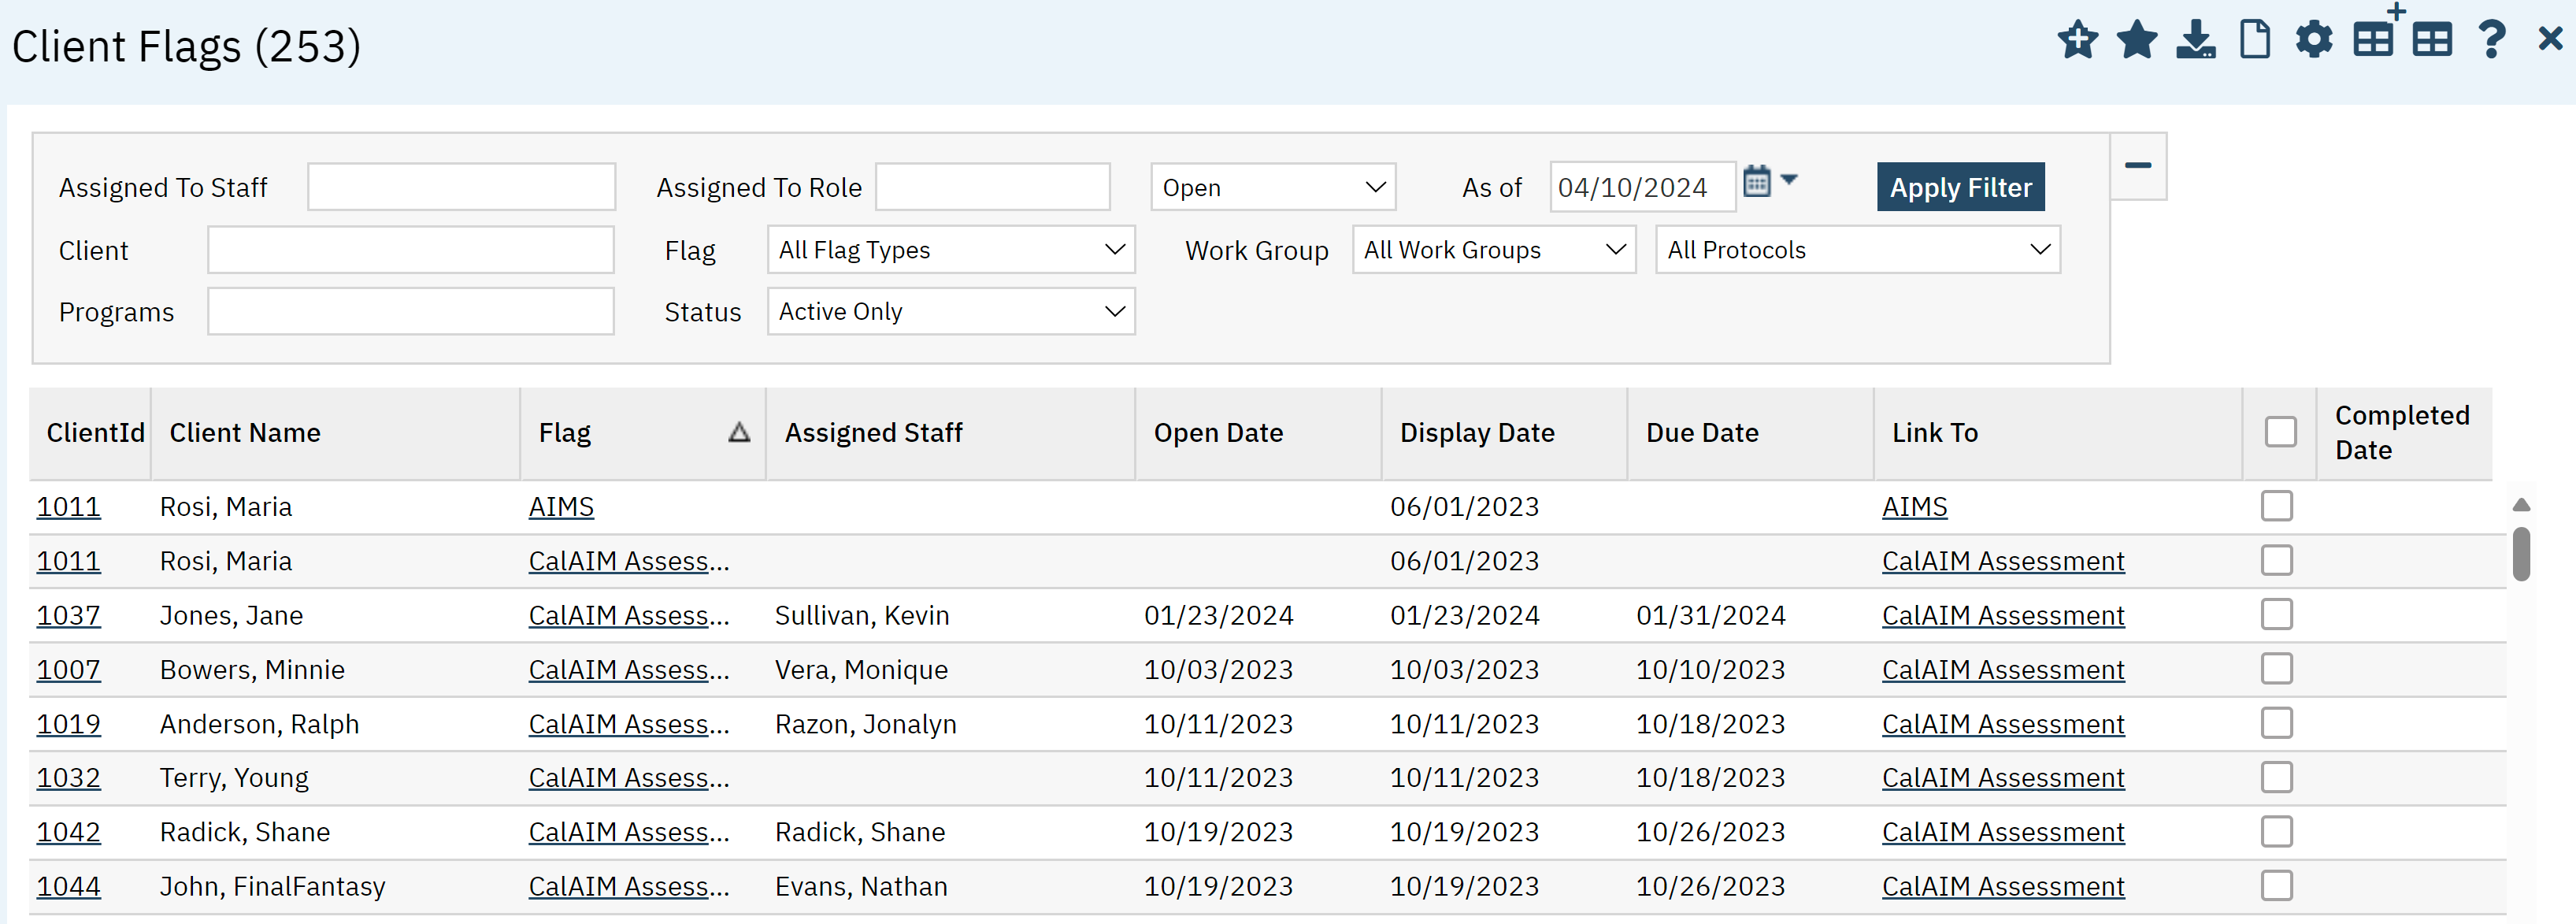
The Client Flags (My Office) list page offers a lot of valuable information. This list page will give you the ability to manage client flags via various filtering options.
- Click on the Search icon.
- Type “Client Flags (My Office)” in the search bar.
- Select “Client Flags (My Office)” from the search results.
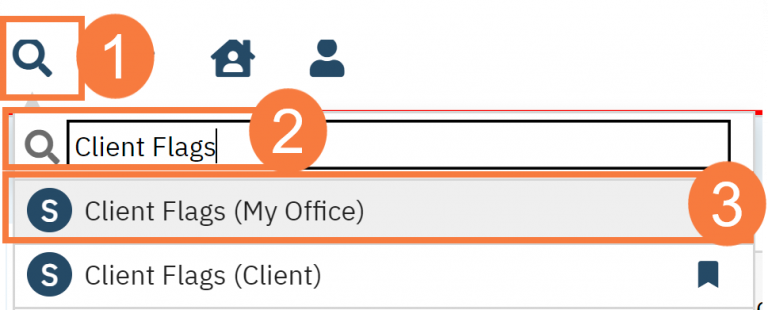
- This will bring up the Client Flags (My Office) list page.
For more information about how to create a client flags, please visit here: https://2023.calmhsa.org/how-to-create-a-flag-to-alert-treatment-team-members-to-important-client-information/
Filters
Use the filters/search functions as needed.
- Assigned to Staff: This searchable field gives you the ability to search client flags by staff who are assigned to the program.
- Assigned to Role: This searchable field gives you the ability to search by roles like “Primary Clinician”, “ Teacher”, etc.
- Status of Flag: This filter will give you the ability to filter by pre set due dates
- As of Date:
- Client: This searchable field gives you the ability to search client flags by client
- Flag Type: You are able to filter by flag type here such as “Child turns 18 on” or “ Do Not Call”
- Work Group: This will give you the able to filter by work groups
- Protocol: This filter will give you the ability to filter by protocols such as “SUD Outpatient Adult”, etc.
- Programs: This searchable field will give you the ability to search by Program
- Status of Flag: You can filter by any active or inactive flags
- Click Apply Filter once the appropriate options are selected.

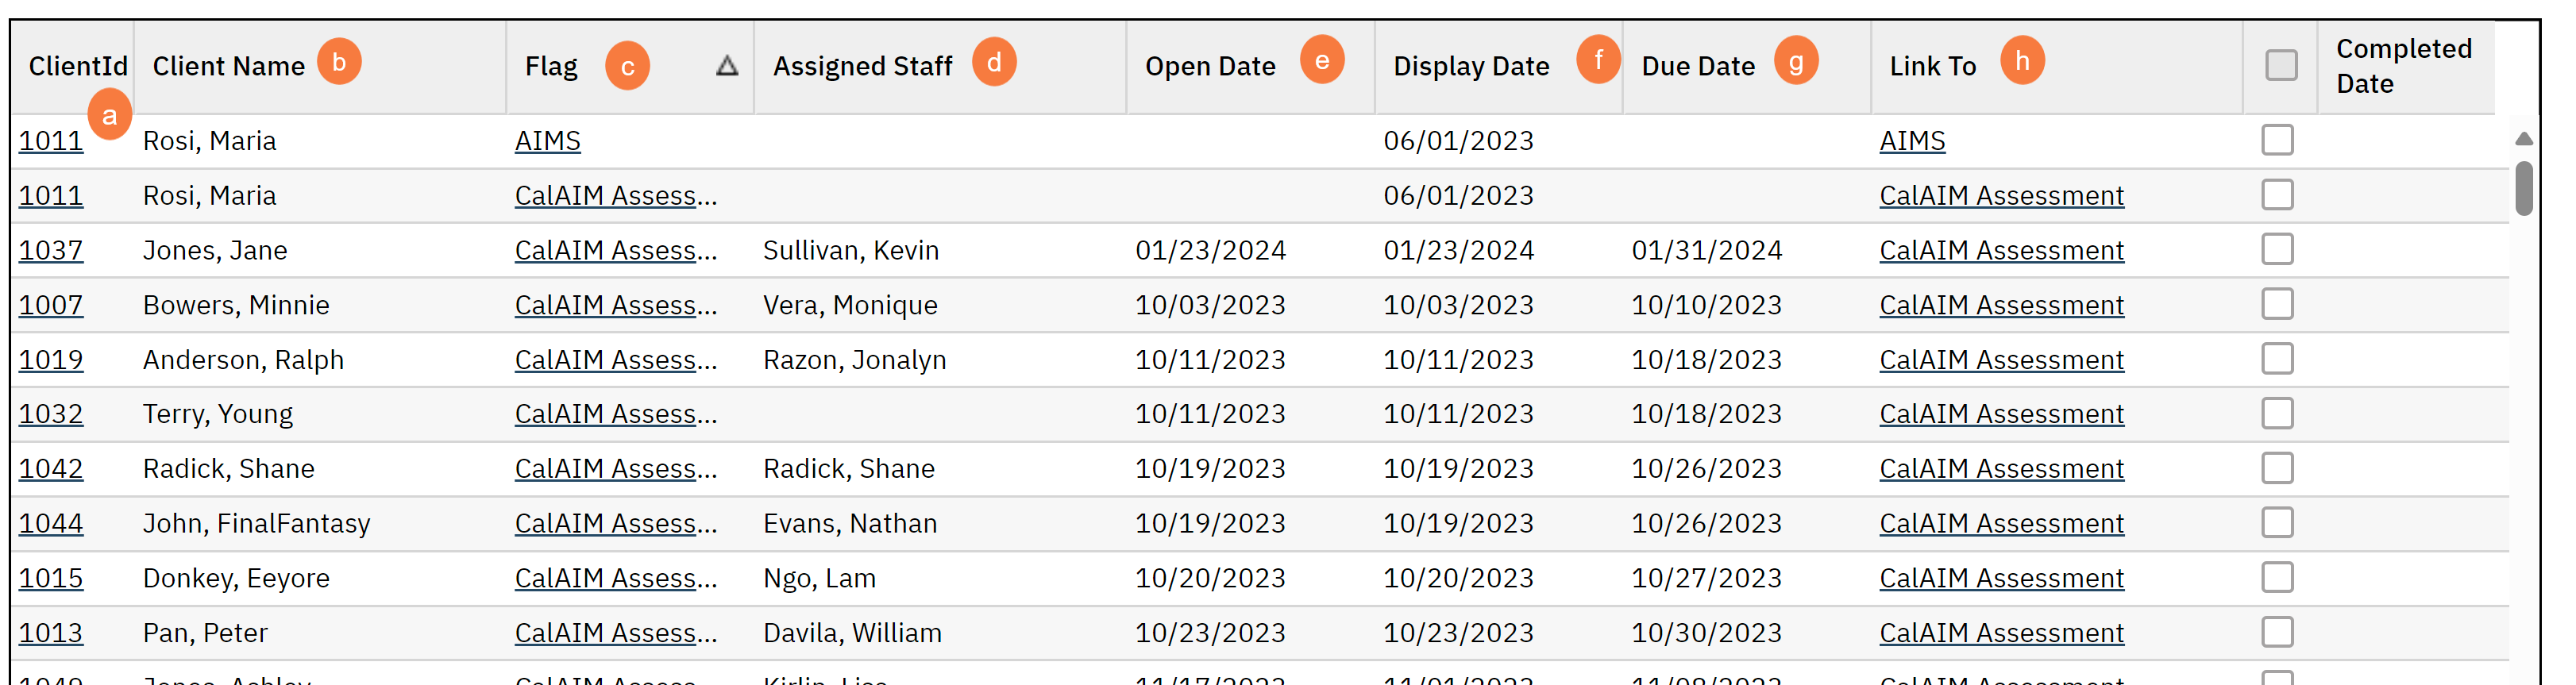
Columns
The following columns are available in this List Page:
- Client ID: This hyperlink will take you to the Client Information (Admin) screen
- Client Name: This displays the client name.
- Flag: This hyperlink will take you to the Client Flag Details screen.
- Assigned Staff: If this flag was assigned to specific staff, you will see the staff name here.
- Open Date: This will show the date the flag was opened.
- Display Date: This will show the date that the flag will display. This is different from the open date.
- Due Date: This will show the date the flag is due, if it was set.
- Link to: This hyperlink will take you to the screen that needs to be completed.
Exported Fields
Exportable fields are as follows:
- ClientID
- Client Name (Last, First)
- Flag
- Assigned Staff
- Display Date
- Due Date
- Note Field
- Work Group
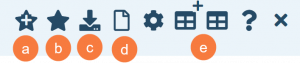
Upper Right-Hand Icons
- New Favorites Icon: Clicking on the “new favorites” icon will allow you to add this screen to your favorites for quick access.
- Favorites Icon: If you have this listed as your favorite already, when you hover over this icon, it will tell you the favorite name.
- Export Icon: This icon is available to admins. You will be able to export the data from this screen into an excel spreadsheet.
- New Icon: Use this icon to create a new flag for a client.
- Customize Column: This will allow to customize the columns that display below.