How to Create a Flag to Alert Treatment Team Members to Important Client Information
Make sure you have the client open. Click the plus icon next to the client’s name.
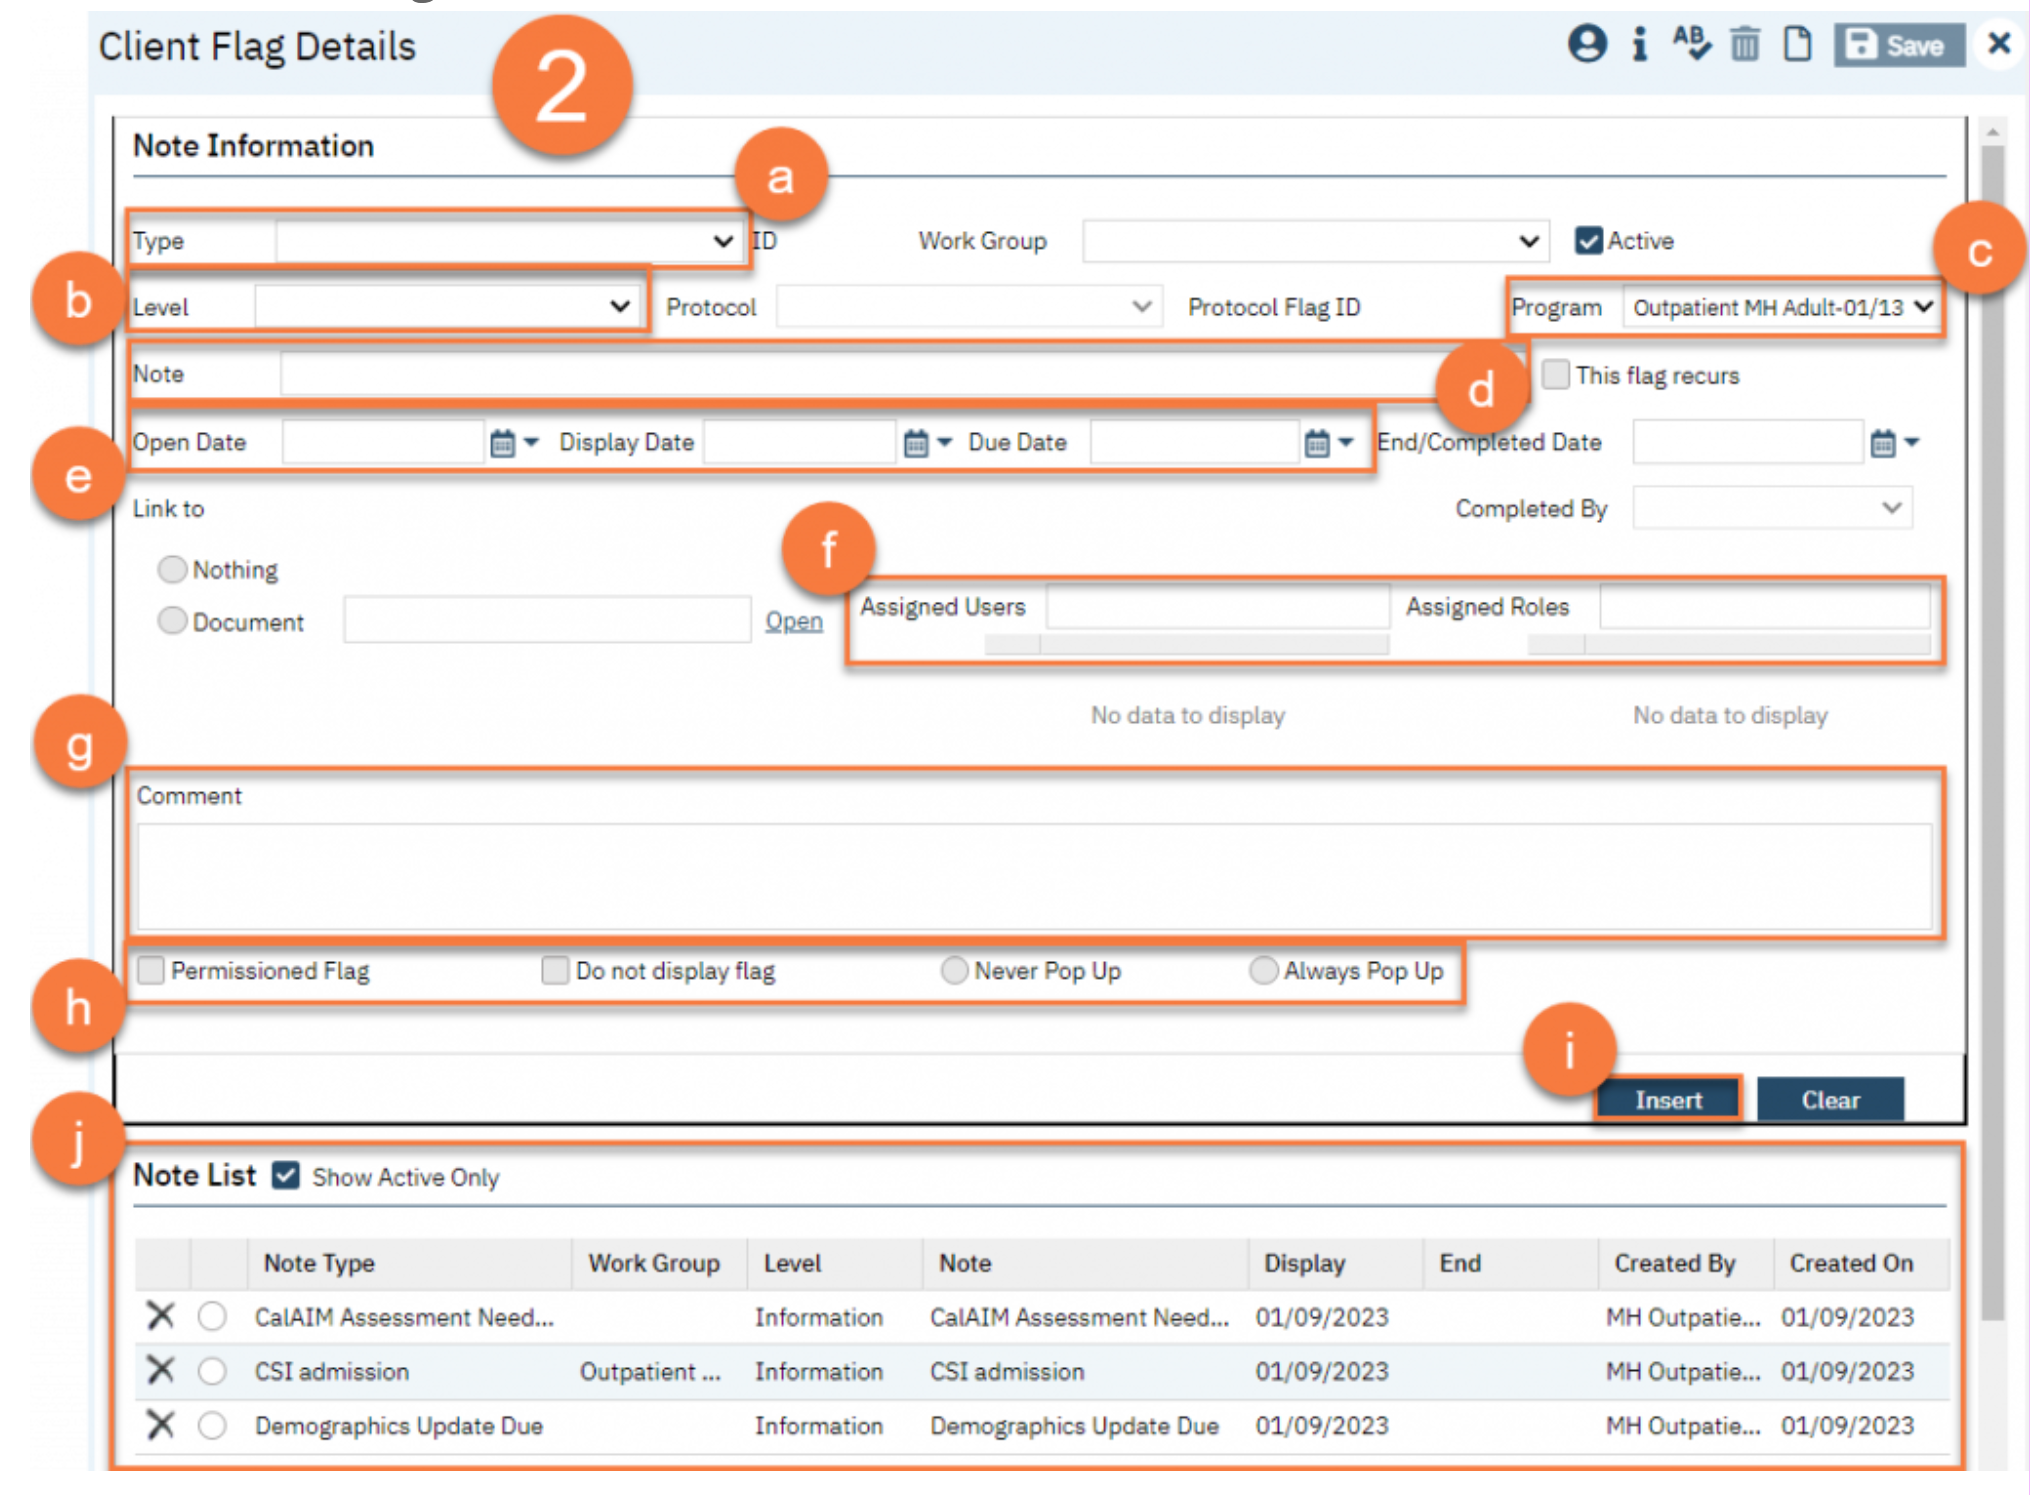
This takes you to the Client Flag Details screen. Add the relevant information in the Note Information section. Your user role may only allow certain information to be completed. For example, a supervisor may have additional permissions that a clinician does not.
Select the type of flag. Your system will have a list of flags to choose from.
Select the level of the flag. The options are: Information, Urgent, and Warning.
Make sure to include your program. This will ensure client privacy is upheld.
Enter the specific language of the flag in the Note field.
Enter the display date. If there is a due date, enter the Open Date (date it became available) and the Due Date (the date the task is due).
If you need to assign this task to a specific user, you can enter that information in. You can also assign this task based on the treatment team role. An example would be to alert all nurses working with the client of a lab that’s due.
Enter any additional comments as needed.
If you want this flag to show as a pop-up when opening the client’s chart, make sure to mark “Always Pop Up.”
Once you’ve entered all the information, click Insert.
This adds the flag to the Note List section at the bottom of the screen.
Once you’ve added all flags, click Save. You are now finished and may close this screen.
How to Modify a Flag
With the Client open, click the Plus sign to open the Client Flag Details screen.
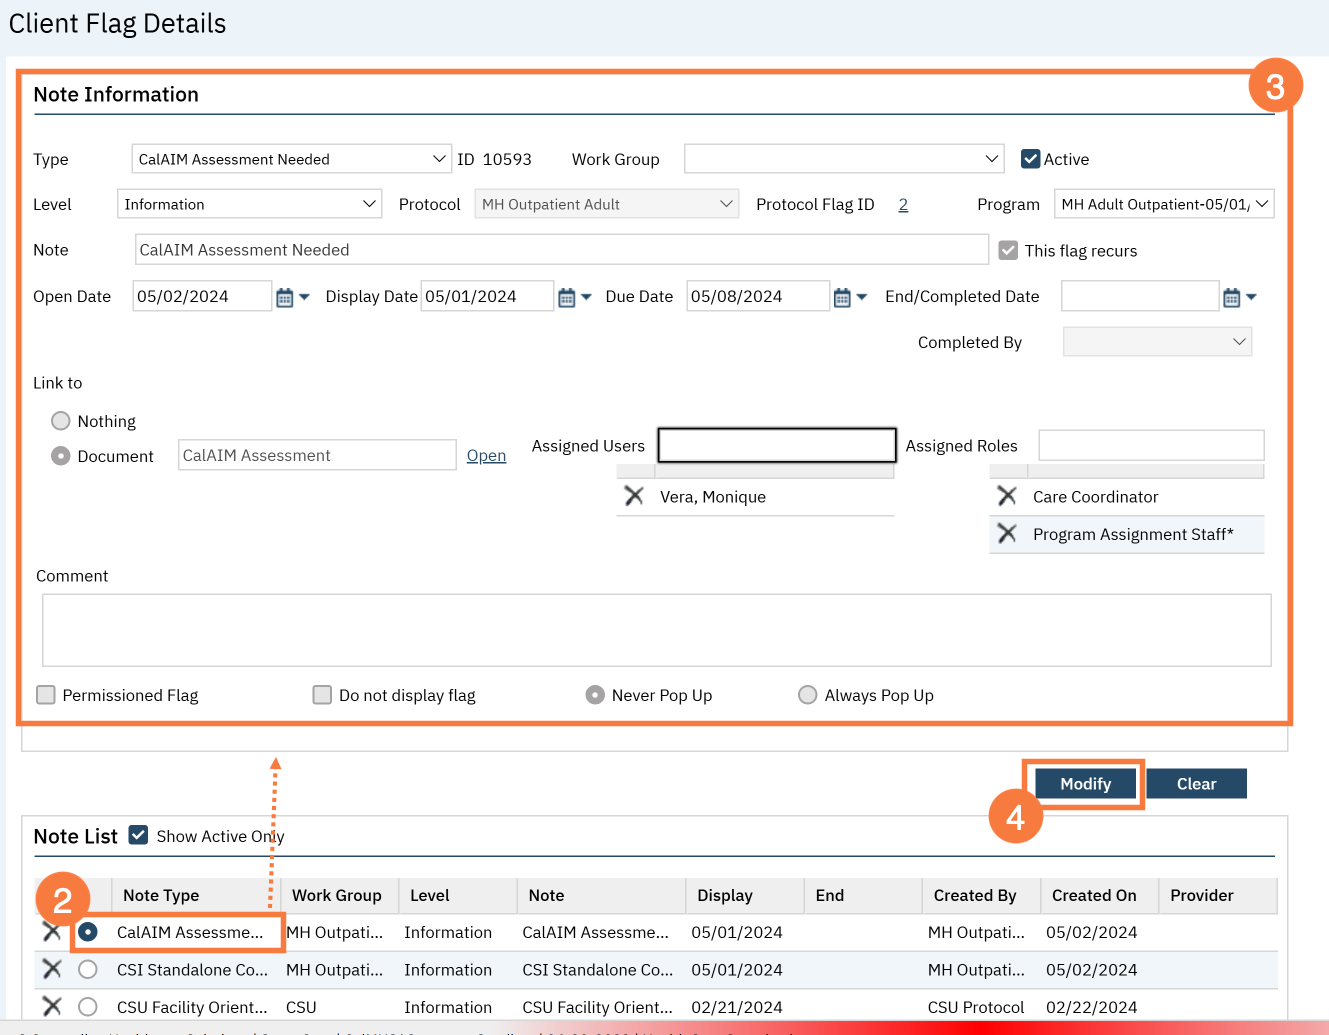
In the Note List section, select the radio button for the flag you want to update.
This will populate the Note Information section. Update the appropriate fields
Click Modify.
Click Save and Close.
How to Mark a Flag Complete
With the Client open, click the Plus sign to open the Client Flag Details screen.
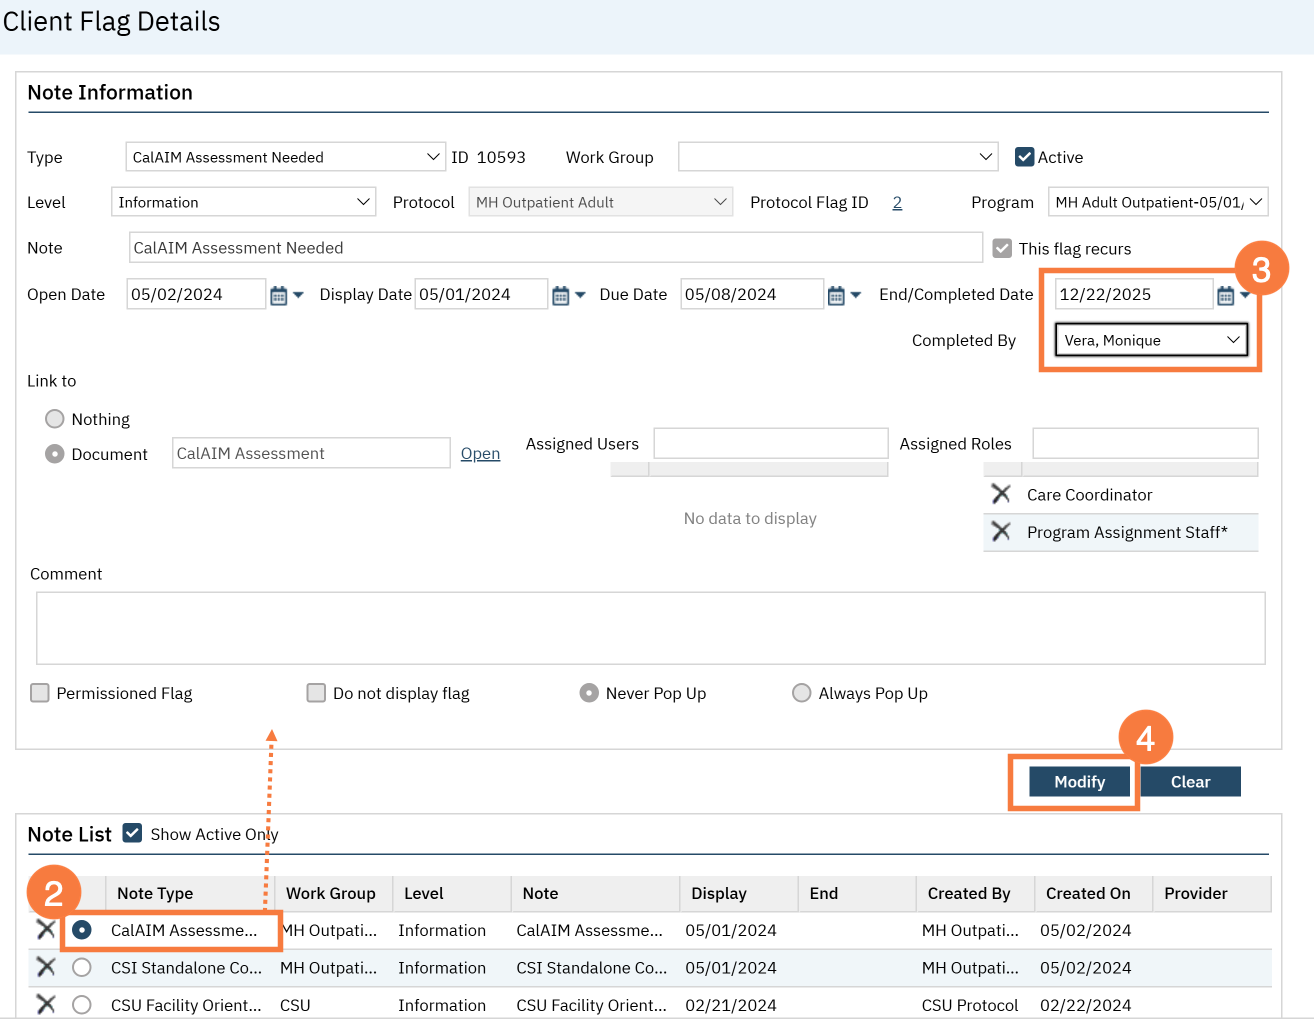
In the Note List section, select the radio button for the flag you want to mark complete.
This will populate the Note Information section. Enter the End/Completed Date and the Completed By fields.