If you want to allow users to be able to find a sequestered client in the search, though not be able to open the chart without requesting access, there are a few things to know.
- The ability to see sequestered clients in the client search is addressed via a permission. Being able to see that a client exists does not give that user access to their chart. They will need to request access.
- Certain user roles must be designated to receive client access requests. They will receive the requests submitted in item 2 above.
- Requests aren’t “approved” or “denied” via functionality in SmartCare at this point. The arbiter simply will add the user to the approved client access list if the request is approved.
Setting User Roles That Can See Sequestered Clients in the Search Results but Must Request Access
This capability is governed by the permission “Allow restricted client search” in the permission type “ClientAccess Rules”.
This permission can be granted to a user role or to a specific user via permission override. See How to Modify Permissions in a User Role and Staff/User Administration: Assign User Roles/Permissions for detailed instructions.

When making a client access request, there is a pop-up screen. This screen has been permissioned to all CalMHSA base user roles by default, in case any county wanted to allow users to search for sequestered clients. This permission is “Client Access Reason Popup” in the permission type “Screens”.
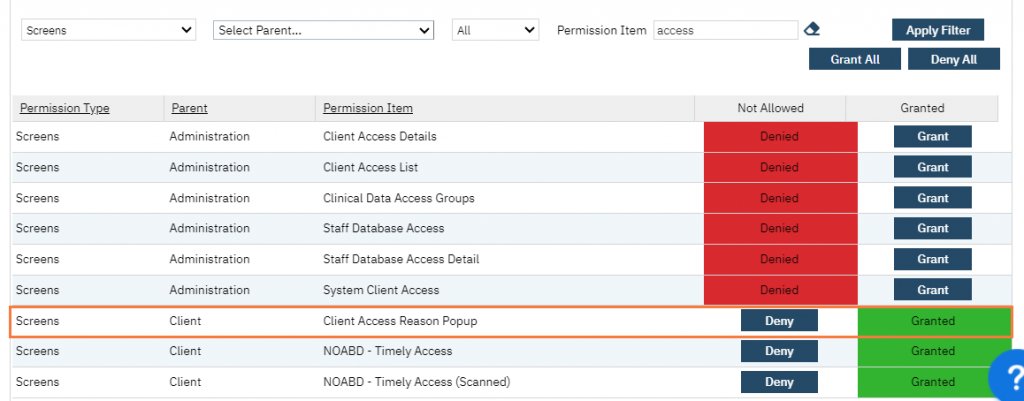
Setting User Roles That Receive the Request to Access a Sequestered Client
By default, the County Affiliate Sys Admin user role is the only user role set to receive client access requests. This means that only users with this user role will receive these messages. Counties may add additional user roles to this distribution list via recodes.
- Navigate to the Recodes list page.
- Click on the Search icon.
- Type in “Recodes” in the search bar.
- Click to select “Recodes (Administration)” from the search results.

- Select “SetStaffGrantAccessToRestrictedClient” in the recode category field.
- Click Apply Filter.
- Click on the link in the Recode Category column.

- This will bring you to the Recode Detail screen for this recode category. To add another user role, enter the name of the recode record and the start date. In the Integer Code Id field, enter the Global Code ID of the user role you want to add.
- Click Insert.
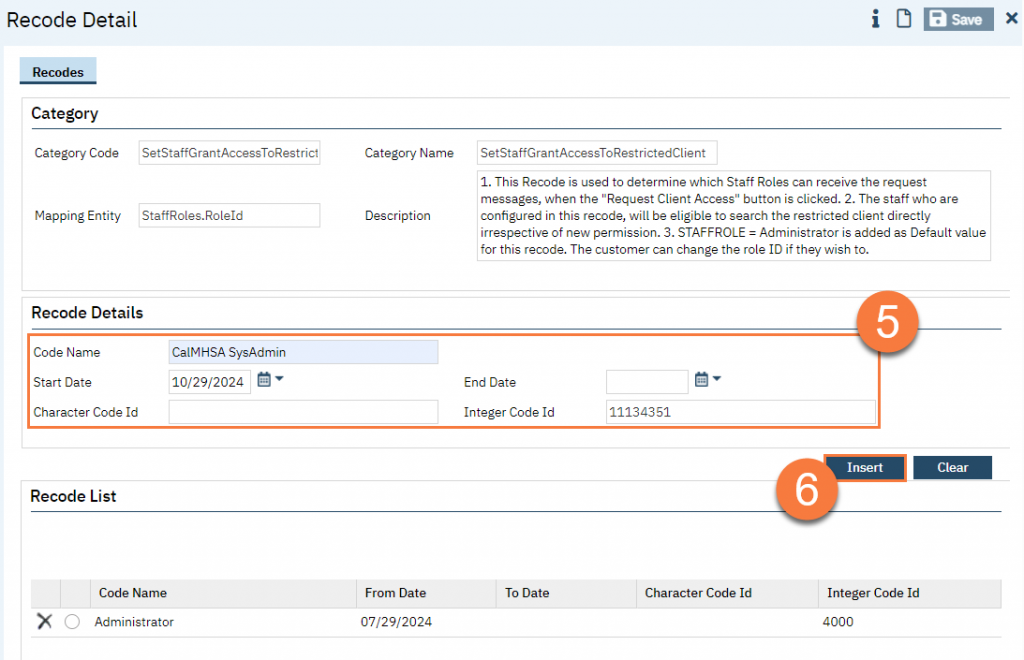
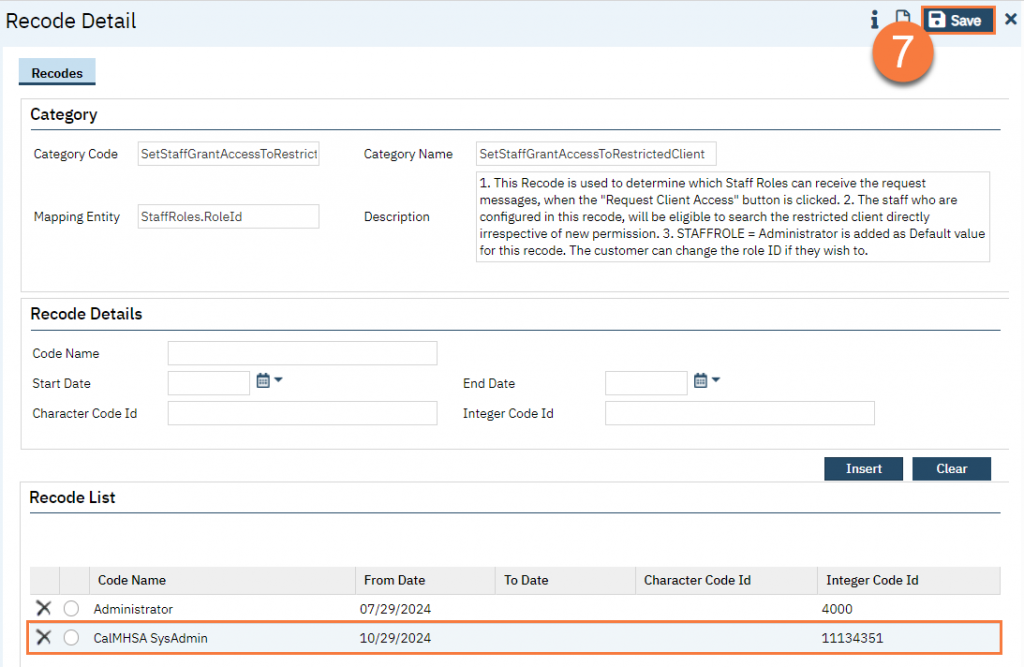
- This will add your recode record to the “Recode List” section of the screen. Click Save.
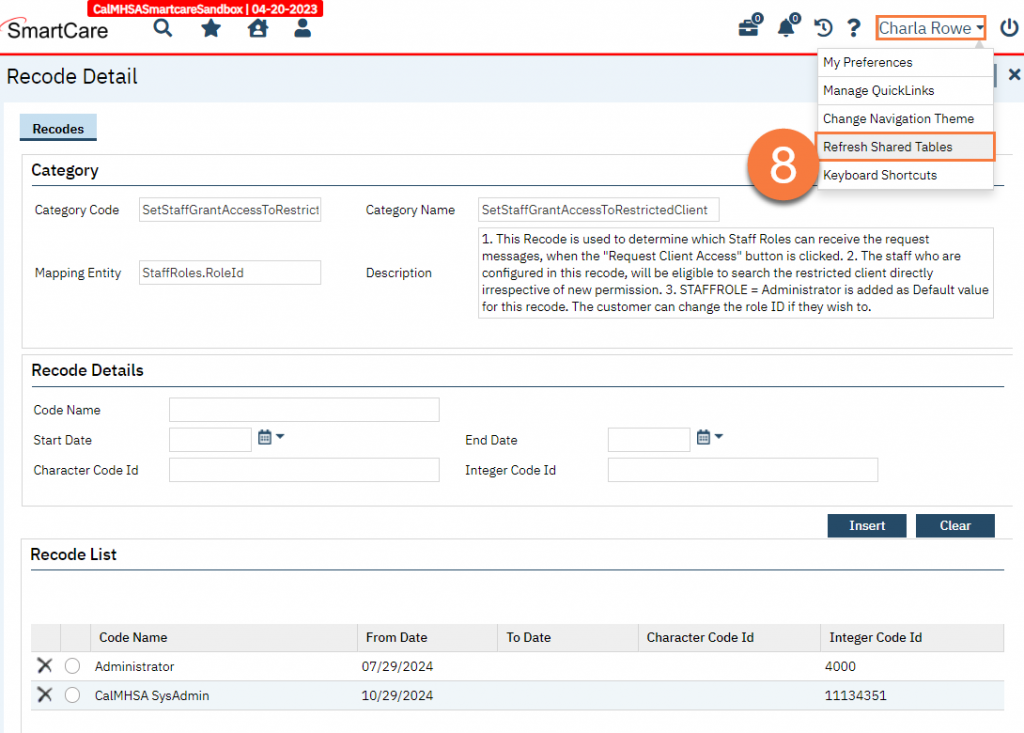
- Refresh Shared Tables. Users may have to log out and log back in before seeing the change. Any messages already sent will not be re-sent.
Receiving a Client Access Request
You will receive a Client Access Request via your Alerts and Messages. This can be seen in the “New Alerts/Messages” widget.
- In the New Alerts/Messages widget, click on the message to open it.

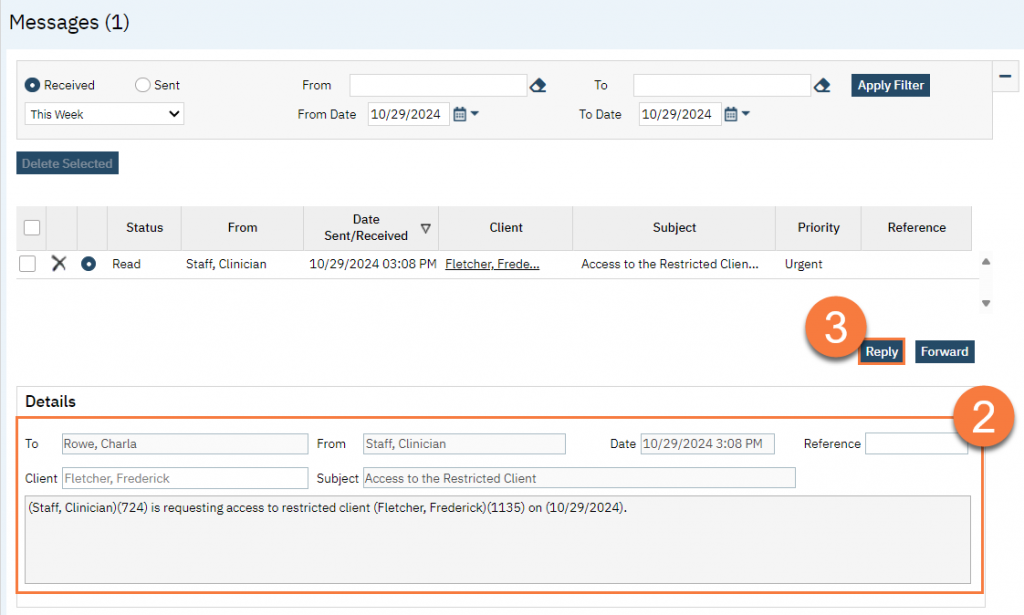
- This will take you to the Messages list page. You can view the message details in the Details section. Review the message and determine if client access should be granted or not.
- If the client access request is granted, you’ll need to manually add the user to the Client Access Details screen for that client. Follow the instructions in the section “How to Modify the Approved Users/User Roles for a Sequestered Client” on the VIP Client Sequestering knowledge base article.
- Click Reply to let the requester know of the decision.
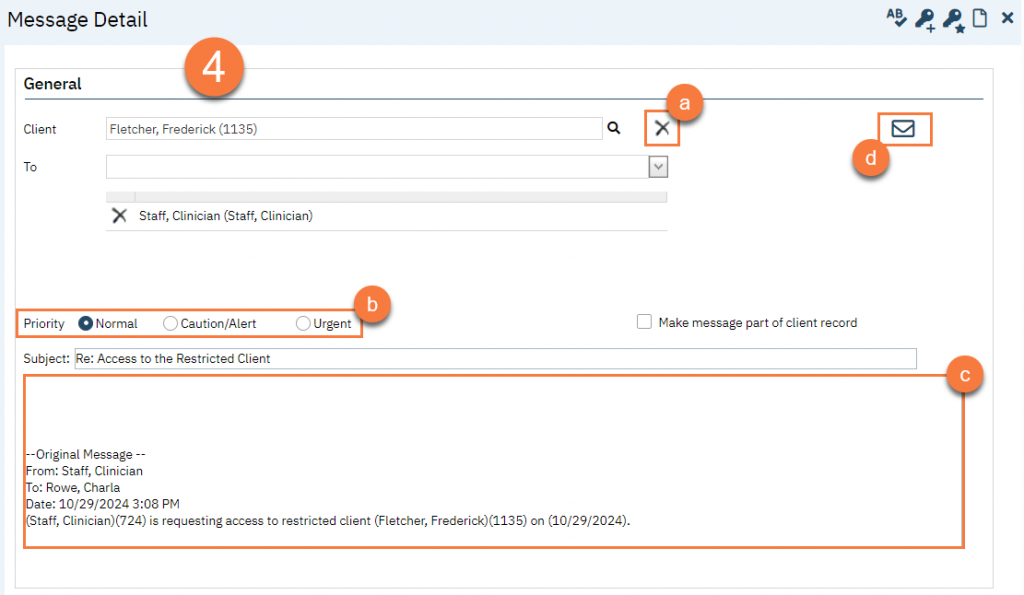
- This will take you to the Message Detail screen.
- NOTE: If you are denying the request, you’ll need to delete the client tag. Otherwise, the message will not be visible to the recipient. If you are approving this request, leave the Client present.
- Select the priority of the message. This will default to Normal.
- Enter your message.
- Click the Send icon to send this message to the requester.
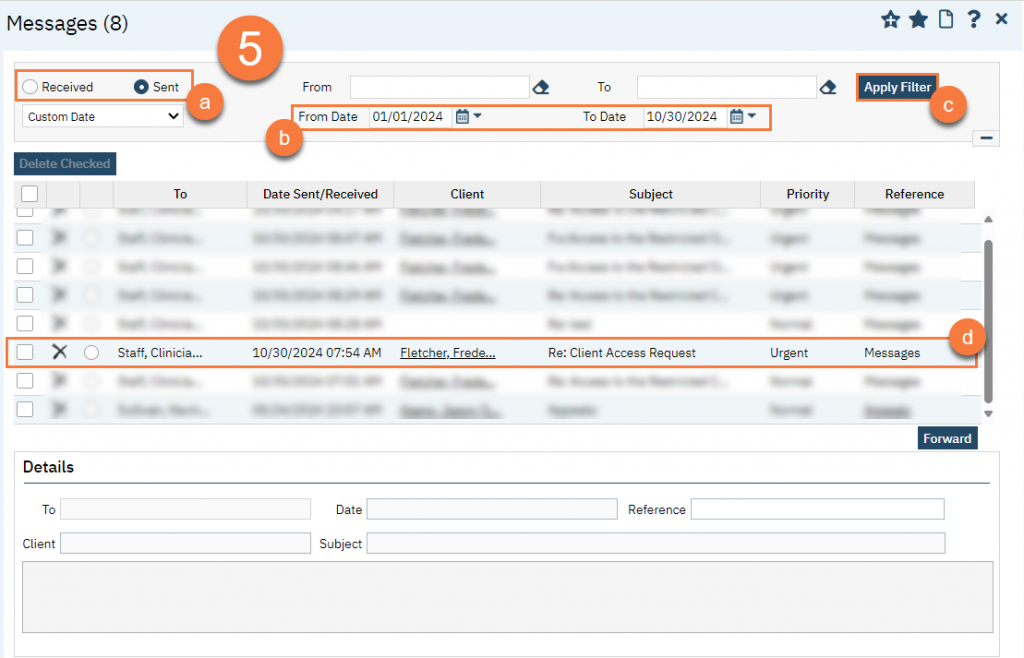
- You can confirm the message was sent by filtering in the Messages list page.
- Select “Sent”.
- Ensure the Date Range is appropriate.
- Click Apply Filter.
- You should be able to find the message in the search results.
Client Access Overrides Report
This functionality is currently not approved for production use. We are working with Streamline to make necessary changes and will update this section when appropriate.
Updated12/23/24
