Overview
Workgroups are essentially a group of staff users. They allow a user to message or assign a set of users at a single time. For example, you can assign a Client Flag to be completed by a workgroup rather than a specific staff user. When something is assigned to a workgroup, all staff users in that workgroup should be able to see that this item needs to be completed. For documents, this should show on all of their staff Tracking Widget when the Workgroup is selected.
Workgroups should generally be created and maintained by counties. Much like other administrative functions, this is managed by a List Page – Detail Screen combination.
To access the Workgroups (Administration) list page:
- Click on the Search icon.
- Type in “Workgroups” in the search bar.
- Click to select “Workgroups (Administration)” from the search results.

Note: This used to be “Work Groups” but CalMHSA is changing the name to “Workgroups” to match the field names used elsewhere in SmartCare. If you can’t find “Workgroups”, try searching for “Work Groups”.
This list page does not just list what workgroups exist in your system, but also which staff users are associated with those workgroups. This allows you to filter by either workgroup OR by staff user.
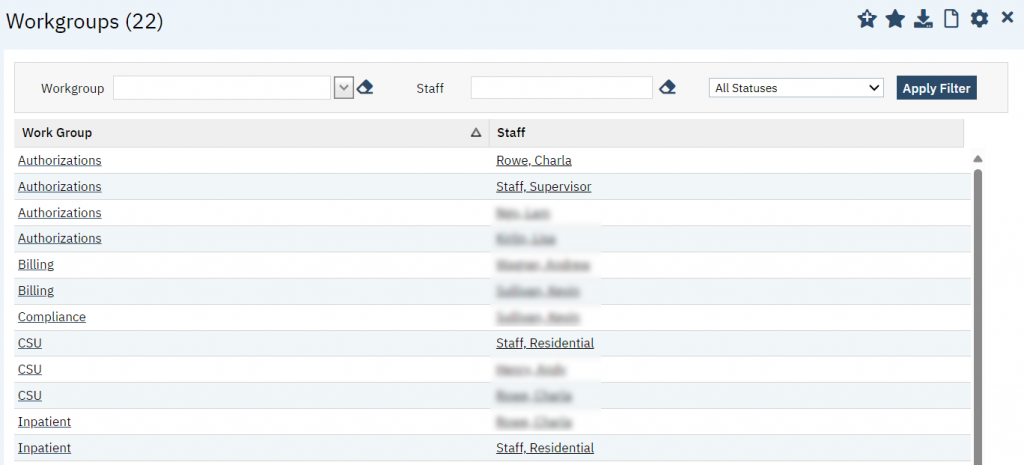
Workgroups are also associated with CDAGs. On certain screens, only workgroups that are associated with your current logged-in CDAG will show. Think of the associated CDAGs as which CDAGs include users that will need to use this workgroup.
Lastly, there are permissions associated with workgroups. In order to message a workgroup, a user must be granted permission to that workgroup. This is handled via permission type “Message Workgroups”. The workgroups that you create will show as permission items in this category.

How to Create a Workgroup
- Navigate to the Workgroups list page.
- Click on the Search icon.
- Type in “Workgroups” in the search bar.
- Click to select “Workgroups (Administration)” from the search results.

- Click on the New icon.
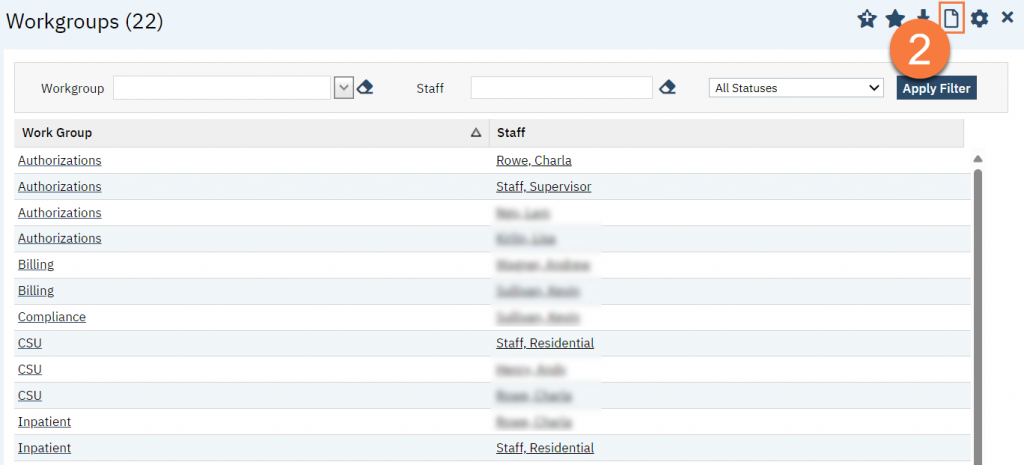
- This takes you to the Work Group Detail screen. Enter the Workgroup Name.

- Add staff.
- This is a search field. Type the name of the staff user you want to add.
- As you type, search results will appear. Click to select the staff user you want to add.
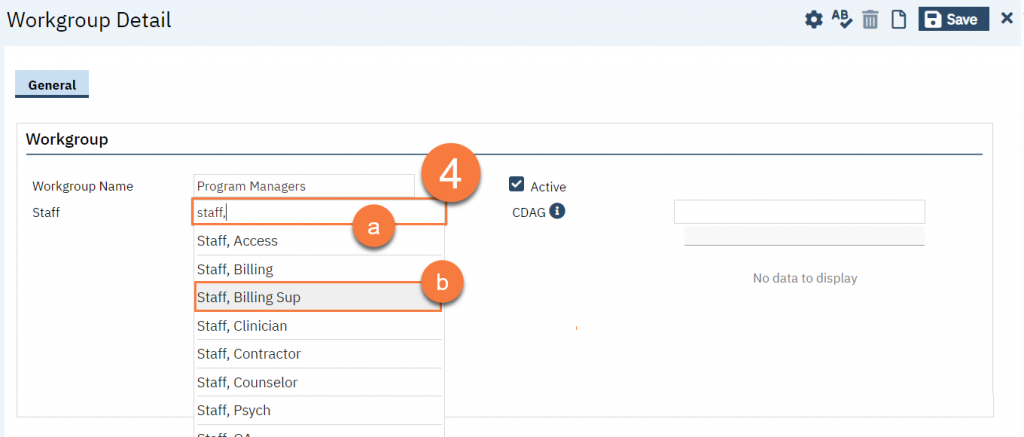
- This will add the staff user to the list of users associated with this workgroup.

- Repeat until all staff users have been added.
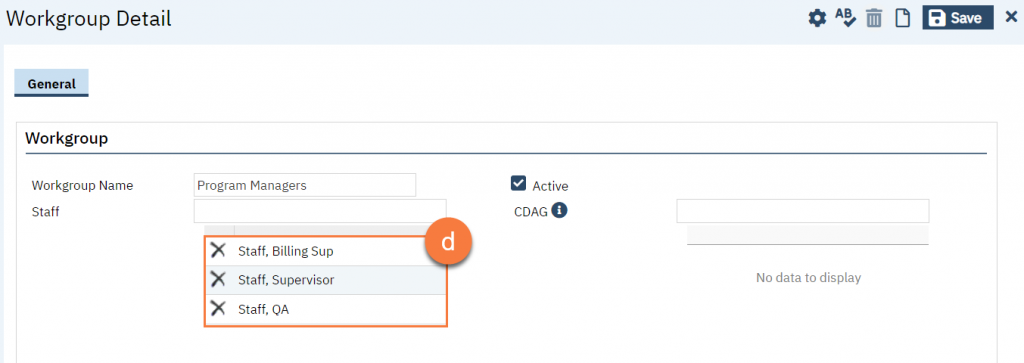
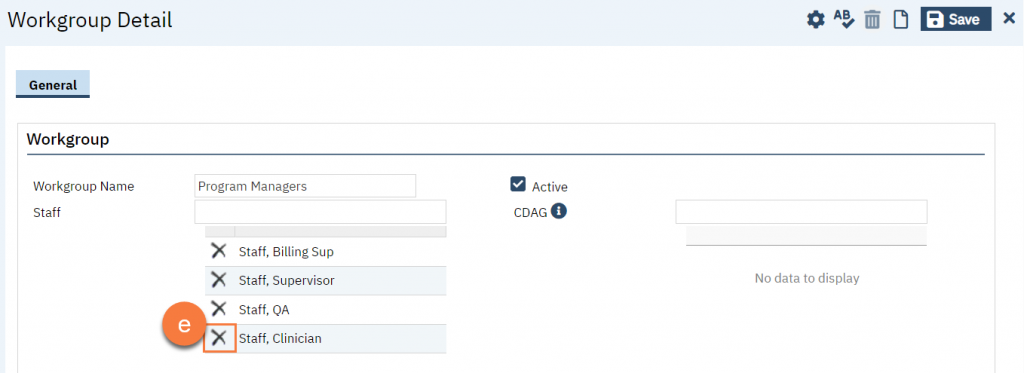
- If you’ve added someone you need to remove, click on the delete icon next to their name.
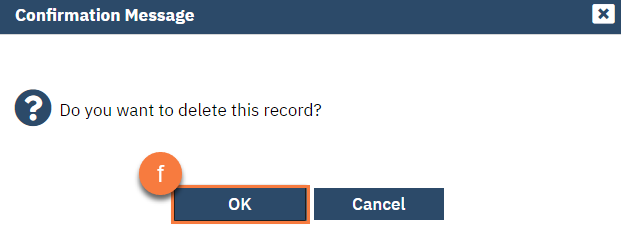
- This will bring up a confirmation message. Click OK to delete the user from the workgroup.
- Add CDAGs.
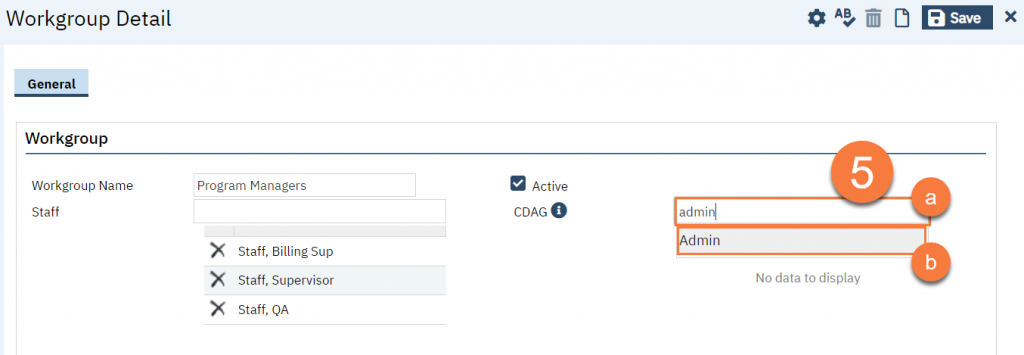
- This is a search field. Type the name of the CDAG you want to add.
- As you type, search results will appear. Click to select the CDAG you want to add.
- This will add the CDAG to the list of CDAGs associated with this workgroup.
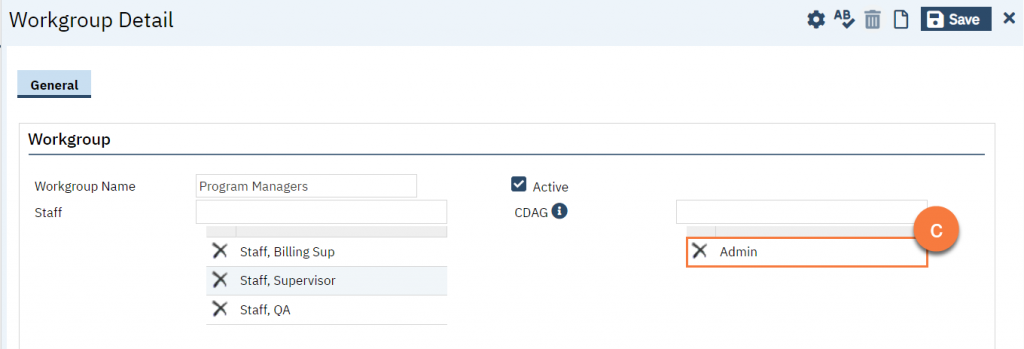
- Repeat until all CDAGs have been added.
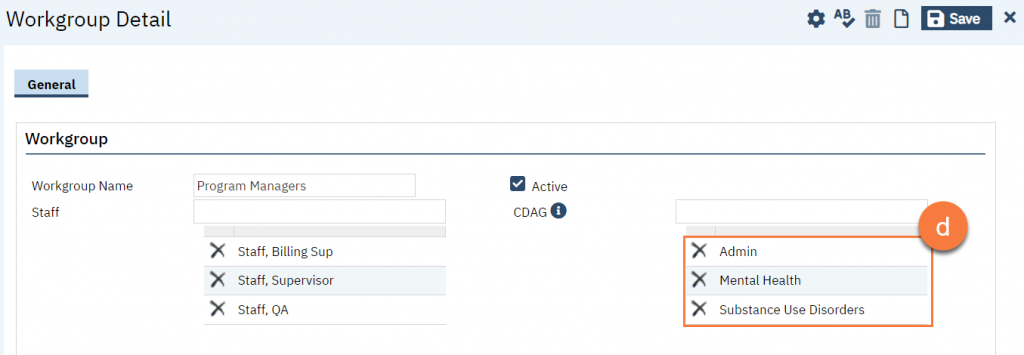
- If you’ve added a CDAG you need to remove, click on the delete icon next to its name.
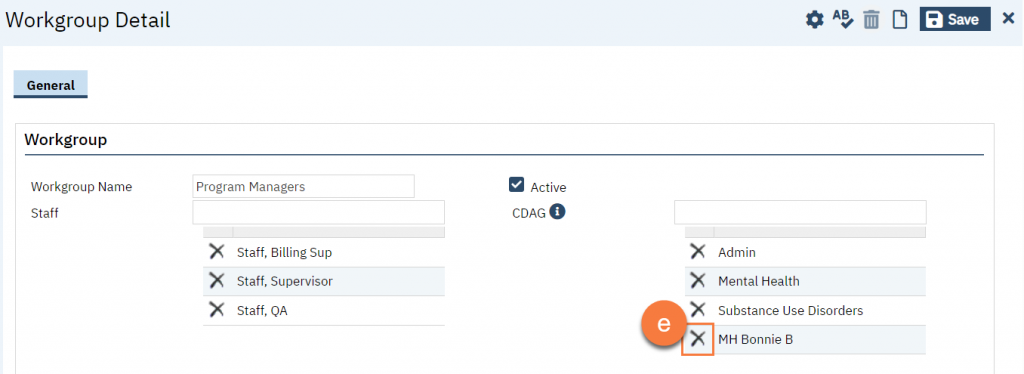
- This will bring up a confirmation message. Click OK to delete the CDAG from the workgroup.
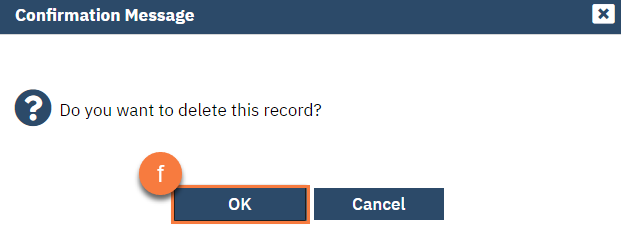
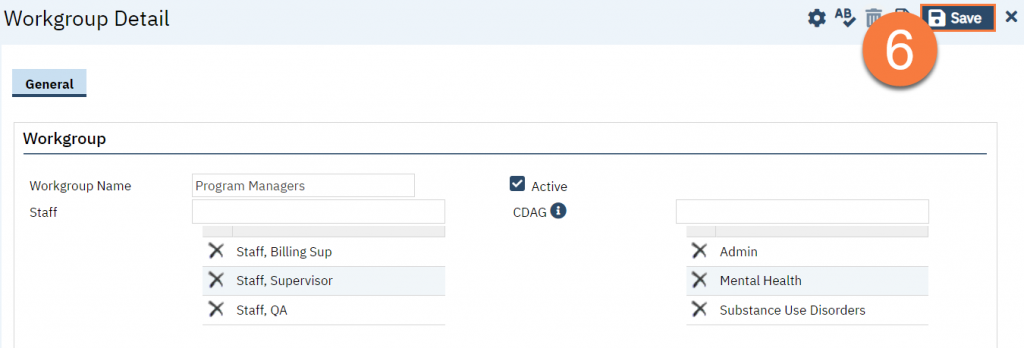
- Click Save.
- Permission the new workgroup to user roles. See How to Modify Permissions in a User Role for more details.
How to Modify a Workgroup
You will need to modify a workgroup in order to add or remove staff users, add or remove CDAGs, or deactivate a workgroup. A workgroup should not be deleted, but rather only deactivated. If a workgroup was created in error, you can follow instructions below on how to delete a workgroup.
- Navigate to the Workgroups list page.
- Click on the Search icon.
- Type in “Workgroups” in the search bar.
- Click to select “Workgroups (Administration)” from the search results.

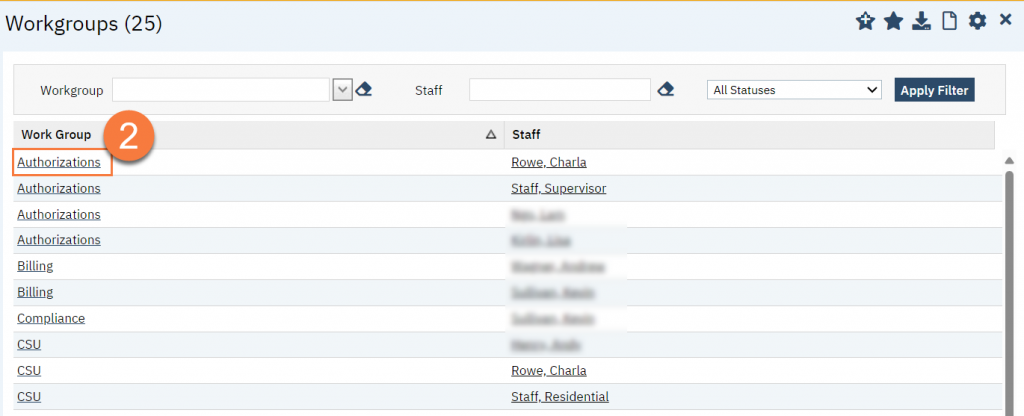
- Select the workgroup you want to modify. If the workgroup you want to modify already has multiple staff, it will have multiple rows on the list page. Click on any of the links in the Workgroup column that has the workgroup name you want to modify.
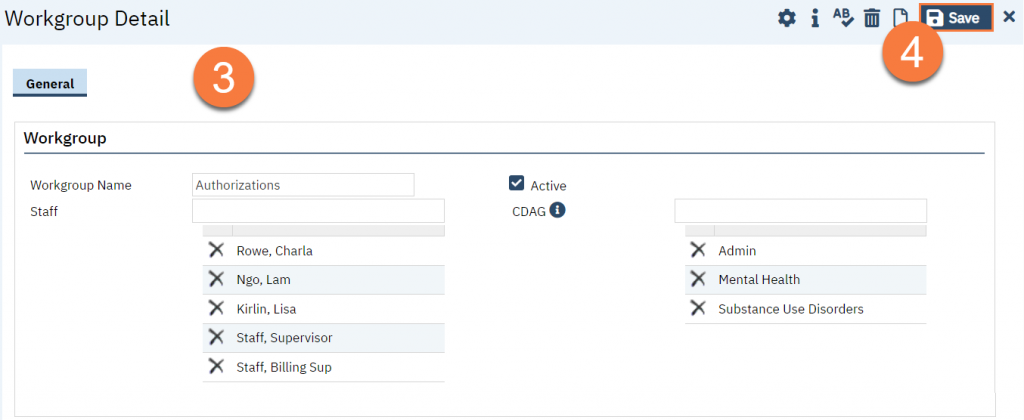
- This will bring you to the Workgroup Detail screen. Make modifications as necessary.
- Click Save when you have finished with your changes.
How to Delete a Workgroup Created in Error
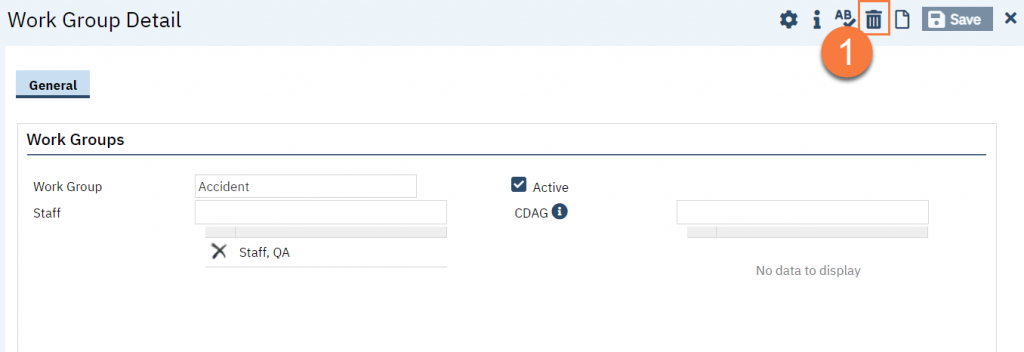
This should only be done when a workgroup was created in error and the workgroup has not been used at all in the system. This can ONLY be done when you are first creating a workgroup and have not yet associated the workgroup with anything in the system. Otherwise, the delete icon will not be visible.
- Click on the delete icon.
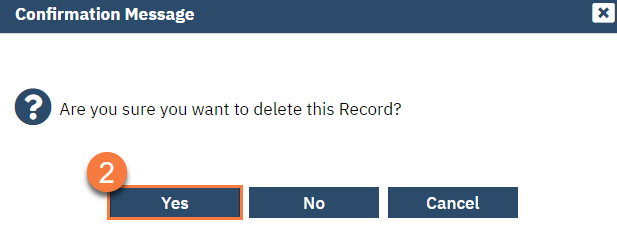
- A confirmation window will popup. Click Yes to confirm the deletion.
Updated 12/5/24
