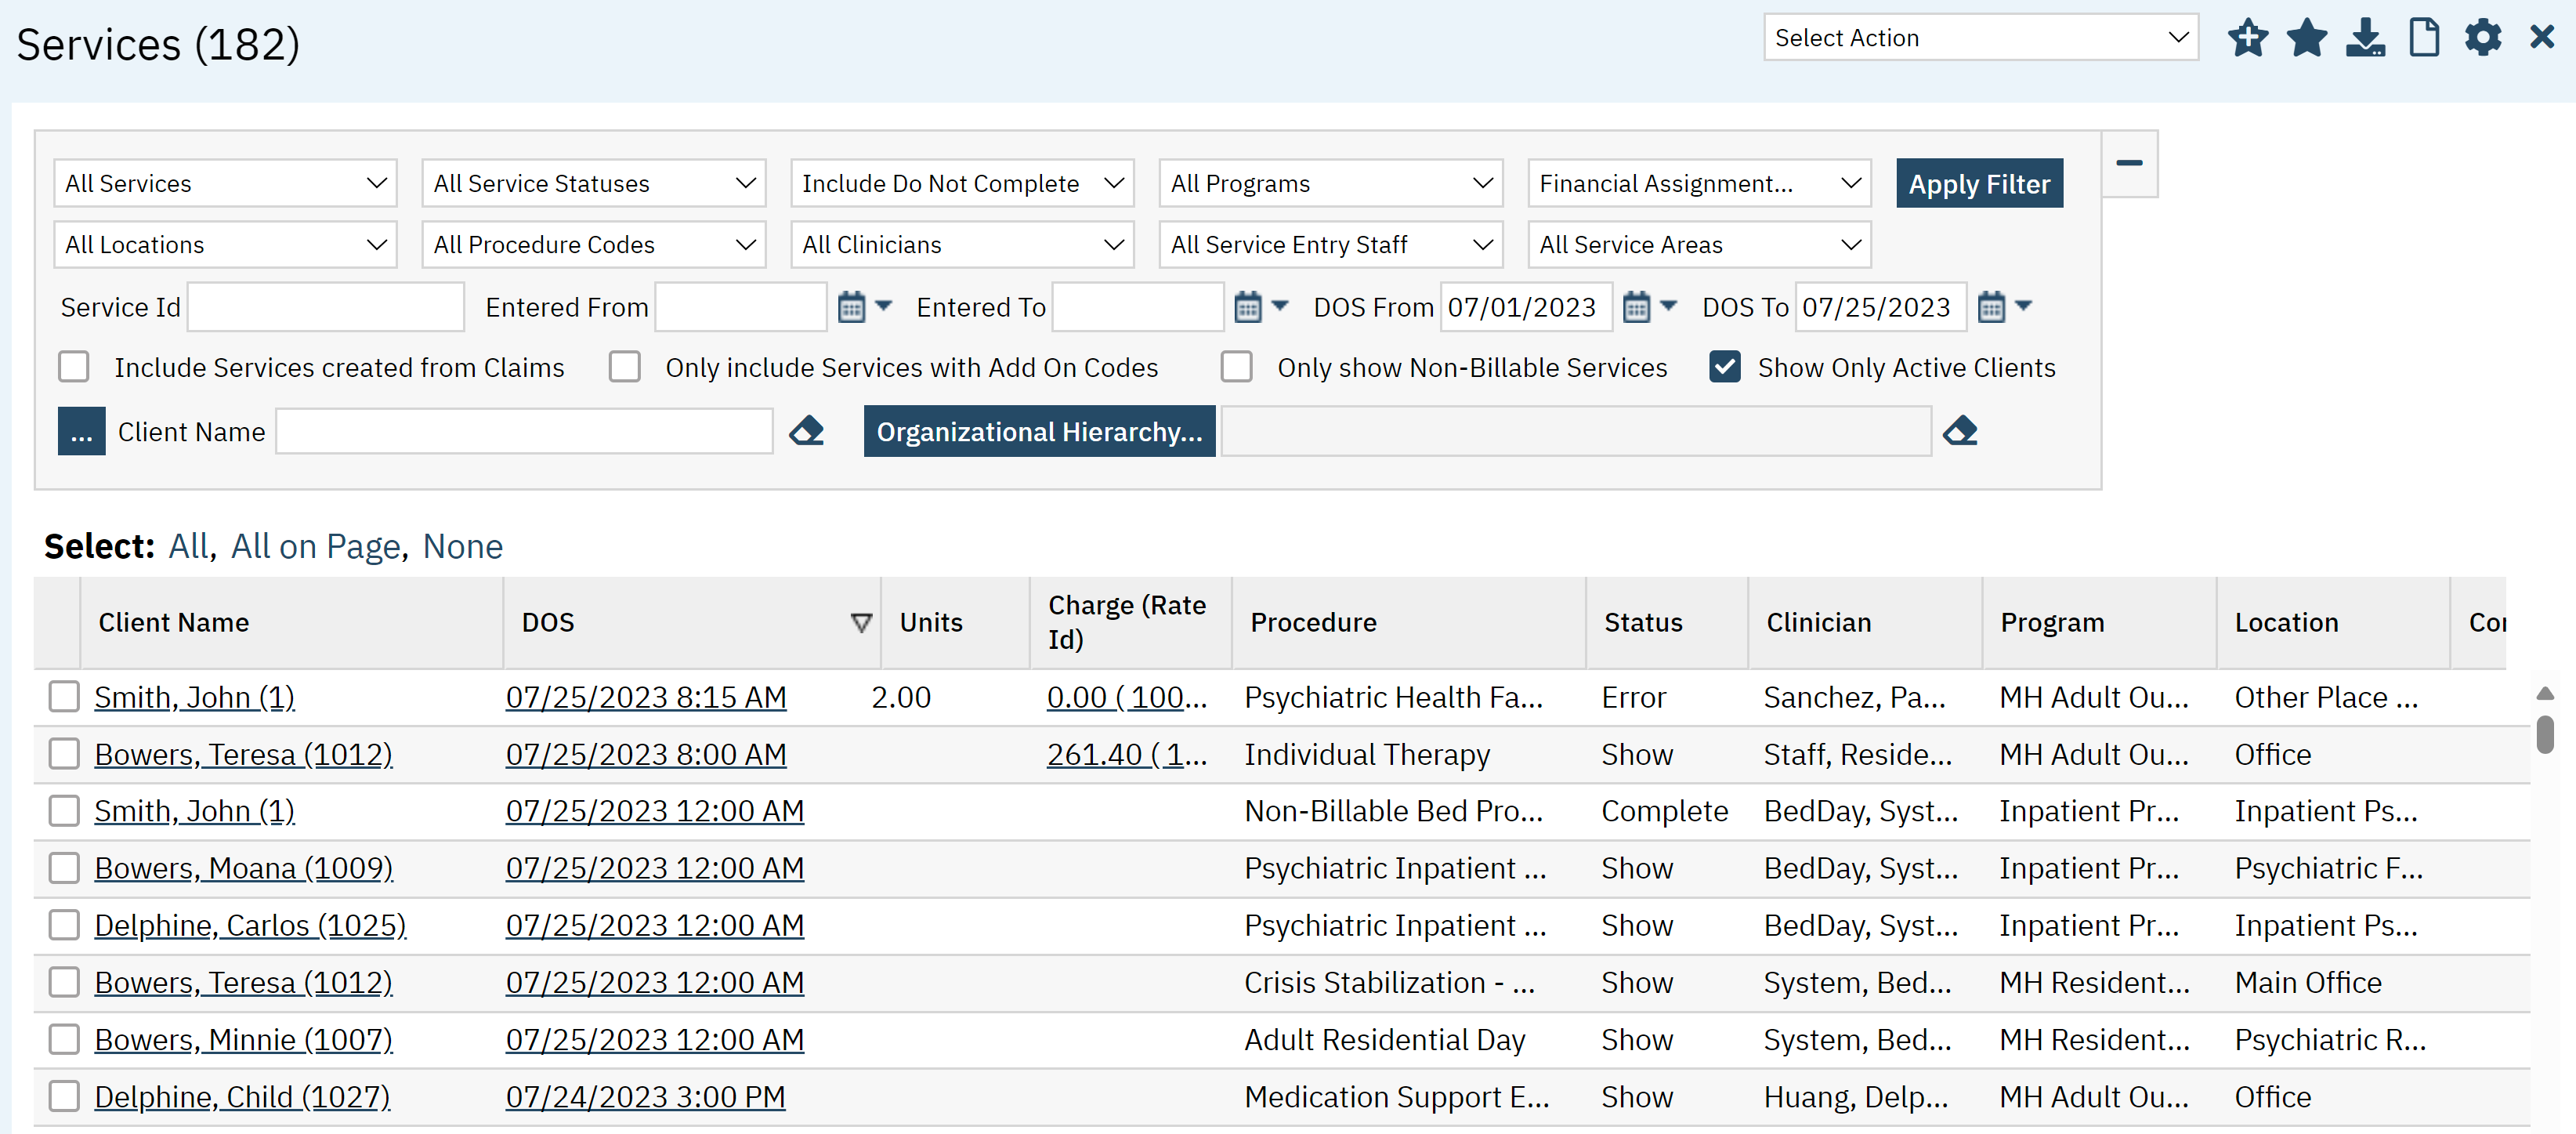
The Services (My Office) list page is a screen where you can see all client services that have been rendered by a clinician. The client services are displayed in a series of columns that identify specific criteria based on the selected filters.
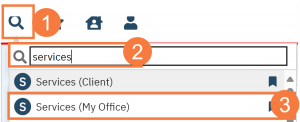
- Click on the Search icon.
- Type “Services” in the search bar.
- Select “Services (My Office)” from the search results.
This will bring up the Services (My Office) list page.
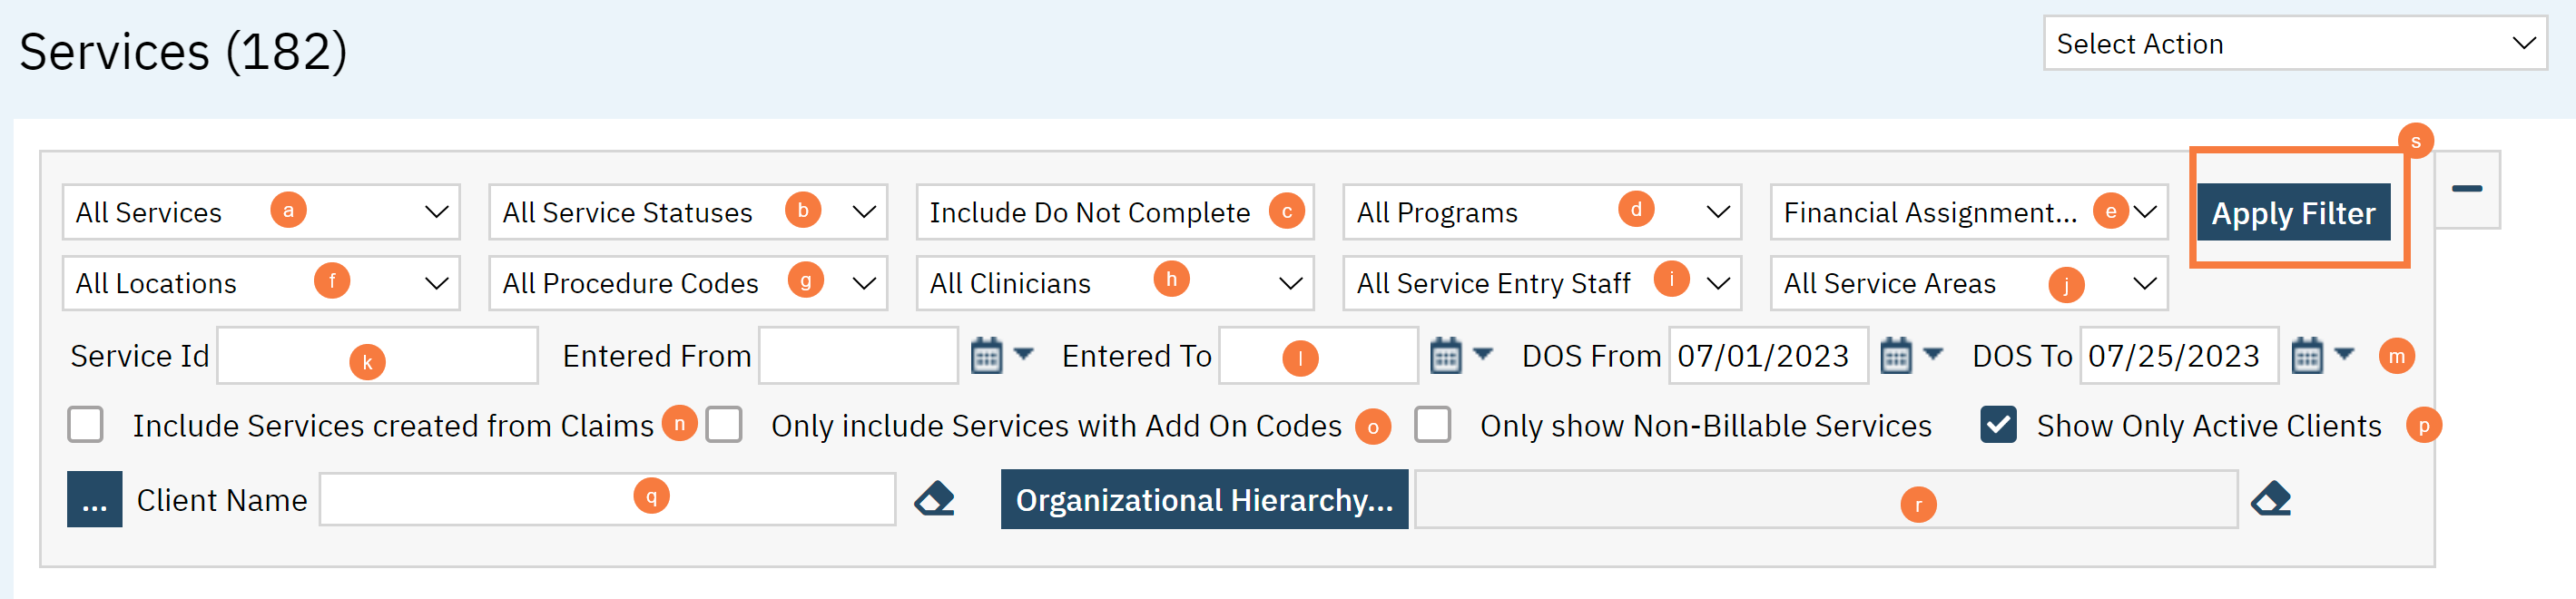
Filters
The following filters are available on this List Page:
- All Services: Click this drop-down to filter by service type.
- All Service Statuses: Click this drop-won menu to filter by the status of the service such as, error, scheduled, show, etc.
- Include Do Not Complete: You can exclude or include do not complete services.
- All Programs: Click this drop down to filter by a specific program.
- Financial Assignment: Click this drop-down to filter by financial assignment.
- All Locations: Click this drop-down to filter by location the service took place in.
- All Procedure Codes: Click this drop-down to filter by a specific procedure code.
- All Clinicians: Click this drop-down menu to filter by clinician.
- All Service Entry Staff: Click this drop-won menu to filter by the staff that entered the service.
- All Service Areas: Click this drop-down menu to filter by DMC or MH.
- Service ID: You can free text the service ID number here.
- Entered From and To: You can enter a date range here related to when the service was entered.
- DOS From and To: You can enter a date range here related to when the date of service was.
- Checkbox to include services created from claims.
- Checkbox to only include services with add on codes.
- Checkbox to only show non-billable services.
- Client Name: Type the client’s name here to search by client. Or you can click the ellipsis button to do a client search.
- Organizational Hierarchy:
- Click Apply Filter once the appropriate options have been selected.
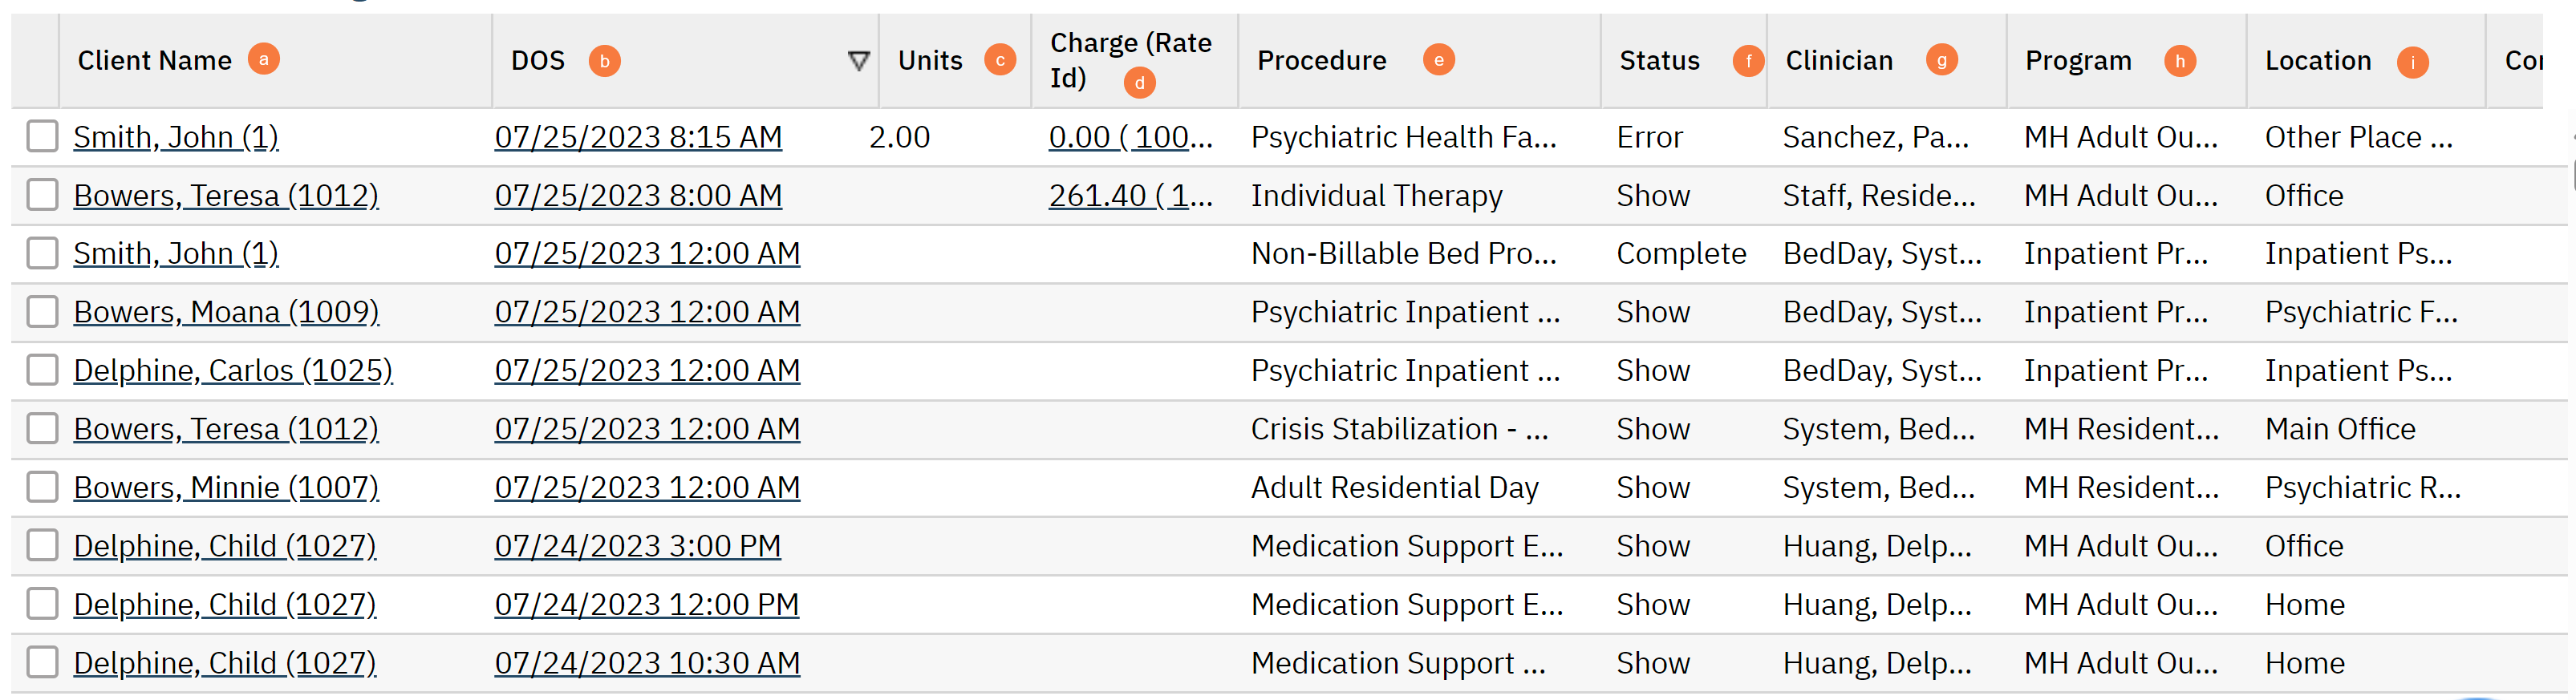
Columns
- Client Name: The client’s name and client ID number will appear here. The hyperlink will take you to the Client Account screen.
- DOS: Date of Service Time and Date will appear here. This hyperlink will take you to the Service Detail screen.
- Units: Number of unites will appear here.
- Charge (Rate Id): The charge rate will appear here.
- Procedure: The procedure tied to the service will appear here.
- Status: The status of the service will appear here such as, Error, Show, Complete, etc.
- Clinician: The clinician tied to the service will appear here.
- Program: The program tied to the service will appear here.
- Location: Location of the service will appear here.
- Comment: Any comments will appear here. (not pictured)
- Failure to complete Reason(s): If the service was not completed the reason will appear here. (not pictured)
- Add on Codes: Any add on codes will appear here. (not pictured)
- Group Name: n/a
- Telehealth (not pictured)
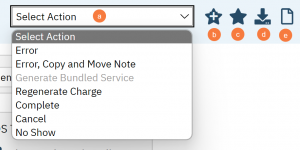
Upper Right-Hand Icons
- Select Action: When lines are selected below you will be able to perform the pictured actions.
- New Favorites Icon: Clicking on the “new favorites” icon will allow you to add this screen to your favorites for quick access.
- Favorites Icon: If you have this listed as your favorite already, when you hover over this icon, it will tell you the favorite name.
- Export Icon: This icon is available to admins. You will be able to export the data from this screen into an excel spreadsheet.
- New Icon: Will take you to the Service Entry screen where you can enter a new service.
Exported Columns
- Client Name
- DOS
- Procedure
- Clincian
- Program
- Location
- Comment
- Charge (Rate Id)
- Failure to complete Reason(s),Status
- Units
- Complete Error Message
- Service Units
- Add On Codes
- Group Name