Service Import allows you to bulk upload services via an Excel template in to SmartCare. After the upload is complete, a nightly job processes the uploaded file, and the services lines display for review on the Batch Service List page. If the upload was not successful, error reasons show which will allow you to review and correct the errors as needed.
How to Complete the Batch Service Upload Template
The template must be completed prior to the upload. See below for specific requirements and formatting. If a field is not required, and will not be used for the upload record, leave the field blank. Note: You might notice Program is not a column/value that is specified in the template. Due to CDAG adherence the Program is selected at the time of the upload.
You will need to create a different upload file for each program you need to upload information for.
Download the Template by clicking on this link: Batch Service Upload Template
Download the Reference Guide, which includes global code ID numbers by clicking on this link: Batch Service Upload Reference Guide
| Column ID | Column Name | Required? | Value, Formatting, |
|---|---|---|---|
| A | ClientID | Yes | Client's SmartCare ID number |
| B | ClinicianID | Yes | The Staff ID for the clinician who provided the service |
| C | ProcedureCodeID | Yes | The ID associated with the procedure code |
| D | LocationID | Yes | ID associated with the location |
| E | DateOfService | Yes | Requires the date AND time the service was provided. Format must be MM/DD/YY 08:00 AM Example: 05/23/23 09:00 PM |
| F | EndDateOfService | No | This column is not required. If using it, it requires the date AND end time of the service. Format must be MM/DD/YY 08:00 AM Example: 05/23/23 09:00 PM |
| G | FaceToFaceTime | Yes | This is the duration of the service. The duration must match the service entry unit defined on the Procedure Code (minutes, hours, days, etc.) |
| H | TravelTime | No | This is the travel time associated with the service, if applicable. |
| I | DocumentationTime | No | This is the documentation time associated with the service, if applicable. |
| J | AttendingID | No | Enter the Clinician ID for the Attending Provider, if applicable. |
| K | ReferringId | No | If the service requires a referring provider reported in the claim file, complete this field. The Code ID from the ReferringClinician Global Code must be used. This is very rarely used. |
| L | EmergencyIndicator | No | If the procedure for the service requires an Emergency Indicator, complete this field. The Code ID from the EMERGENCYINDICATOR Global Code must be used. |
| M | EvidenceBasedPractices | No | If the service requires an Evidence Based Practice be reported, complete this field. These EBPs are associated with CSI State Reporting. The Code ID from the EVIDENCEPRACTICES Global Code must be used. |
| N | TransportationService | No | If the service requires a transportation service designation, complete this field. The Code ID from the TRANSPORTATIONSERVIC Global Code must be used. |
| O | Billing Diagnosis Position 1 | No | Use the ICD-10 code, with decimal. Example: F43.25 |
| P | Billing Diagnosis 1 Present On Admission | No | If the service will be billed via the 837i or UB04 claim formats, enter the POA indicator for the primary diagnosis. The Code ID from the ServiceDxPOA Global Code must be used. |
| Q | Billing Diagnosis Position 2 | No | Use the ICD-10 code, with decimal. Example: F43.25 |
| R | Billing Diagnosis Position 3 | No | Use the ICD-10 code, with decimal. Example: F43.25 |
| S | Billing Diagnosis Position 4 | No | Use the ICD-10 code, with decimal. Example: F43.25 |
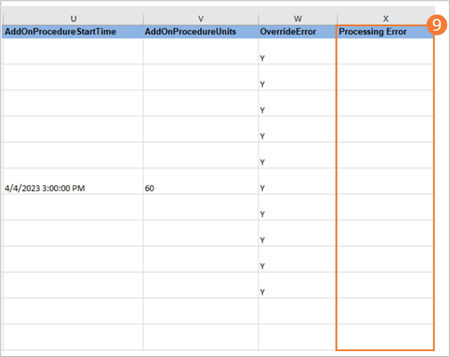
| T | AddOnProcedureCodeId | No | If the service has an add-on code, enter the ID associated with the add-on procedure code. You do NOT need to do this for extended time add-on codes, only other types of add-ons, such as interpretation and interactive complexity. |
| U | AddOnProcedureStartTime | No | If the service has an add-on procedure code, enter the date AND start time for the add-on service. Format must be MM/DD/YY 08:00 AM Example: 05/23/23 09:00 PM |
| V | AddOnProcedureUnits | No | Enter the number of units for the add-on service |
| W | OverrideError | No | Use this field to notate if the Override Errors checkbox on the Service Details screen should be selected. Entering Y will indicate that a note is NOT required for this service, with the understanding that the clinical information is entered in a different EHR. Enter Y or leave blank for N |
Updated 8/28/23
How to Complete a Batch Service Upload
After completing the spreadsheet, you’ll have to upload this information into SmartCare.
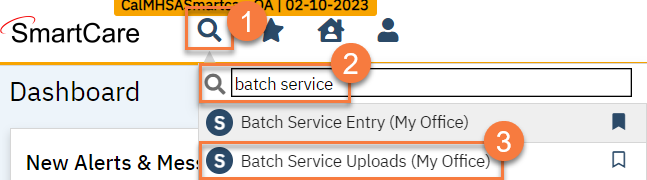
- Click the Search icon.
- Type in “Batch Service Upload” in the search bar.
- Select “Batch Service Upload (My Office)” from the search results.
- This takes you to the Batch Service Upload list page. Click on the Upload New Batch Service icon.

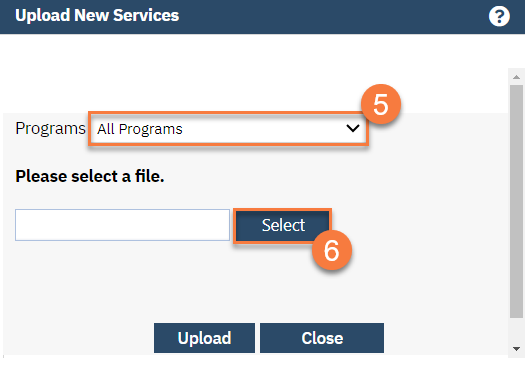
- This brings up the Upload New Services popup window. Select the Program you’re uploading services for. Only one program can be selected at a time.
- Click the Select button to choose a file to upload.
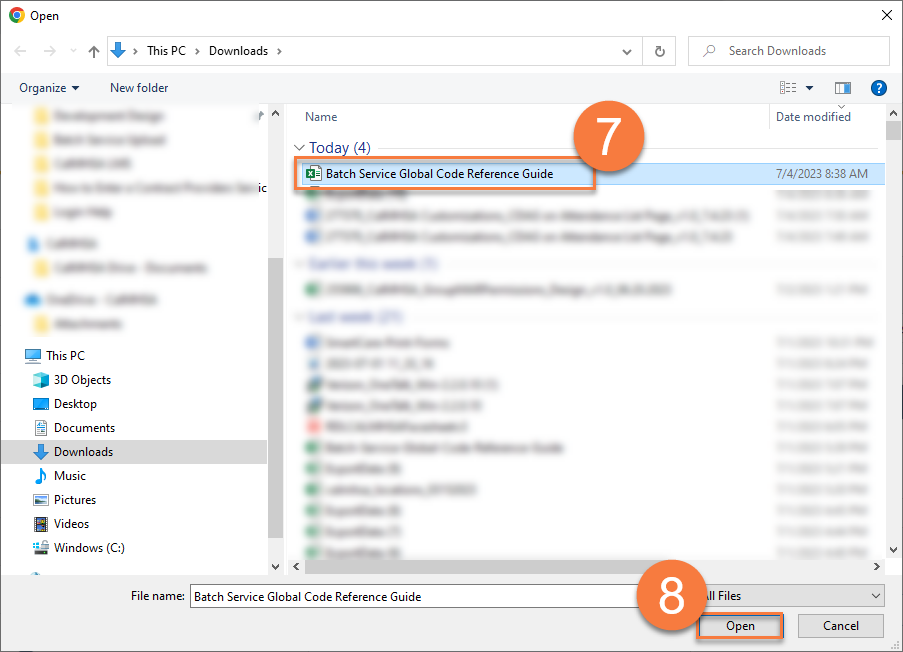
- This opens a window with your files. Select the file you want to upload.
- Click Open.
- This will soft-upload the file. Confirm you’ve selected the correct file. If needed, you can click Remove and repeat the previous steps to select the correct file.
- Click Upload.

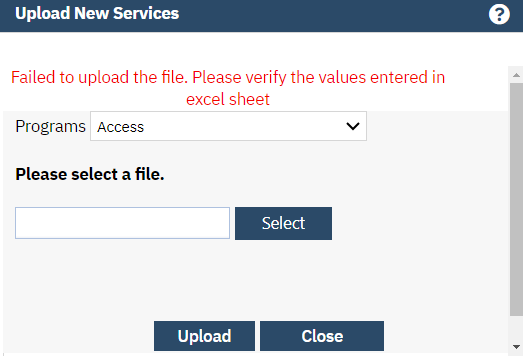
If the values do not match the template, a validation displays prompting you to verify the values in the excel sheet.
If your spreadsheet is filled out correctly, a validation displays letting you know that the file has been uploaded.
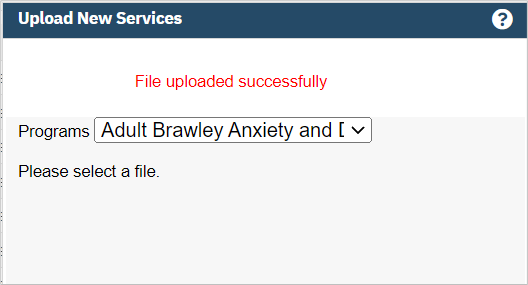
The “file uploaded successfully” popup will automatically close and it will take you back to the list page. You can now see your batch file on the list page.

How to Review an Uploaded Batch Service File
- Click the Search icon.
- Type in “Batch Service Upload” in the search bar.
- Select “Batch Service Upload (My Office)” from the search results.
- This takes you to the Batch Service Upload list page. Select the batch file you want to review.
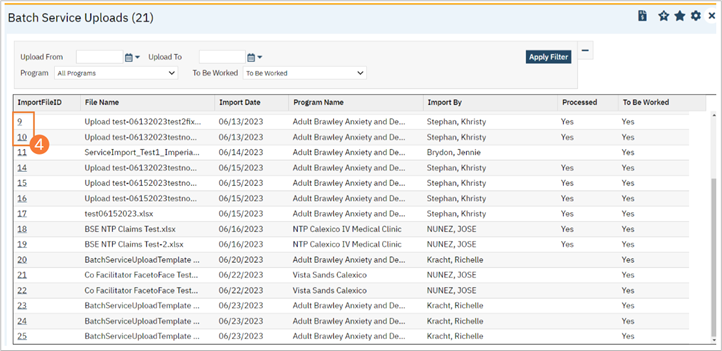
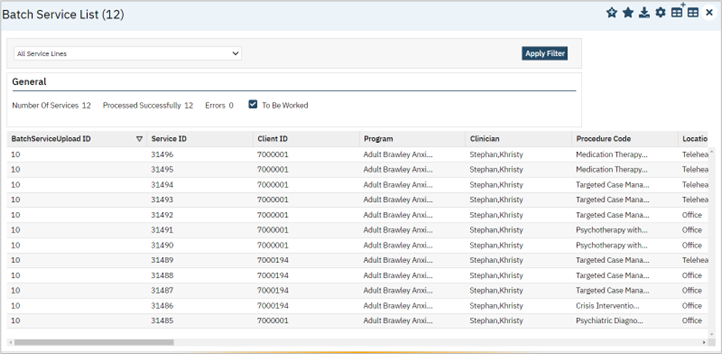
The Batch Service List page opens. Review the list of services.
How to Correct Batch Upload Errors
- Click the Search icon.
- Type in “Batch Service Upload” in the search bar.
- Select “Batch Service Upload (My Office)” from the search results.
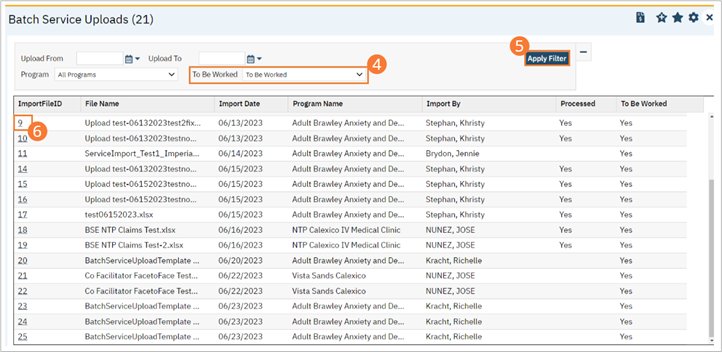
- Filter for “To be Worked”
- Click the Apply Filter button.
- Select the File Name hyperlink.
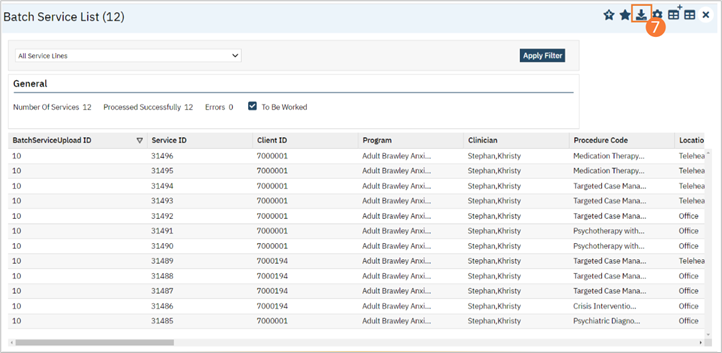
- The Batch Service List page opens. Review the list of services and select the Export icon in the toolbar to export the list containing processing errors. When this list is exported it should export in the same template as the upload with an additional column for the processing error.
- Correct the processing error(s).
- Delete the processing error column in the excel sheet once the errors are corrected.
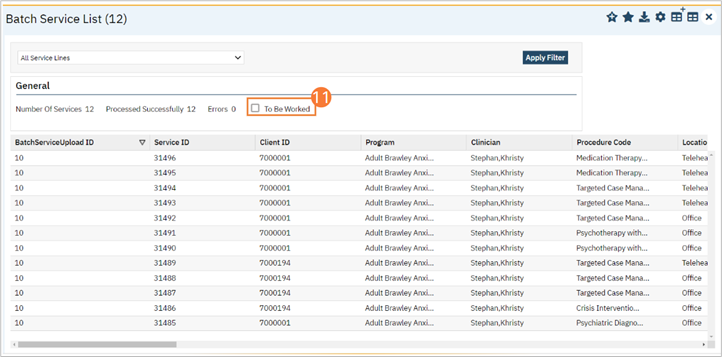
- On the Batch Service List page, uncheck the To be Worked checkbox to indicate that there are no corrections needed on the file. If the Processing Error column is blank, the record is “clean.” The overnight job will run and create the service.
- Once the corrections are made, you will need to upload the file again.
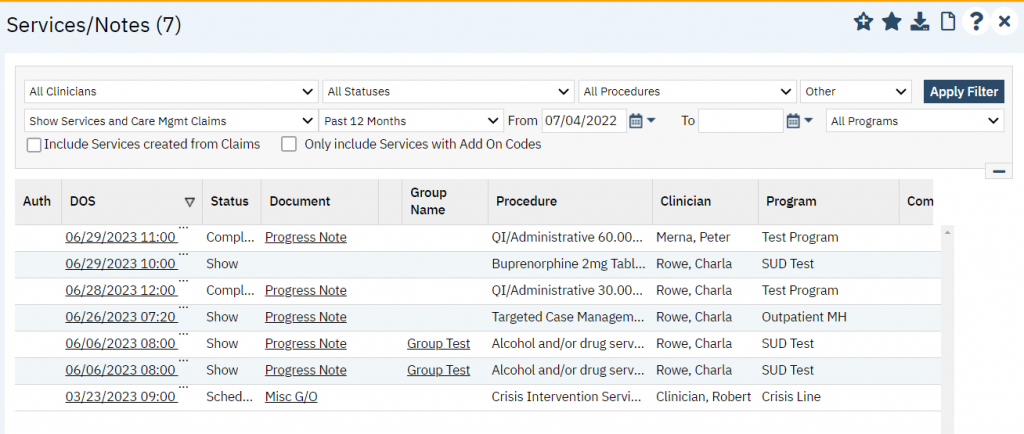
How to View Services Created from the Nightly Service Job
The new overnight job created for this process will run and create the services for any records that do not have an error. Any records that had an error from the upload that have not been corrected, will not have a corresponding service created.
You can view these services in the Services/Notes list page.
- Click the Client Search icon.
- Type the name of the client (last name, first name) in the search bar.
- Select the client from the search results.

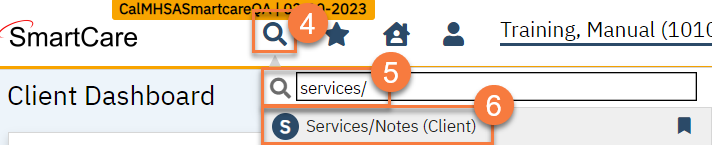
- The client’s record will open. Click the Search icon.
- Type “Services/Notes” in the search bar.
- Select “Services/Notes” from the search results.
- The Services/Notes list page opens. Here, you can review any of the services associated with this client.