Room(s) needs to be set up for every unit. The set up for the room does not differ between settings (IP, CSU, Residential), but do need to ensure the correct rooms are set up for the correct unit.
- Click the New Room icon in the tool bar to open Room Details.c
-
- If you are no longer in the Units/Rooms/Beds screen follow step 1 in the Units/Rooms/Beds section.
- Enter the Room Name. This will automatically copy over to Display As.
-
- If you would like the display as to be different feel free to change it. This is the name the end user will see.
- Corresponding conversion file: Setup_Data_Rooms
- Column Name: RoomName and DisplayAs
- Select Unit from dropdown options. This will display created units.
- Ensure you select the correct unit which should correspond to the room.
- Corresponding conversion file: Setup_Data_Rooms
- Column Name: UnitId, enter the Id number associated with the unit.
- Active checkbox would default to be checked. This should remain as is.
- This would only be deselected if the Room is no longer utilized.
- If deselected you should enter an Inactive Reason.
- Corresponding conversion file: Setup_Data_Rooms
- Column Name: Active and InactiveReason
- Active: Y indicates the checkbox would be selected or leaving this blank would indicate the checkbox is not selected.
- InactiveReason: CodeId associated to BEDINACTIVEREASON global code.
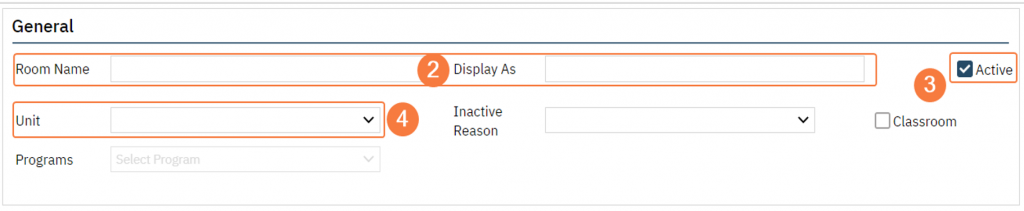
- Classroom checkbox and Program dropdown are utilized for a separate functionality; do not use these fields.
- The corresponding columns in the conversion file (Setup_Data_Rooms) should be left blank.
- In the Availability section enter a Start Date, this is the date the room has become active.
- You can backdate this date.
- End Date should only be entered if the room was no longer active.
- Click Insert. This information will not display in the Availability History section.

- Click Save in the tool bar, upper right hand corner.
- If additional rooms are needed click New icon and repeat the steps above.
