Reception/Front Desk (My Office) is a list page that shows all appointments for a certain day. It allows users to interact with and view details on all appointments for a selected day. The screen also allows users to reschedule or cancel appointments, print all currently shown clients’ information and the day’s schedule. You can also create a new service for a specific client.
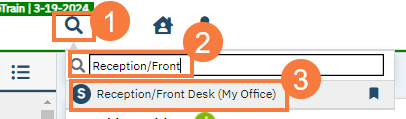
- Click on the Search icon.
- Type “Reception/Front Desk” in the search bar.
- Select “Reception/Front Desk (My Office)” from the search results.
This will bring up the Reception/Front Desk list page.
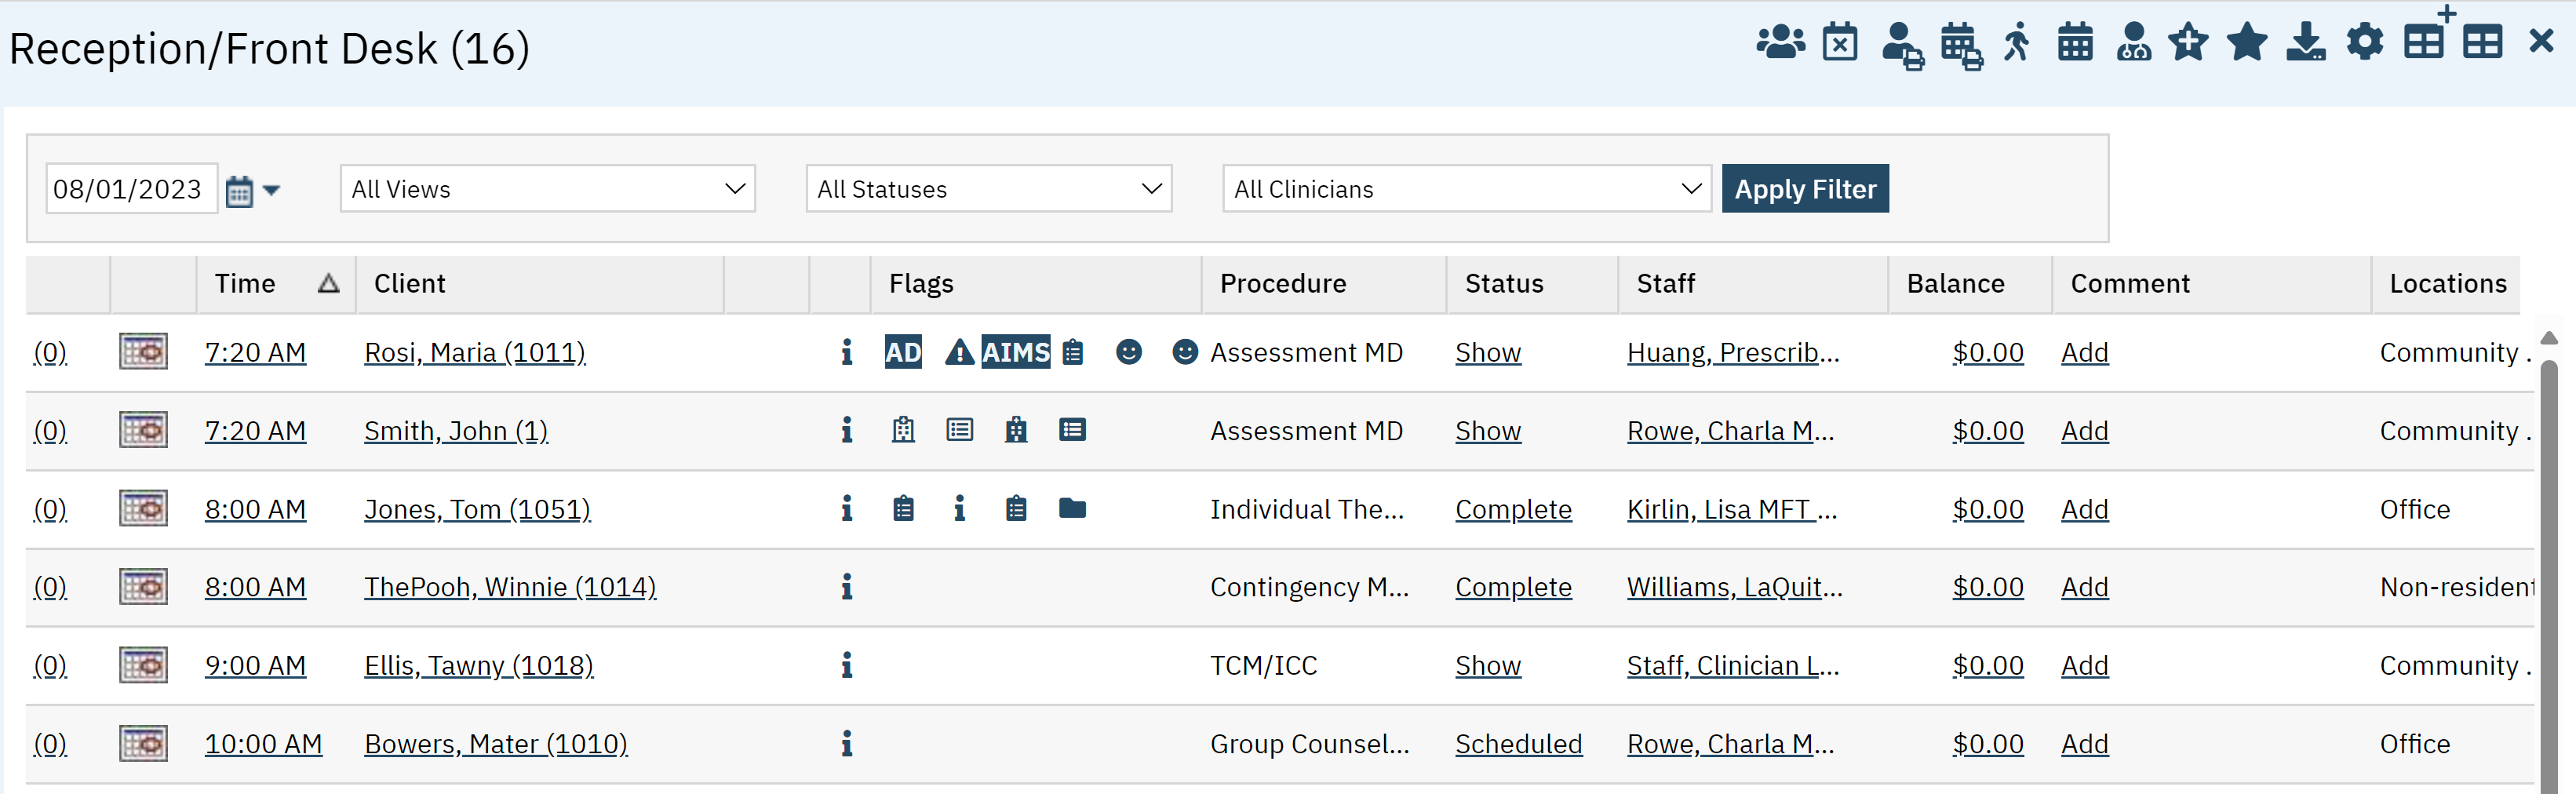
Filters
The following filters are available on this list page:
- Date Filter (Filter is not formally label) Switches the view to a specific day’s appointments.
- All Views (Filter is not formally labeled, this shows the default option when first viewing the screen) “All Views” is the only option for this filter.
- All Statuses (Filter is not formally labeled, this shows the default option when first viewing the screen)
- All Clinicians (Filter is not formally labeled, this shows the default option when first viewing the screen)
- Click the Apply Filter button once the appropriate options have been selected.

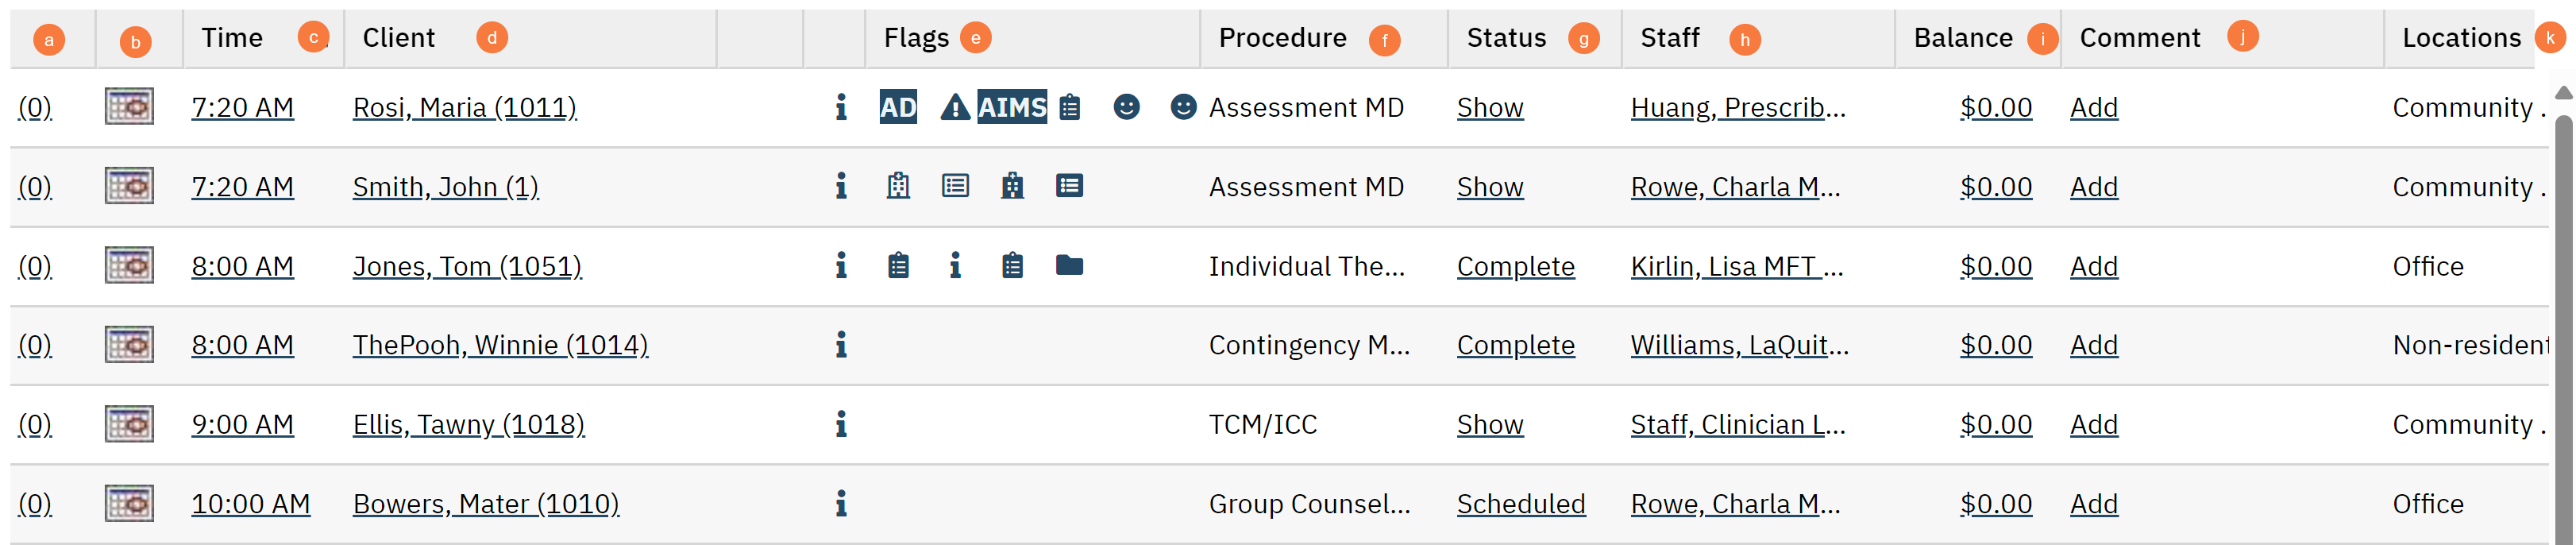
Columns
- Number Of Time Rescheduled (This column is not formally labeled). The number of times an appointment had been rescheduled. This hyperlink will allow you to reschedule the appointment.
- Calendar icon: You can create a follow-up appointment by clicking this icon.
- Client: The client ‘s name and ID number. This hyperlink will take you to the Client Account screen.
- Flags: The client’s flags will appear here. If you hover over the flag, it will give you a description.
- Procedure: Shows what procedure the client is scheduled for.
- Status: Shows the status of the appointment such as Show, Complete, Cancelled, etc. This hyperlink will allow you to change the status of the appointment.
- Staff: The staff the client is scheduled with. This hyperlink will take you to the staff’s calendar.
- Balance: Shows the client’s balance. This hyperlink will take you to the Client Payment window.
- Comment: Comments will display here. To add a comment, click the Add hyperlink.
- Locations: Shwos the location of the appointment.
- Programs: Shows the program the appointment is associated with.
- Primary Ins: Client’s Primary insurance. This hyperlink will take you to the coverage screen.
Upper Right-Hand Icons
- Group Icon: This button will take you to the Groups list page.
- Cancel Icon: This will cancel the selected appointment(s).
- Print (Patient) Icon: This will allow you to print client information.
- Print (Schedule) Icon: This icon will allow you to print the schedule based on your filters.
- Enter Service Icon: This icon will take you to the Service Detail screen.
- New Favorites Icon: Clicking on the “new favorites” icon will allow you to add this screen to your favorites for quick access.
- Favorites Icon: If you have this listed as your favorite already, when you hover over this icon, it will tell you the favorite name.
- Export Icon: This icon is available to admins. You will be able to export the data from this screen into an excel spreadsheet.
- Customize Icon: Using these icons you can customize the columns.

Exported Columns
- Number Of Time Rescheduled
- Time
- Client
- Chosen Name
- Flag
- Procedure Name
- Status
- Staff
- Client Balance
- Comment
- Is Crossed Yellow Limit
- Is Crossed Red Limit
- Co-pay amount
- Client Phone number
- Is Minor
- Payment Id
- Amount
- Locations
- Programs
- Primary Ins.