The MAR stands for Medication Administration Record, but it does not only include Medications. Other items, such as safety checks and follow-ups, are also administered on the MAR. Items are administered in similar ways, regardless of type.
How to Document Administering Items
- Begin on the Client MAR page with the client you wish to administer.
- See How to Display the Client MAR Page section for details.
- If you need administer the MAR to…
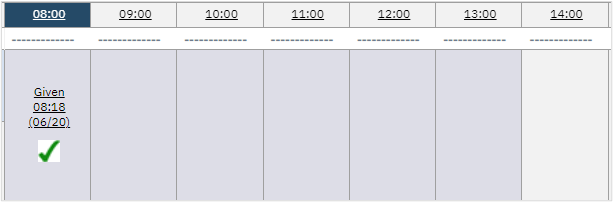
- A status of “Self-Administration”:
- Click the blue check mark
- A status of “Given”:
- Click the red and white capsule icon
- A status other than “Given”:
- Click the time in the header column
- Multiple medications:
- Click the time in the header column
- Note: Only medications within the administration window will be available to administer.
- Questions on the order for one medication:
- Click the red and white capsule icon
- Questions set up to show on administration will always appear.
- Questions on the order for multiple medications:
- Click the time in the header column
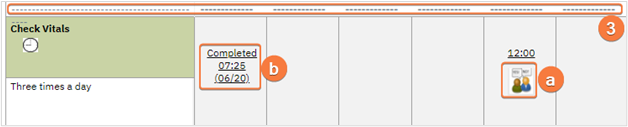
- A status of “Self-Administration”:

- The Client MAR includes non-medication items; these appear beneath the dotted line
- To administer/complete the item click the people icon
- The icon only appears when the order is non-PRN. For PRN order see How to Enter Status and Date…Includes PRN) section
- When the icon is selected, it will automatically be marked as Completed
- To administer/complete the item click the people icon
- As a reminder, MAR has various icons under the order. For details on this, please see How to Understand the Client MAR Icons sections
How to Enter Status, Date, Time, and Dosage (including PRN)
Use these directions to add a status other than the default, if there are multiple items to be administered, or for any PRN items.
- Begin on the Client MAR page with the client you wish to make changes for.
- Click on the time in the column header of the item you want to document
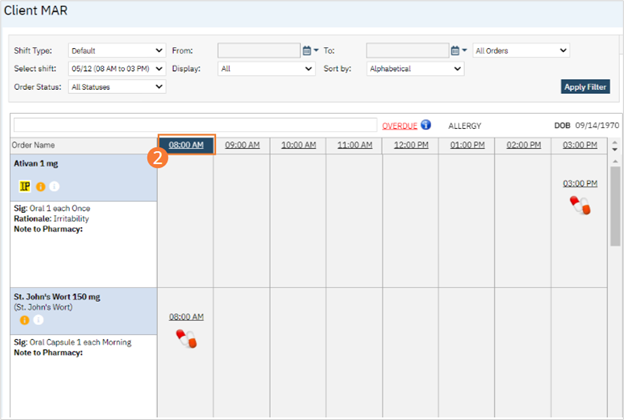
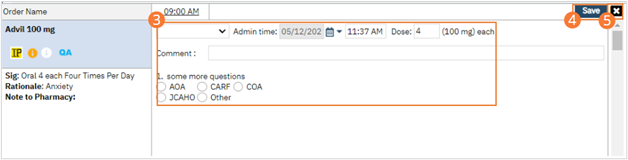
- Complete the fields in the right-hand column.
- Note, there are many more options than Given.
- This may or may not include questions, based on order set up.
- Click the Save button.
- Click the Close icon to return to the time grid.
- All PRN medications appear below a dotted line.
- The same steps as above should be followed for PRN medications.
- However, a PRN reason text field will appear. Enter the reason for PRN medication.

- When a PRN medication is administered and if it does have a frequency associated with it, e.g. Q2H PRN, the system will not allow administering the medication again until 2 hours have passed. A darker gray overlay will appear on times the PRN medication cannot be administered.
- In the screenshot below, the medication cannot be administered again until 14:00.