Inquiries (My Office) is a list page that show all inquiries that had occurred within the county. It allows users to view details about certain inquiries that had occurred in the past. The screen also allows users to open up a new inquiry for a client. The following data can be found in this list page: Client (Potential), Client Id, Inquirer, Start Date/Time, Recorded BY, Assigned To, Disposition, Inquiry Status, Program Name, Location, Phone, Inquiry Type, Urgency Level, Contact Type, End Date/Time, Disposition Comment, Screening Comment. It is recommended that front desk staff and clinicians use this list page as it would allow them to view any past inquiries that have been done on certain clients.
- Click on the Search icon.
- Type “Inquires” in the search bar.
- Select “Inquires (My Office)” from the search results.
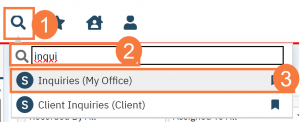
This will open the Inquiries (My Office) List Page.
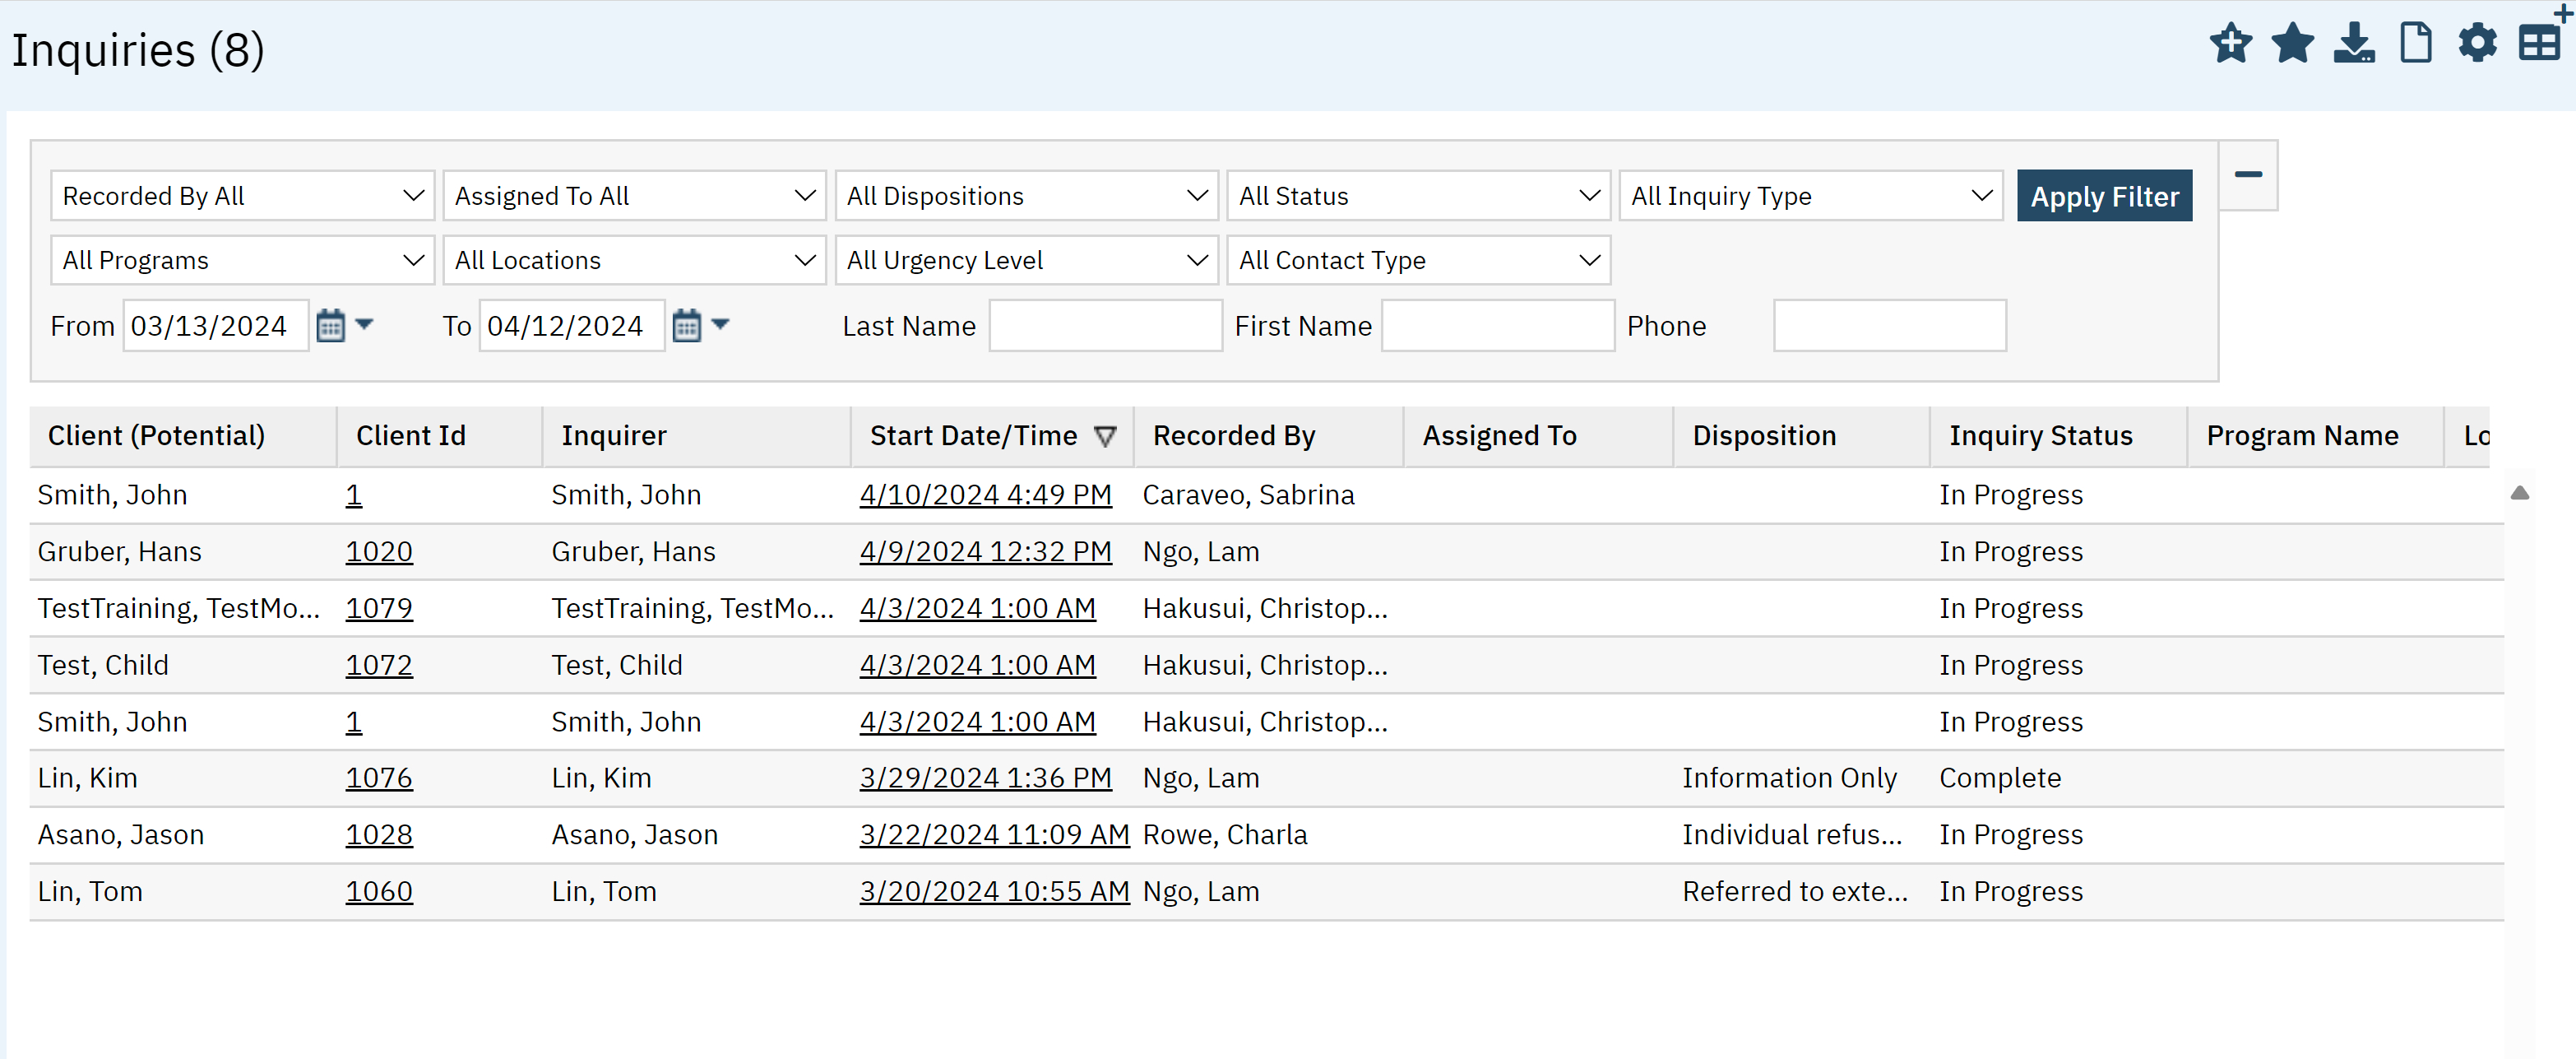
Filters
- Recorded By All (Filter is not formally labeled, this shows the default option when first viewing the screen). A staff list dropdown that allows users to specify the staff who recorded the inquiry.
- Assigned To All (Filter is not formally labeled, this shows the default option when first viewing the screen). A staff list dropdown that allows users to specify the staff who is assigned to the inquiry.
- All Dispositions (Filter is not formally labeled, this shows the default option when first viewing the screen). A dropdown list that allows users to specify the disposition that was set for the inquiry. If an inquiry has multiple dispositions set, this filter will only specify the first disposition.
- All Status (Filter is not formally labeled, this shows the default option when first viewing the screen)
- All Inquiry Type (Filter is not formally labeled, this shows the default option when first viewing the screen)
- All Programs (Filter is not formally labeled, this shows the default option when first viewing the screen)
- All Locations (Filter is not formally labeled, this shows the default option when first viewing the screen). A dropdown list that specifies the location of the staff that handled the inquiry.
- All Urgency Level (Filter is not formally labeled, this shows the default option when first viewing the screen)
- All Contact Type (Filter is not formally labeled, this shows the default option when first viewing the screen)
- From Date range box that works with the “To” date rage. Specifies the date the inquiry occurred. To Date range box that works with the “From” date rage. Specifies the date the inquiry occurred
- Last Name: Search box that specifies the inquiry client’s last name
- First Name: Search box that specifies the inquiry client’s first name
- Phone: Search box that specifies the inquiry client’s phone number
- Click Apply Filter once all the appropriate options have been selected.

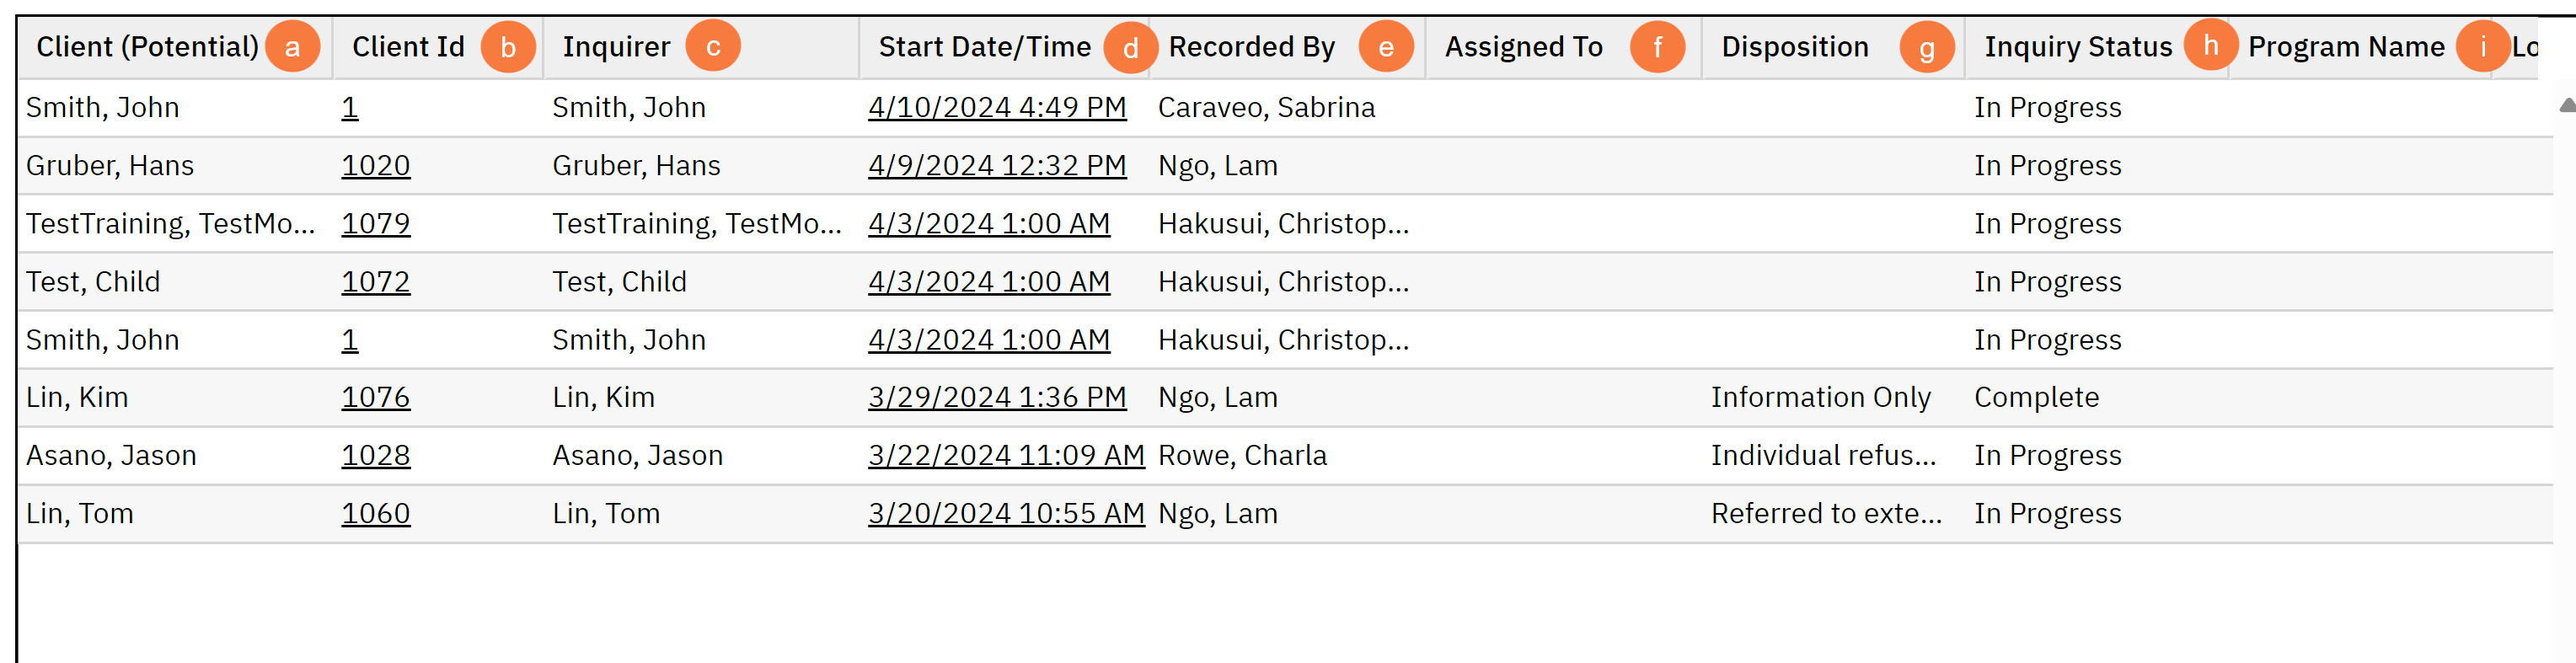
Columns
- Client (Potential): Person who made the inquiry or who the inquiry was regarding.
- Client ID: Unique identification number given to the client. Hyperlink will take you to the Client Summary screen.
- Inquirer: Could be the client or the person who called on behalf of the client or potential client.
- Recorded By: Staff member who took the inquiry.
- Assigned To: The staff member the inquiry is currently assigned to.
- Disposition:
- Inquiry Status: This tells you the status of the inquiry such as; In Progress, Complete, etc.
- Program Name: If the client has been assigned to a program it will appear here.
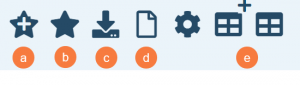
Upper Right-Hand Icons
- New Favorites Icon: Clicking on the “new favorites” icon will allow you to add this screen to your favorites for quick access.
- Favorites Icon: If you have this listed as your favorite already, when you hover over this icon, it will tell you the favorite name.
- Export Icon: This icon is available to admins. You will be able to export the data from this screen into an excel spreadsheet.
- New Icon: You can create a new inquiry from the screen when you click this button.
- Column Customization