Step by step video guide here:
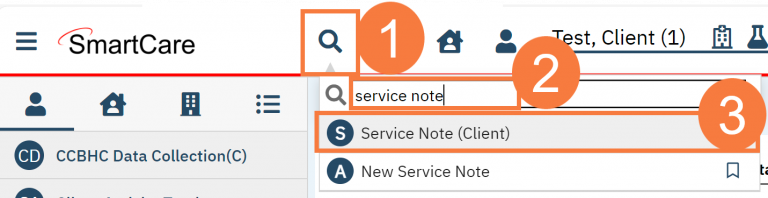
- Click the search icon, with the client open.
- Type in “Services/Notes” in the search bar.
- Click on “Services/Notes (Client)” in the search results.
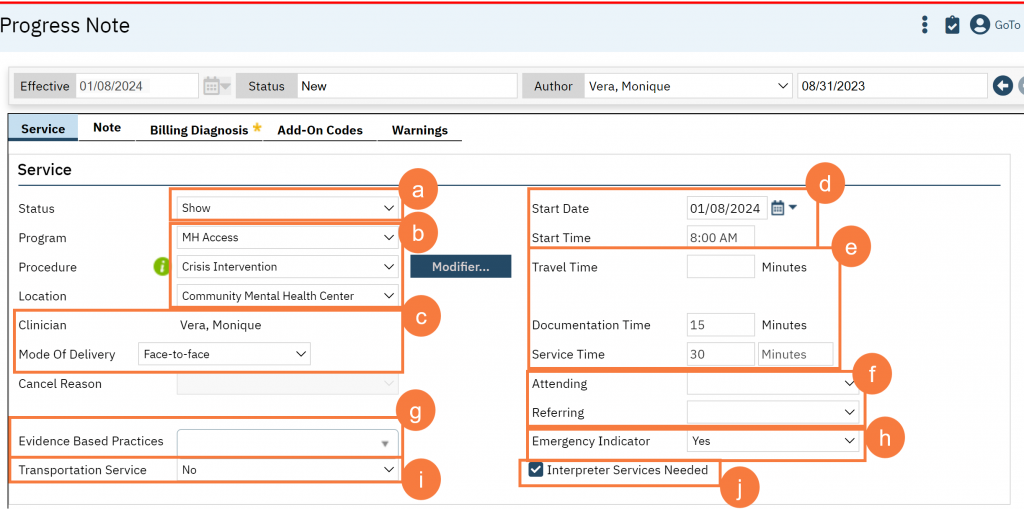
- This opens the service note screen. Review and complete the service details.
- Confirm the Status of the service appointment is set to Show.
- Enter the Program, Procedure, and Location
- Confirm the Clinician, and Mode of Delivery are accurate.
- Confirm the Start Date and Enter the Start Time
- Complete the time fields.
- Travel Time – any time spent traveling to or from this service appointment. This will not be billed but is used for tracking.
- Documentation Time – any time spent documenting the service or related forms.
- Service Time – the length of the service time, even if the client was not present.
- Leave Attending and Referring blank.
- If you are in a Mental Health program, you may enter any Evidenced Based Practices you provided. This is used for CSI reporting, so you can only select up to 3 and the options are limited to CSI reporting values. If you are in an SUD program, leave this field blank.
- Depending on the procedure code, an Emergency Indicator field will appear. Enter whether this was an emergency or not.
- Enter whether Transportation Service was provided or not. If the client does not have the Transportation Service checkbox checked in the Client Information, this will automatically populate as “No”. For services done via phone or telehealth, this may be marked “N/A.”
- Check Interpreter Services Needed if applicable.
-
- In the Custom Fields section, enter Interpreter and Language information if applicable.
- Interpreter has been scheduled – If you mark Yes, indicate who the interpreter was. This could be an agency name or the name of a person. If an interpreter was not needed because you, the provider, did the service in the client’s native language, you can leave this blank.
- Indicate the language the service was provided in.
- In the Custom Fields section, there is a section for Comments. This is usually used for no-shows and cancellations. Your Front Desk staff may also put notes for you in this section, such as “the client called and will be 5 minutes late to the appointment.” Keep in mind that anything entered in this section will be considered part of the client’s record and can be viewed by the client at any time.
- In the Custom Fields section, enter Interpreter and Language information if applicable.

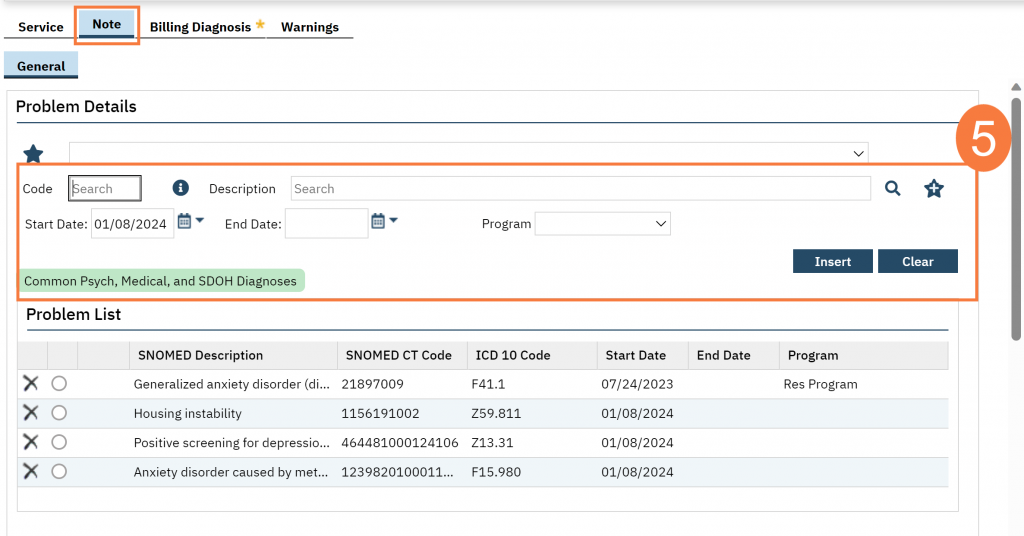
- If the status of the service is “Show”, you may now click on the Note tab. Complete the progress note tab. This note type may look different depending on the procedure code you have chosen. Most will include 3 fields: the Problem List section, the Note section, and the Care Plan section.
- If you want to add problems to the problem list, you can do so here. Search for the problem using either the Code or Description field, enter the start date, and select your program. Then click Insert.
-
- Select which problems you addressed in today’s session. If you added a problem in step 3a above and don’t see the problem on this list, click the Refresh button.

-
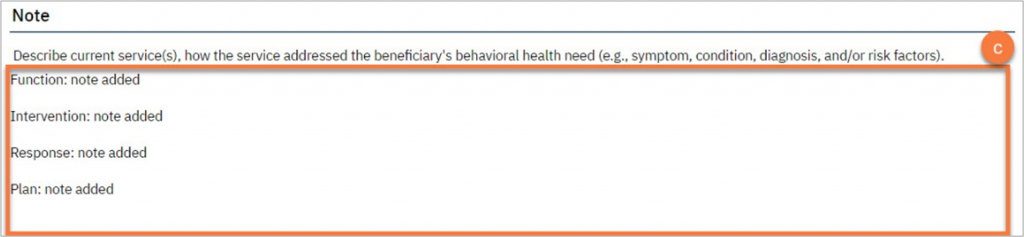
- Enter your note in the Information section. This should include all your usual clinical information, such as your interventions and the client’s response to the interventions.
-
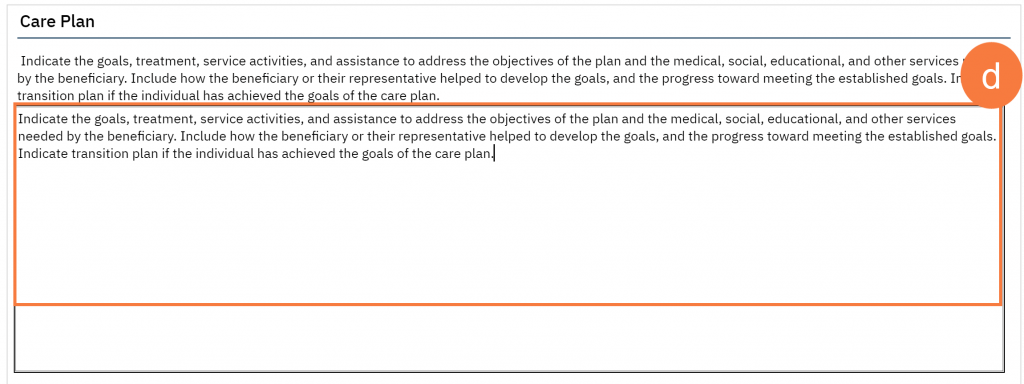
- Enter your plan of care in the Care Plan section. For services that require a treatment plan with specific items, this is where the treatment plan is entered. This information will pull forward from the most recent service note in the same program. There may be text templates available for specific treatment plan requirements.
- The Billing Diagnosis tab will show you which diagnoses will be pulled onto the billing. You should generally ignore this tab for ongoing services. However, if you need to change the billing order, for example you want this note to focus on the secondary diagnosis, you can re-order the diagnoses to match your service without changing the overarching diagnosis form.

- When you are done, click Sign.
Updated 01/08/24