- On your Appointments for Today widget, click on the link for the time of the group you’re documenting.

- This opens the Group Services Detail screen. In the upper left, you’ll see the group information. Confirm the information and add any additional information regarding the entire group.
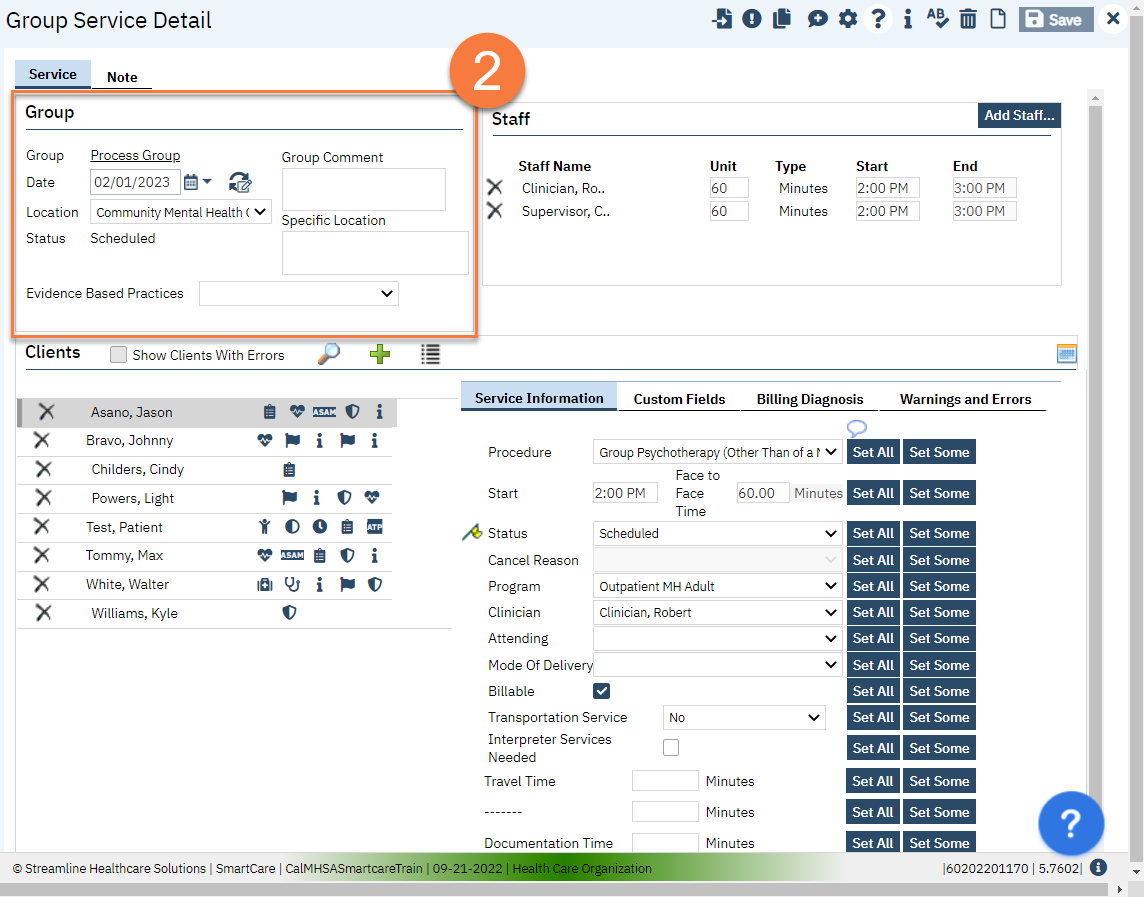
- In the upper right, you’ll see the staff members that are set as facilitators for this group.
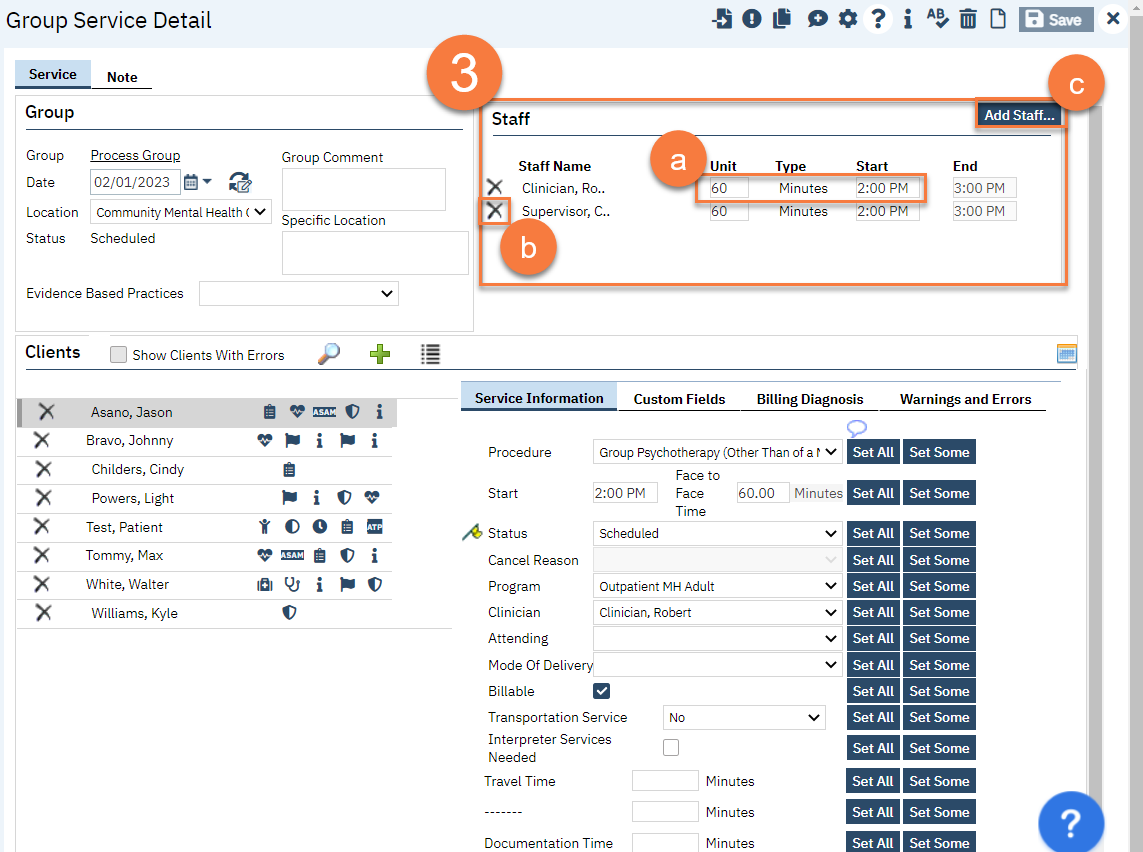
- Make edits to which staff members were present. For example, if a staff was only present for half of the group time, indicate this by editing the Unit (how many minutes they were present) and the Start Time to match what actually happened.
- If a staff member was not present, click the Delete icon next to their name to remove them from this service.
- If an additional staff member was present who is not listed, click the Add Staff button.
- This brings up the Group Service Staff Pop Up. Select the staff member(s) you want to add and click OK.
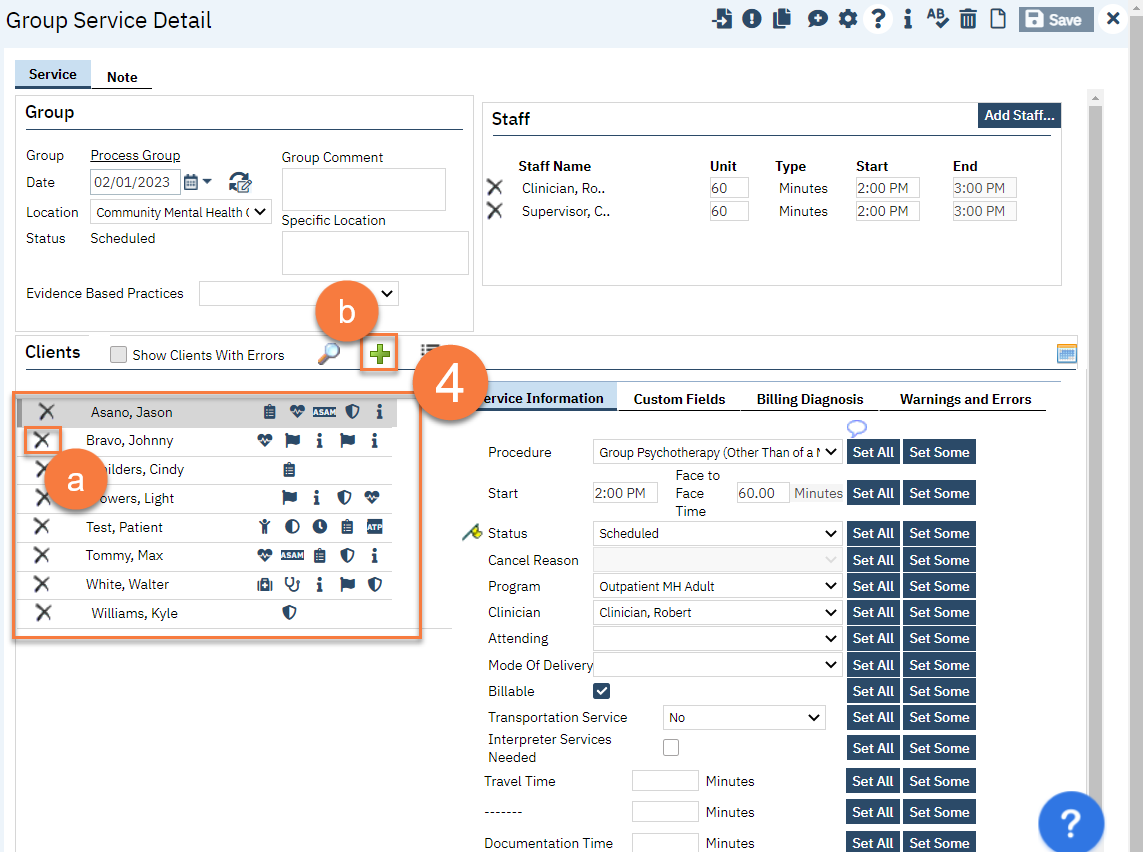
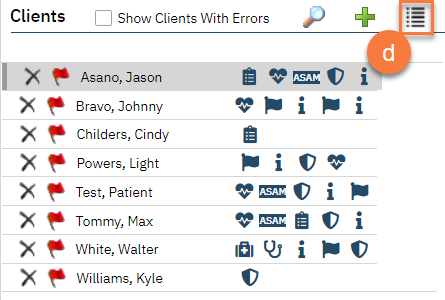
- On the middle left side of the screen, you’ll see the list of clients enrolled in this group. Make edits to this list to confirm the group roster.
- To remove a client from the roster, click the Delete Service icon. DO NOT do this if they are simply a no-show. Only do this to remove them from this service’s roster entirely.
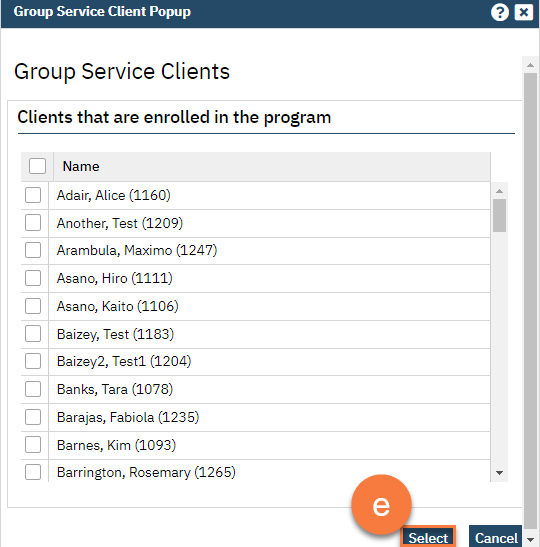
- To add a client who has already been enrolled in this group, click the Plus icon.
- This will open up the Group Service Client Popup, which will list any additional clients that are enrolled in this group. Select the client and then click Select to add them to this service.
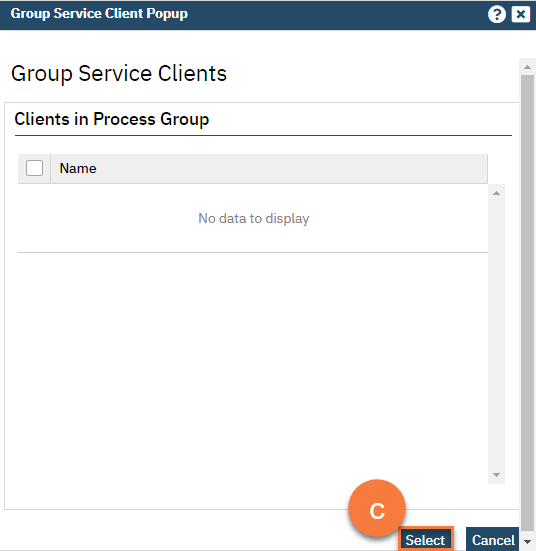
- To add a client who is enrolled in this program but not yet enrolled in this group, click the List icon.
- This will open up the Group Service Client Popup, which will list any clients that are enrolled in this program but are not yet enrolled in this group. Select the client(s) you want to add and click Select to add them to this service.
- To add a client from another program, click on the Magnifying Glass icon.
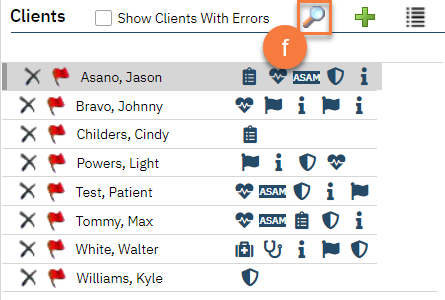
- This will bring up the client search function. Search for the client you want to add and click Select & Close. If you want to add more than 1 client, you can simply click Select and then search for the next client you want to add.

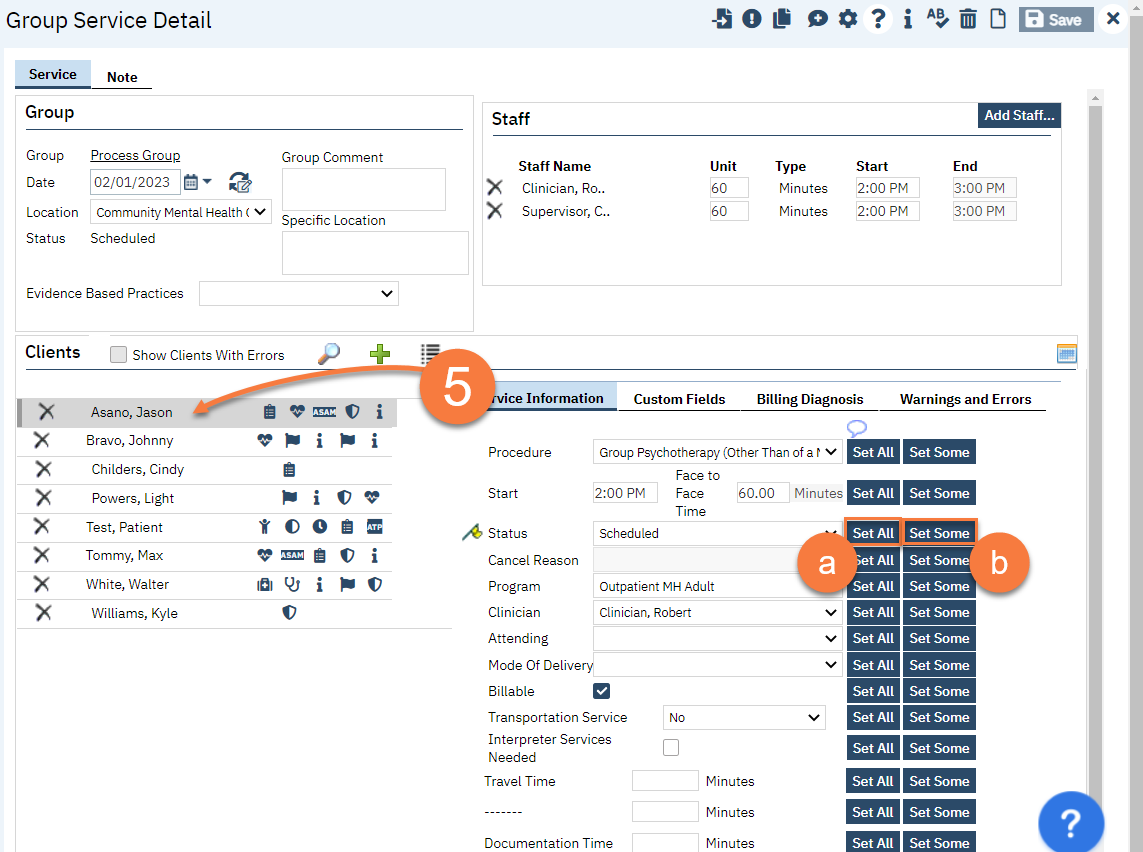
- Once you have your group roster set up, move to the service information section. The first client will be highlighted. As you make changes, this will update this particular client. This is where you mark whether clients who were a no-show for the group, or who canceled.
- If you want to set this information for all of the clients, click the “Set All” button. You can do this for each item in the service information section.
- If you want to set this information for more than one client, but not all of them, click the “Set Some” button.
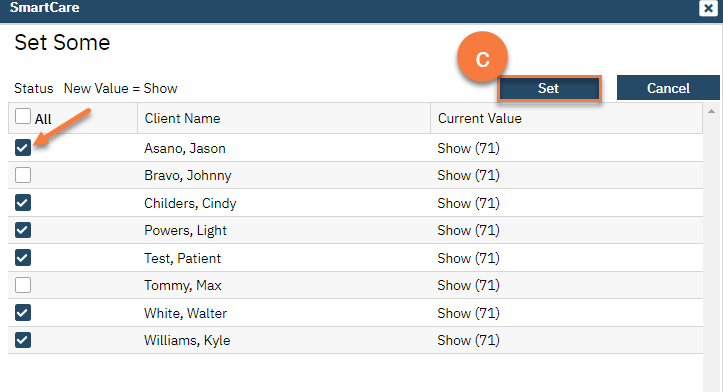
- This will bring up the Set Some pop-up window. Select the clients you want to include in this change (e.g. all the clients who you want to mark as “show”). Then click Set.
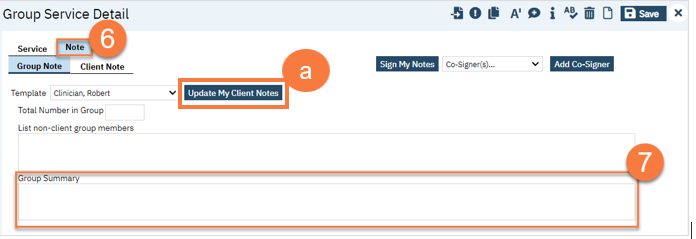
- Once you’ve completed the service information, navigate to the Note tab.
- Enter the group note summary.
- Click the Update My Client Notes button. This will be pushed to all of the group member’s notes.
- Click the Update My Client Notes button. This will be pushed to all of the group member’s notes.
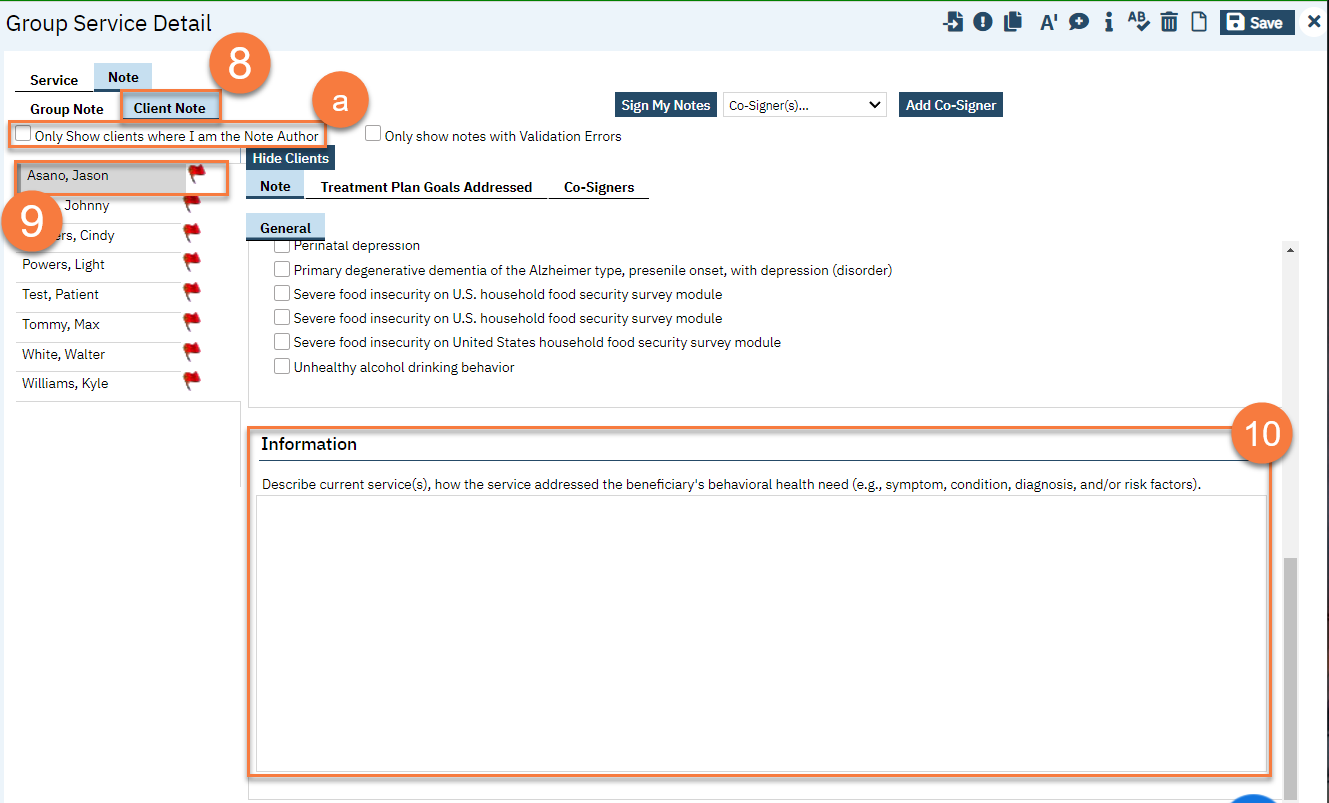
- Navigate to the Client Note tab.
- On the left side of the screen, select the client you’re writing the note for.
- You can click on the checkbox “Only Show clients where I am the Note Author” to limit the clients on the list.
- On the right side of the screen, enter the individual client’s note for this group service.
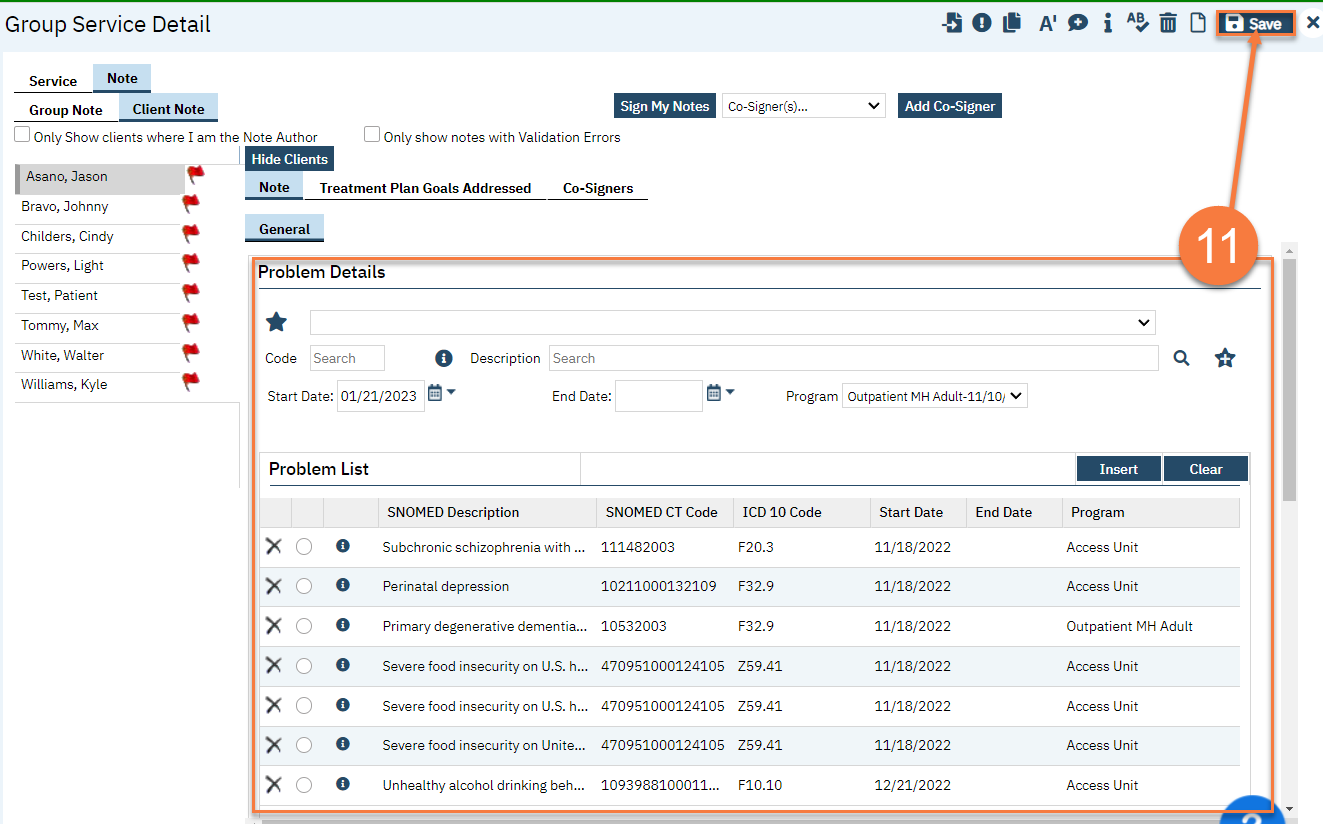
- Add problems to the problem list as necessary. See Problem List for more information. After adding any problems, make sure to click Save.
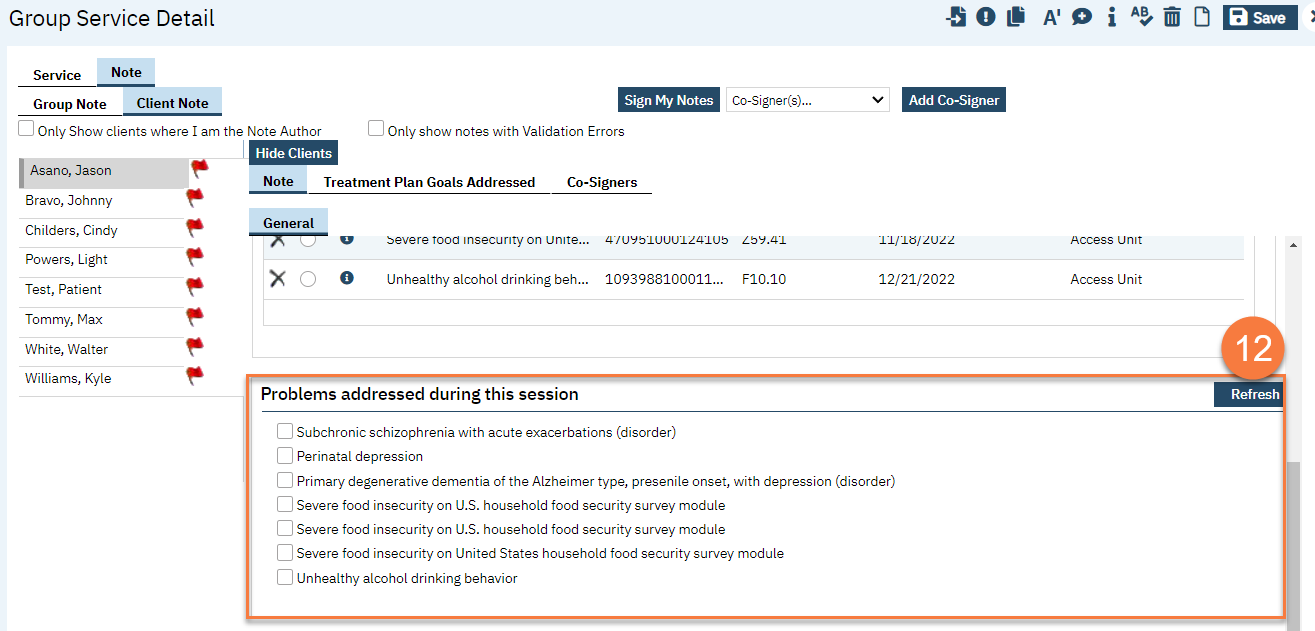
- Select problems that were addressed in today’s session. If you’ve added any problems to the problem list during this note writing, click Refresh to update this list.
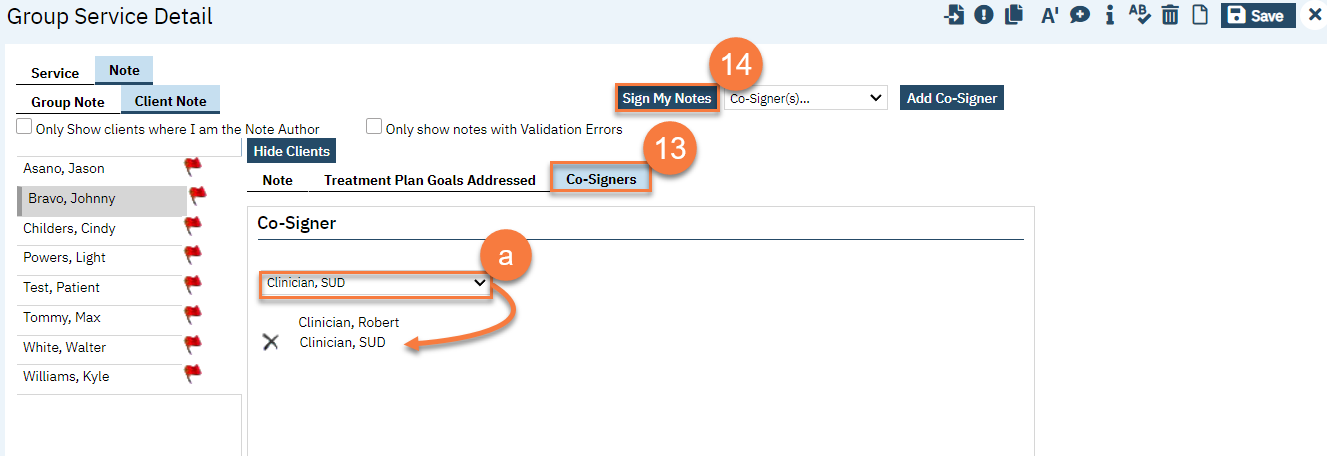
- To add Co-Signers as necessary, navigate to the Co-Signers tab.
- Select the staff from the dropdown menu. This will add them to the list of people who will be asked to co-sign the note.
- Once you’re finished with all of your notes, click “Sign My Notes.”