Your System Administrator can set up Intake Document Tasks Lists, called “Tracking Protocols” for your system. This allows you to track documents that are completed in SmartCare, documents that are completed outside of SmartCare, and even tasks that aren’t tied to documents at all. Tasks are denoted as “flags” in SmartCare.
How to View the Intake Document List
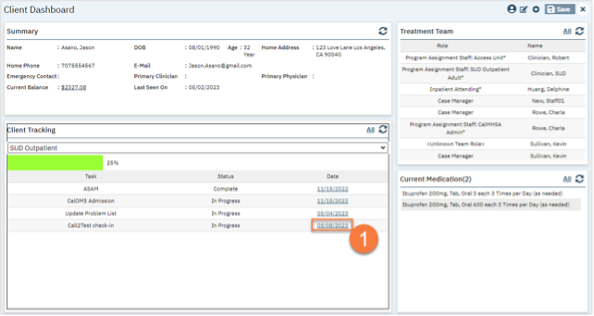
- Open the client’s record. This should take you to Client Dashboard. If you already have the client open, click on their name to quickly navigate to the Client Dashboard.

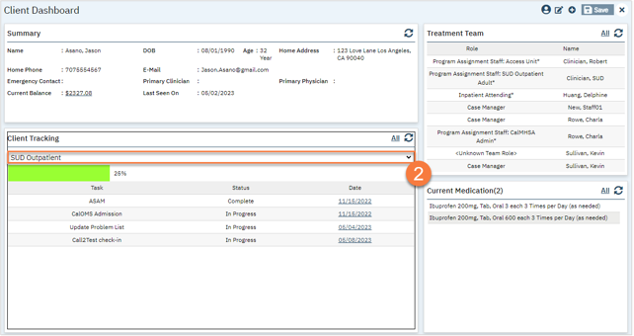
- Navigate to the “Client Tracking” Widget and select your program from the drop-down menu. This shows you all the flags (tasks) associated with that program.
How to Mark a Flag as Complete
If a task (flag) is tied to a document in SmartCare, when you complete that document, the task will automatically be marked as complete. For tasks that aren’t tied to a SmartCare document, you’ll have to manually mark them as complete.
- Click on the link in the Client Tracking widget.
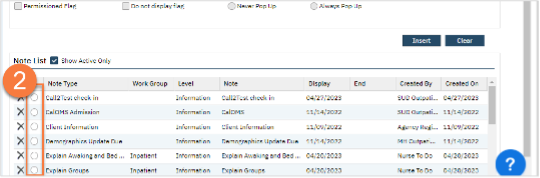
- This takes you to the Client Flag Details screen. Select the flag you want to complete.
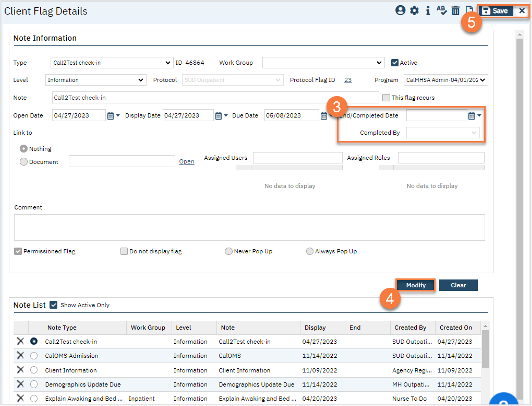
- This brings the information to the top half of the screen. Enter the “End/Completed Date” and the “Completed By” fields.
- Click “Modify”. This marks the flag as complete.
- Click Save and close.
How to Complete Intake Documents
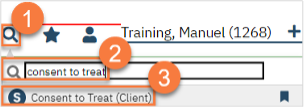
- You must first have the client open, then click the Search icon.
- Type the document’s name into the search bar.
- Click to select the document from the search results.
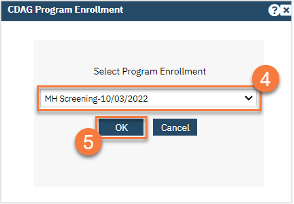
- In the CDAG Program Enrollment window pop-up, click the drop down and click to select the appropriate program.
- Click OK to continue.
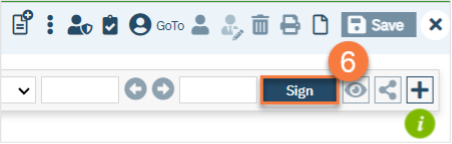
- The document will open. Complete the document based on the client’s responses. Once completed, click Sign.
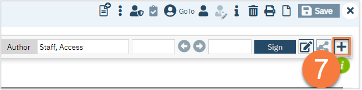
- This will create the PDF version of the form. Click the Plus icon in the upper right corner of the PDF viewer.
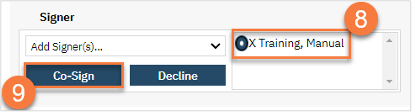
- This opens the signature details. Select the client and/or guardian from the Signer field. You will need to select each cosigner one at a time, so repeat these steps as needed.
- Click Co-Sign.
- This brings up the Signature Page pop-up window. The co-signer can now sign using a signature pad, a mouse, or a touchpad to capture their signature. You can also designate that the client has signed on a paper version of the document or that they client verbally agreed and was unable to sign. If the client has signed a paper version of the form, that form should be scanned in. See How do I scan in a document to the client’s chart?
- Select the method of capturing the signature.
- Once the co-signer is happy with their signature, click the Sign button. If the client has signed a paper version of the form or has agreed verbally and is unable to sign electronically at this point, these are other options.
- If the cosigner needs to start over, click the Clear button to erase the current signature.

Once signed by all required people, you are finished with this document and may move on to the next.