Sometimes documents are completed on paper but need to be included in the client’s record. In this section, we’ll cover how to scan a document into the client’s record.
- Click the Search icon.
- Type “Scan” into the search bar.
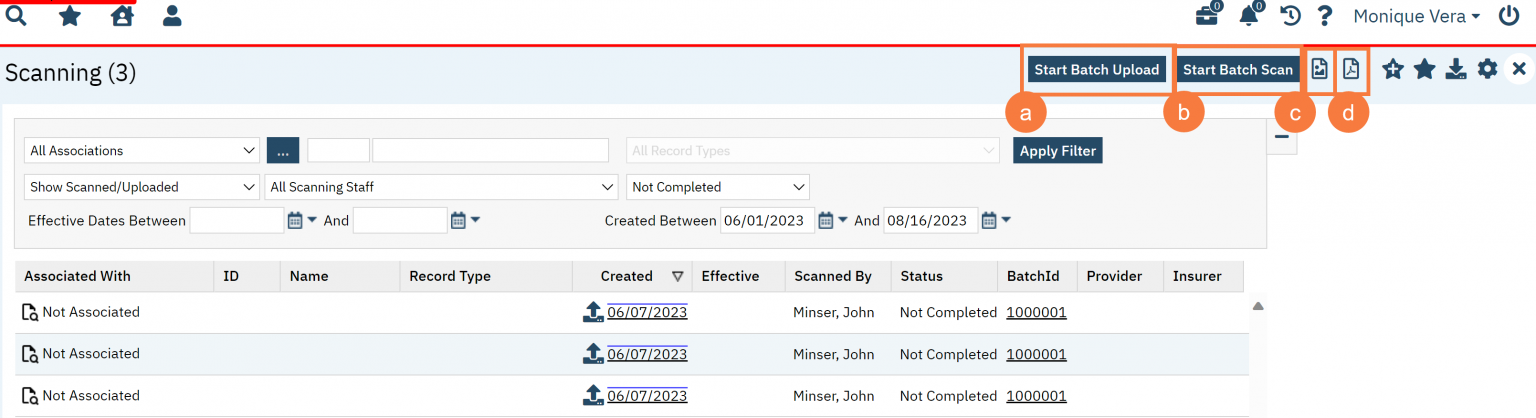
- Click to select Scanning (My Office). The Scanning list page will open.

- Click the icon for the type of document import you wish to perform.
- Start Batch Upload– This allows you to batch upload documents into SmartCare that are already in electronic format.
- Start Batch Scan– This allows you to batch scan images or documents into SmartCare and put them in electronic format.
- Scan New Images icon– This allows you to scan images or documents into SmartCare.
- Upload New Images icon-This allows you to upload images or documents into SmartCare.
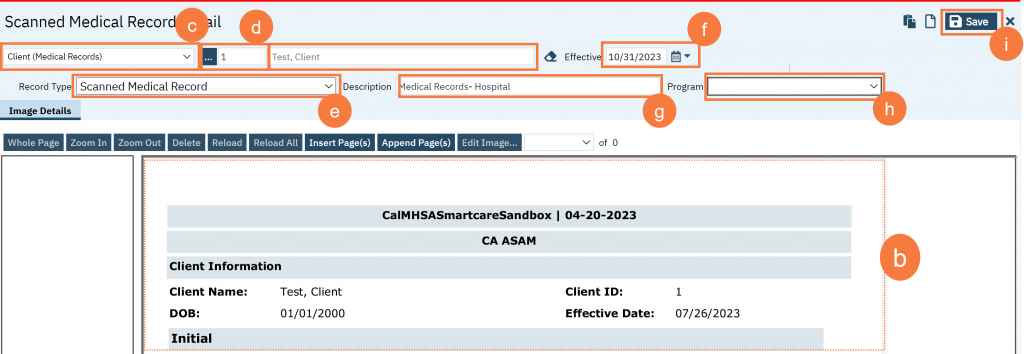
- If you selected Scan, the Scan page will open.
- Your scanning hardware will initialize. Follow organizational workflows to operate your scanning hardware.
- An image will display in the center pane when a file has been successfully scanned.
- Select “Client (Medical Records)” from the dropdown.
- Click the ‘…’ button to perform a client search using the steps found under How to Search for a Client. This step will be skipped, and a client will be pre-selected, if you opened Scanning (My Office) with an active client. In this cases, select the ‘…’ button to change active clients.
- Select a record type from the dropdown.
- Set an effective date.
- Type a Description into the text field.
- Select the correct client program.
- Click Save.
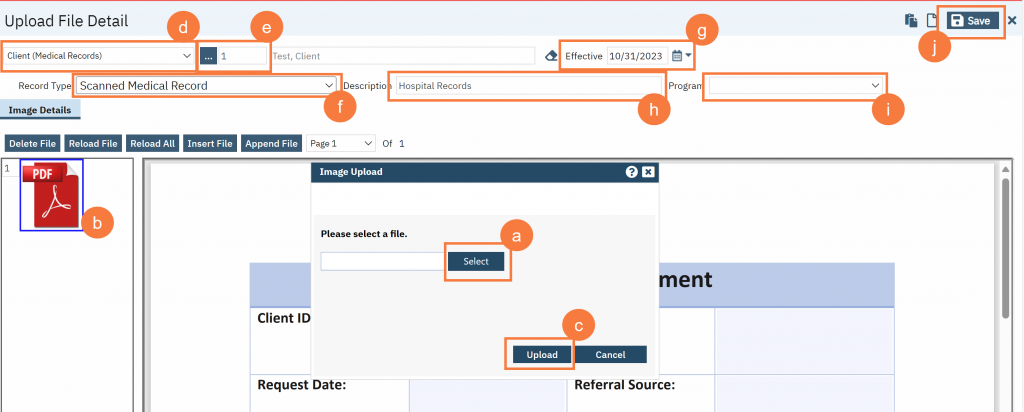
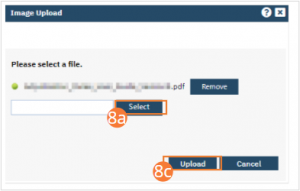
- If you selected Upload, the Upload pop-up will open.
- Click Select.
- Select your desired file from your computer file browser.
- Click Upload. An image will display in the center pane.
- Select “Client (Medical Records)” from the dropdown.
- Click the ‘…’ button to perform a client search using the steps found under How to Search for a Client. This step will be skipped, and a client will be pre-selected, if you opened Scanning (My Office) with an active client. In this cases, select the ‘…’ button to change active clients.
- Select a record type from the dropdown.
- Set an effective date.
- Type a Description into the text field.
- Select the client program.
- Click Save.
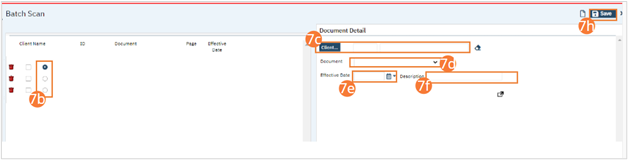
- NOTE: Before selecting Batch Scan, you will need to print one or more Scan Separators from the Scan Separator (My Office) page. One Separator should be placed between two documents to signal to the system that they should be treated as separate. If you selected Batch Scan, the Batch Scan page will open.
- Your scanning hardware will initialize. Follow organizational workflows to operate your scanning hardware. Ensure a Scan Separator is placed between each set of documents.
- On the left, you will see multiple documents listed. Select the radio button beside one to display it.
- Click the Client button to perform a client search using the steps found under General Client Search.
- Select a record type from the dropdown.
- Set an effective date.
- Type a Description into the text field.
- Repeat Steps 7b-7e for each document scanned.
- Click Save.
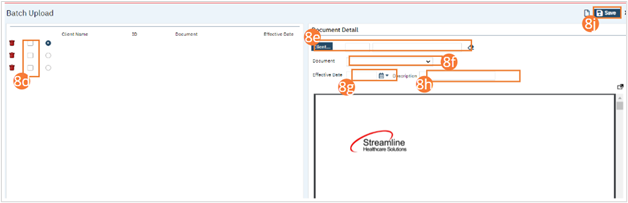
- If you selected Batch Upload, the Batch Upload window will open.
- Click Select.
- Select your desired files from your computer file browser. The Batch Upload function supports multiple selections.
- Click Upload.
- On the left, you will see multiple documents listed. Select the radio button beside one to display it.
- Click the Client button to perform a client search using the steps found under General Client Search.
- Select a record type from the dropdown.
- Set an effective date.
- Type a Description into the text field.
- Repeat Steps 8d-8h for each document uploaded.
- Click Save.
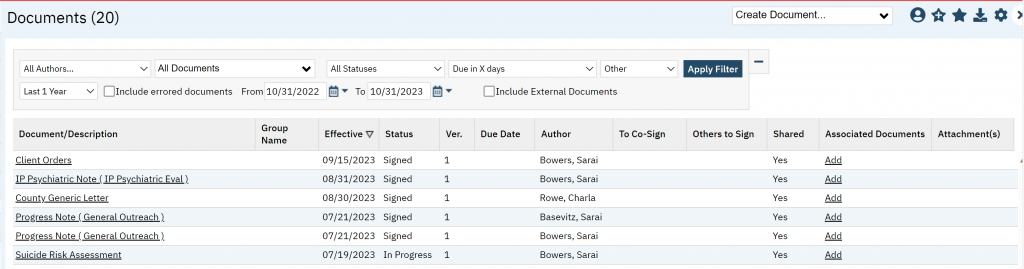
- After saving your associated documents, open the “Documents (Client)” screen to view them.

- Review the documents scanned/uploaded here. If necessary, click the Add hyperlink in the Associated Documents column to upload new documents that should be associated with the selected document.
Updated 4/29/24