How to Document a Scanned ROI

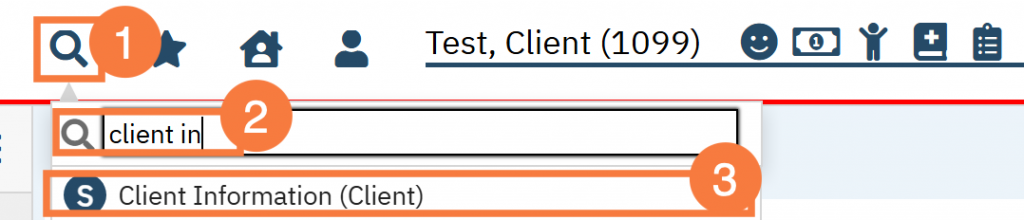
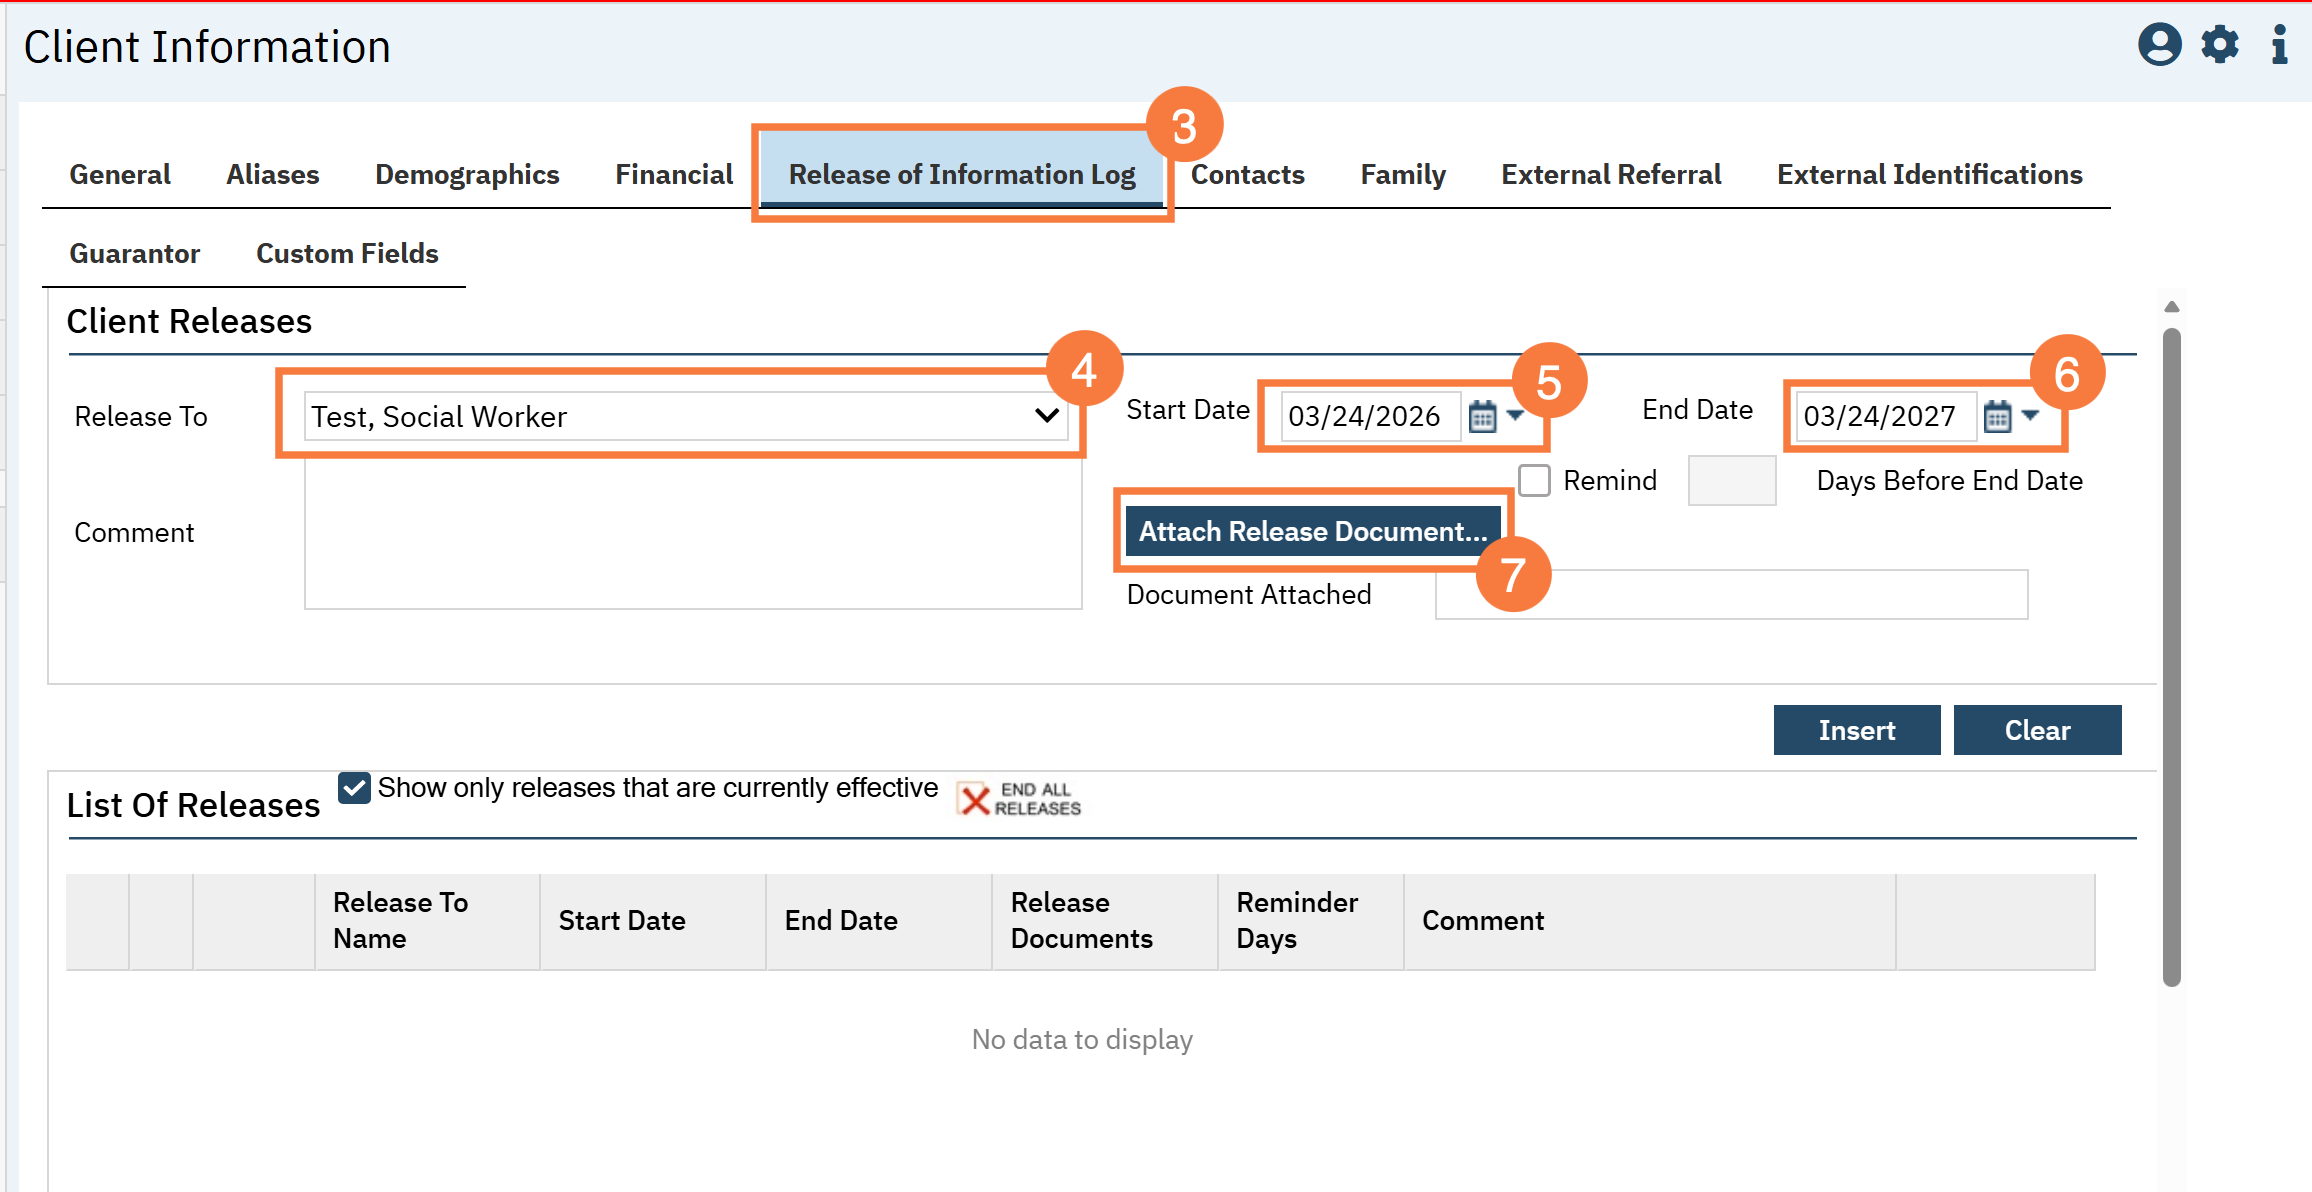
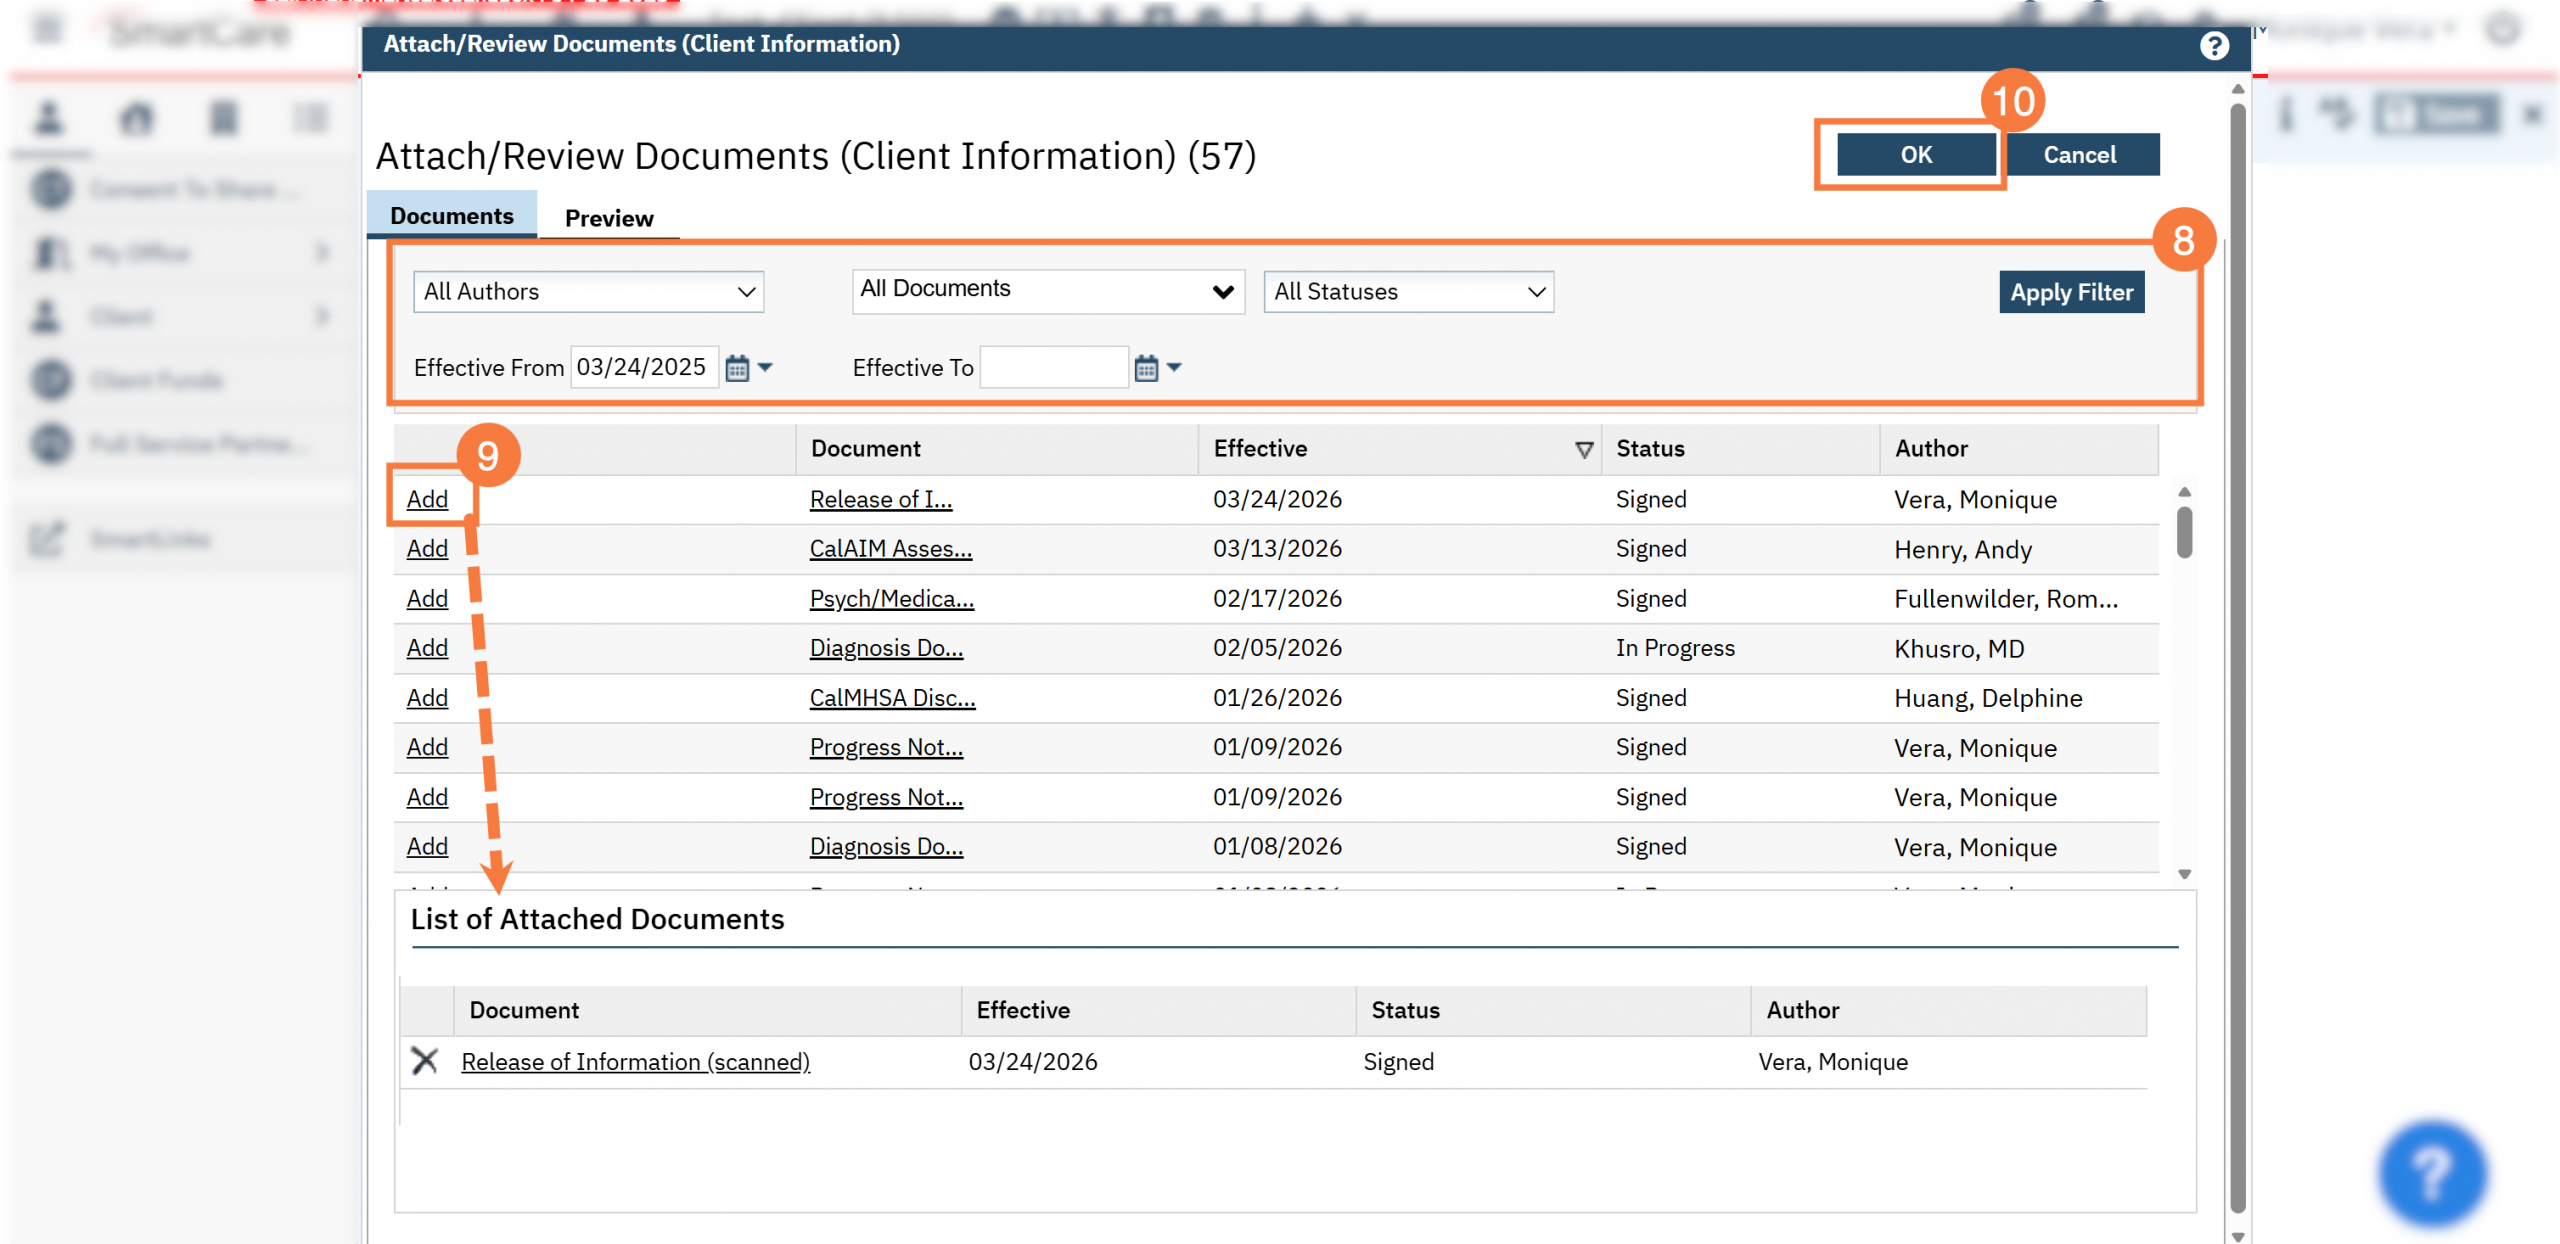
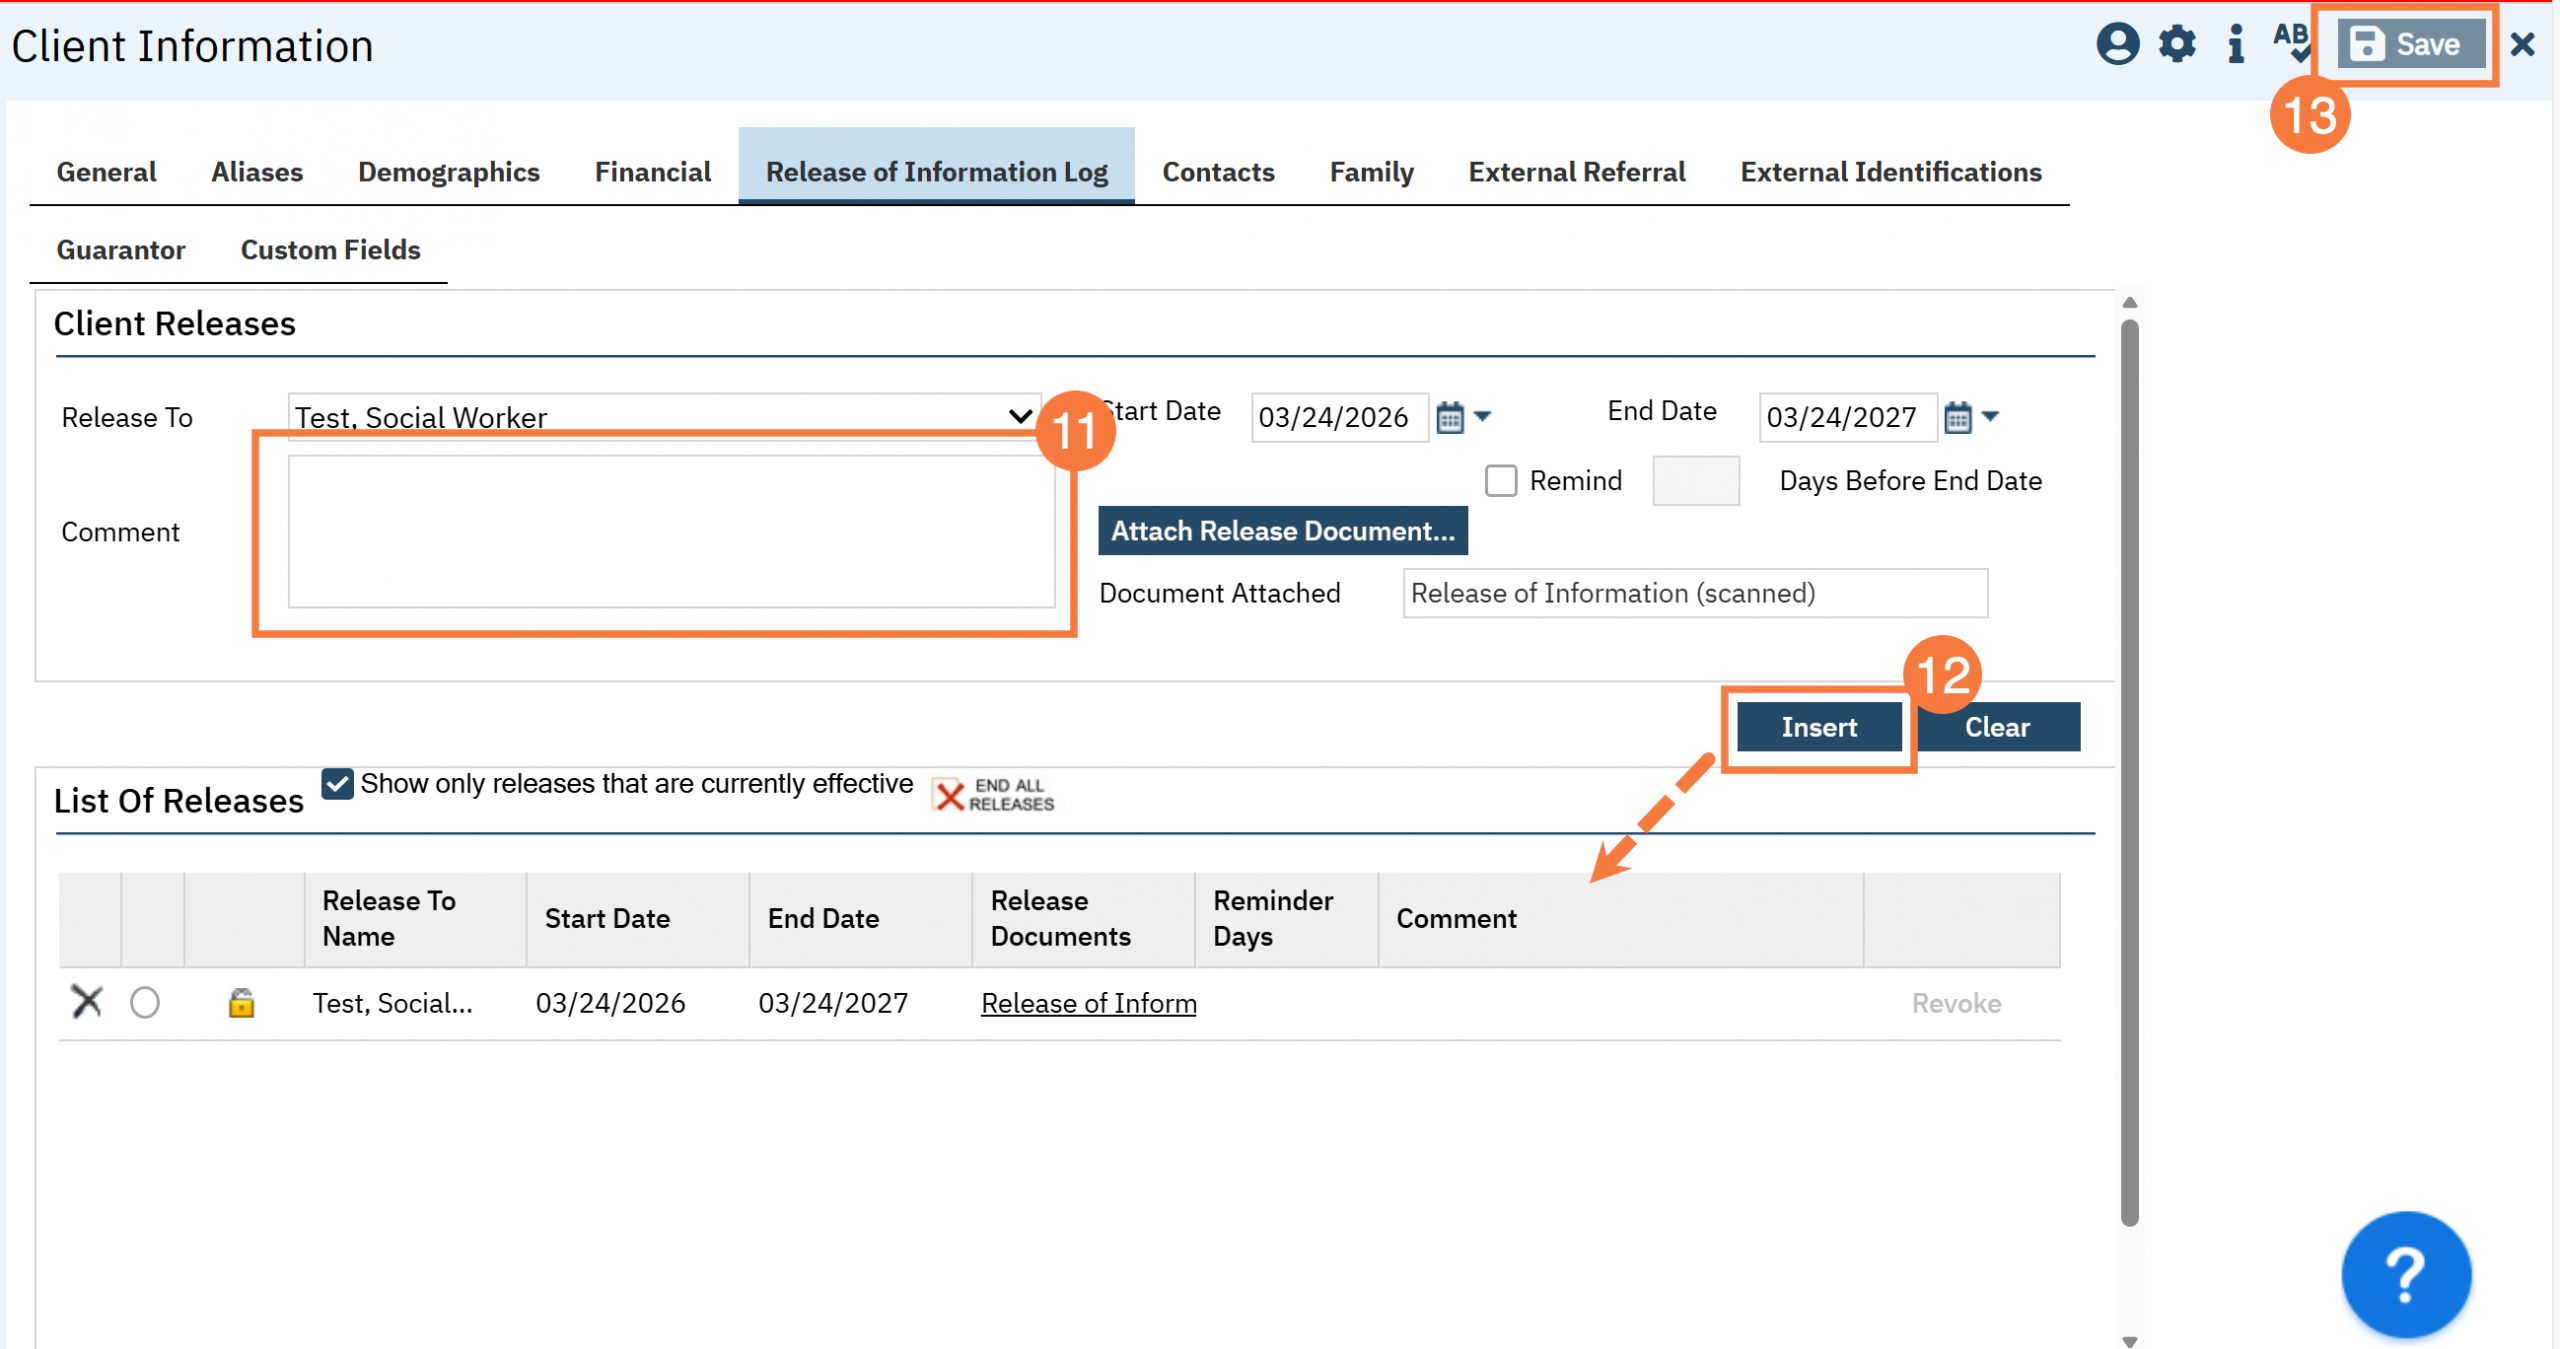
In this article, you will learn how to document a scanned Release of Information using the ROI Log on the Client Information screen.

  1. Follow the Instructions for How to Scan or Upload Documents into the Client’s Record
    1. Select Client (Medical Records) for the Select Associated With field.
    2.  Select Release of Information (scanned) for the Record Type.
  2. Navigate to the Client Information Screen.
    1. Click the Search icon, with the client open.
    2. Type Client Information into the search bar. 
    3. Click to select Client Information (Client) from the search results. 
  1. Click the Release of Information Log tab.
  2. In the Release To field, select the client contact the information will be released to.
    1. The person/organization must be added as a client contact. Follow the instructions for How to Add a Client Contact. 
  3. Enter the Start Date.
  4. Enter the End Date.
  5. Click the Attach Release Document button.
  1. The Attach/Review Documents(Client Information) window will open. Use the filters if needed to narrow down the results in the grid below.
  2. Click the Add button next to the scanned release of information. The Document will drop into the List of Attached Documents section.
  3. Click OK.
  1. Add any necessary comments.
  2. Click Insert. This will drop it to the List of Releases section.
  3. Click Save.