Requests can be initiated here and saved without completing the Disclosure section of the screen. This allows staff members to consider and work requests, which will remain open and accessible through the Disclosures/Requests (My Office) and Disclosures/Requests (Client) pages. Use the steps under How to Display an Existing Disclosure or Request to access in-progress Requests.
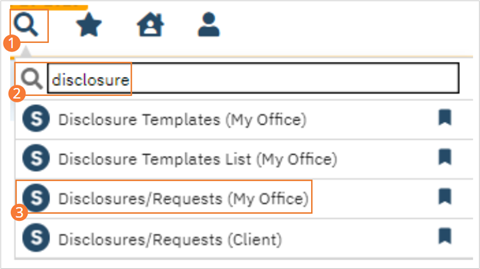
- With an active client selected, click the Search icon.
- Type ‘Disclosure’ into the search bar.
- Click to select Disclosures/Requests (Client). The Client Disclosures/Requests list page screen will open.
- Click the New icon in the toolbar. A new request or disclosure page will open.
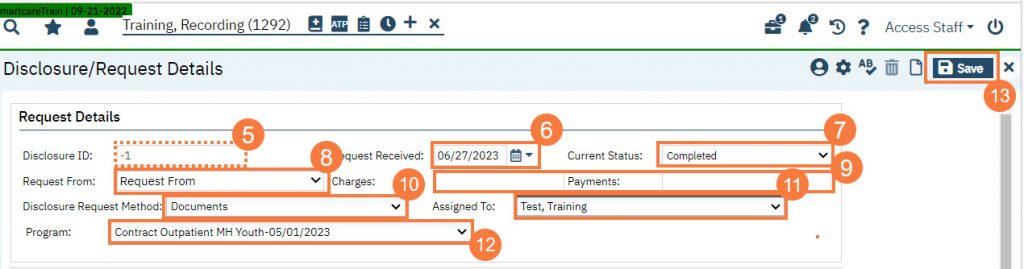
- Disclosure ID will automatically populate on Save, no need to enter anything.
- Enter the Request Received date. This may be a date prior to the current date.
- Select the Current Status from the dropdown. If you will be completing the disclosure, select Completed.
- Select Request From in the dropdown. Note, this pulls from the client contacts (Client Information screen > Contacts tab).
- If a request is from someone not on the client contact, and you do not intend to add them as a contact, you may type directly into the field by adding your curser to the Request From field.
- Enter Charges and Payments, if applicable.
- These can be entered for tracking. They will not actually create a charge or a payment.
- Select Disclosure Request Method from the dropdown.
- Select Assigned To if Request is being assigned to someone.
- Assigned requests can be located on the list pages, a notification is not sent.
- Select the Program. If a client is only associated with one program it will default to the program.
- Click Save.
How to Create a New Disclosure
Disclosure Details allow you to track the disclosure. This may be done at time of entering the request or at a later point after entering the request, this may also be done by a different individual.
- Enter the Disclosure Date. This is the date the disclosure occurs.
- Select the person who performed the disclosure from the dropdown.
- Select the purpose of the disclosure.
- Select the method of disclosure from the dropdowns.
- Other and Verbal will disable the ability to attach documents; the button will be disabled.
- Select the release that authorizes the disclosure. This dropdown pulls from Client Information > Release of Information Log.
- ROI log can store releases signed in SmartCare and releases that are manually added.
- If no ROI exists, select the Disclosed Without Authorization checkbox.
- Disclosed To will automatically populate based on release selected.
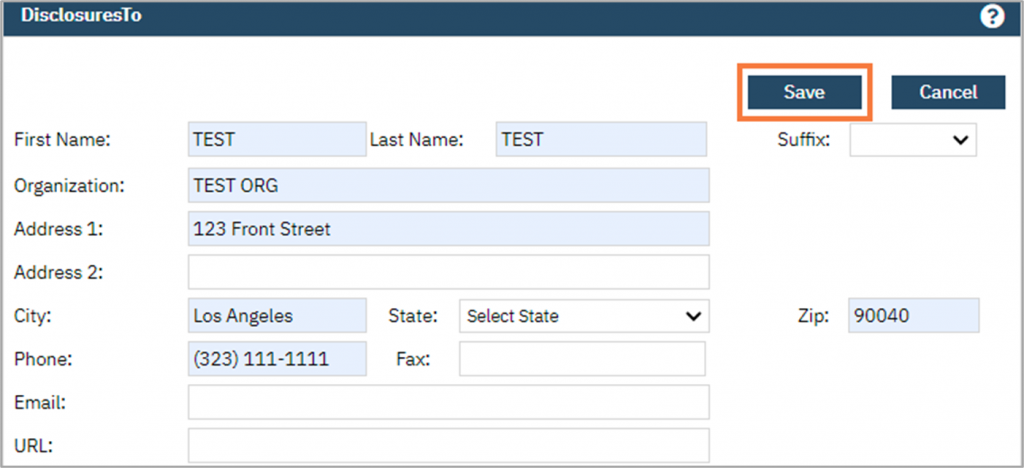
- If the person/organization to whom information was disclosed is not found, an ellipses button will initialize.
- Click the ellipsis button, the Disclosure To pop-up window will appear.
- Add information about the person/organization and click Save.
.
- If needed, select the organization from the dropdown.
- Select delivery type from the dropdown options.
- Name/Address field will populate from the Disclosed To. You can edit this field if needed.
- Cover Letter Comments can be added if you will be utilizing a cover letter in the disclosure and want to add additional comments.
- Add any comments if needed.

- When disclosing actual parts of the client record, you will want to add items to be disclosed. This is accomplished by:
- Attach/Review Items Disclosed
- Attach Report
- Add Redacted Disclosure
- Attach Record Set buttons

-
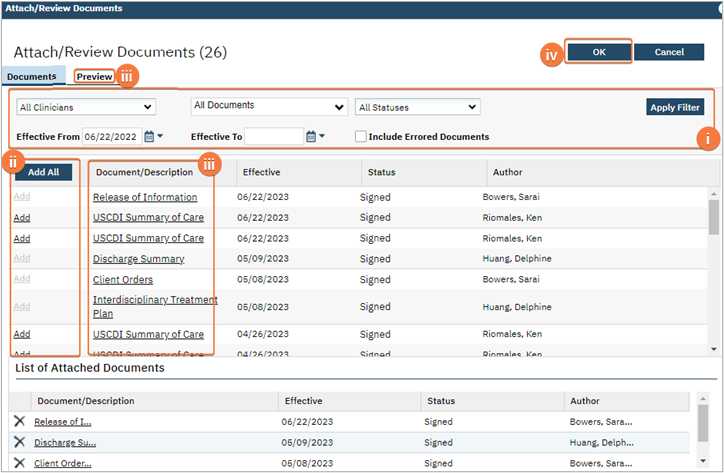
- Click Attach/Review Items Disclosed. The pop-up window will display items in the client’s record.
-
-
- You can utilize the filters to narrow down items displayed.
- Click Add or Add All to attach the items to the disclosure.
- Clicking the Document/Description name will display it on the Preview tab. It will not add it to the disclosure.
- Click the OK button. The pop-up will close and attached items will display in Items Disclosed section.
-
-
- To attach a Record Set, you must choose a Disclosure Template from the dropdown beside the Disclosure Details header. Click the Attach Record Set button. The record set associated with the template will be attached.
- Disclosure templates identify documents that should be included in a disclosures. Saves time from having to add them, step 12.a.
-
- Click the Attach Report. The Attach Report pop-up window will display.
- Select the desired report from the dropdown. Only reports configured to display here will be available.
- Click the Attach Report button.
- Click the Attach Report. The Attach Report pop-up window will display.

-
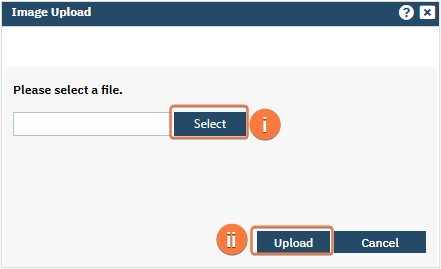
- Click Attach Redacted Disclosure to add a redacted item. SmartCare does not redact items directly they will need to be uploaded into the disclosure.
-
-
- In the pop-up, click ‘Select’ and choose a file from your computer’s file structure.
- Click the Upload button
-
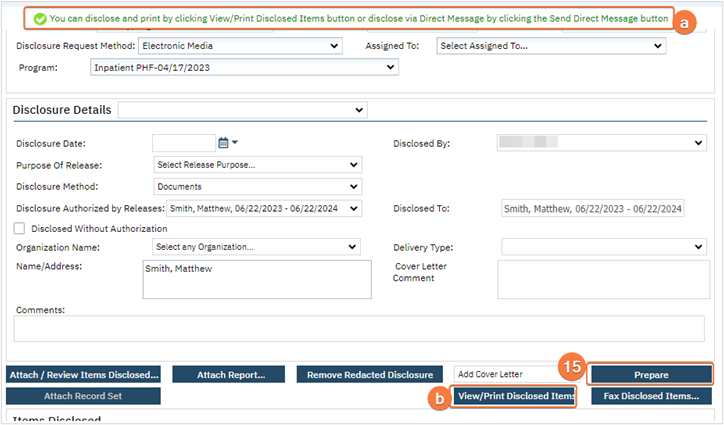
- A cover letter can also be added to the disclosed items. Select a cover letter from the Add Cover Letter dropdown.
- Cover letters are created by system administrators.
- Once all desired attachments have been added to the disclosure, choose a method for disclosure.
- To print or download the items, click the Prepare button. This will convert the multiple PDF’s into one PDF.
- You will see a message at the top, in green, indicating that the items can be printed.
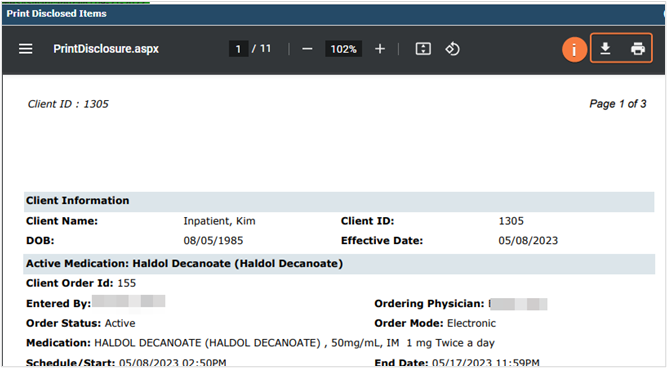
- Click View/Print Disclosed Items button
- Click Download or Print to save or print the document. Complete the disclosure according to the recorded method.
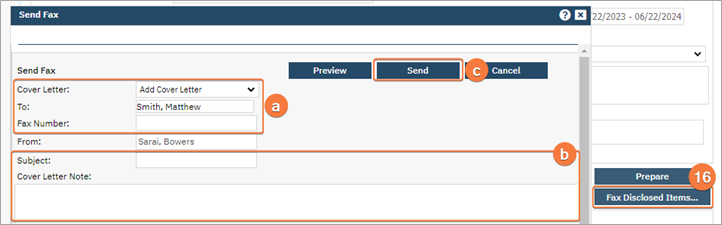
- To fax, click Fax Disclosed Items, select a cover letter from the dropdown.
- Enter the recipient and the fax number.
- If needed, add to the subject and cover letter note.
- Click the Send button.