This article will take you through all the steps to document a call to the Mobile Crisis line and how to complete the Mobile Crisis Dispatch Screening tool in SmartCare.
- Click on the Search icon.
- Type in “Inquiries” in the search bar.
- Select “Inquiries (My Office)” from the search results.

- This takes you to the Inquiries list page. Click on the new icon.

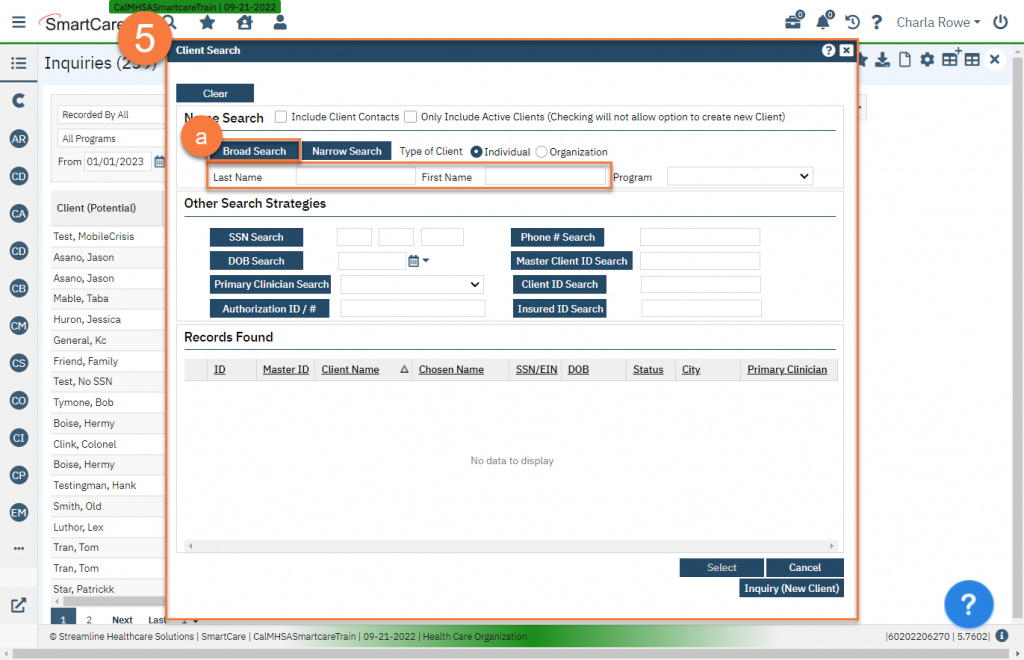
- This will bring up the Client Search window.
- If you have the name of the person in crisis, search to see if they’re already a client in the system. To do this, enter their name and click “Broad Search”.
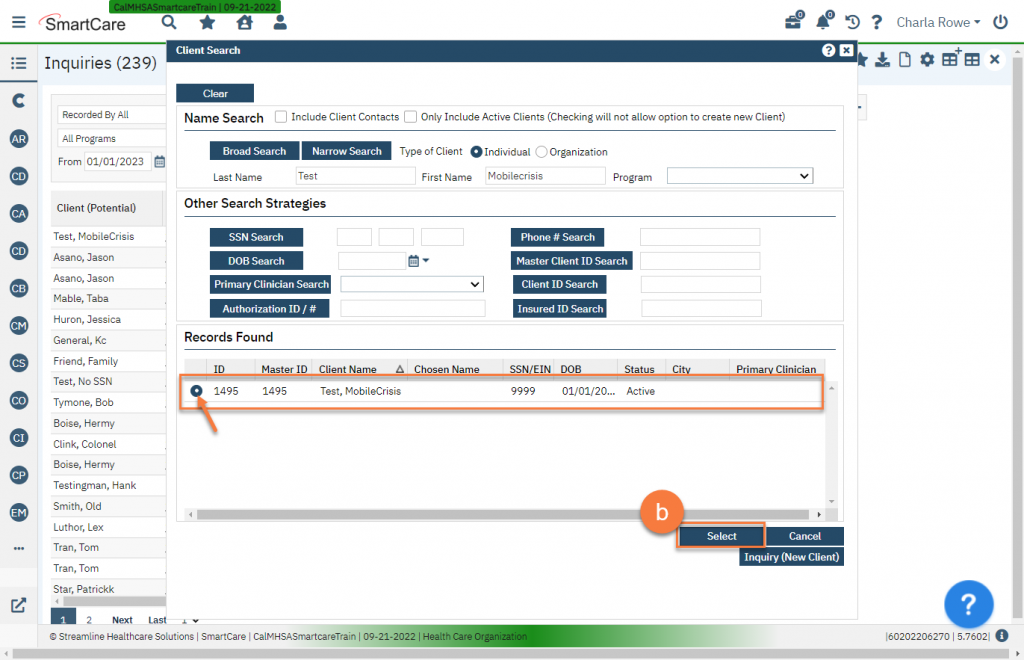
- If the client shows up in the Records Found section, click on the radio button next to their name and click Select to tie this request to this client.
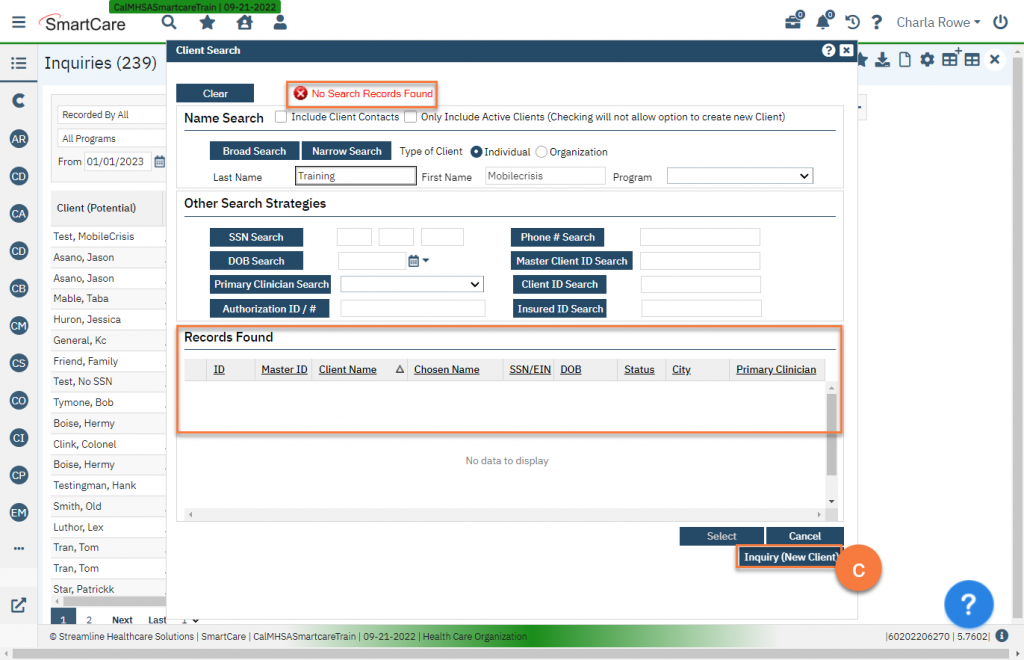
- If the client does not show up in the Records Found section, or you don’t have the name of the person in crisis yet, click “Inquiry (New Client)”.
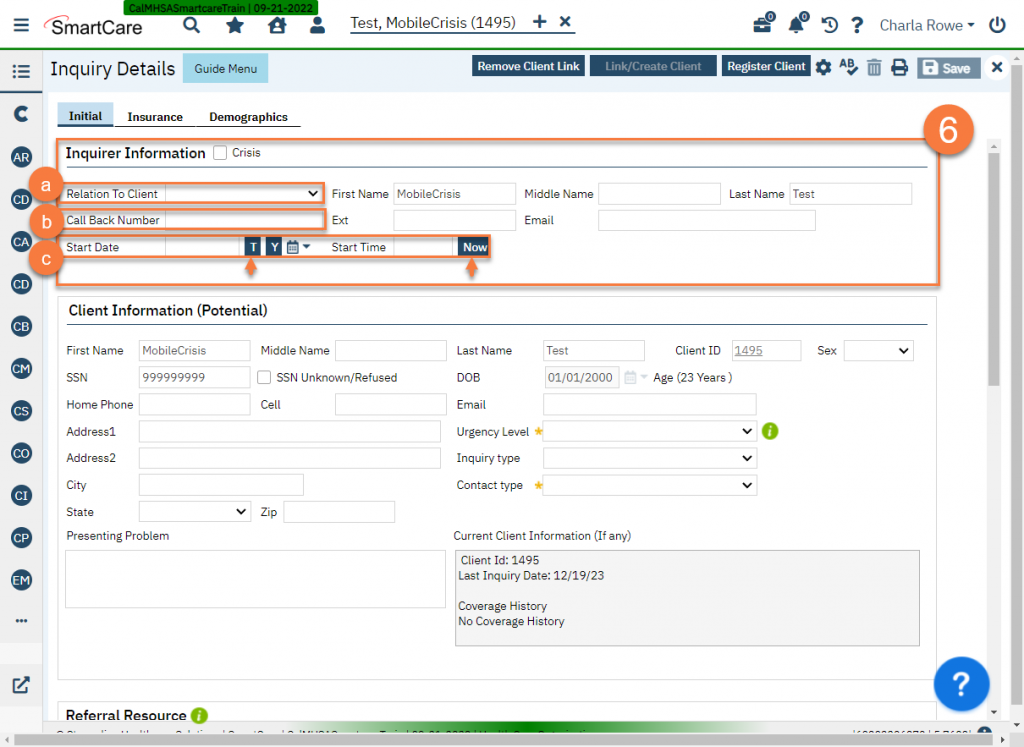
- This takes you to the Inquiry Details screen. Complete the Inquirer Information section. This is where you document who is calling on behalf of the client.
- If the client is calling for themselves, select “Self” in the “Relation To Client” field. Any information you enter in this section will push down to the Client Information (Potential) section fields.
- We recommend you get a Call Back Number in case you are disconnected.
- Make sure to enter the State Date and Start Time. You can click on the “T” button to automatically populate today’s date and the “Now” button to automatically populate the current time.
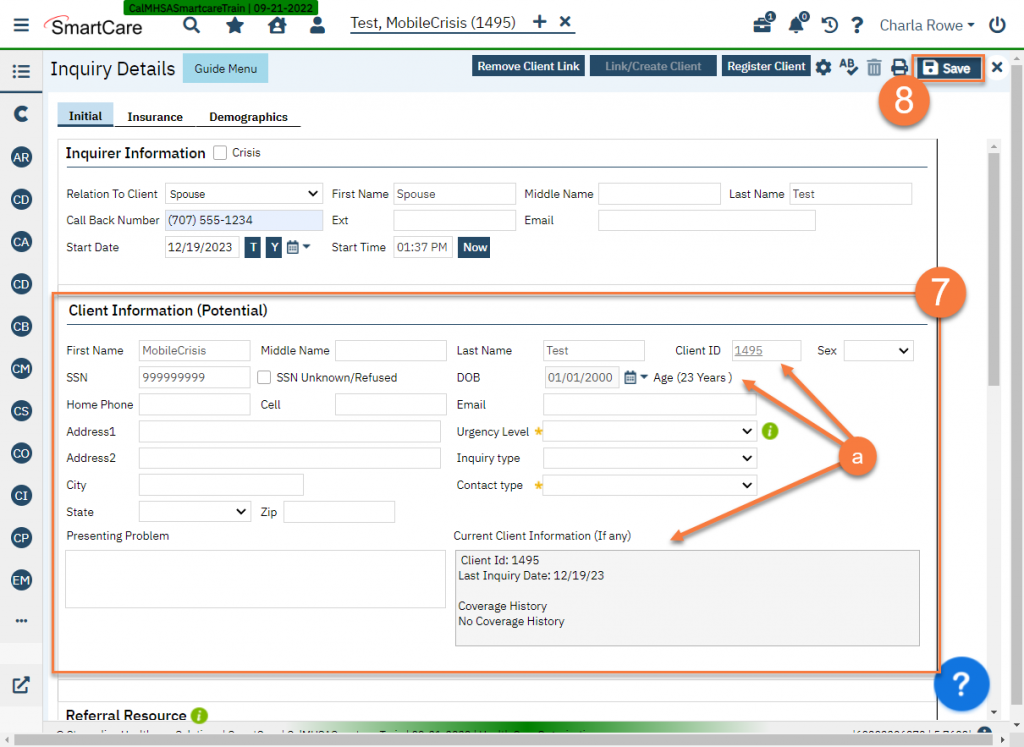
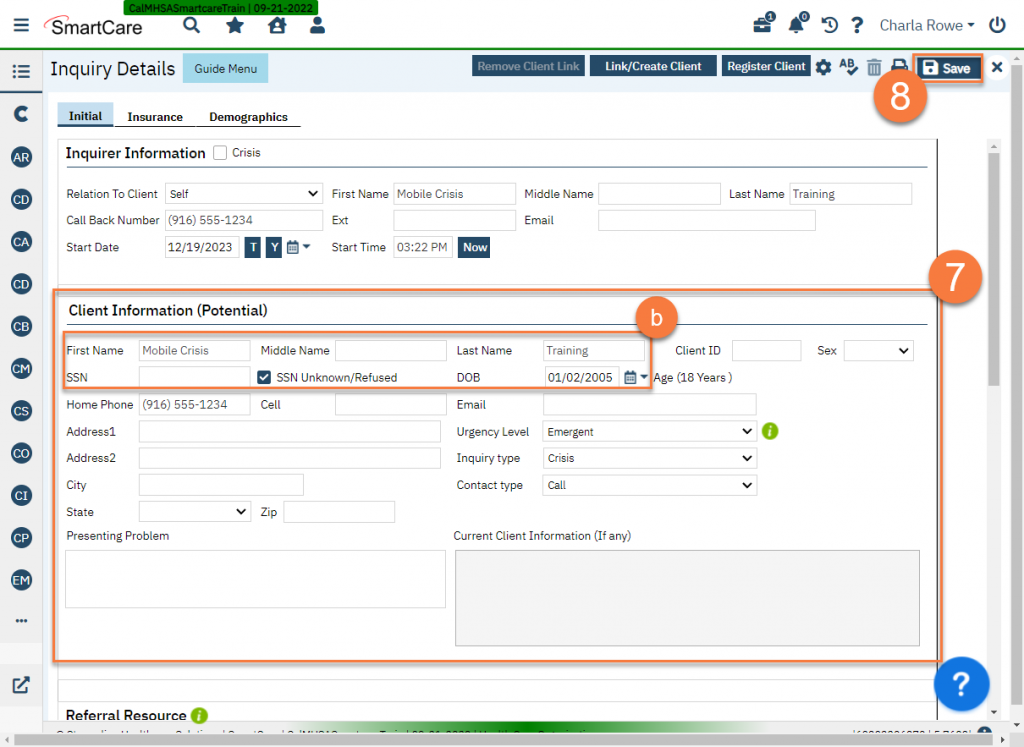
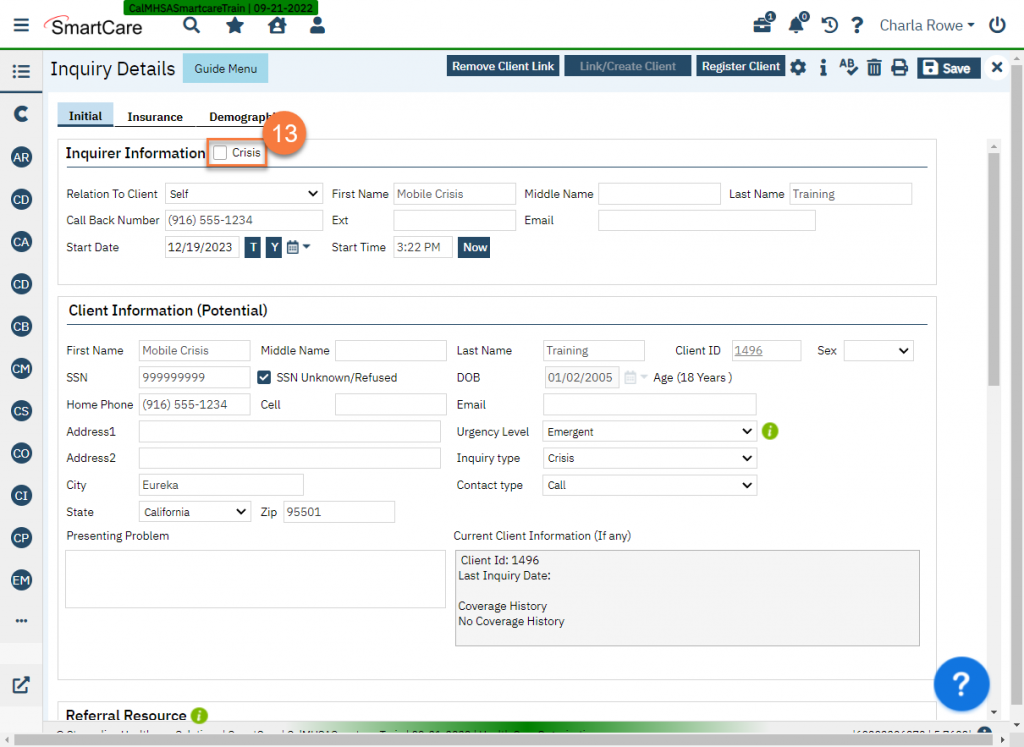
- Complete the “Client Information (Potential)” section. This is where you document information about the person who is in crisis.
- If you have selected a client that already exists, some information will already be completed, pulled from their Client Information screen. Any information you add or update here will push back to the Client Information screen.
- If you have chosen “Inquiry (New Client)”, make sure to complete the client’s First Name, Last Name, SSN, and DOB fields. Because this is a crisis, there is the option of selecting “SSN Unknown/Refused”, which will populate the SSN field with all 9s (999999999). This information can be changed at a later time when the client is no longer in crisis. If you don’t know the client’s date of birth (DOB), follow county policy on what to enter here. These fields are required to create a client ID in SmartCare, which is why they are required at this step.
- Click Save.
- If you have not already linked this request to a client, do so now. Click the “Link/Create Client” button.

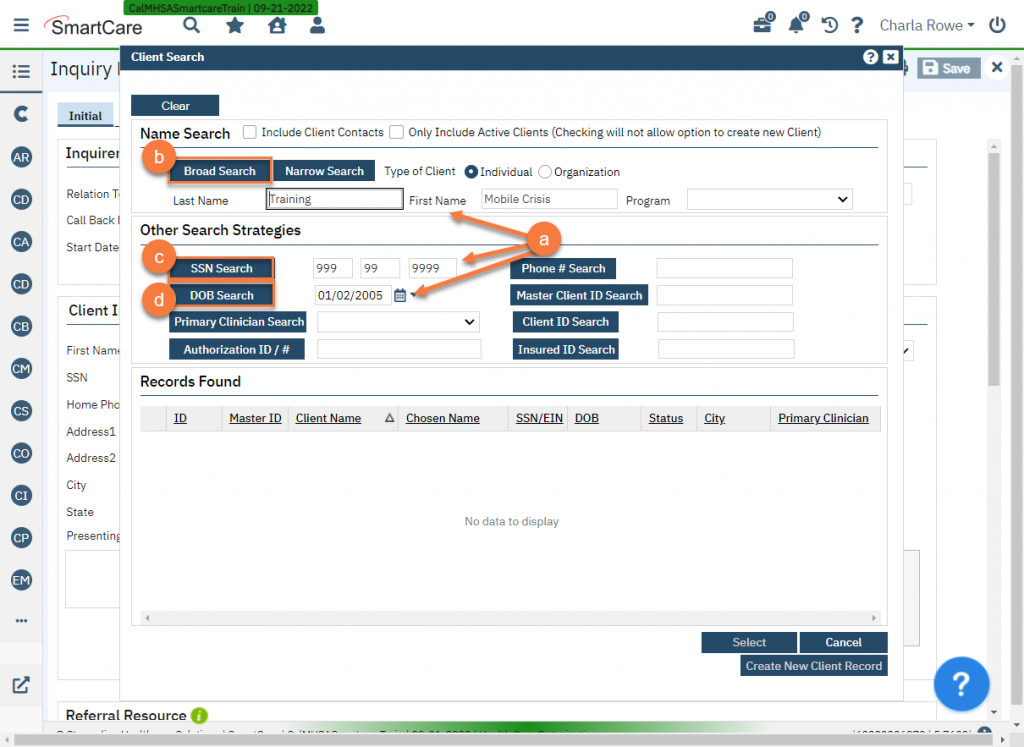
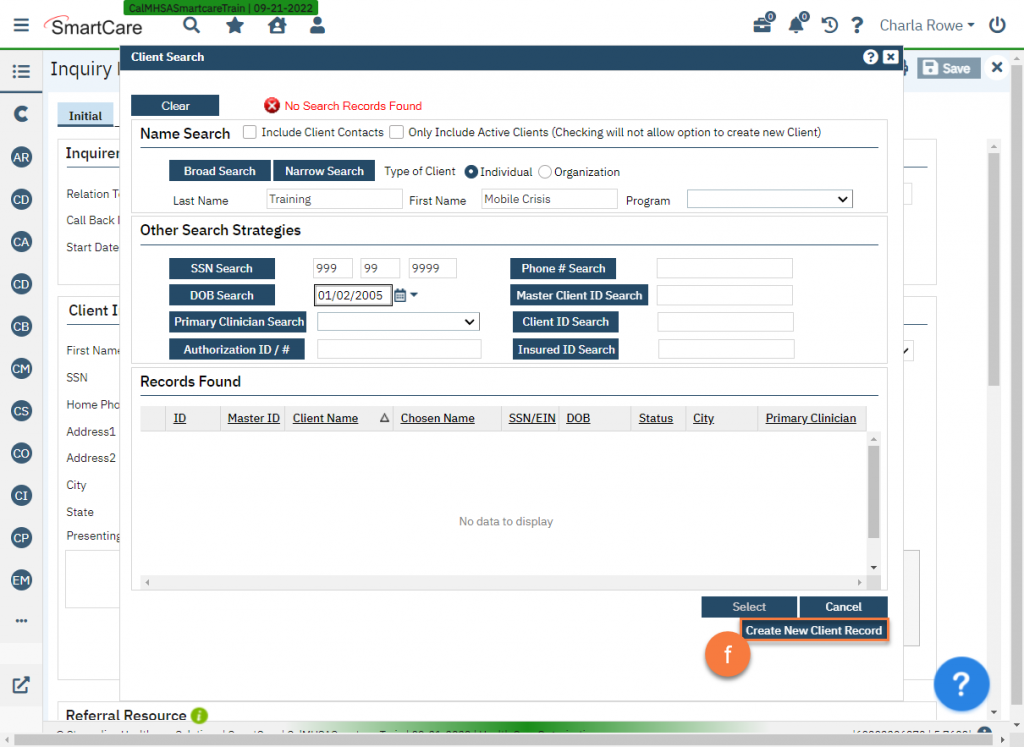
- This will bring up the client search with the client’s name, SSN, and DOB filled out. You will have to search for the client 3 ways before the system allows you to create a new client.
- Click on “Broad Search” to search the client by name.
- Click on “SSN Search” to search by social security number.
- Click on “DOB Search” to search by date of birth.
- If you find the corresponding client in the “Records Found” section, select the client and click “Select” to link the client to this request.
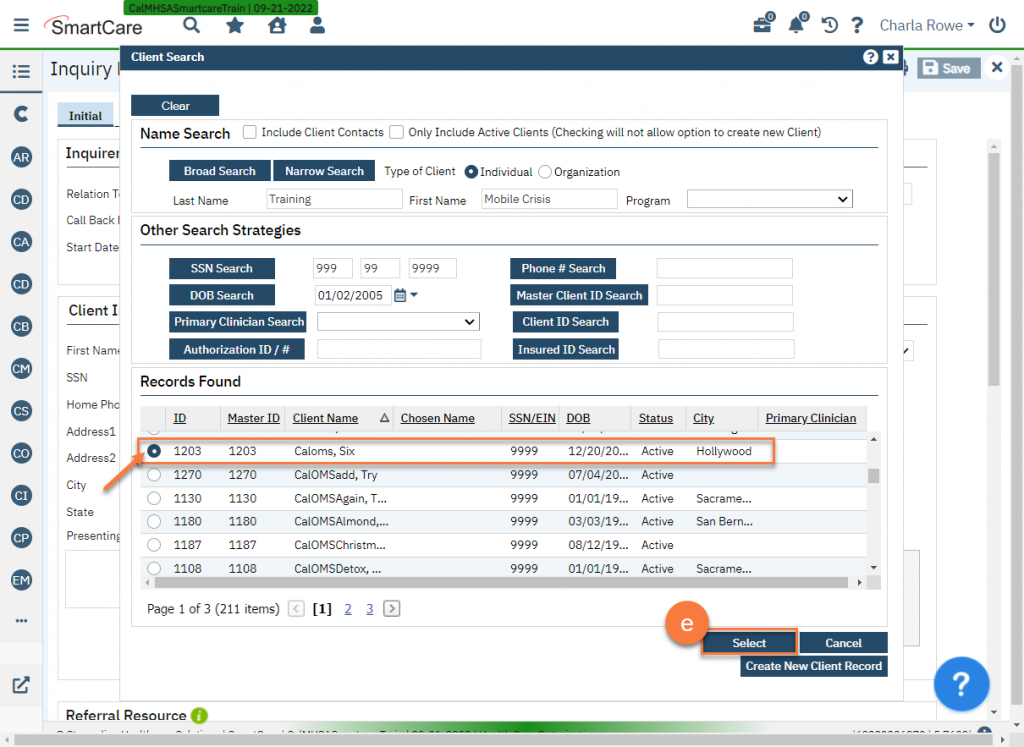
- If you receive no results, or do not find the person in the system, click “Create New Client Record”.
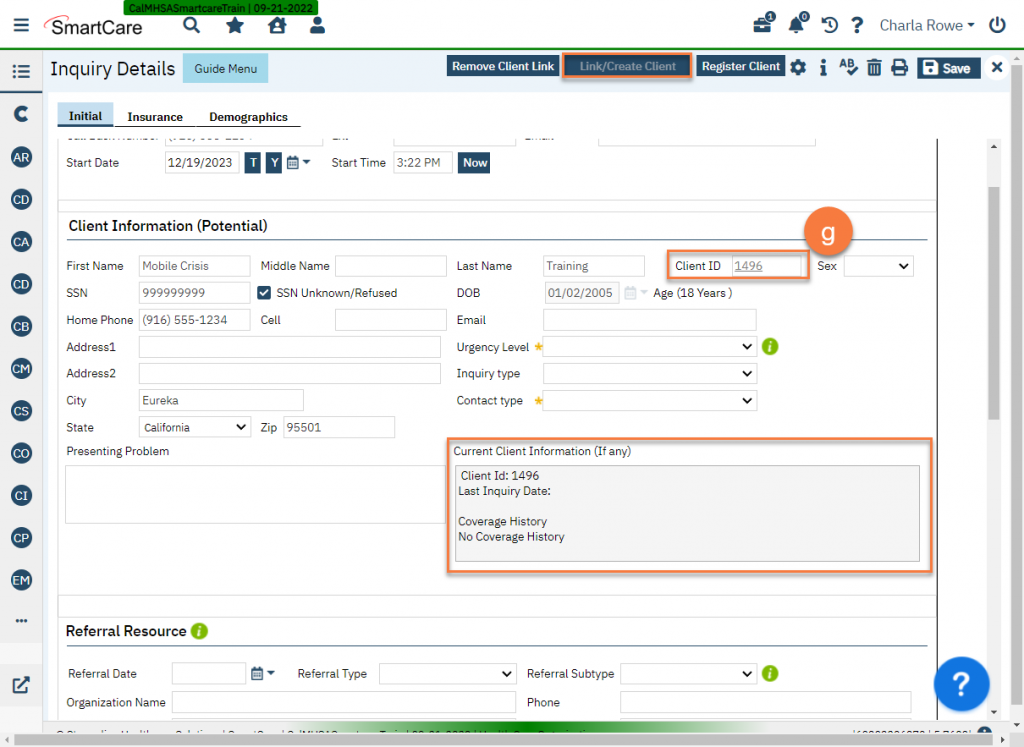
- Linking an existing client (by clicking “Select”) or creating a new client (by clicking “Create New Client Record”) will take you back to the Inquiry Details screen. The “Link/Create Client” button will now be greyed out, the “Client ID” field will be populated, and the “Current Client Information (If any)” field will also be populated.
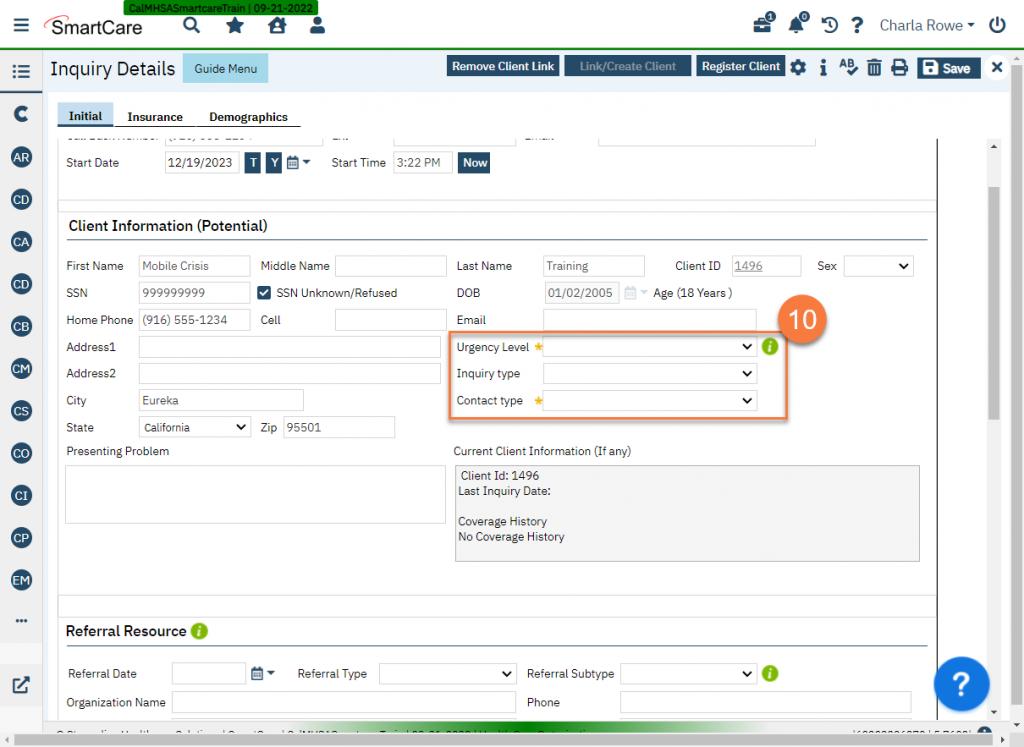
- Complete information about the call. In general, “Urgency Level” will be “Urgent” or “Emergent”. “Inquiry type” will be “Crisis”. “Contact type” will be “telephone”.
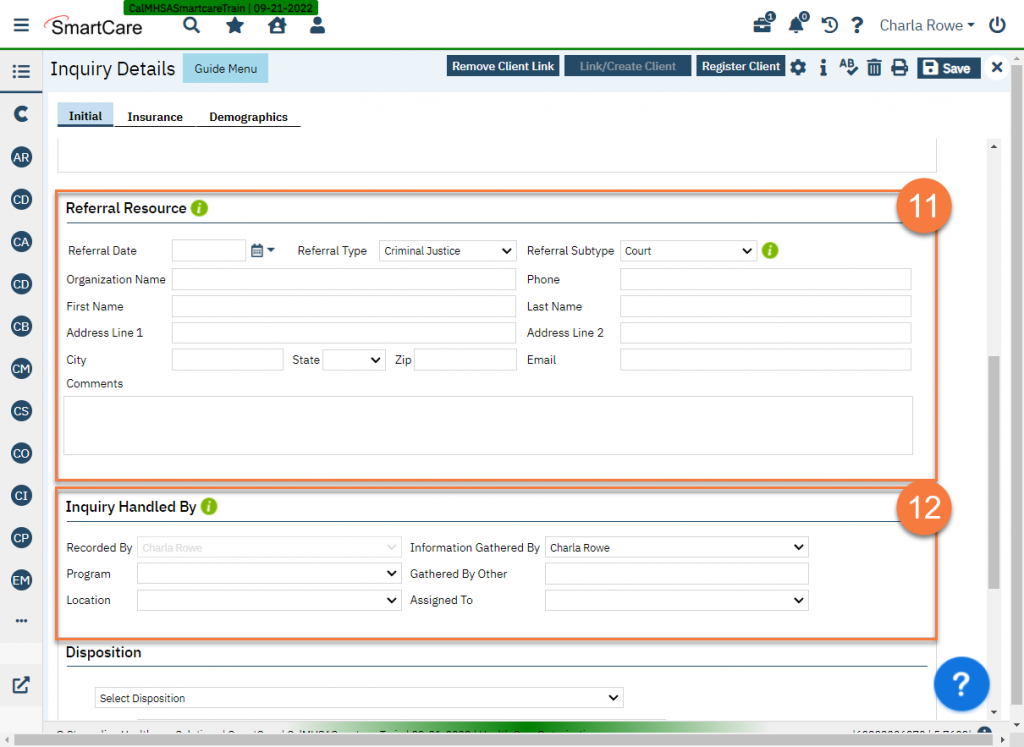
- Complete the Referral Resource section according to your county’s policy. Your county may or may not require this section to be completed. This will allow your county to track where your Mobile Crisis requests are coming from. “Referral Date” would be today. “Referral Type” will determine what “Referral Subtypes” are available. Enter any comments as indicated.
- In the “Inquiry Handled By” section, add your program, according to your county’s policy. Your county may or may not require this section to be completed. This will allow your county to track which programs are receiving requests for Mobile Crisis encounters.
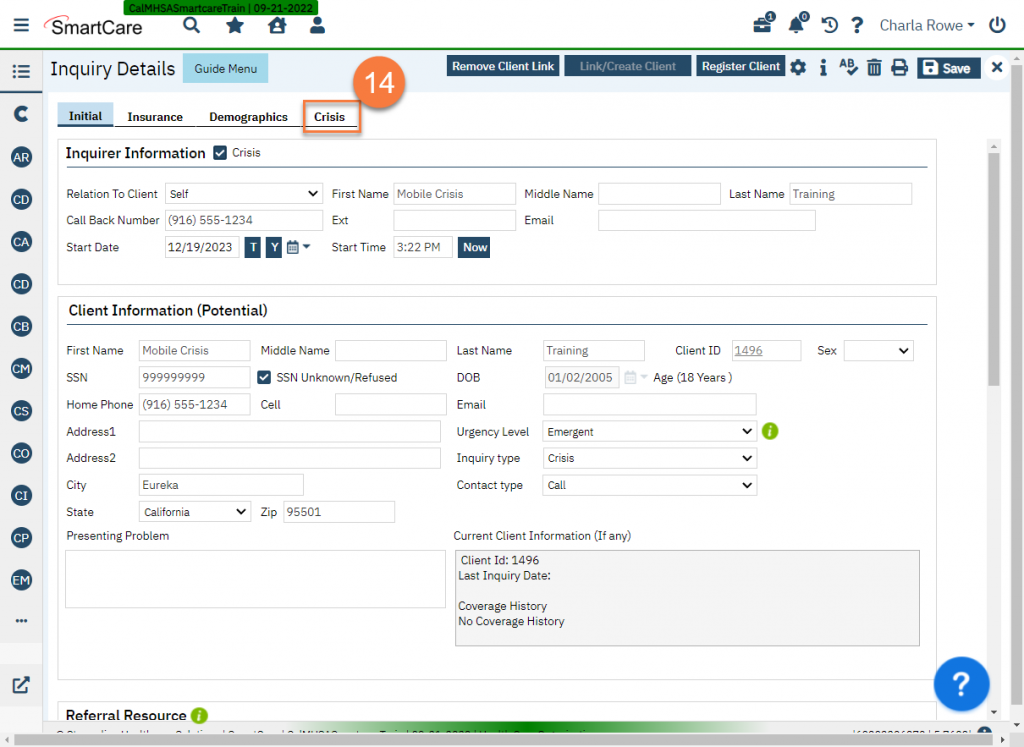
- Scrolling back to the top of the screen, click on the “Crisis” checkbox.
- This will create a new tab on the Inquiry Details screen called “Crisis”. Click into this tab.
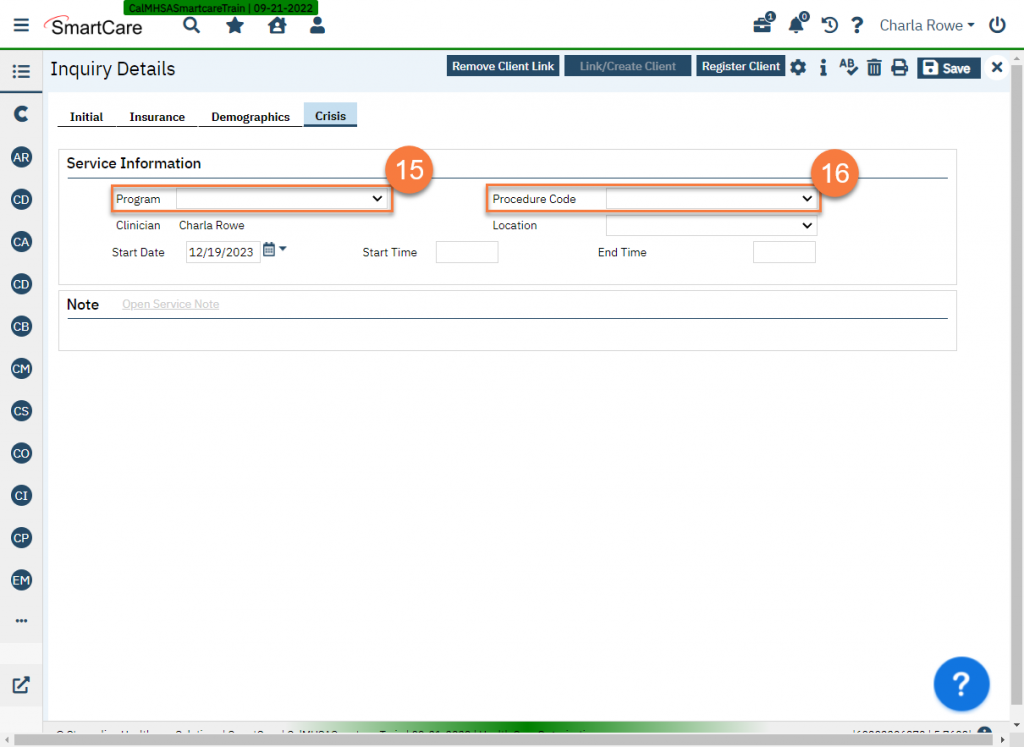
- Select your Program. If you’re not seeing your program, reach out to your system administrator.
- If this is occurring in the moment of a crisis, complete the Mobile Crisis Dispatch Screening using the offline version of the tool. This can be scanned in or entered later. You will have to uncheck the “Crisis” checkbox you selected in step 13 in order to save this Inquiry. Skip the rest of the steps in this section and move to the next section. You can revisit these steps later once the System Administrator has fixed this issue.
- Select Procedure Code “Mobile Crisis Dispatch Screening”. If you do not see this procedure code, reach out to your system administrator and follow the steps outlined in 15a.
- This will populate the Note section below. Enter the “Location” of the service.
- Enter the Start Time. You may enter “n” to populate the current time (n=now).
- Complete the Dispatch Screening Tool in the Note section of the Crisis tab.
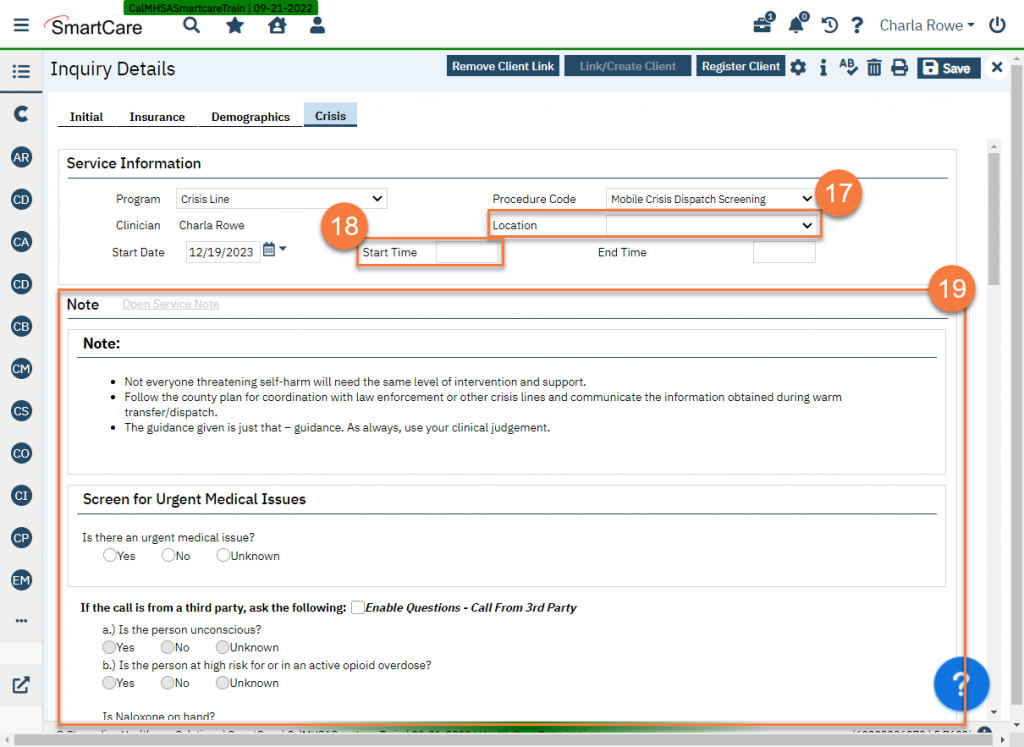
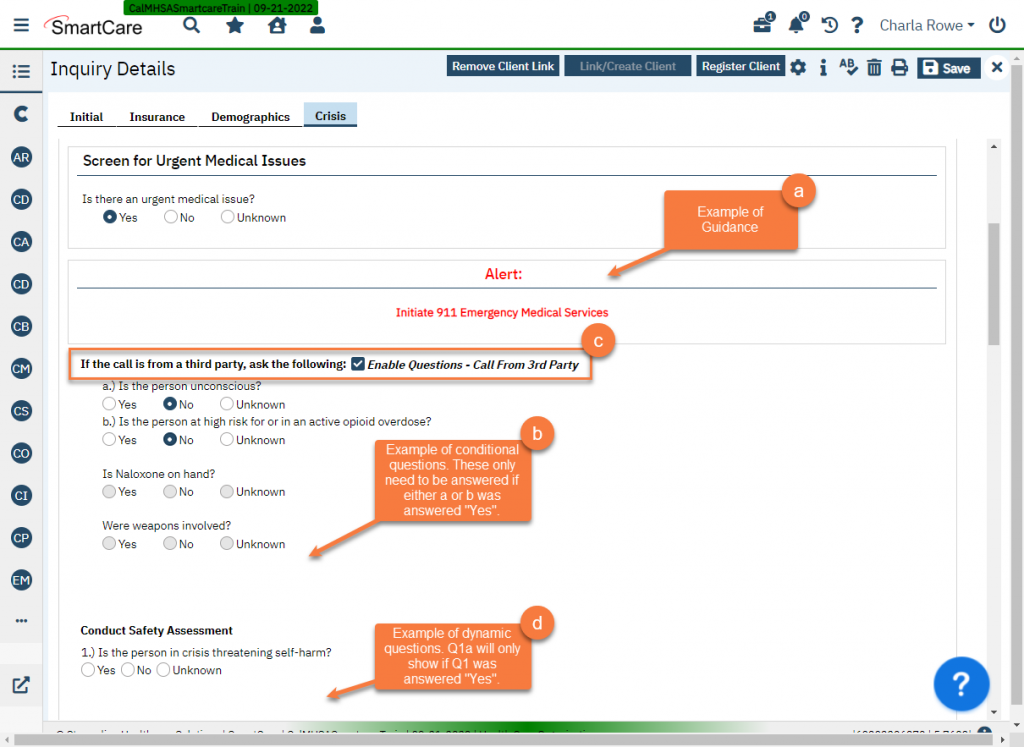
- As you answer questions, you may receive alerts or guidance. Remember that any guidance given is just that – guidance. Take action as you go, as appropriate. In this example, it’s important to initiate 911 medical services for someone who has an urgent medical issue. You don’t need to finish the screening before initiating these services. You also aren’t expected to stop the screening immediately.
- Some questions are conditionally required, meaning they’re only necessary if other questions are answered in a certain manner. Some questions
- If the person calling is not the client, click on “Enable Questions – Call From 3rd Party” and answer all questions.
- Some questions will only show dynamically, meaning they will only show up if other criteria are met.
- Make sure to obtain the reason for the call, written from the caller’s perspective.
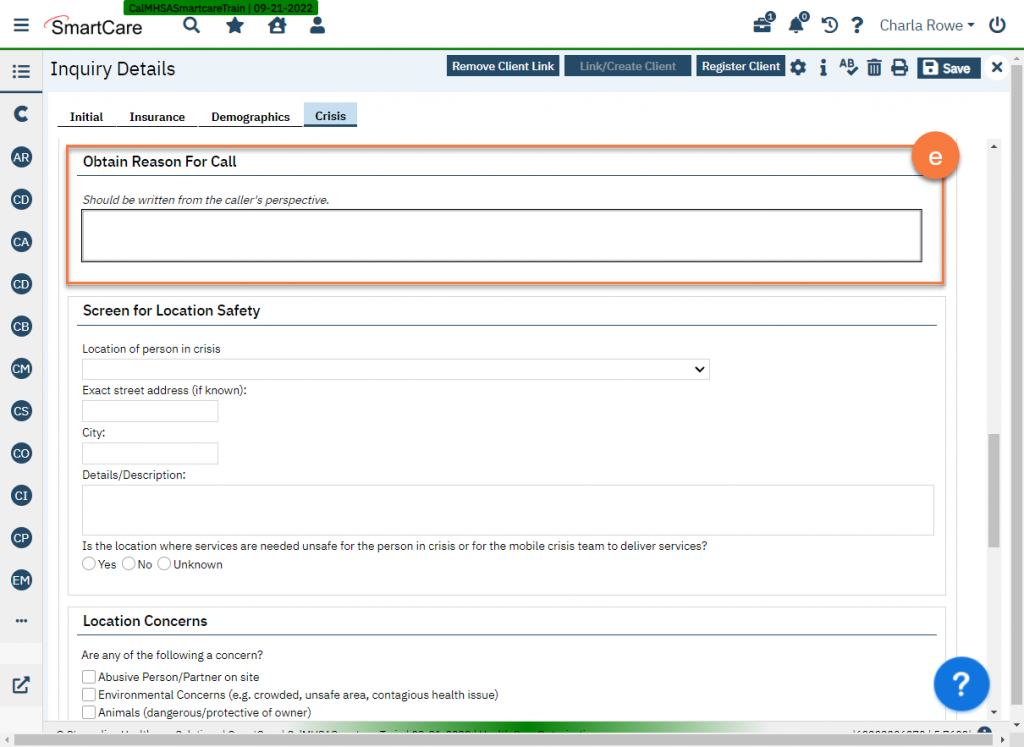
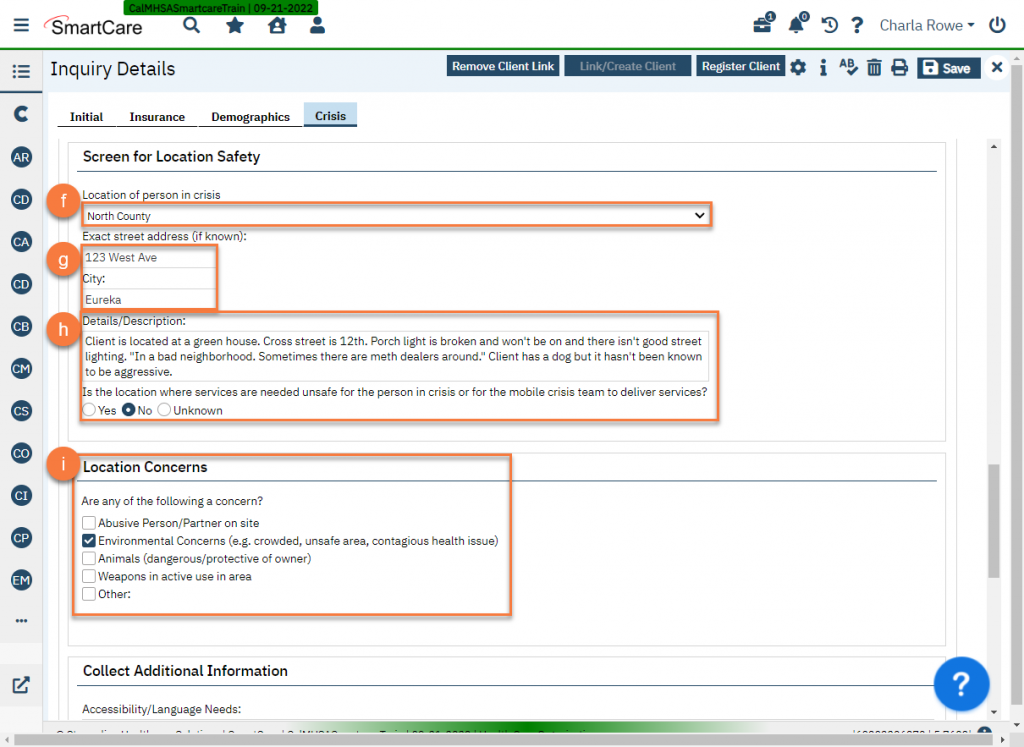
- Enter the location of the person in crisis. This is a drop-down list that is customizable to your county. This should be populated with general areas of your county, such as specific cities, rural areas, etc.
- Enter the exact street address, if you know it, as well as the city they’re actually in. This will help your team dispatch to the correct place and be able to look nearby in case the person in crisis has moved since dispatch was sent.
- Enter any details or description about the location of the person in crisis and explore with the caller if the location of the crisis is safe.
- Note any concerns about the location.
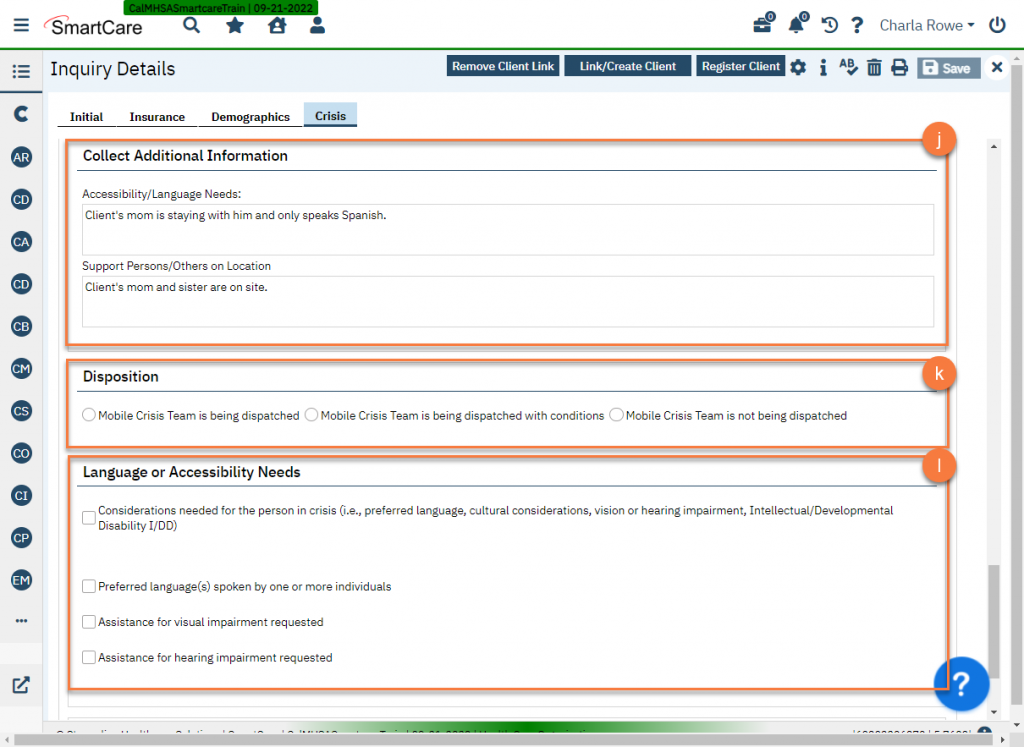
- Enter any additional information, such as accessibility or language needs and what support people or other people are at the site.
- Enter the disposition of the screening. Is the Mobile Crisis Team being dispatched? Is Law Enforcement going with them? This is a dynamic field which will require additional questions based on what is answered first. This is required for reporting to the State.
- Note any specific needs or considerations for dispatch. This may include ensuring there’s an interpreter on site or alerting your dispatch team to cultural considerations.
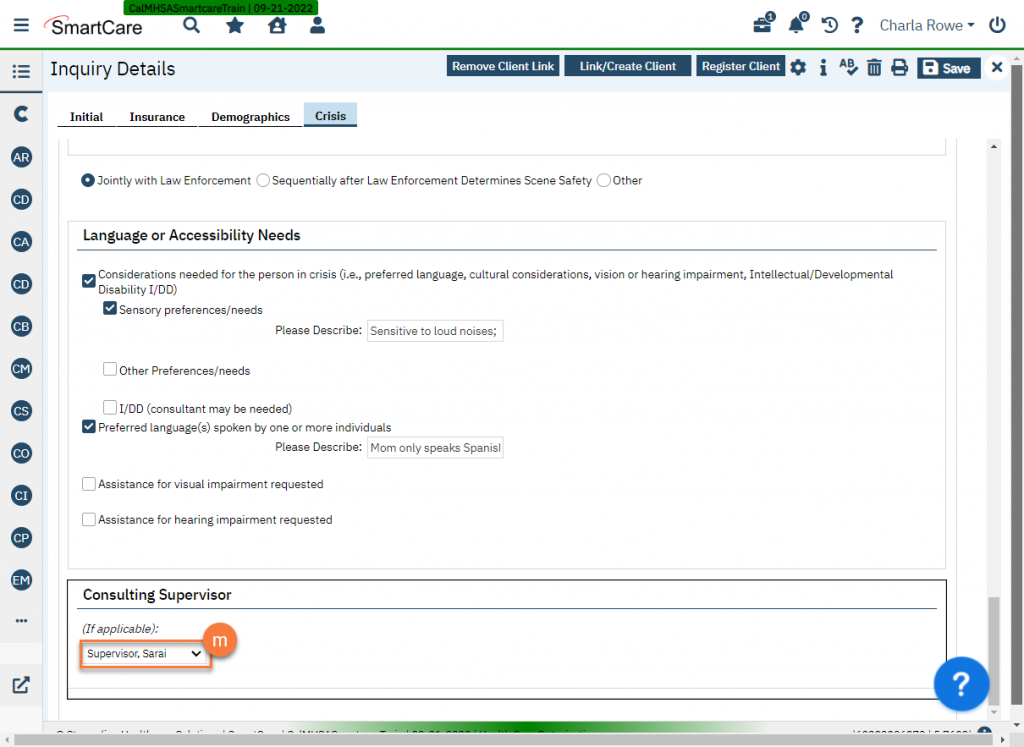
- As you finish the screening, make sure to coordinate with any people who are being dispatched to the site of the person in crisis. This may be your Mobile Crisis Team, 911, Law Enforcement, or others. If you consulted with a supervisor, enter the supervisor’s name in the “Consulting Supervisor” section.
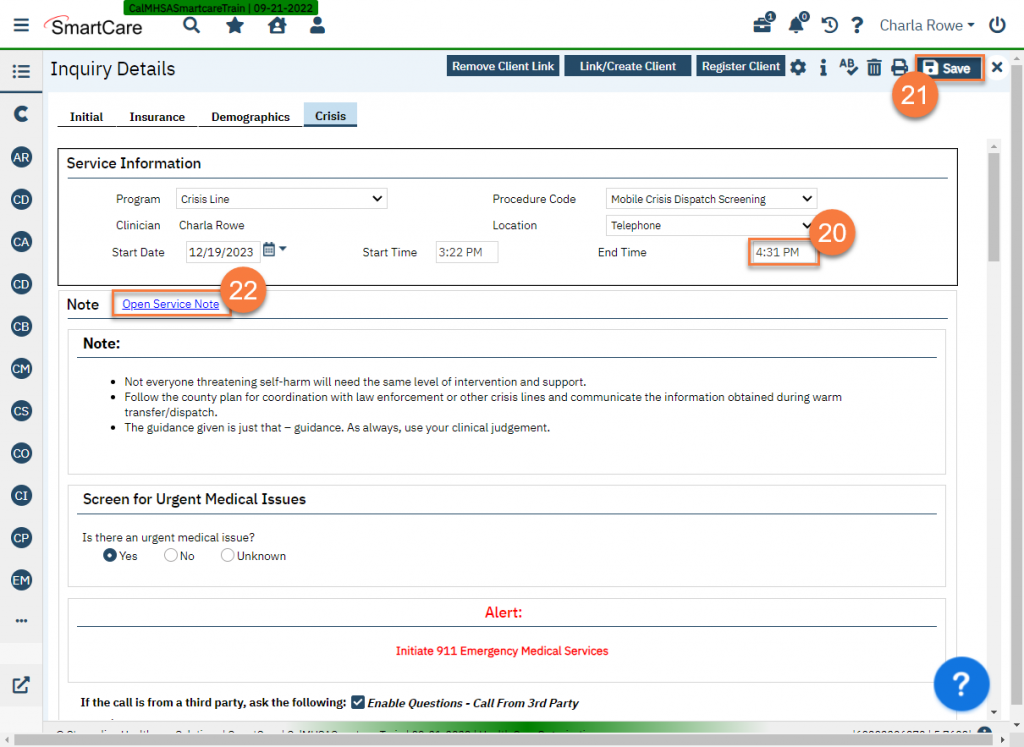
- When you’re finished with the screening and whatever coordination is necessary, scroll to the top of the page and enter the End Time. Again, you can enter “n” to automatically enter the current time (n=now).
- Click Save.
- This will create a link on the text “Open Service Note”. Click on this link.
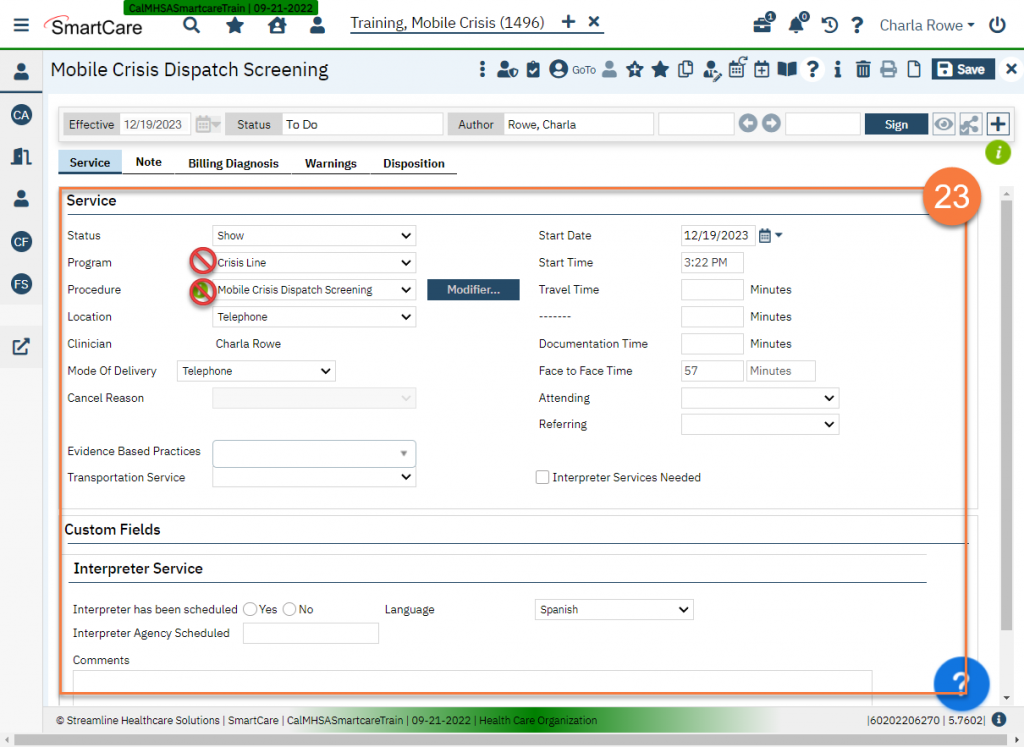
- This will take to you a service note based on the screening you just did. Add Mode of Delivery and any additional information as necessary, such as whether this was completed in a different language. DO NOT change the program or procedure code, as this will break the link with the Inquiry you just completed.
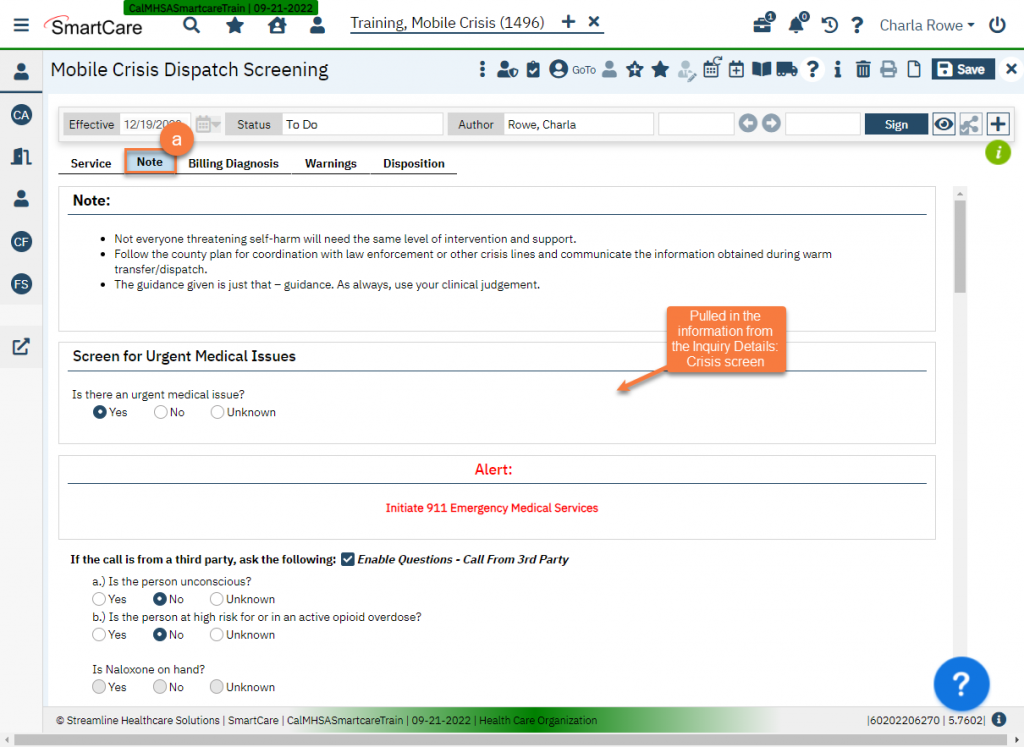
- The “Note” tab has already been populated. If you need to make any changes, you can do so here, but none should be needed.
- Click on the Billing Diagnosis tab.
- Click on the ICD-10 button.
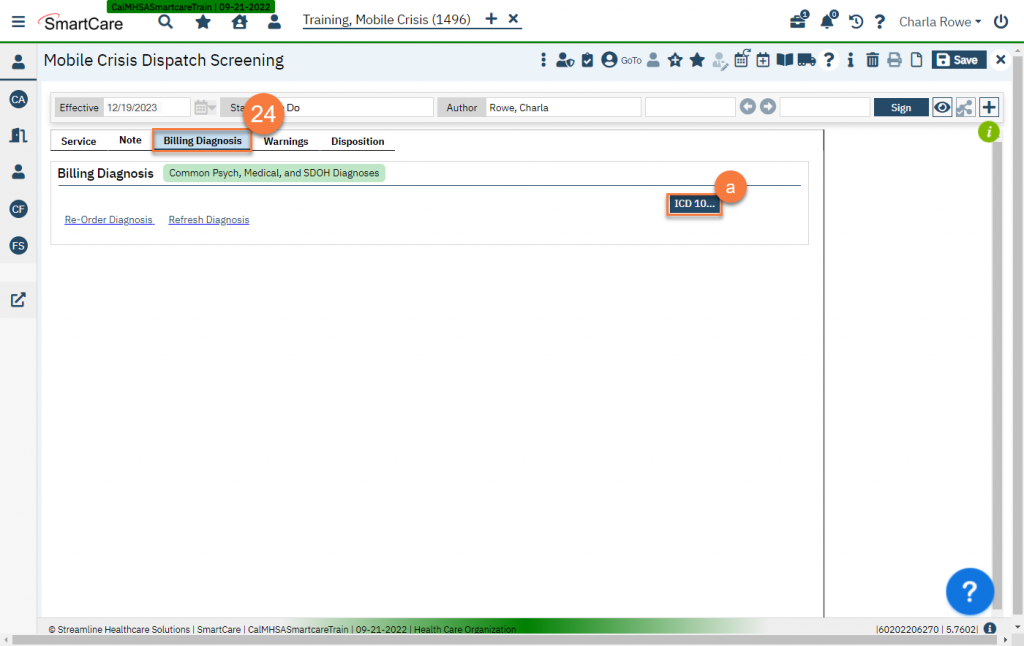
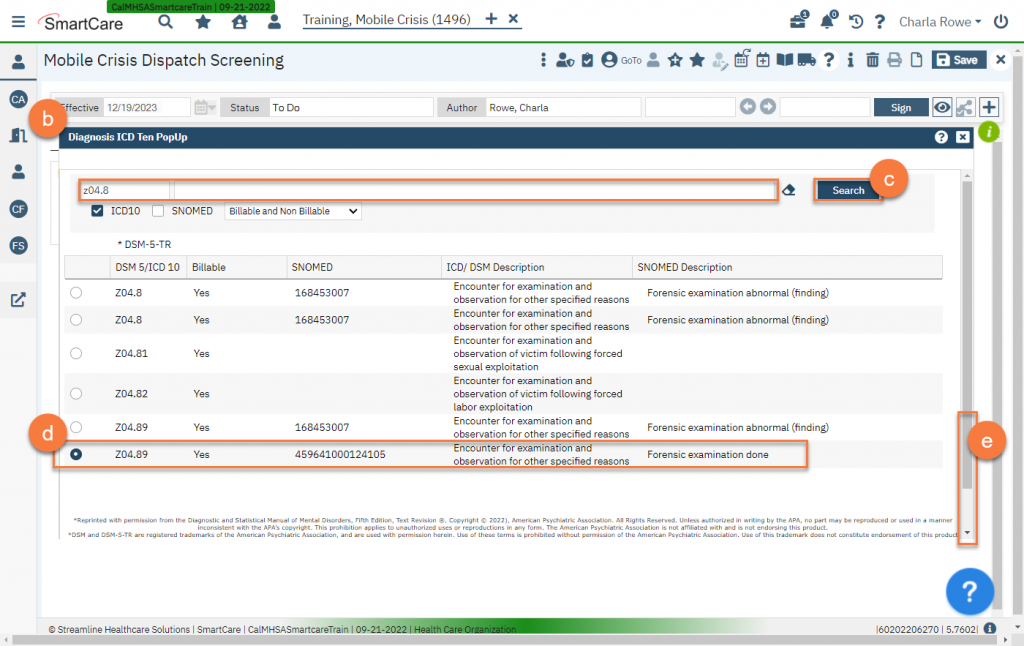
- This will bring up the Diagnosis ICD Ten PopUp window.
- Search using the code and/or description and by clicking “Search”.
- Select the code you want to use by clicking on the radio button next to it.
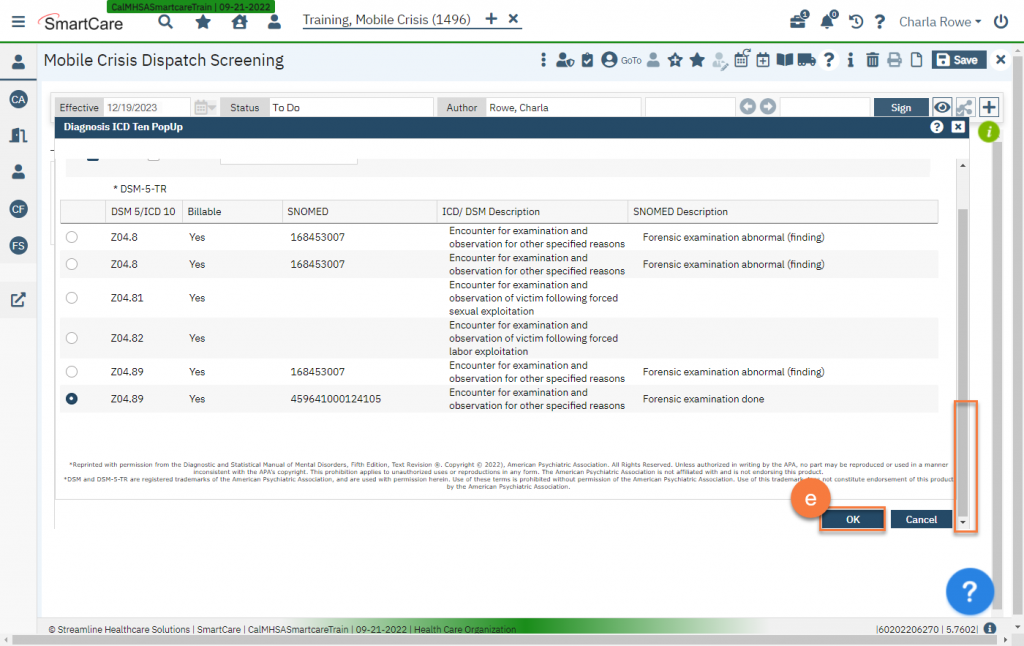
- Scroll down and click OK.
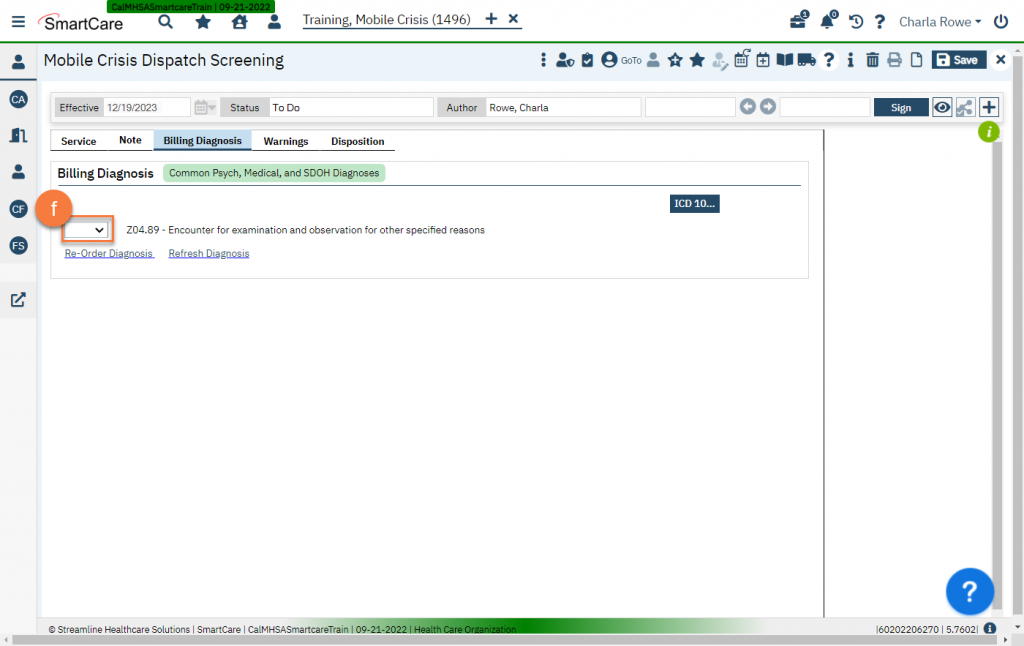
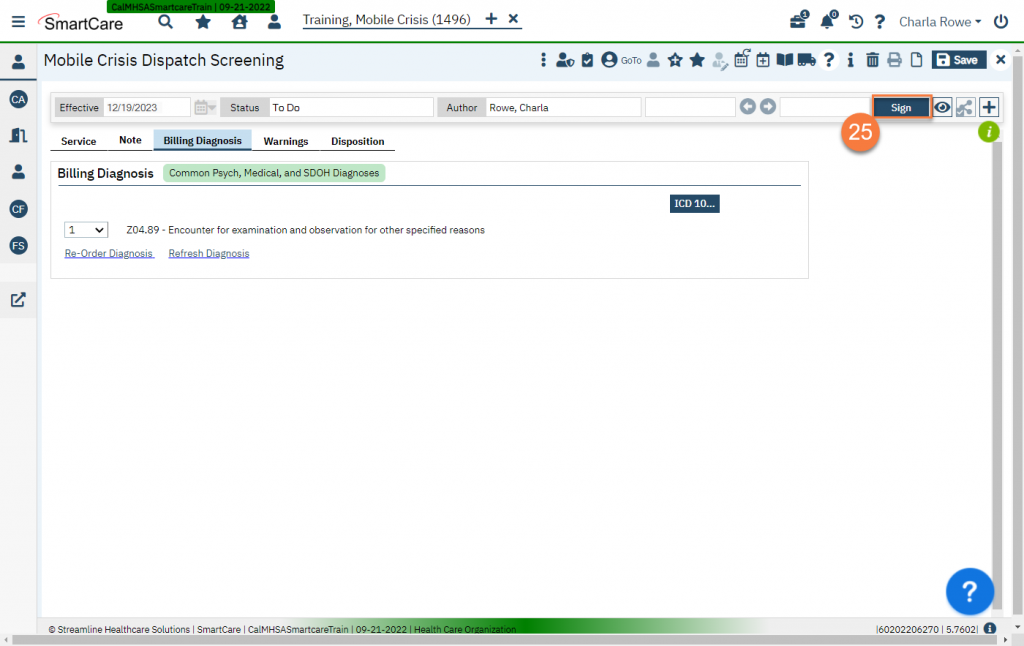
- This takes you back to the Billing Diagnosis tab. Select “1” in the dropdown next to the ICD-10 code you just added.
- Click “Sign” to complete the service note.
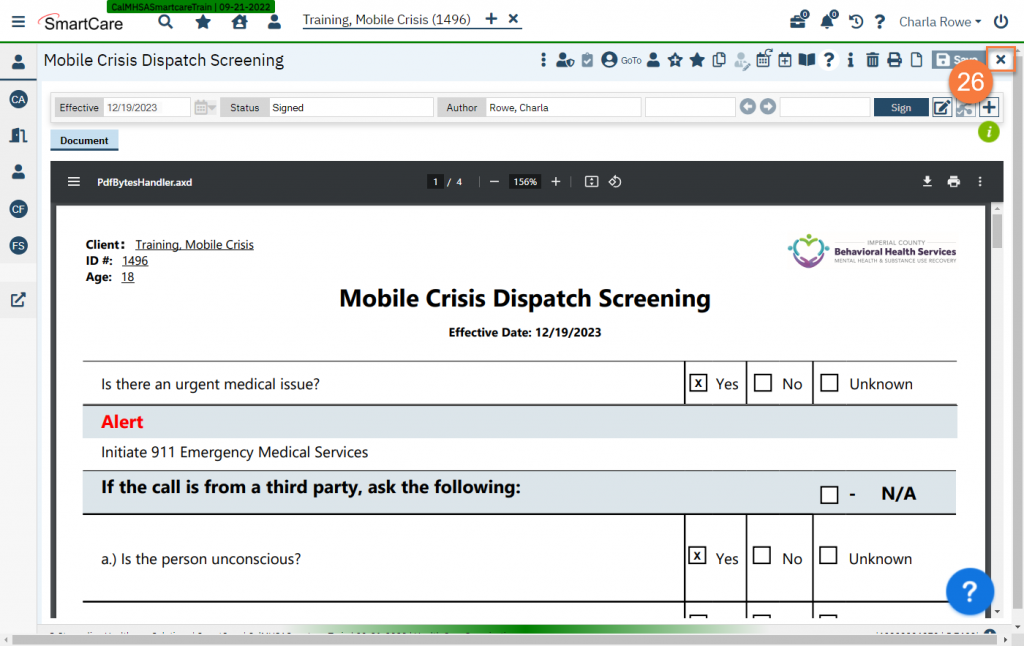
- This will bring up the PDF. Click the close icon to exit this screen. This should take you back to the previous screen, which was the Inquiry Details screen.
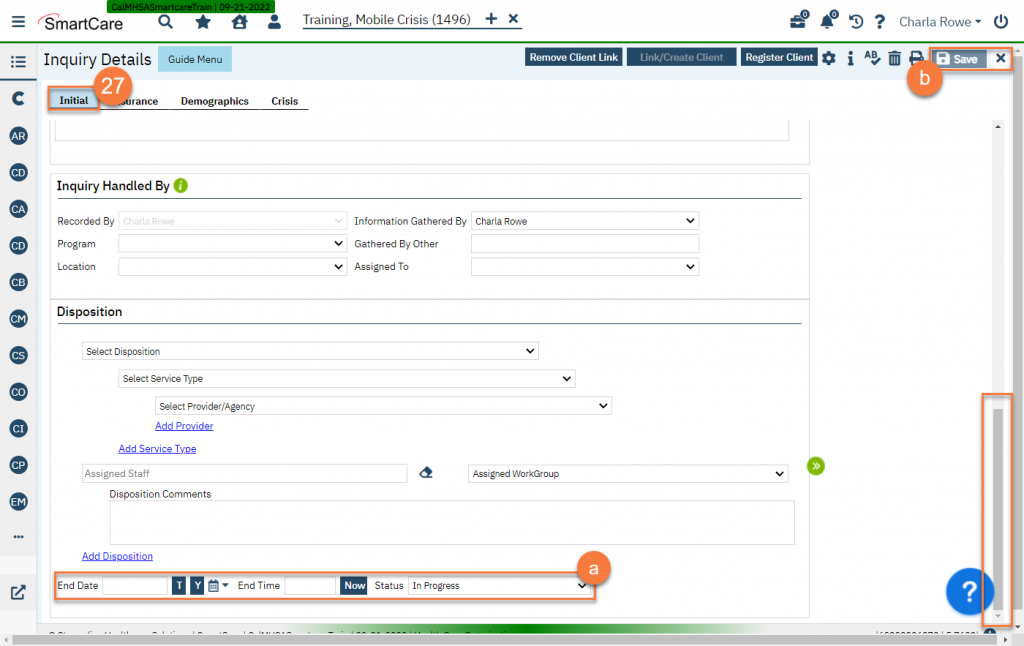
- Click on the Initial tab and scroll to the very bottom of the screen.
- Enter the End Date, End Time, and change the Status to “Complete”. You can once again use the “T” button to automatically populate today’s date and click the “Now” button to automatically populate the current time.
- Click Save and close.
If the Mobile Crisis Team is dispatched, you’ll have to open the client to the Mobile Crisis Program. Click here to see instructions on how to open the client to the Mobile Crisis Program.
Updated 1/5/24
Added link to offline version