When a Mobile Crisis Team is dispatched, one provider must complete the Mobile Crisis Assessment. This is generally done in the field. Because not all places will be well-suited to work on the computer, there are two options for how to document your Mobile Crisis Assessment: Paper and SmartCare.
If you have already completed a paper version of the Mobile Crisis Assessment, you can scan this in upon returning to the office. Follow the scanning instructions HERE and use the document type “Mobile Crisis Assessment (scanned)”.
If you complete the Mobile Crisis Assessment in SmartCare, follow the instructions in this article.
- With the client open, click the Search icon.
- Type “Mobile Crisis Assessment” in the search bar.
- Select “Mobile Crisis Assessment (Client)” from the search results.

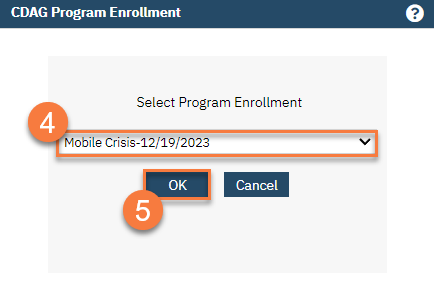
- The CDAG Program Enrollment window will popup. Select the Mobile Crisis program with the enrollment date that matches the dispatch date.
- Click OK.
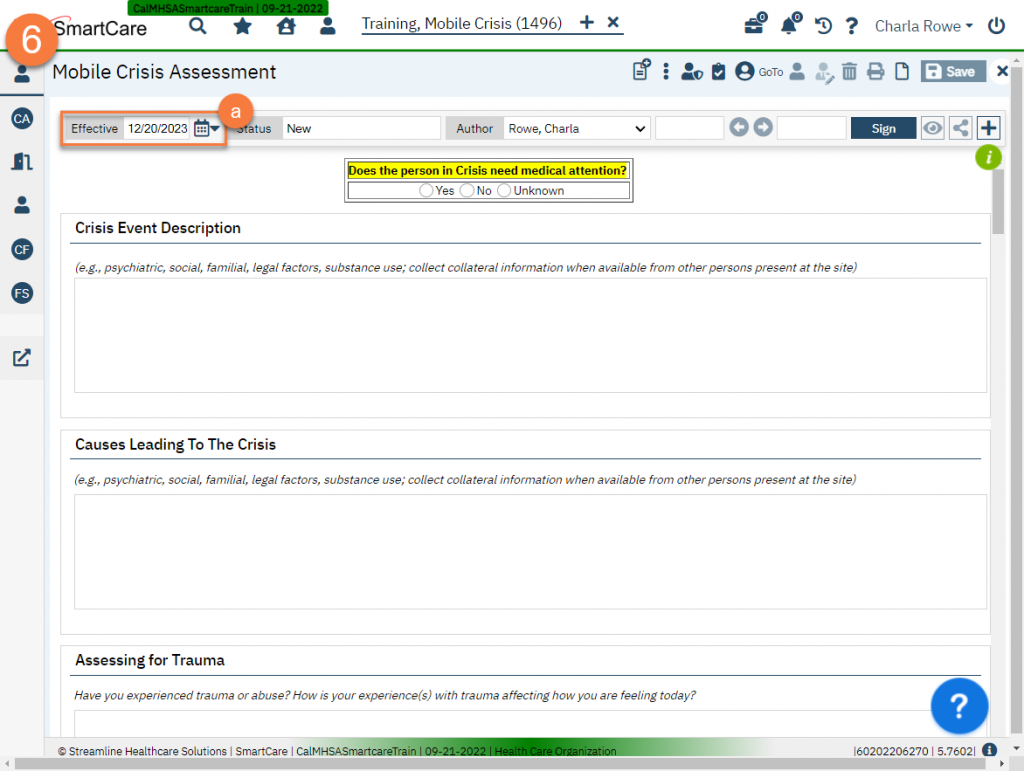
- This will bring you to the Mobile Crisis Assessment document screen. Complete the entire document.
- If you are completing the assessment after the fact, or are entering in the answers from a paper version, make sure your effective date is the date the assessment actually took place.
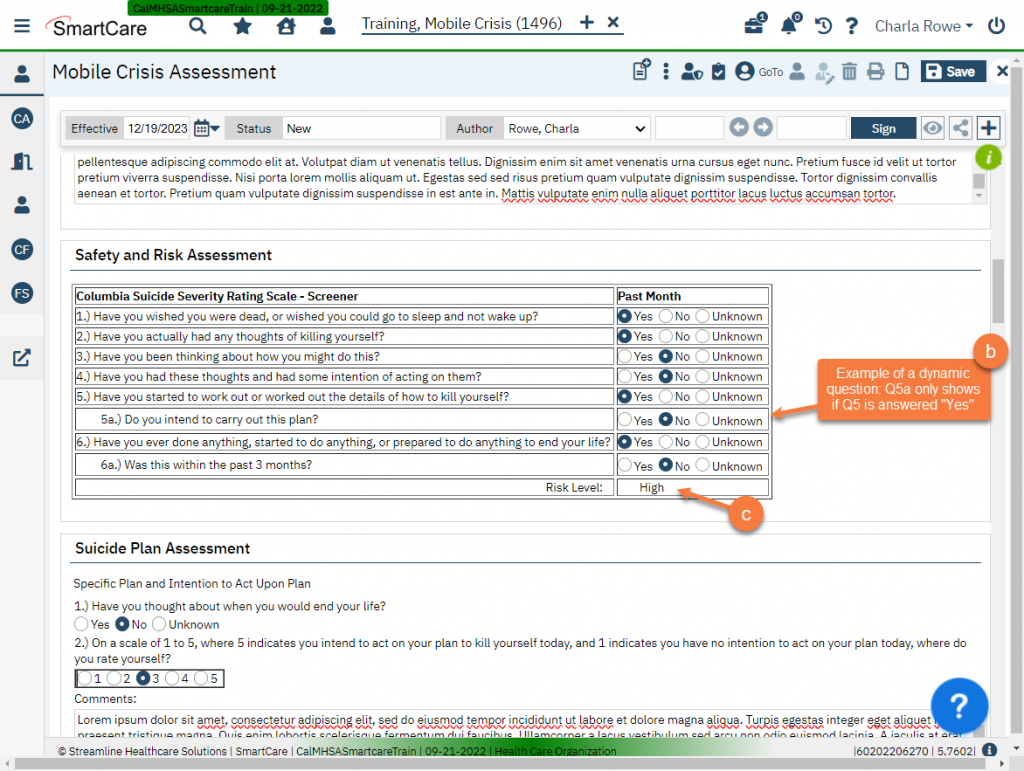
- This form is dynamic, meaning some questions will only be required when other questions are answered a certain way. This may also mean that some questions won’t even show up until other questions are answered.
- The Mobile Crisis Assessment includes a built-in Columbia Suicide Severity Rating Scale Screener. The Risk Level will automatically populate based on the answers to these questions.
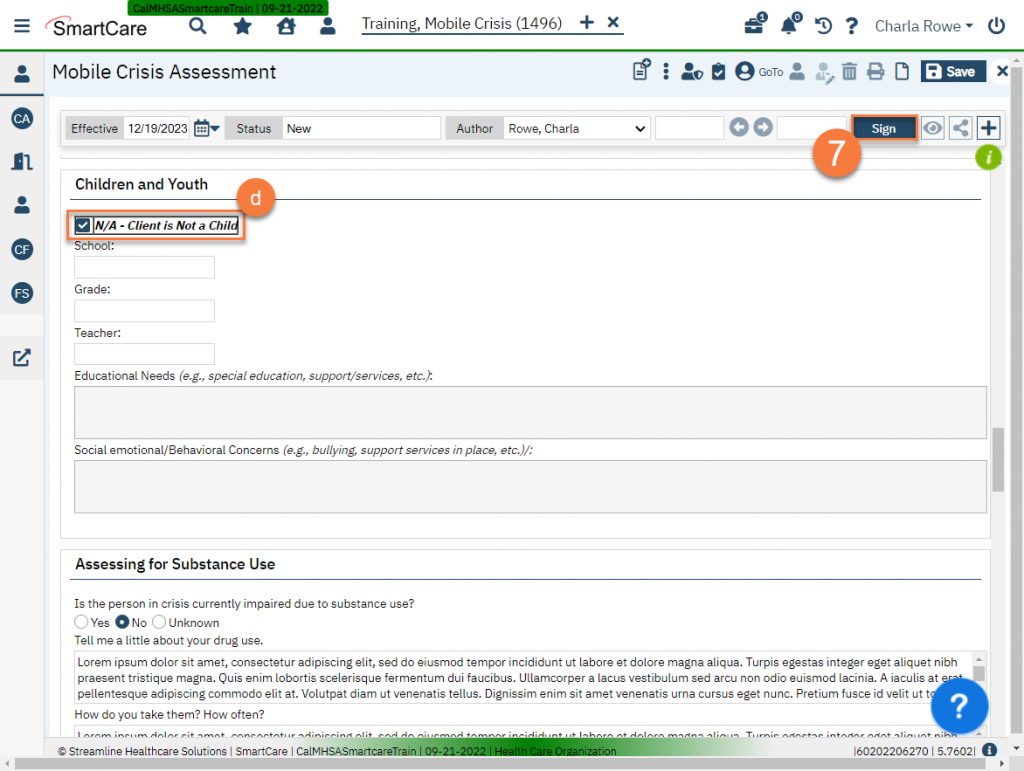
- The Children and Youth section is only required for clients who fit this age-group. If your client is not a youth, select “N/A” to grey out this section.
- When you are finished with the document, click Sign. If you have missed any fields, the system will alert you to what needs to be completed.
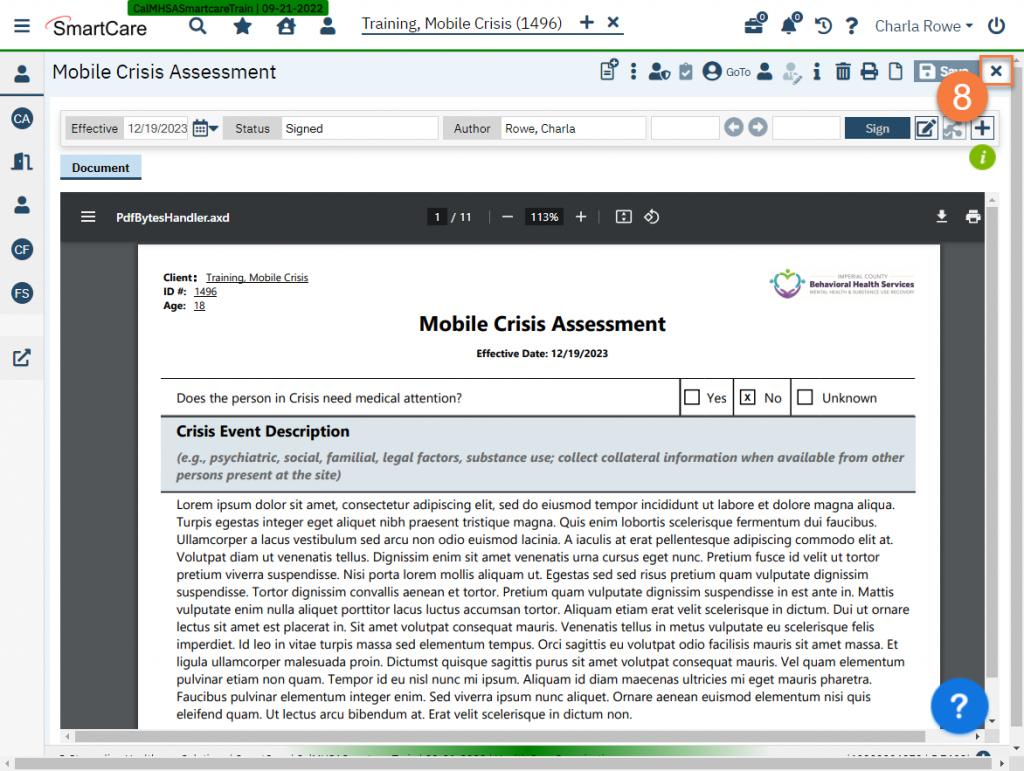
- This will bring you to the PDF. You may now click the Close icon.
