How to Add/Remove Clients or Staff from a Group Service
This article will review how to write a group progress note.
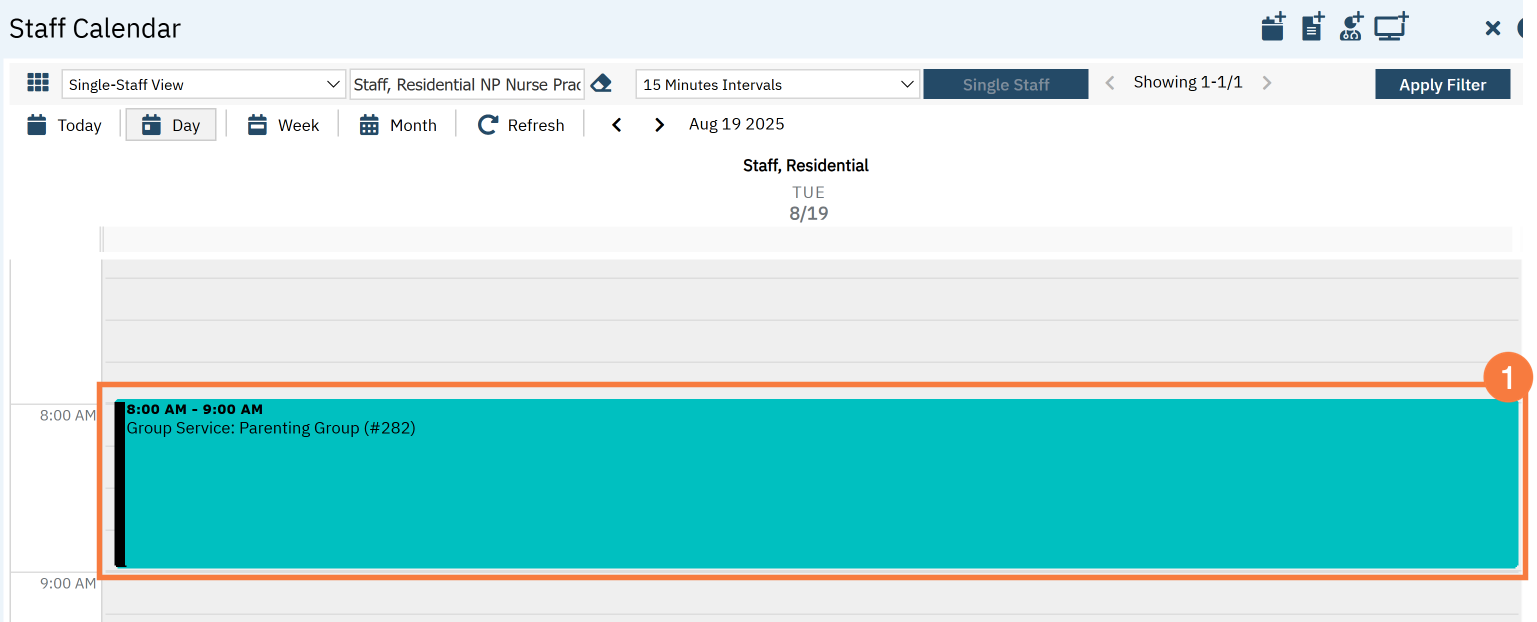
From your schedule, double click the group appointment.
Note: You can also navigate from your “Appointments for the Day” widget on your dashboard.
This will take you to the Group Services Detail page. Review the Group Details tab and make sure everything is correct.
If you need to make any changes to the staff section, you can do so here.
Click the X to remove staff, if they were not present.
Click to adjust the start time, if one of you were only present for a specific period of the group.
Click Add Staff, if needed for this session.
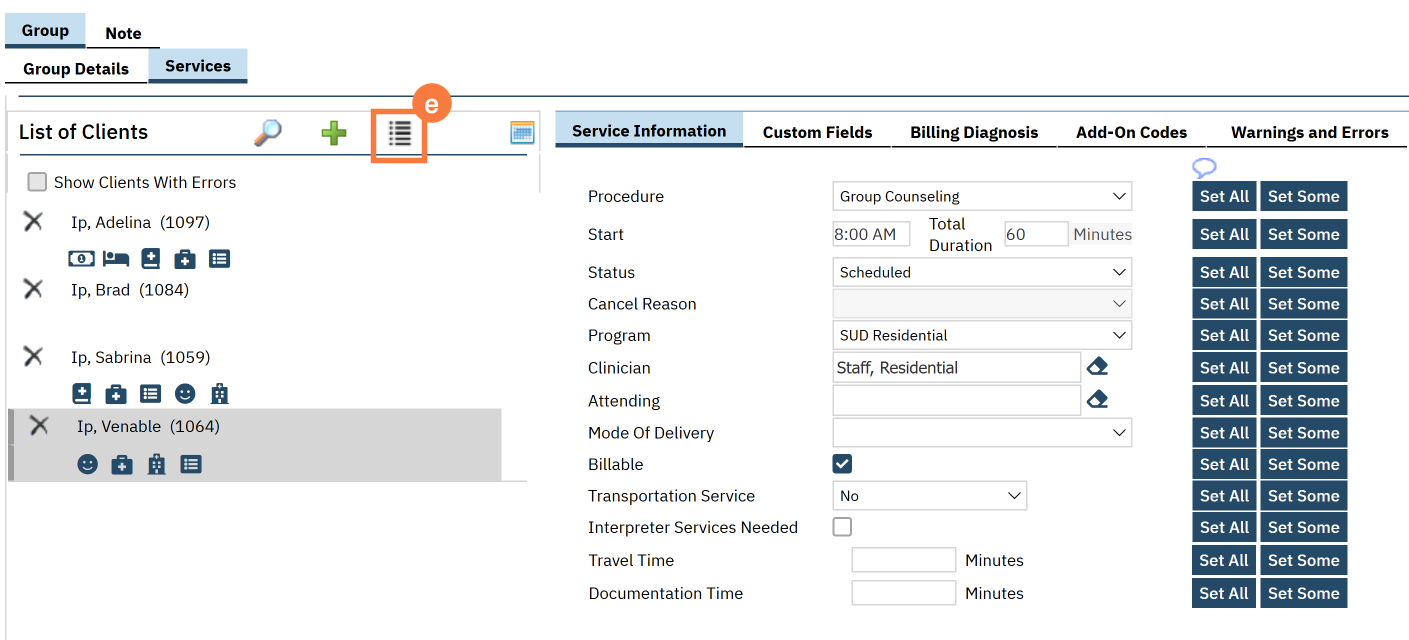
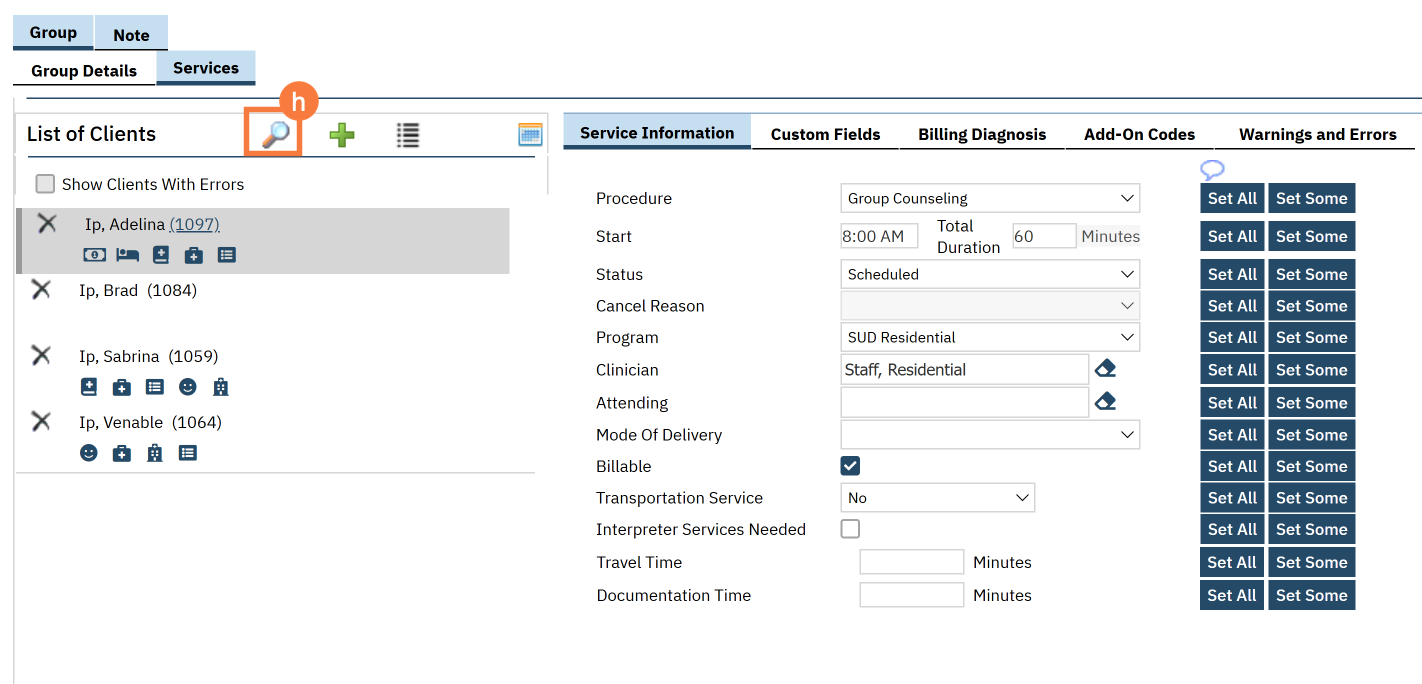
Click the Services tab.
Here you’ll see the list of clients enrolled in this group. Make edits to this list to confirm the group roster.
To remove a client from the roster permanently, click the Delete Service icon. DO NOT do this if they are simply a no-show. Only do this to remove them from this service’s roster entirely.
To add a client who has already been enrolled in this group, click the Plus icon.
This will open up the Group Service Client Popup, which will list any additional clients that are enrolled in this group. Click the checkbox for the client.
Click Select to add them to this service.
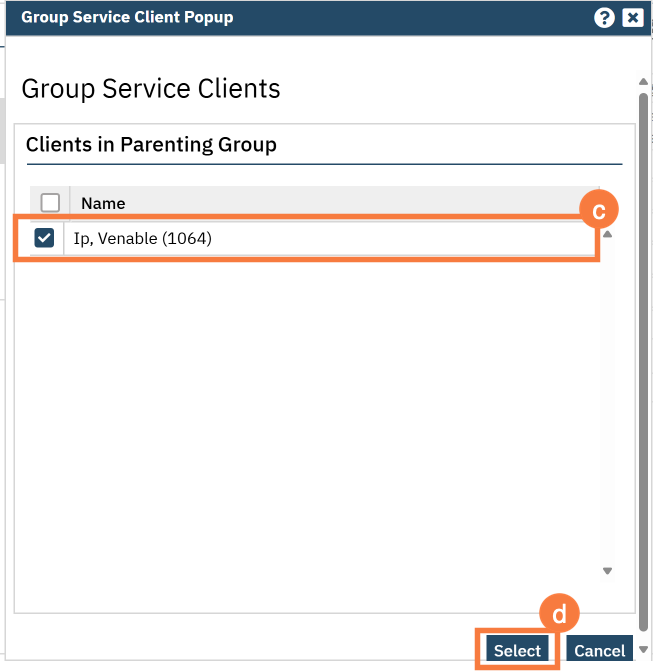
To add a client who is enrolled in this program but not yet enrolled in this group, click the List icon.
This will open up the Group Service Client Popup, which will list any clients that are enrolled in this program but are not yet enrolled in this group. Click the checkbox for the client.
Click Select to add them to this service.
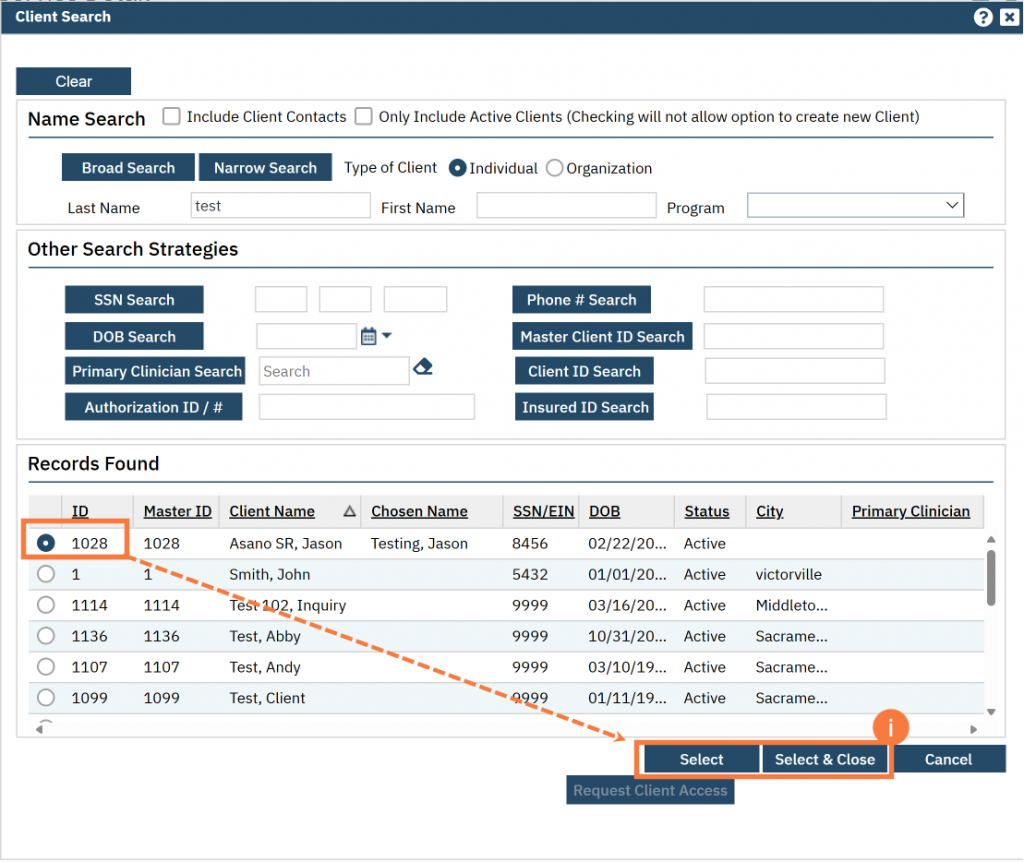
To add a client from another program, click on the Magnifying Glass icon.
This will bring up the client search function. Search for the client you want to add and click Select & Close. If you want to add more than 1 client, you can simply click Select and then search for the next client you want to add.