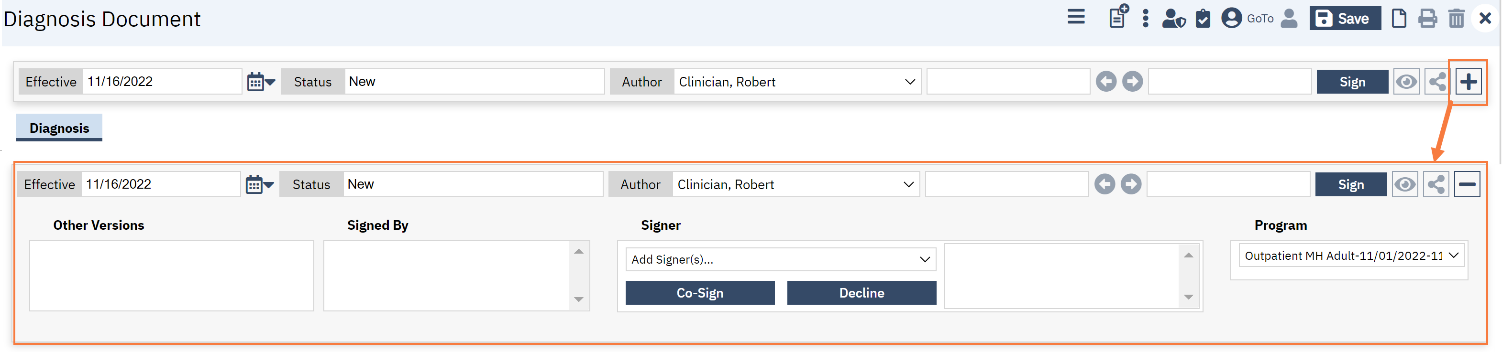
To add a diagnosis, follow the steps below:
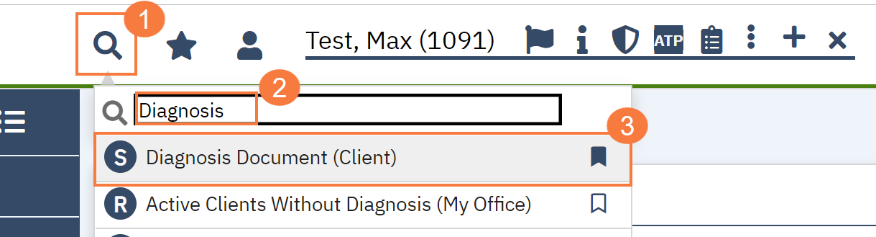
- You must first have the client open, click the Search icon.
- Type Diagnosis into the search bar.
- Click to select Diagnosis Document (Client).
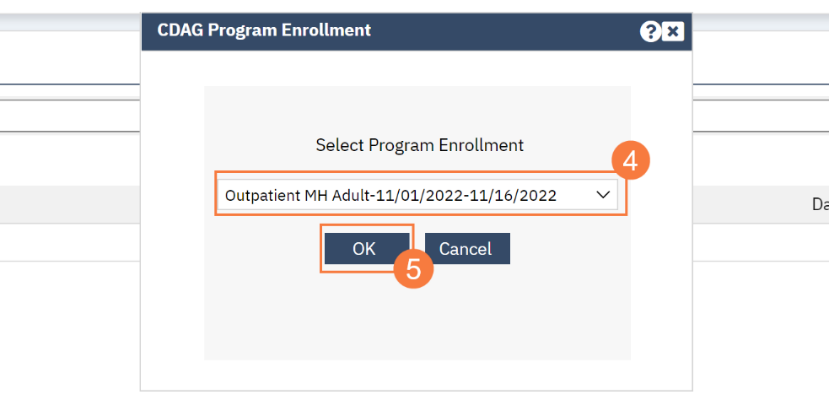
- In the CDAG Program Enrollment window pop-up, click the drop down and click to select the appropriate program.
- Click OK to continue.
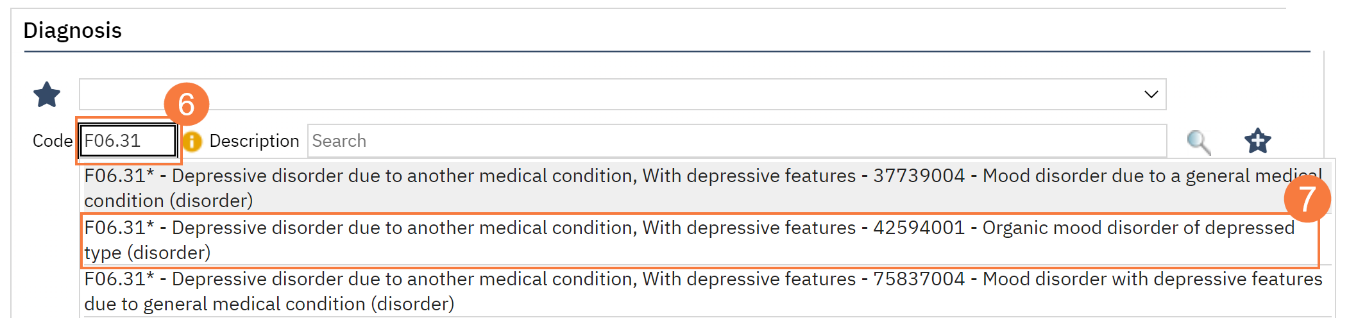
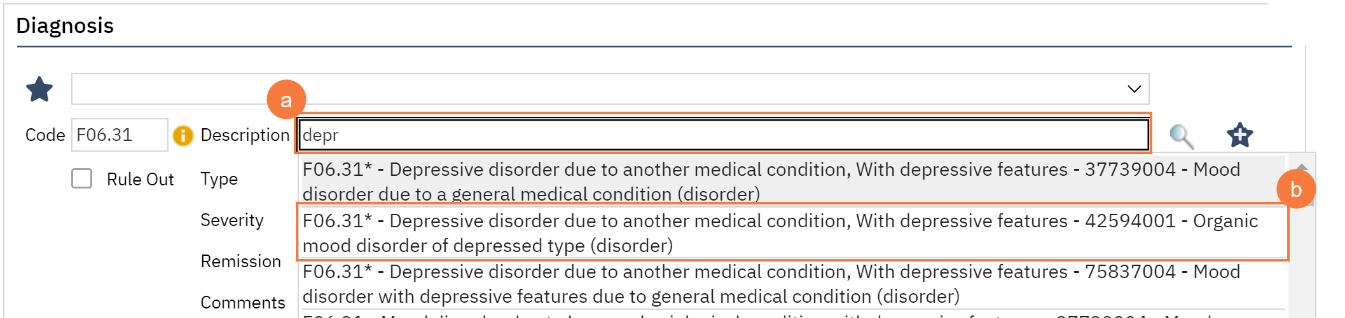
- The Diagnosis Document screen will open, click in the code field and enter the diagnosis code.
- A list of matching diagnoses will populate, click to select the appropriate diagnosis
-
- Alternatively, you can click in the Description filed and enter the diagnosis description.
- A list of matching diagnoses will populate, click to select the appropriate diagnosis
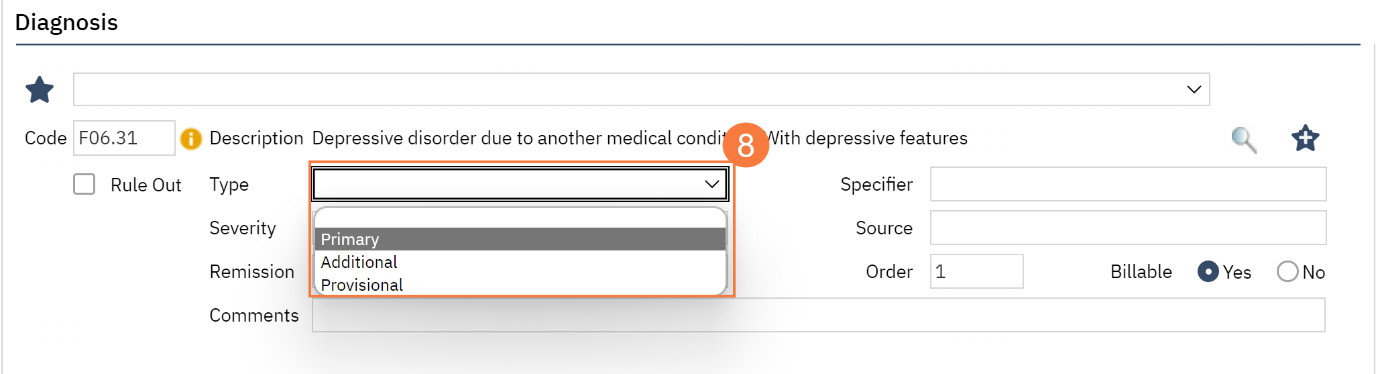
- You must document if the diagnosis is Primary, Additional, or Provisional. Click the drop-down menu in the Type field and select the appropriate option.
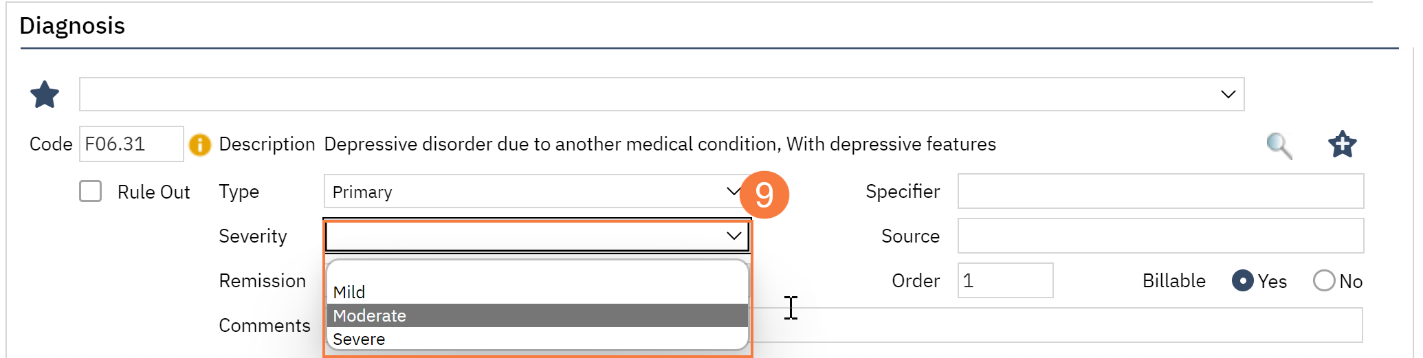
- If a severity level is appropriate, click the drop-down menu in the Severity field and select the appropriate option, mild, moderate, or severe.
- To document that the client is in remission, click the drop-down menu in the Remission field and select the appropriate option.

- If this diagnosis is informational only and not a billable diagnosis, click the No radio button in the Billable field.

- If this diagnosis is informational only and not a billable diagnosis, click the No radio button in the Billable field.
- Click the Insert button to add the diagnosis. It will appear in the Diagnosis List grid below. Repeat steps 1-12 for remaining diagnoses.

- Click Sign to complete and generate the document.

Note: If you need to review the programs the patient is enrolled in, click the More Detail icon at the top of the window.