How to Fix POS and/or Procedure Code for Replacement
How to correct Place of Service and or Procedure code on claimed services that have been flagged with a PCCN.
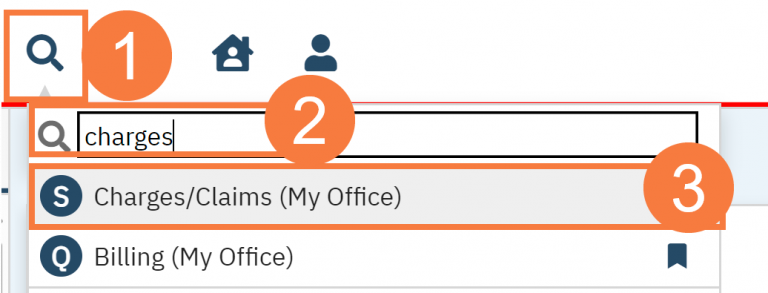
Click the Search icon.
Type Charges/Claims in the Search bar.
Click to select Charges/Claims (My Office).
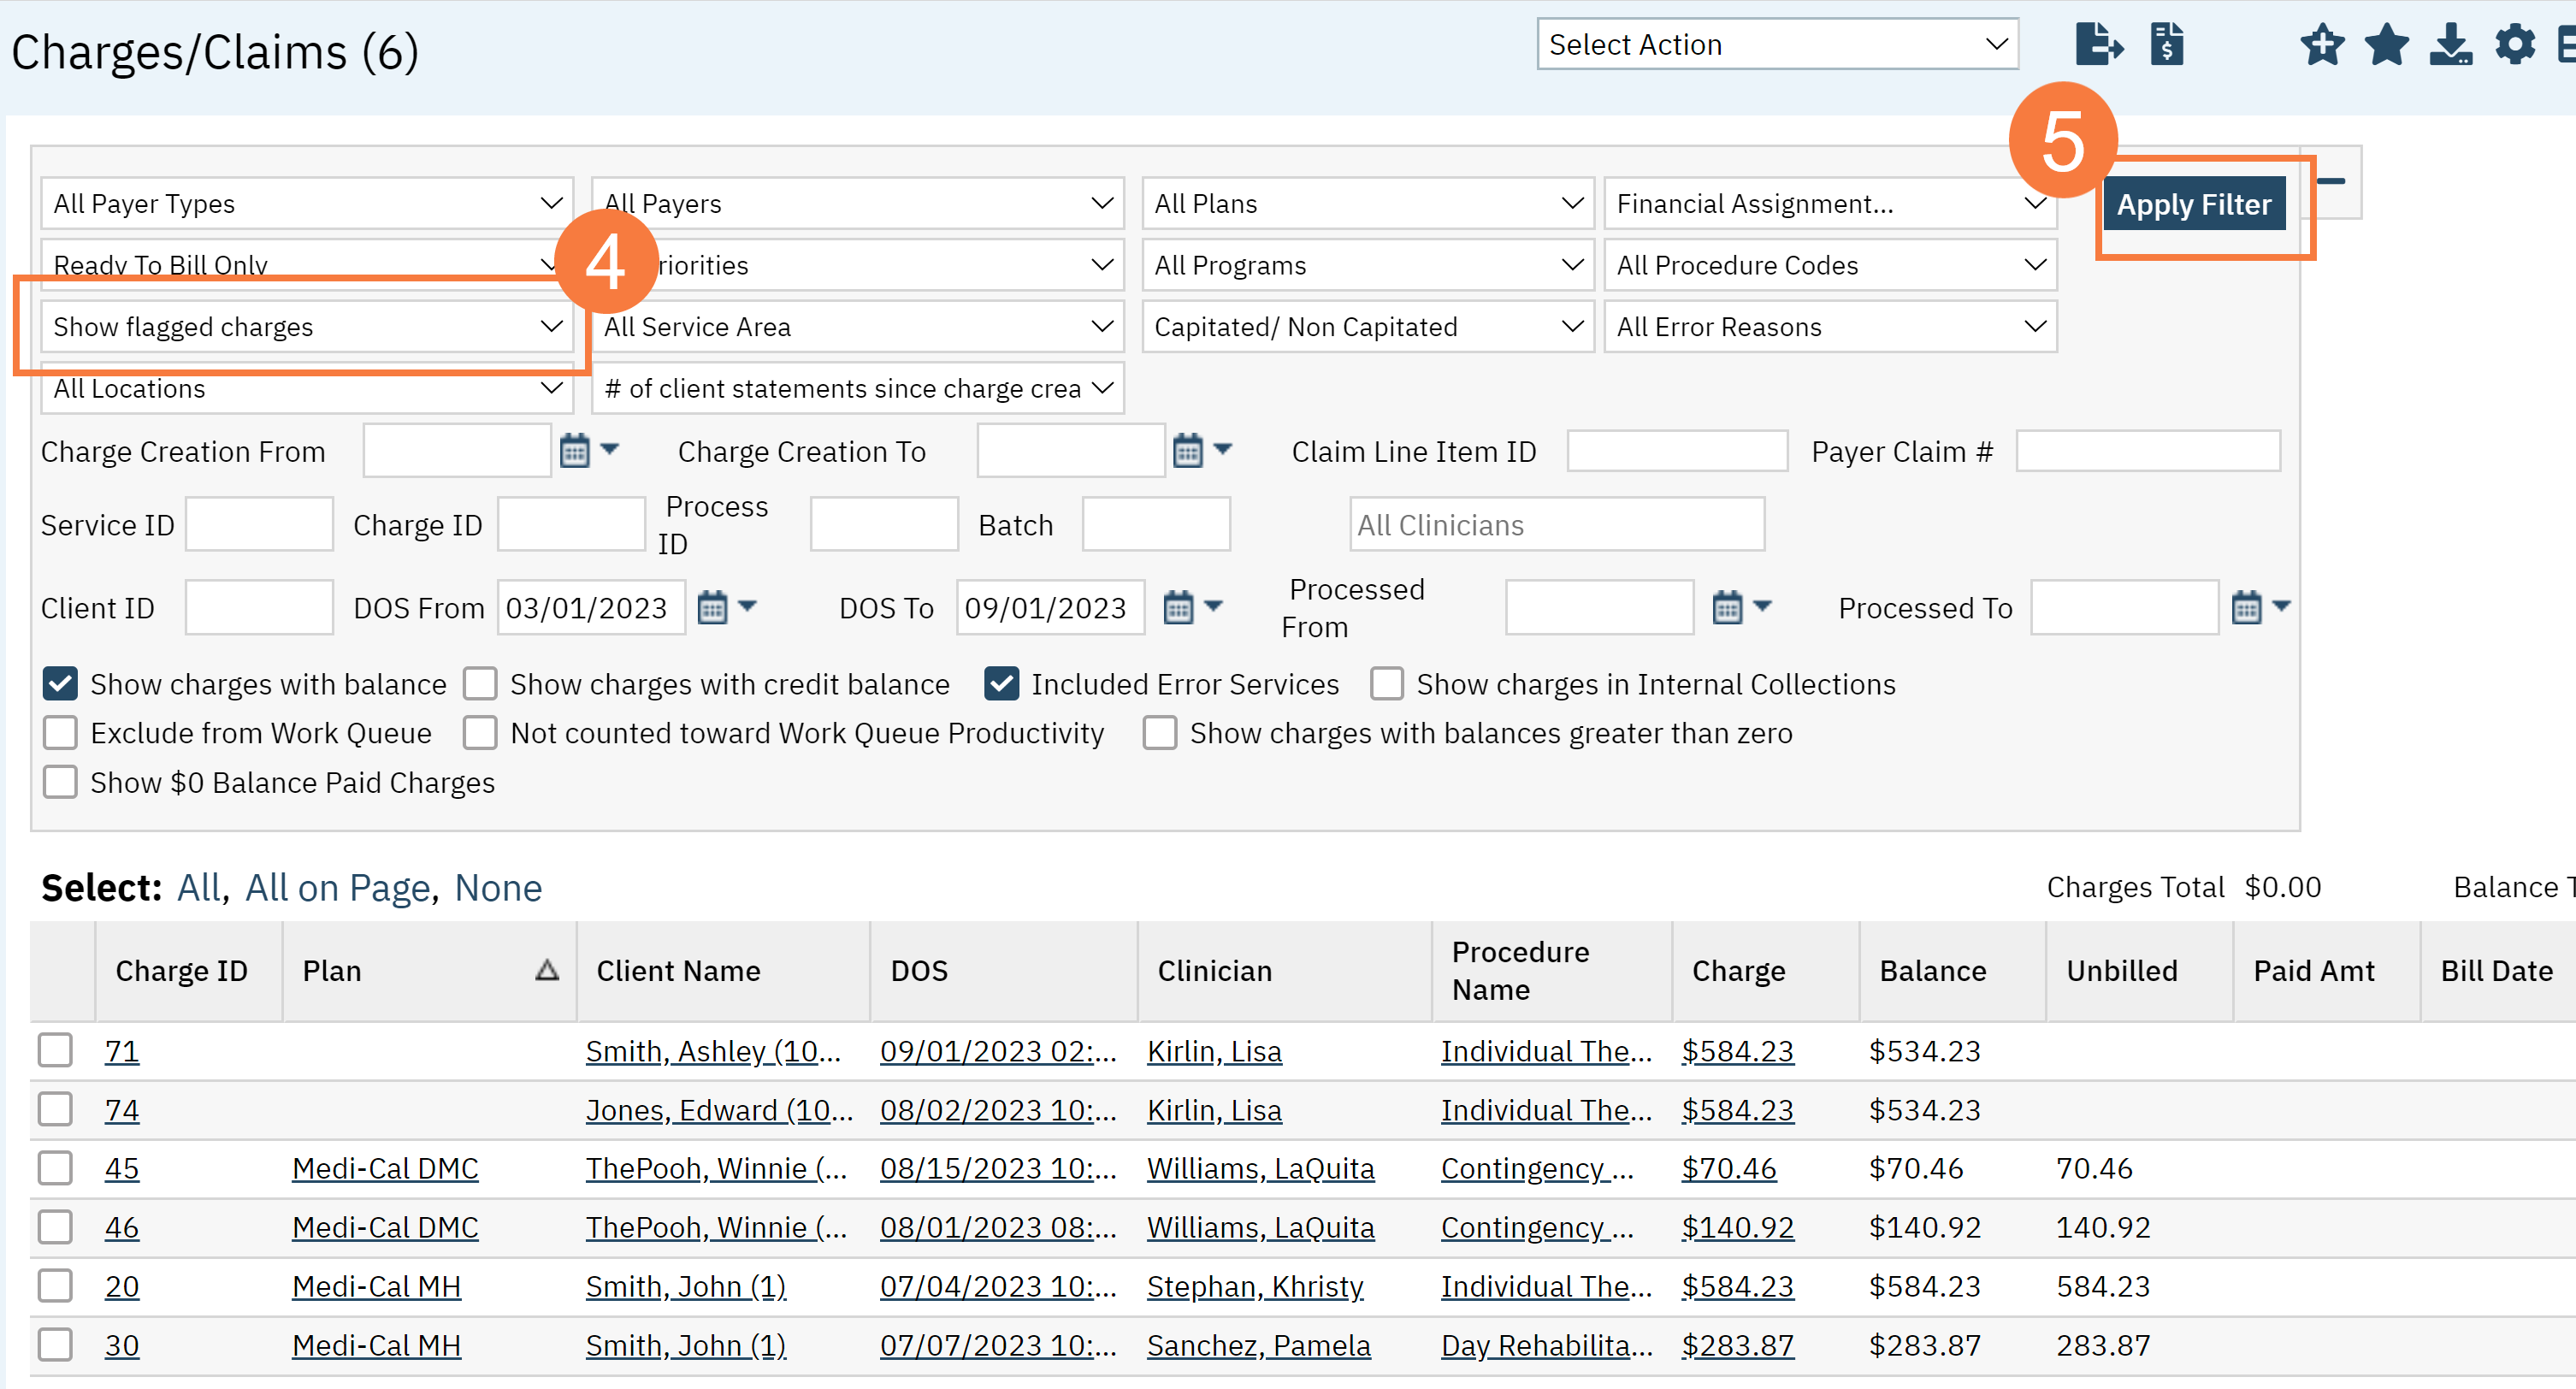
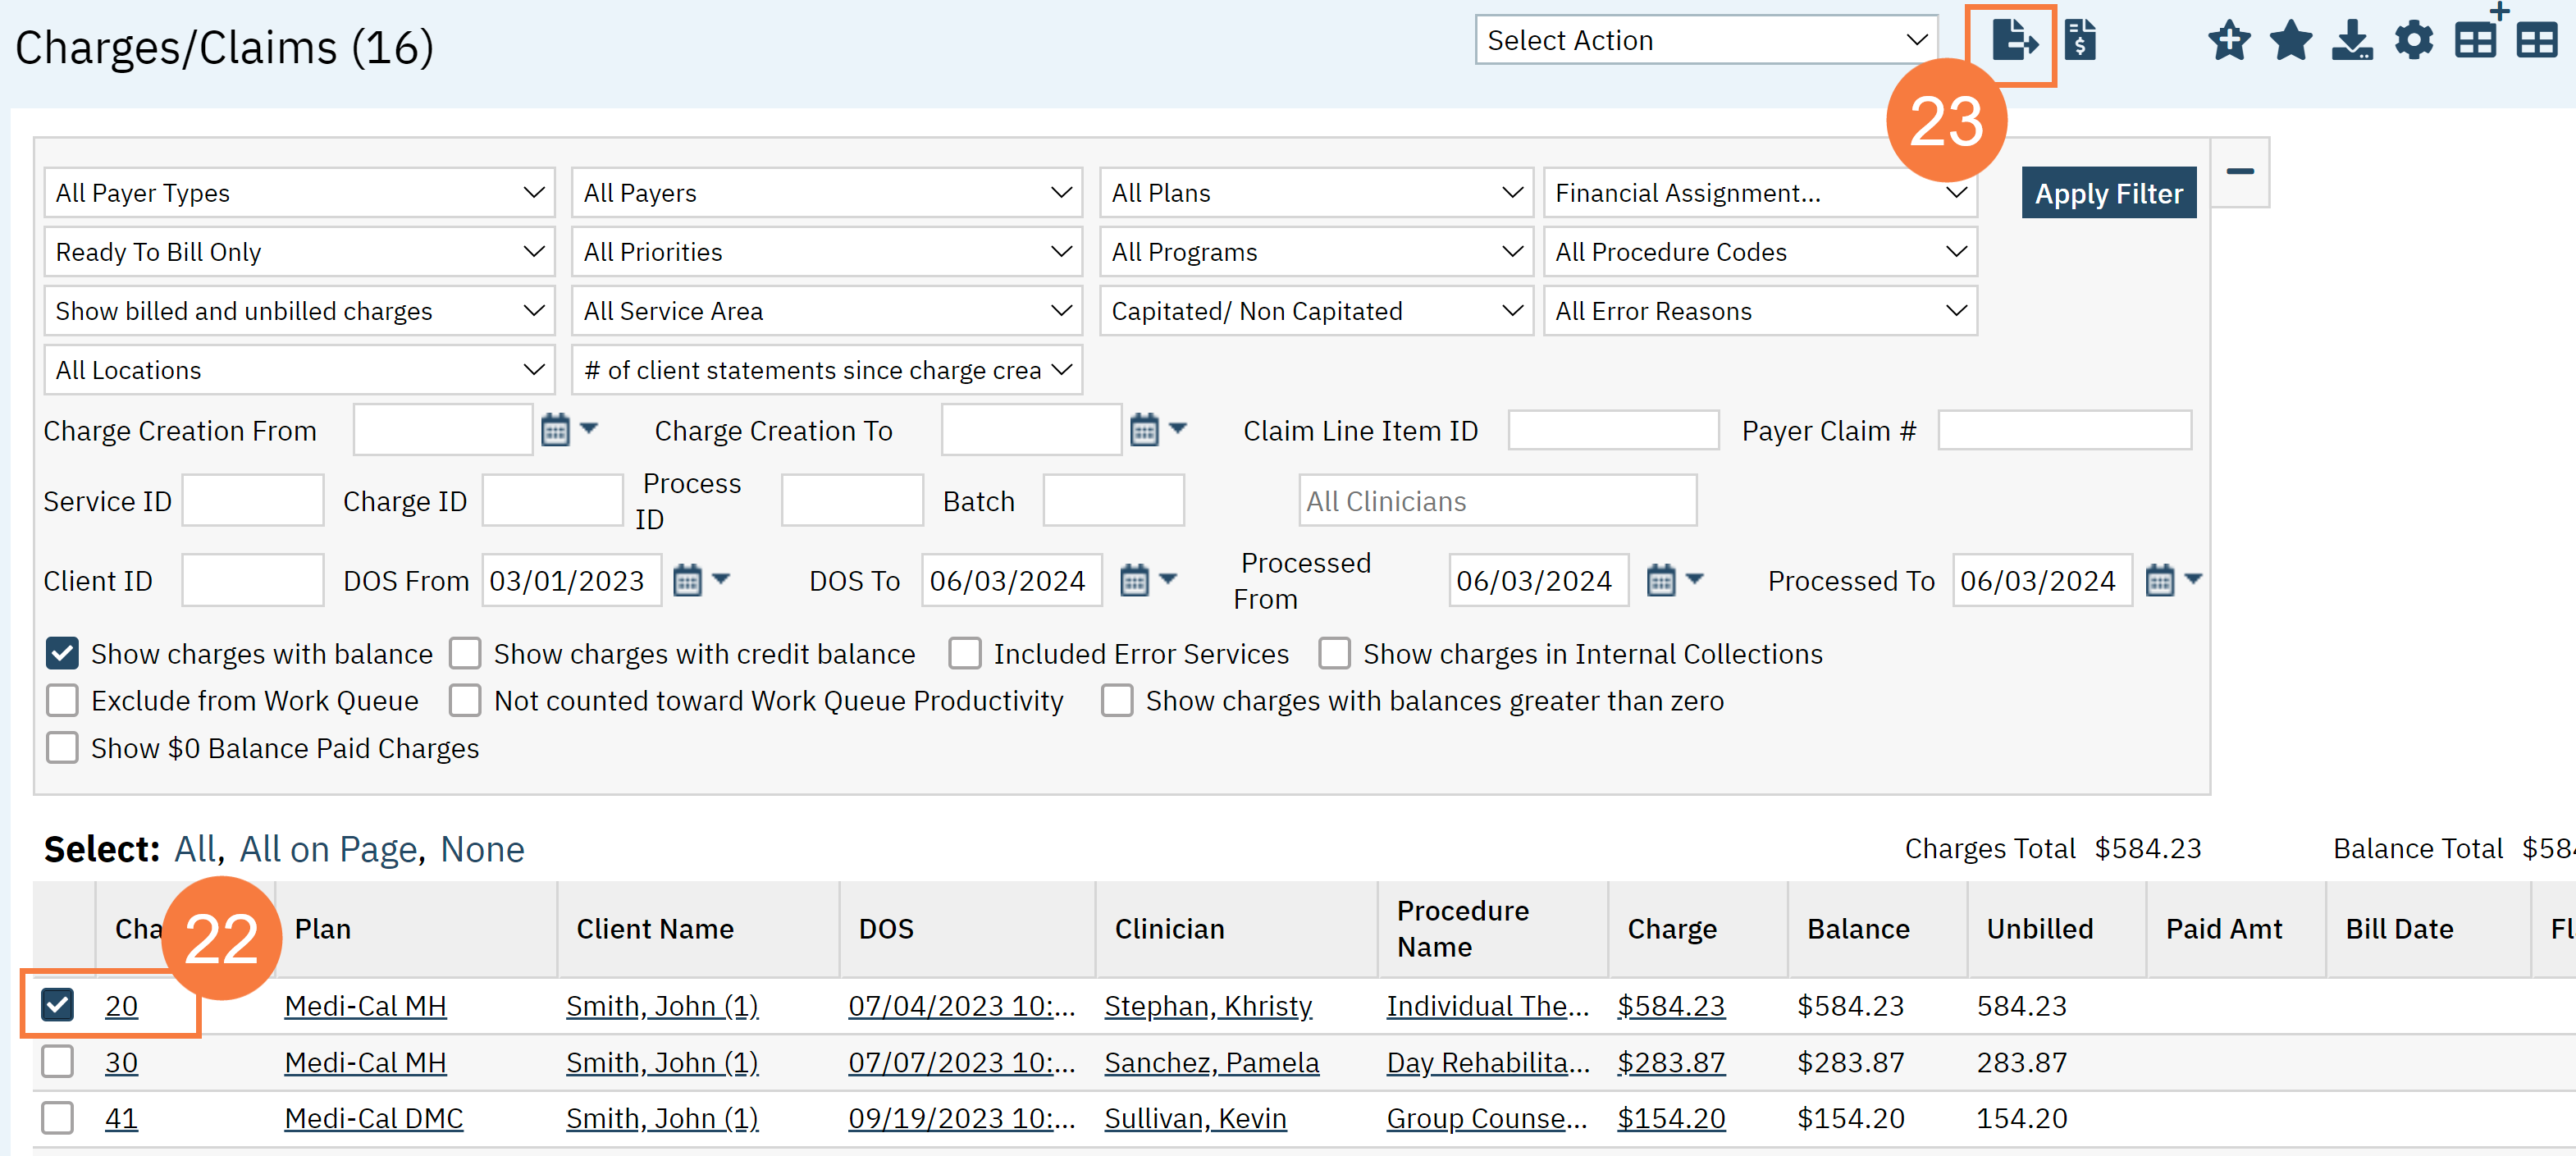
Filter by Show Flagged Charges.
Click Apply Filter.
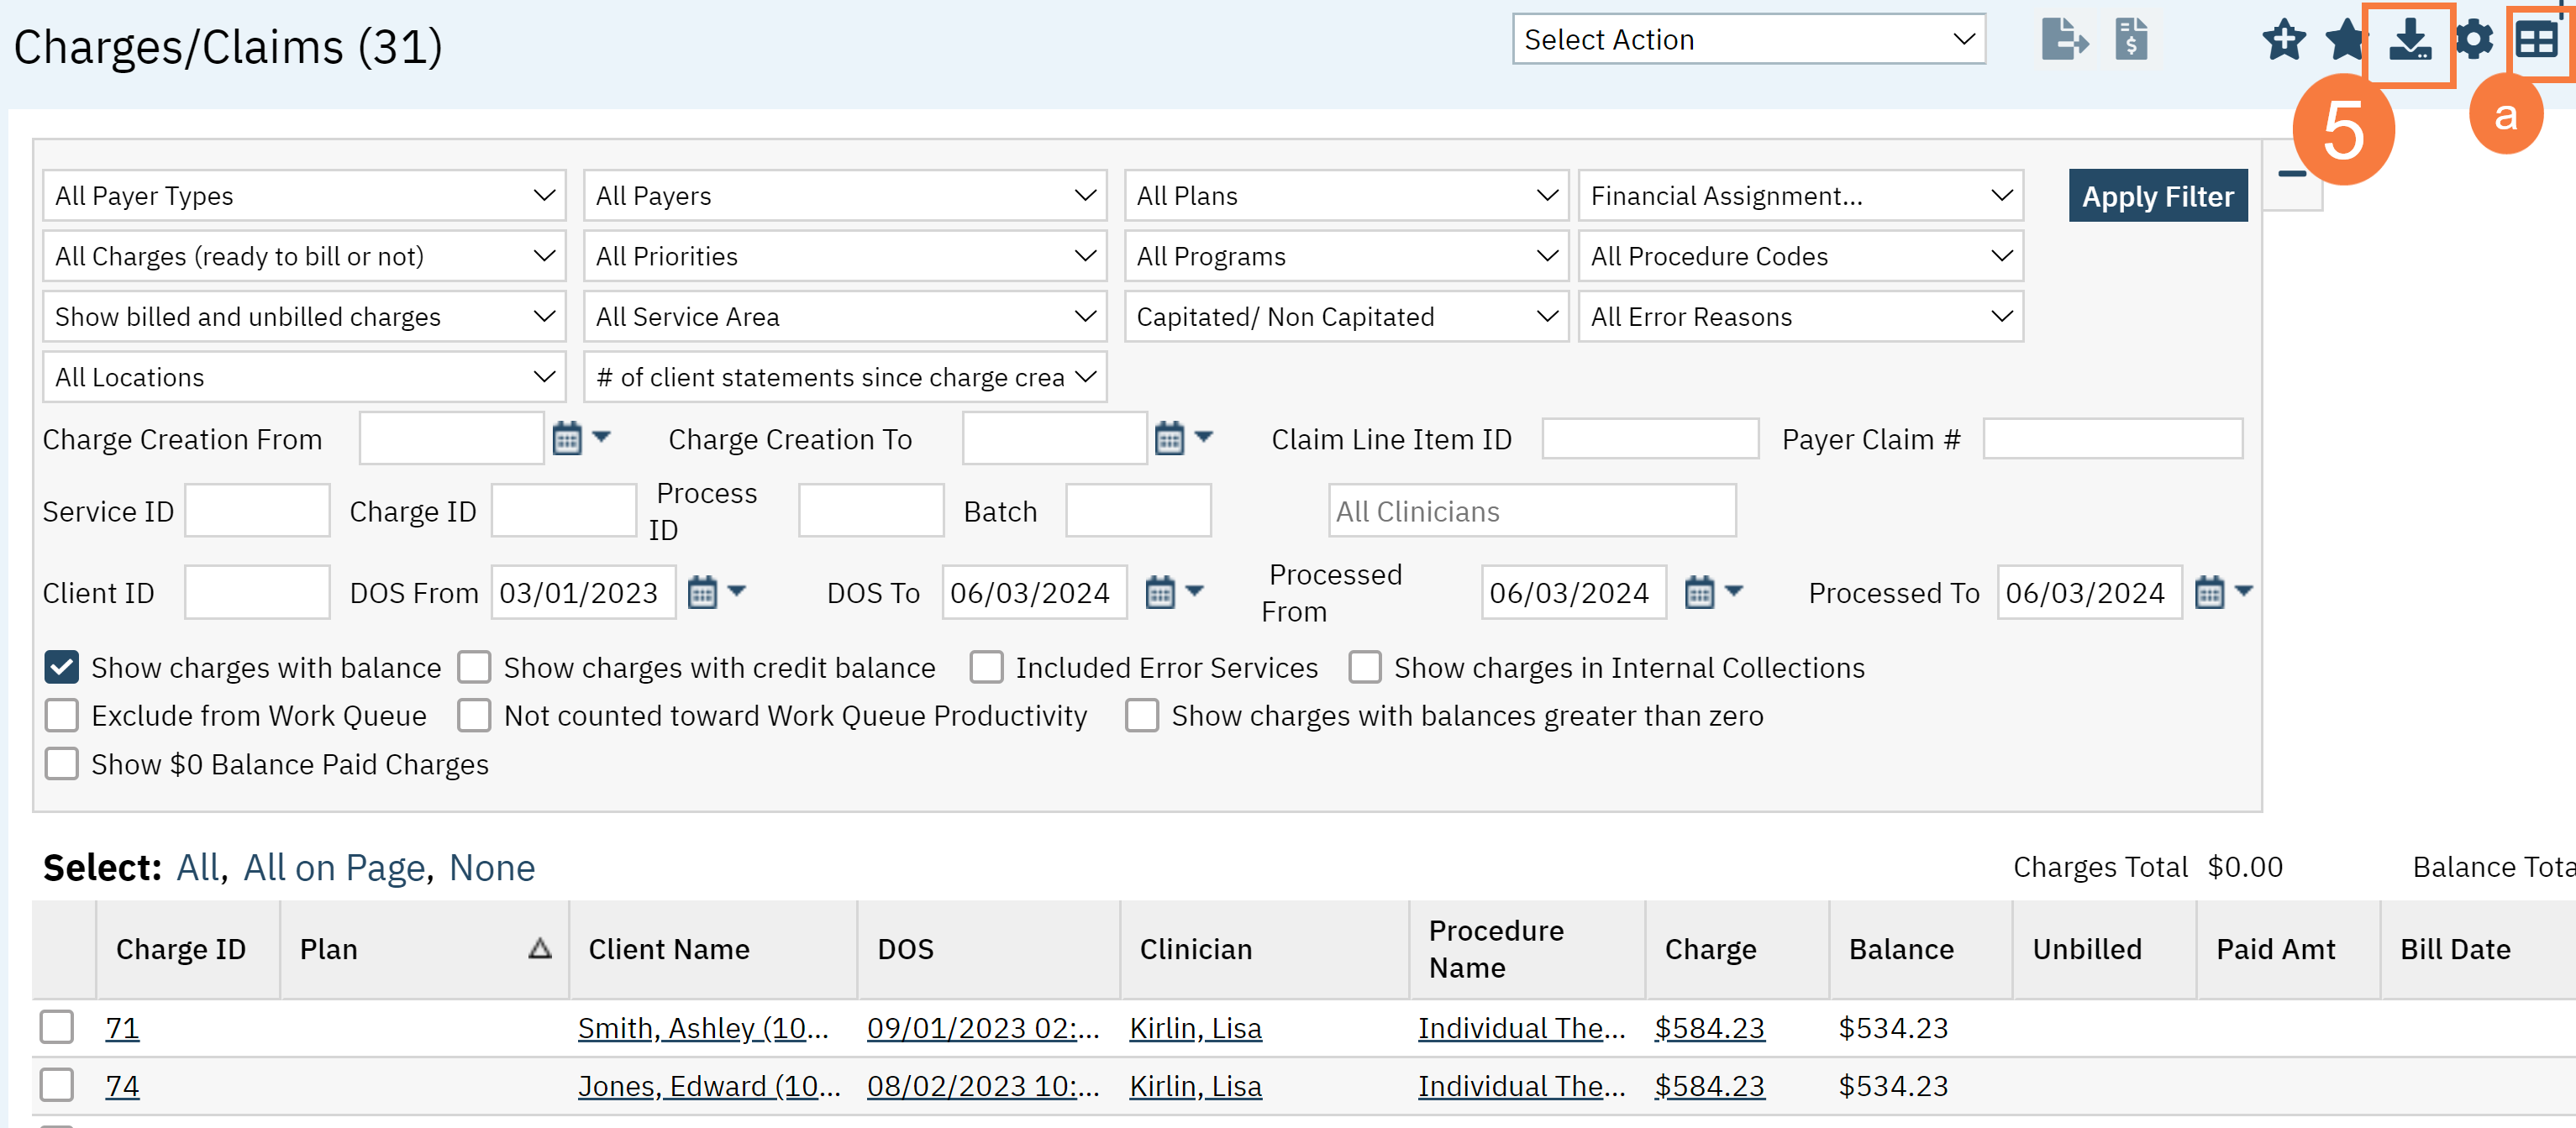
Once the results are displayed in the table below, click the Export button. This is where you will retrieve the PCCN which you will need in a later step.
Note: You will need to have a create a custom view which includes the PCCN number in the search results.)
Take note of the Claim ID Number you want to remove.
From the grid, in the Batch column, click the hyperlinked batch number.
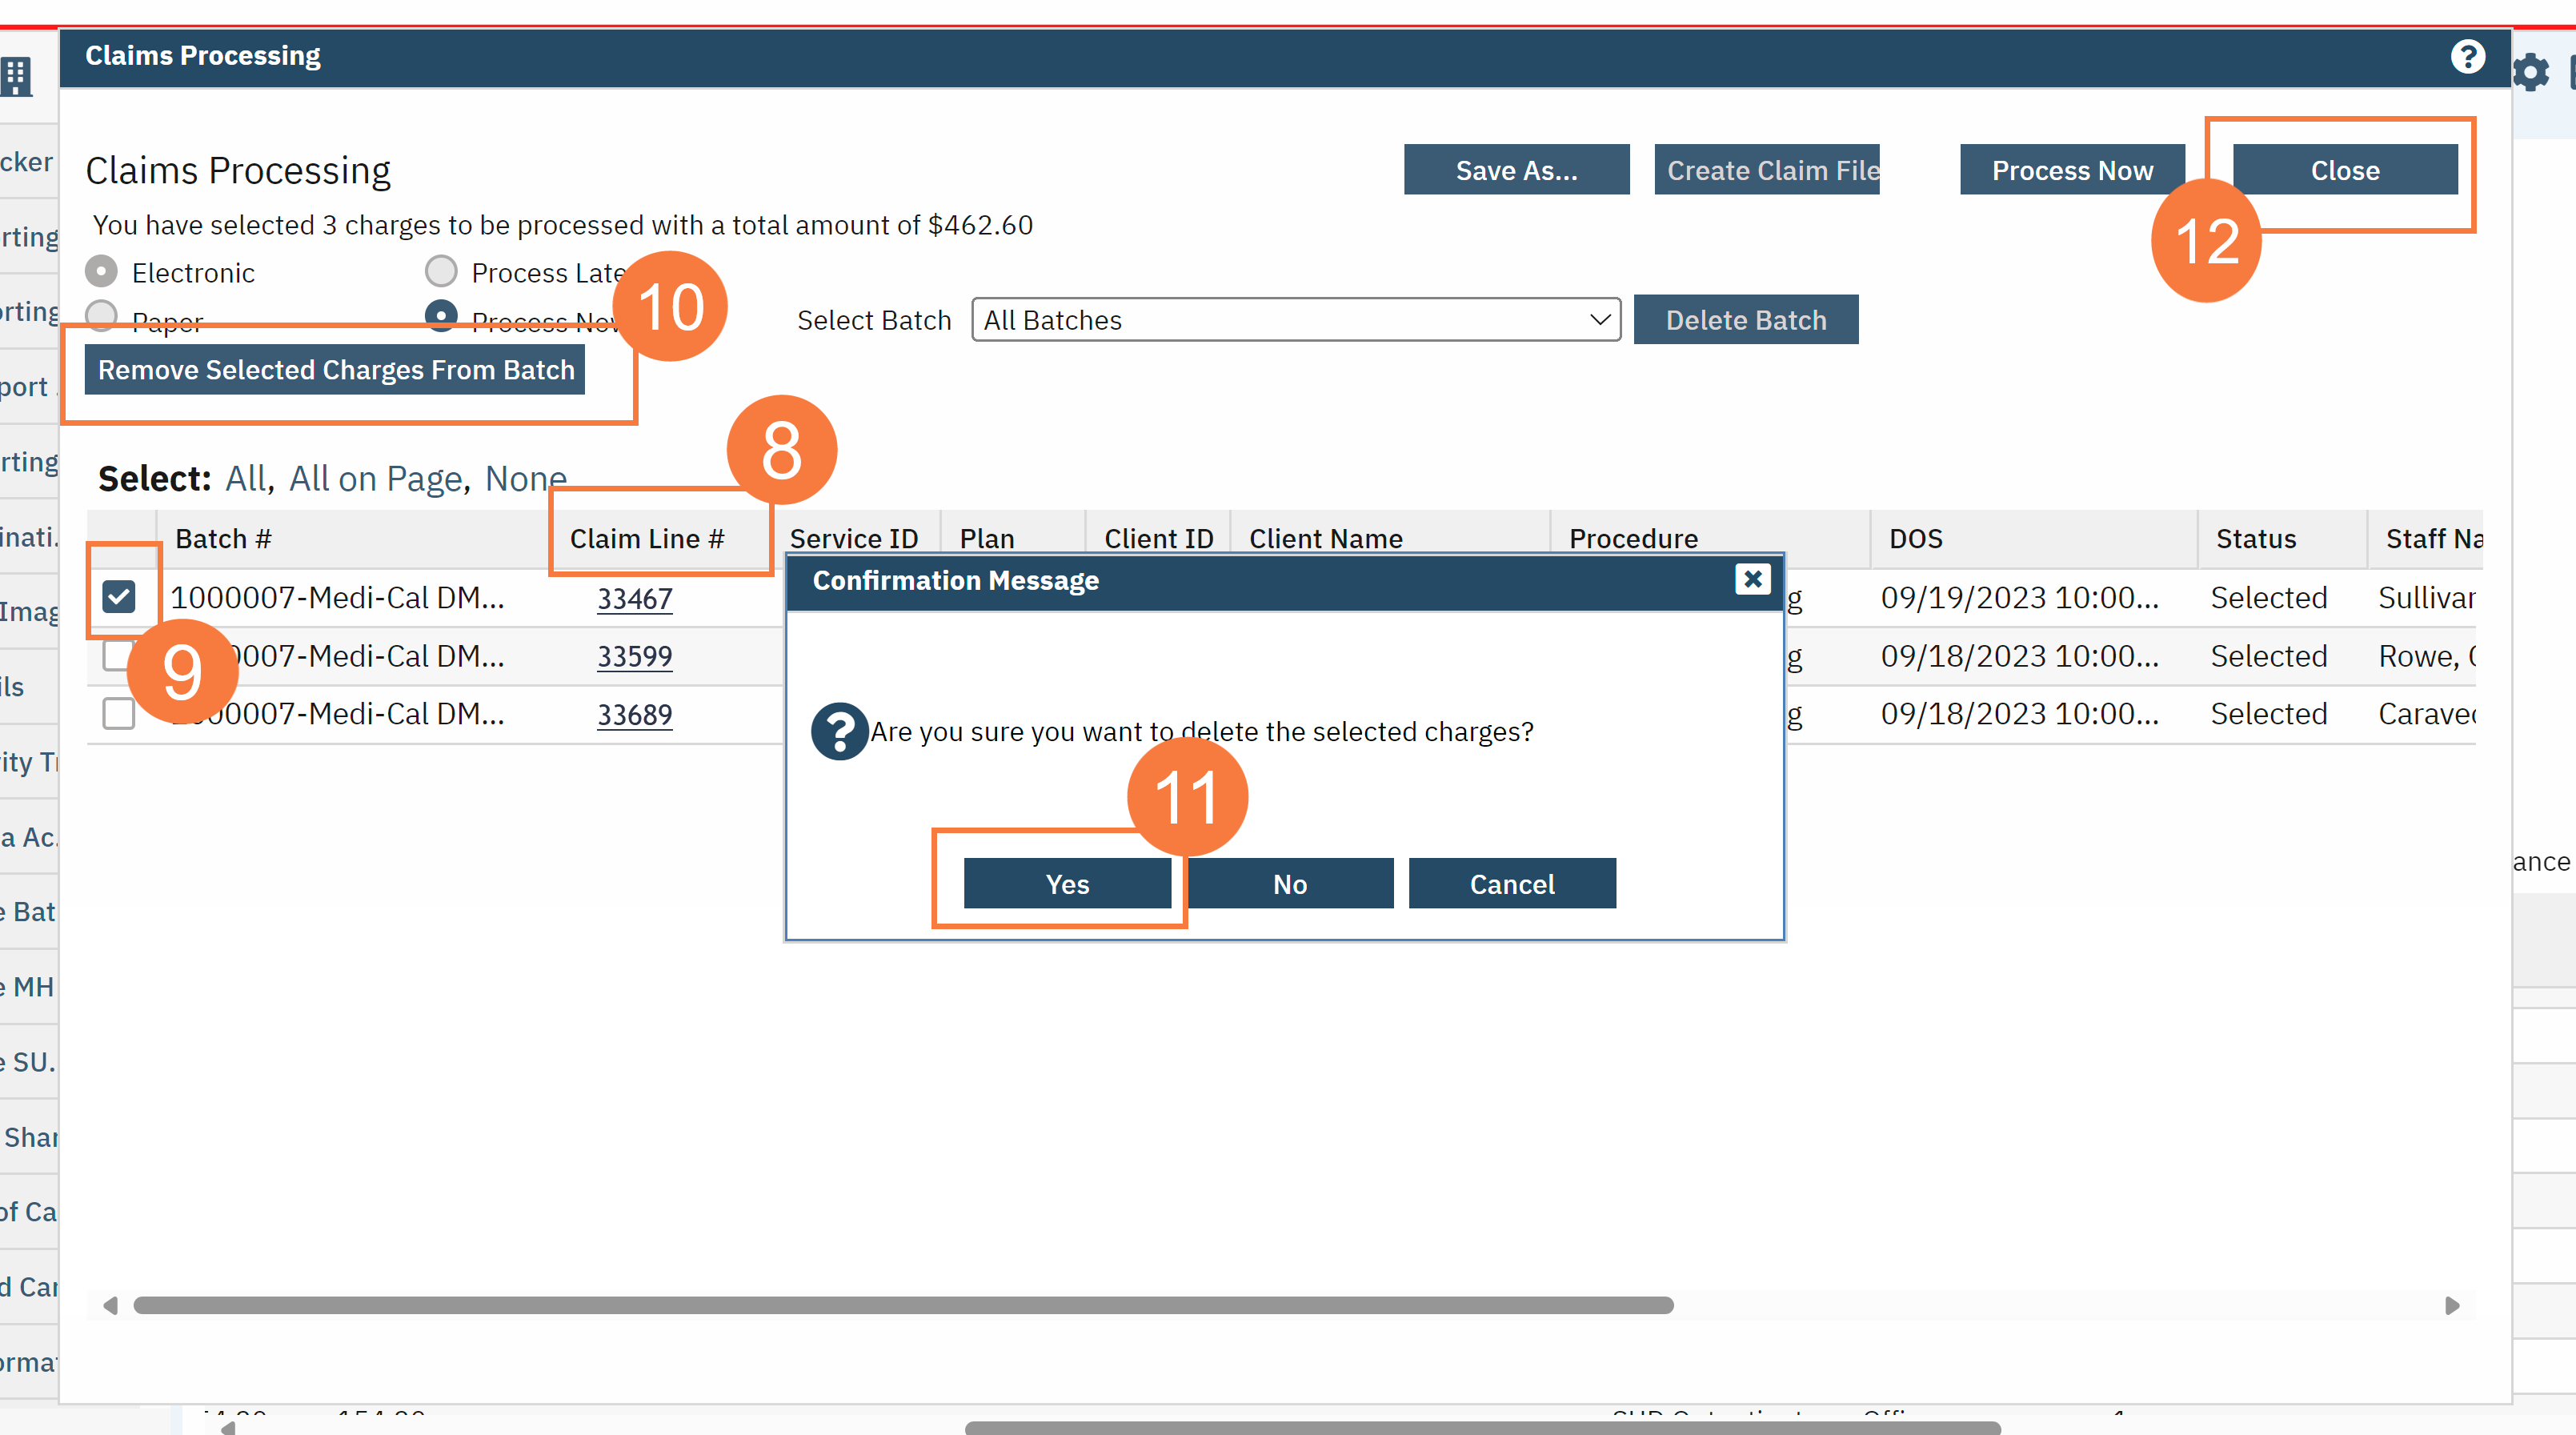
The Claims Processing window will open. Click the Claim Line # column header to sort in numerical order.
Click the checkbox for the service(s) you want to remove.
Click Remove Selected Charges From Batch.
In the confirmation message pop-up, click Yes. This will set the charge back to unbilled status.
Click Close.
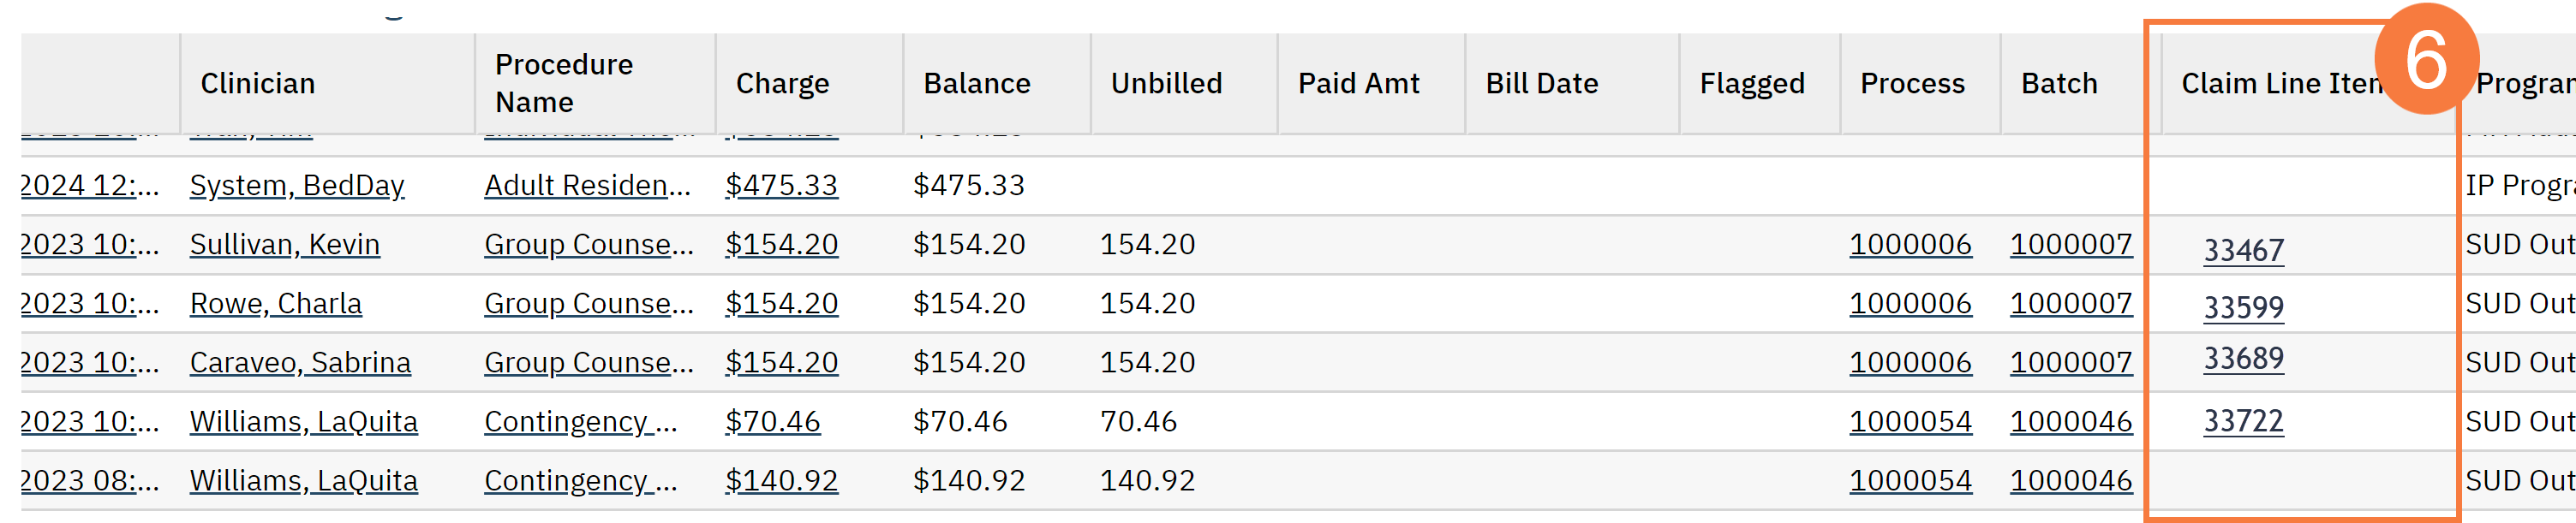
To begin working the claims that were removed from the batch, click the Claim Line Item ID column header to bring the service without a claim line ID number to the top of the grid.
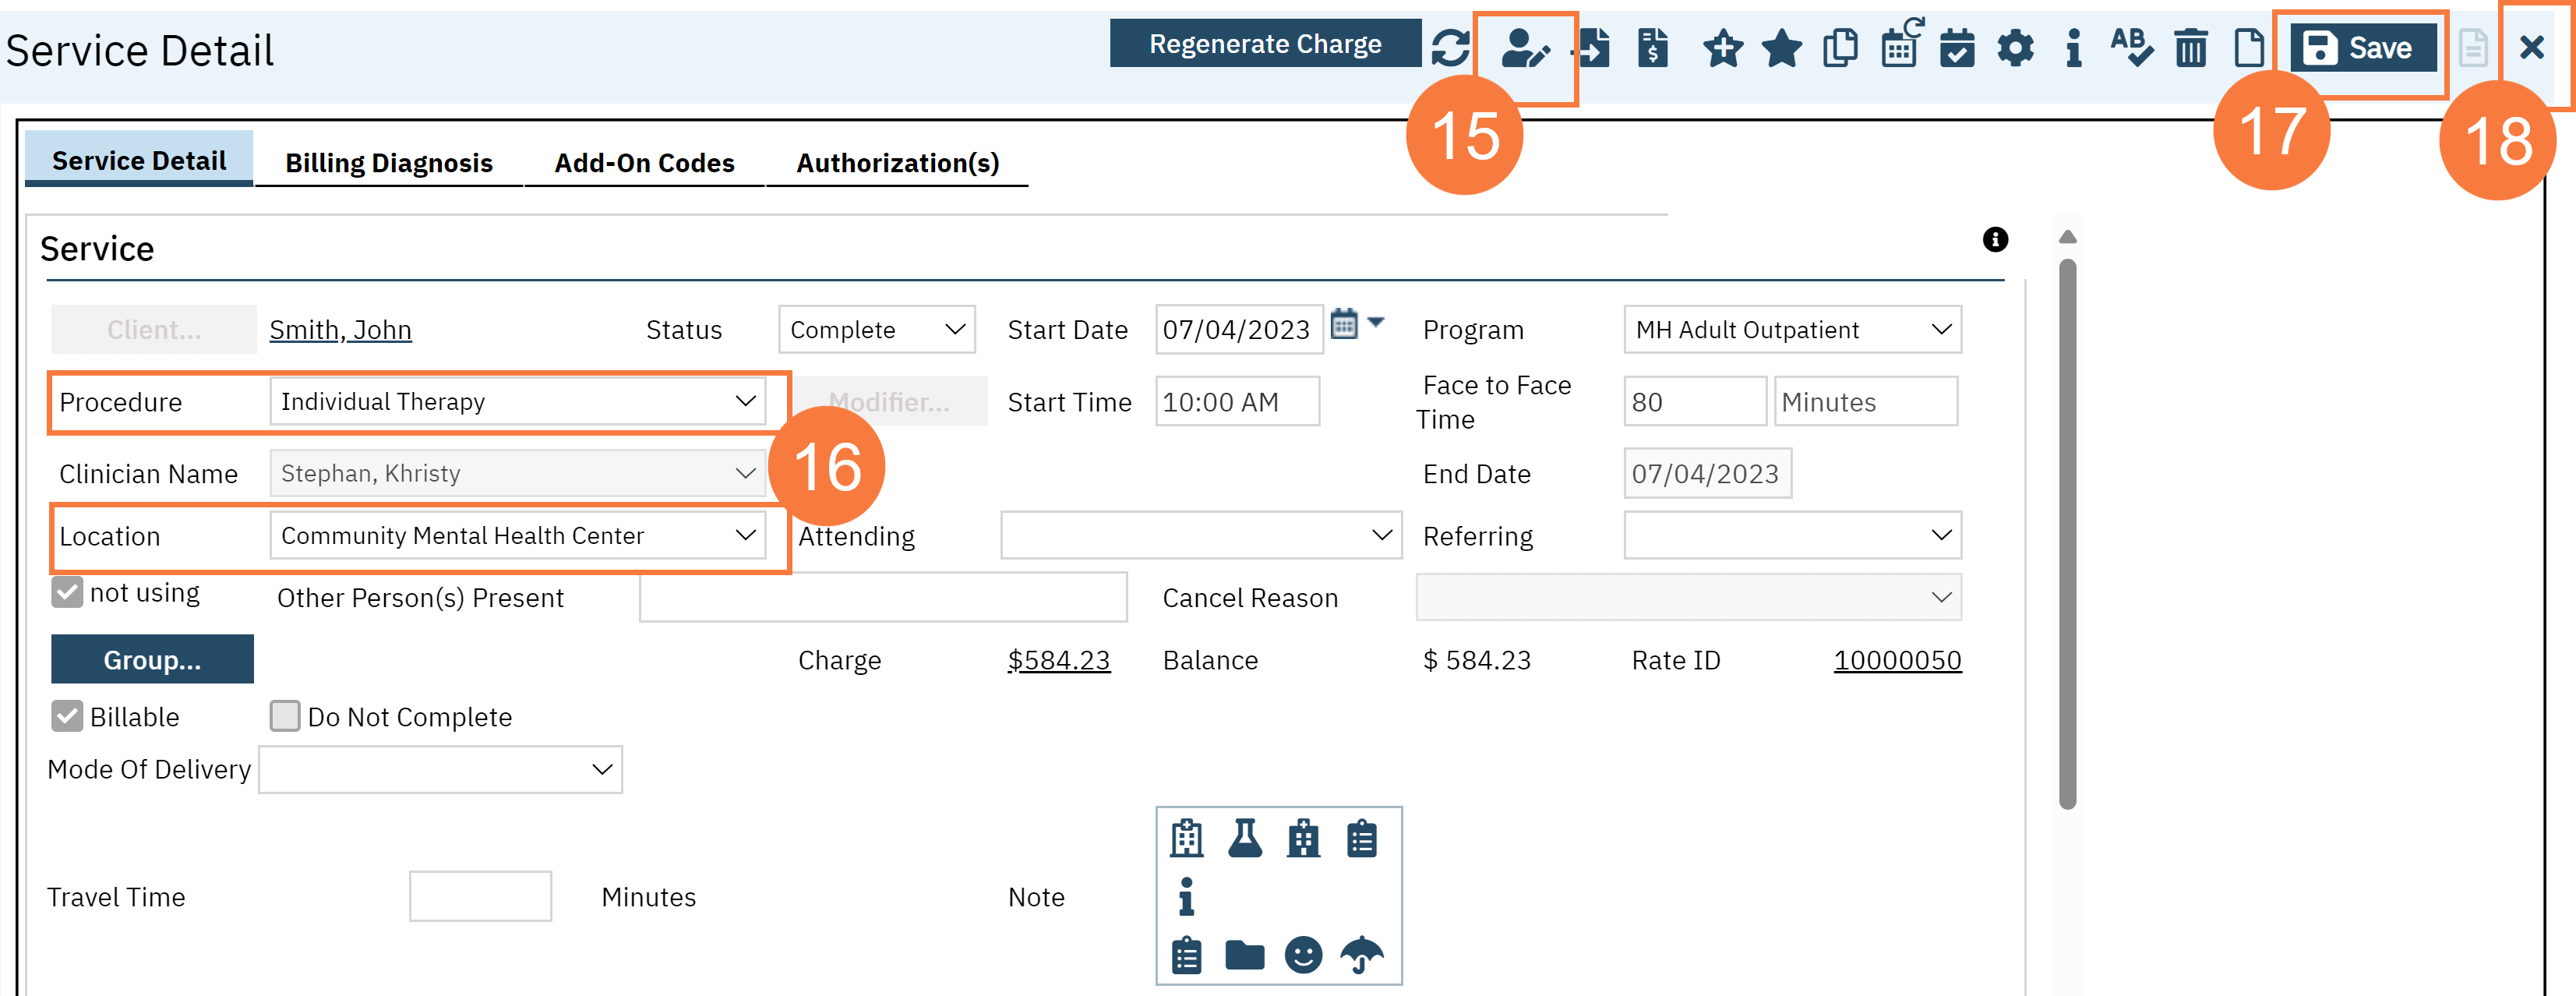
Click the DOS hyperlink for the claim you are working on.
The Service Detail window will open. Click the Override Service Detailicon.
Make your corrections according to your denial reason. (location or procedure code)
Click Save.
Click Close.
Back on the Charges/Claims screen. Click the checkbox for claim(s) you are working.
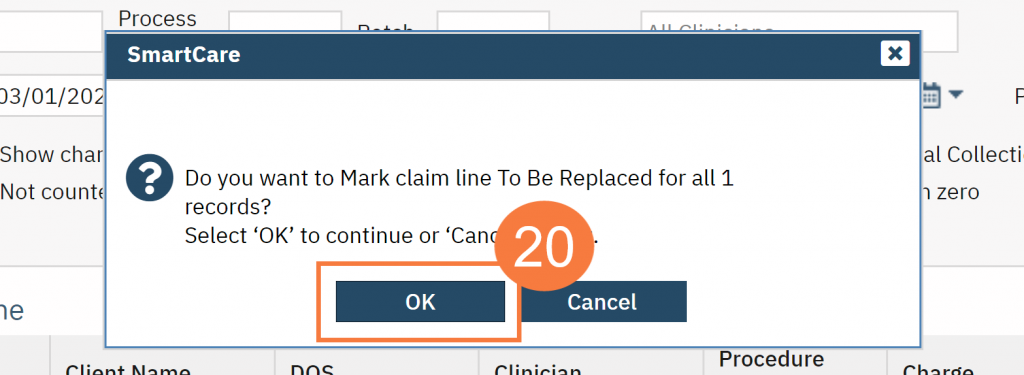
Click the Select Action drop-down menu and select Mark claim line to be replaced.
Click OK to confirm.
Click the Claim checkbox to create a batch with the edited claims.
Click the Electronic Claims icon.
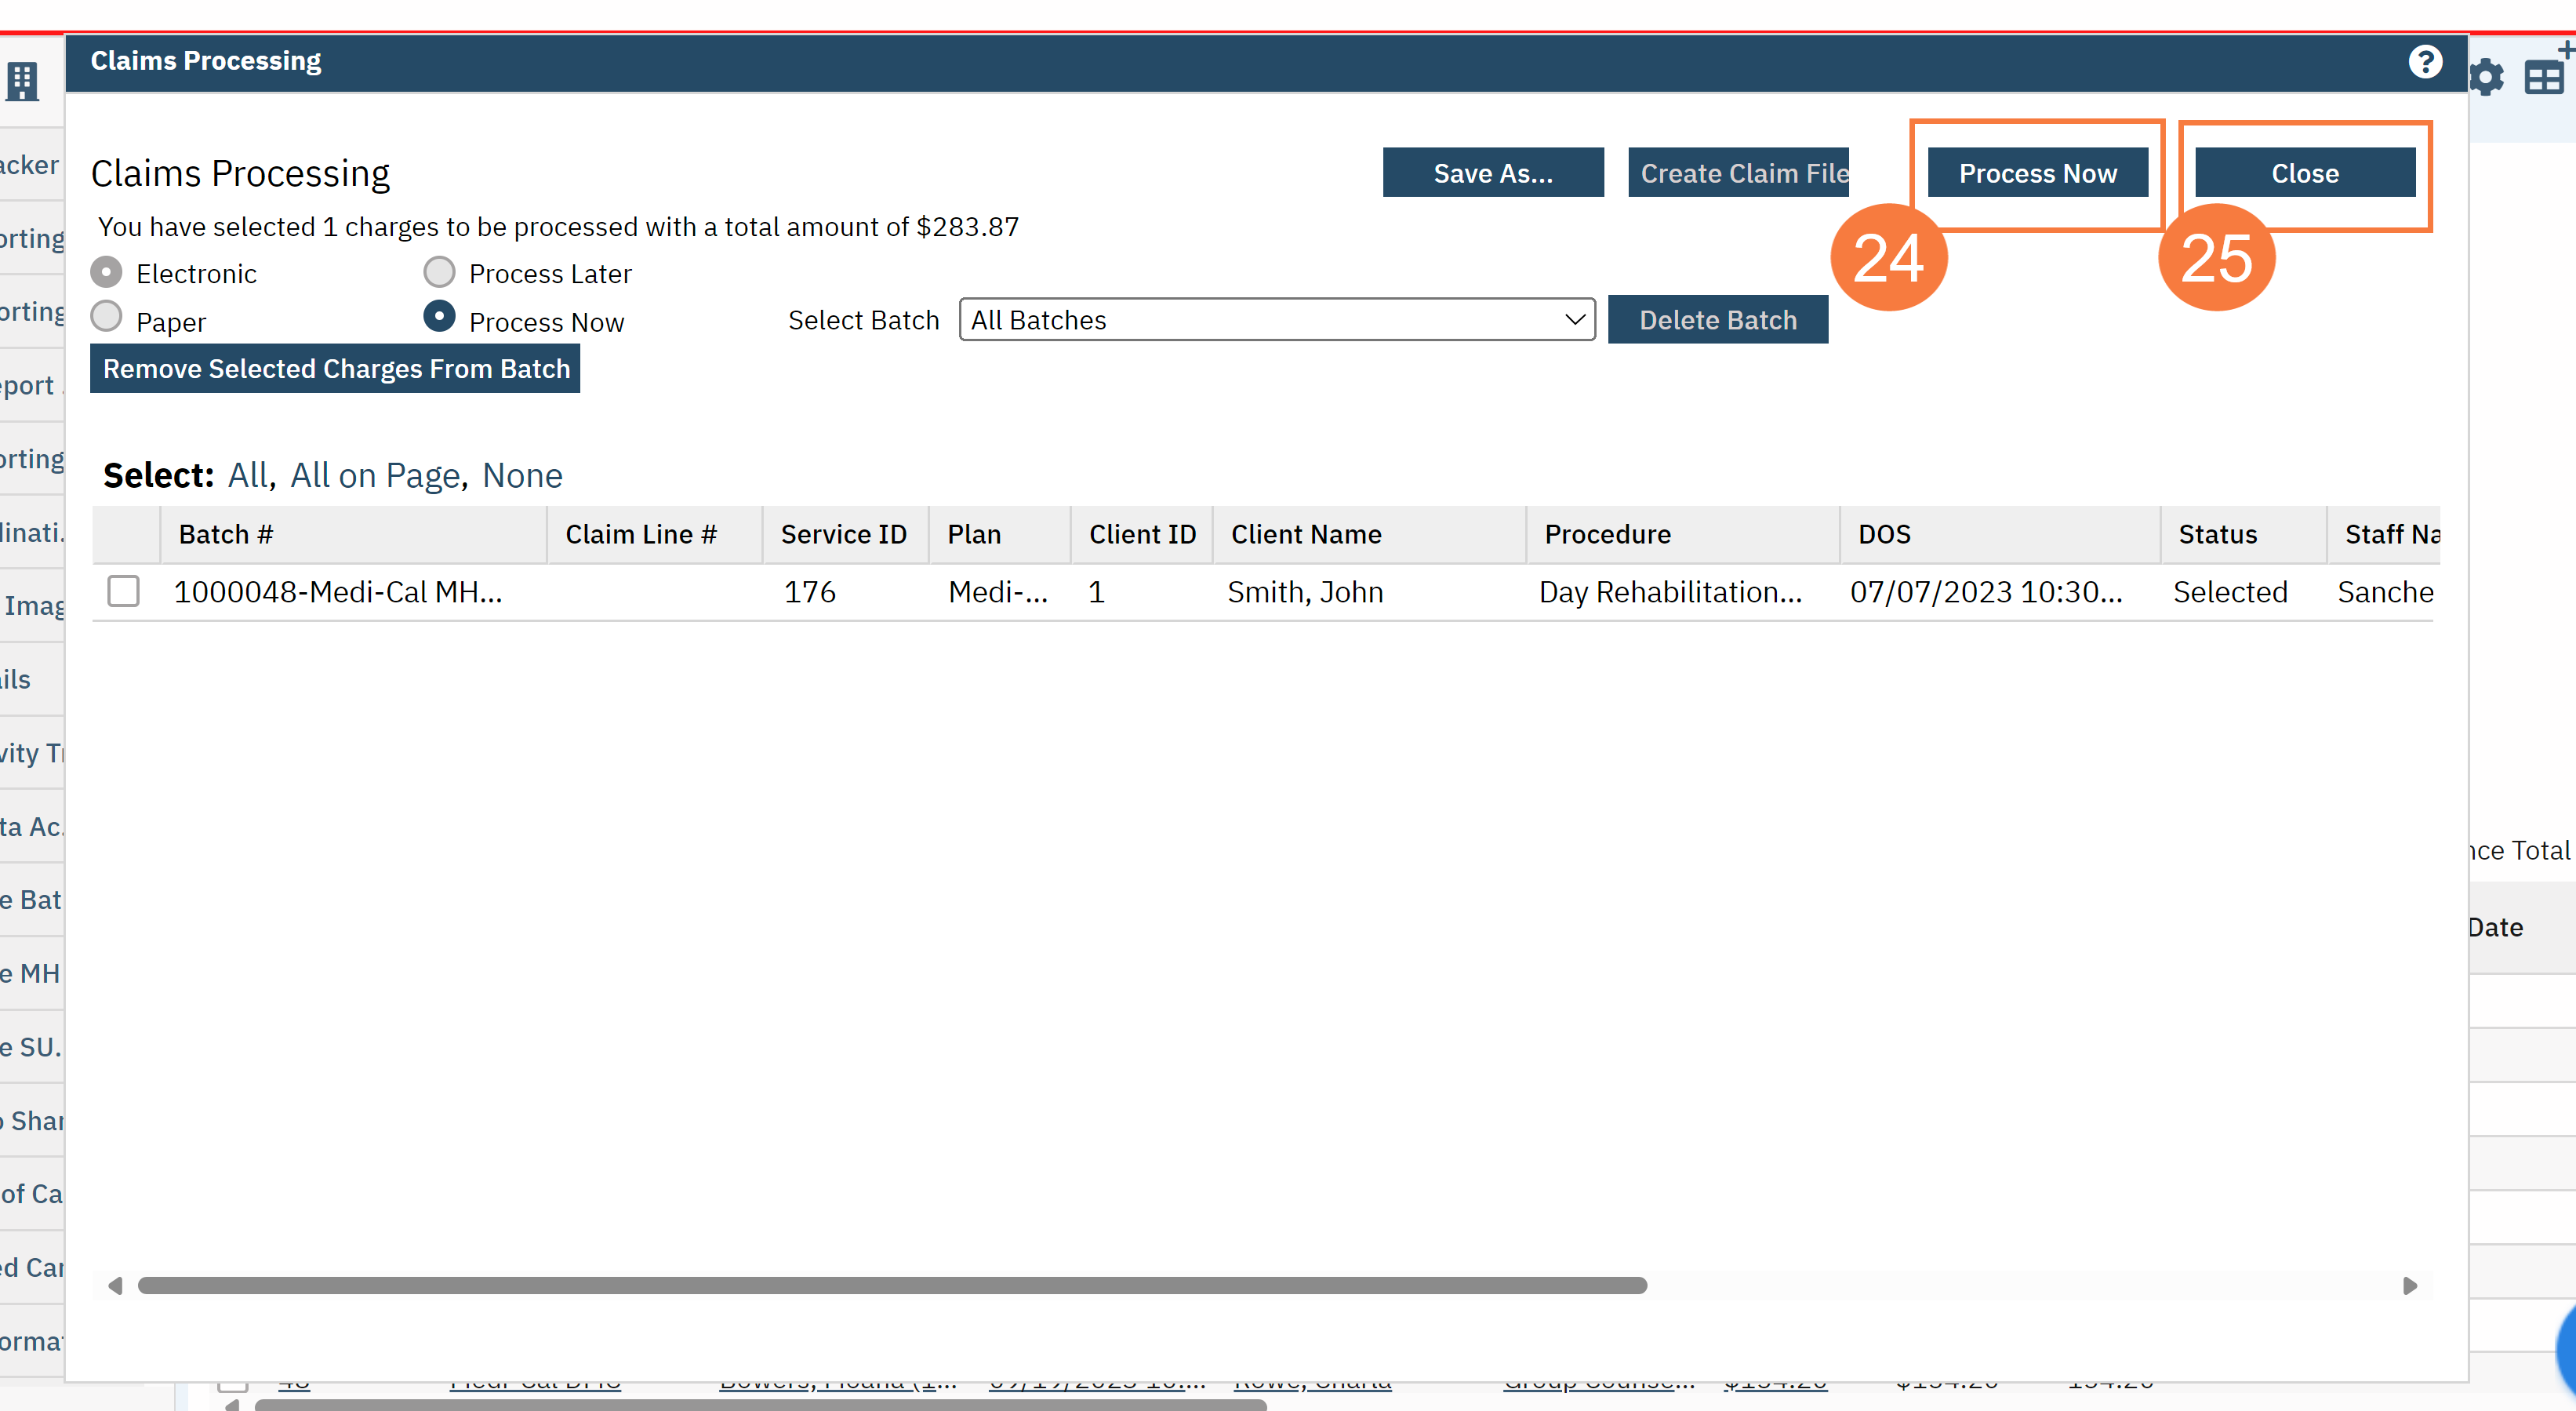
Click Process Now. Note your new batch ID number.
Click Close.
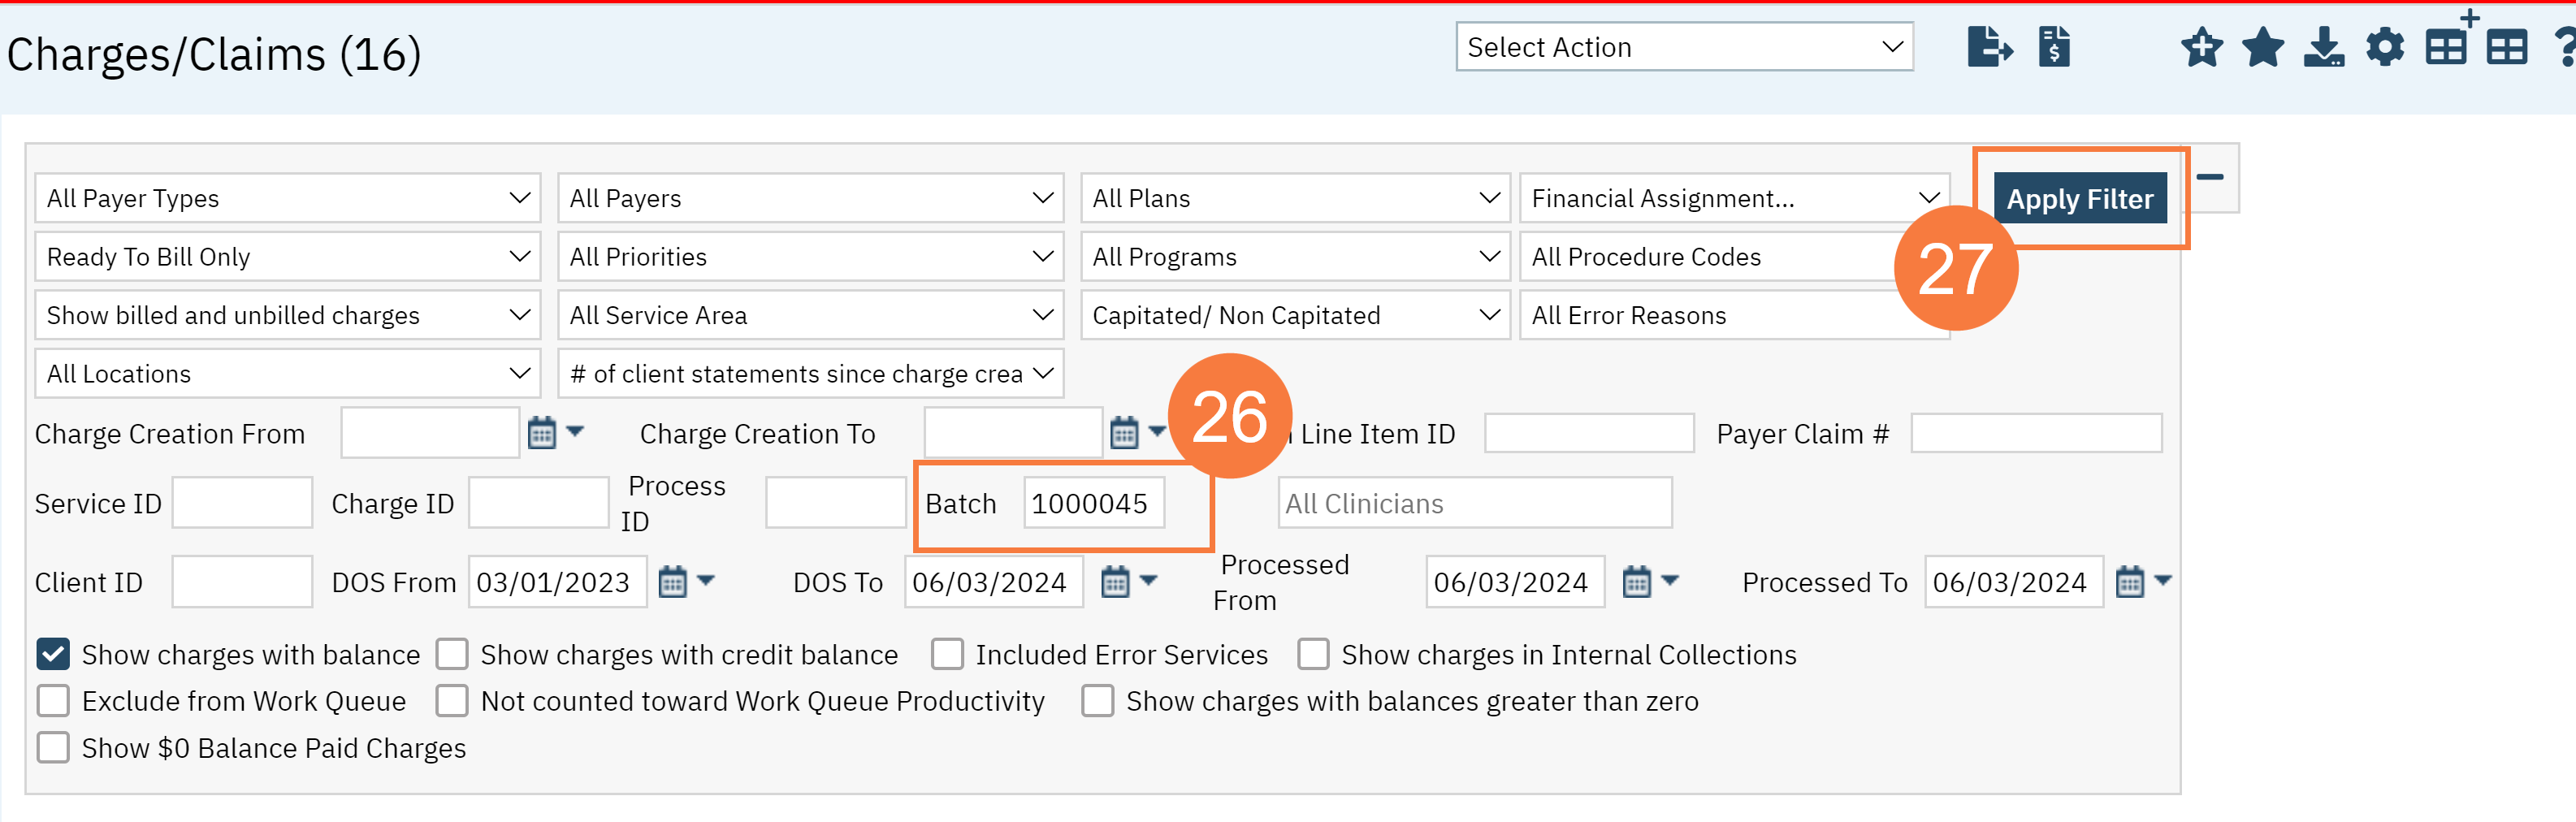
Add the batch ID number in the corresponding field in the filters above the grid.
Click Apply Filter.
Click the Claim Line Item ID hyperlink.
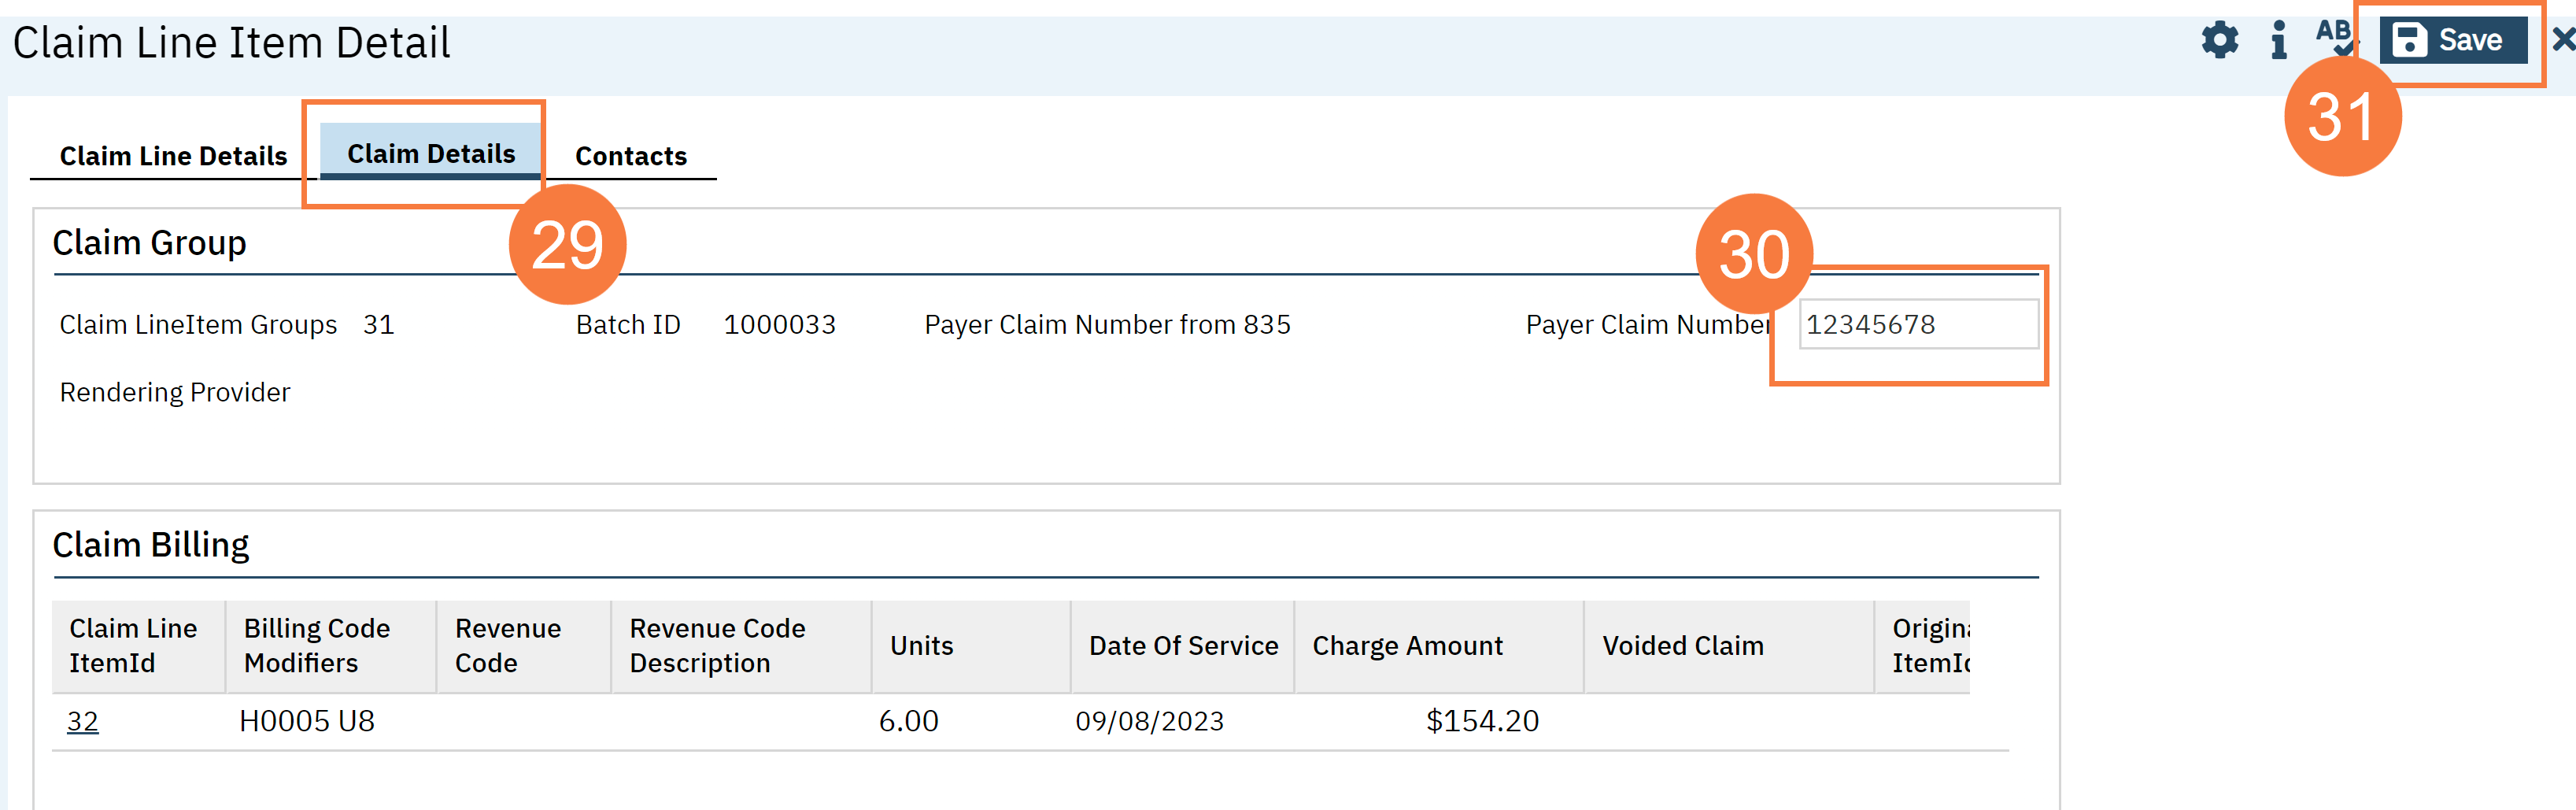
Click the Claim Details button.
Enter the PCCN you got from the spreadsheet in the Payer Claim Number field.
Click Save. Repeat 28-30 for any additional corrections.