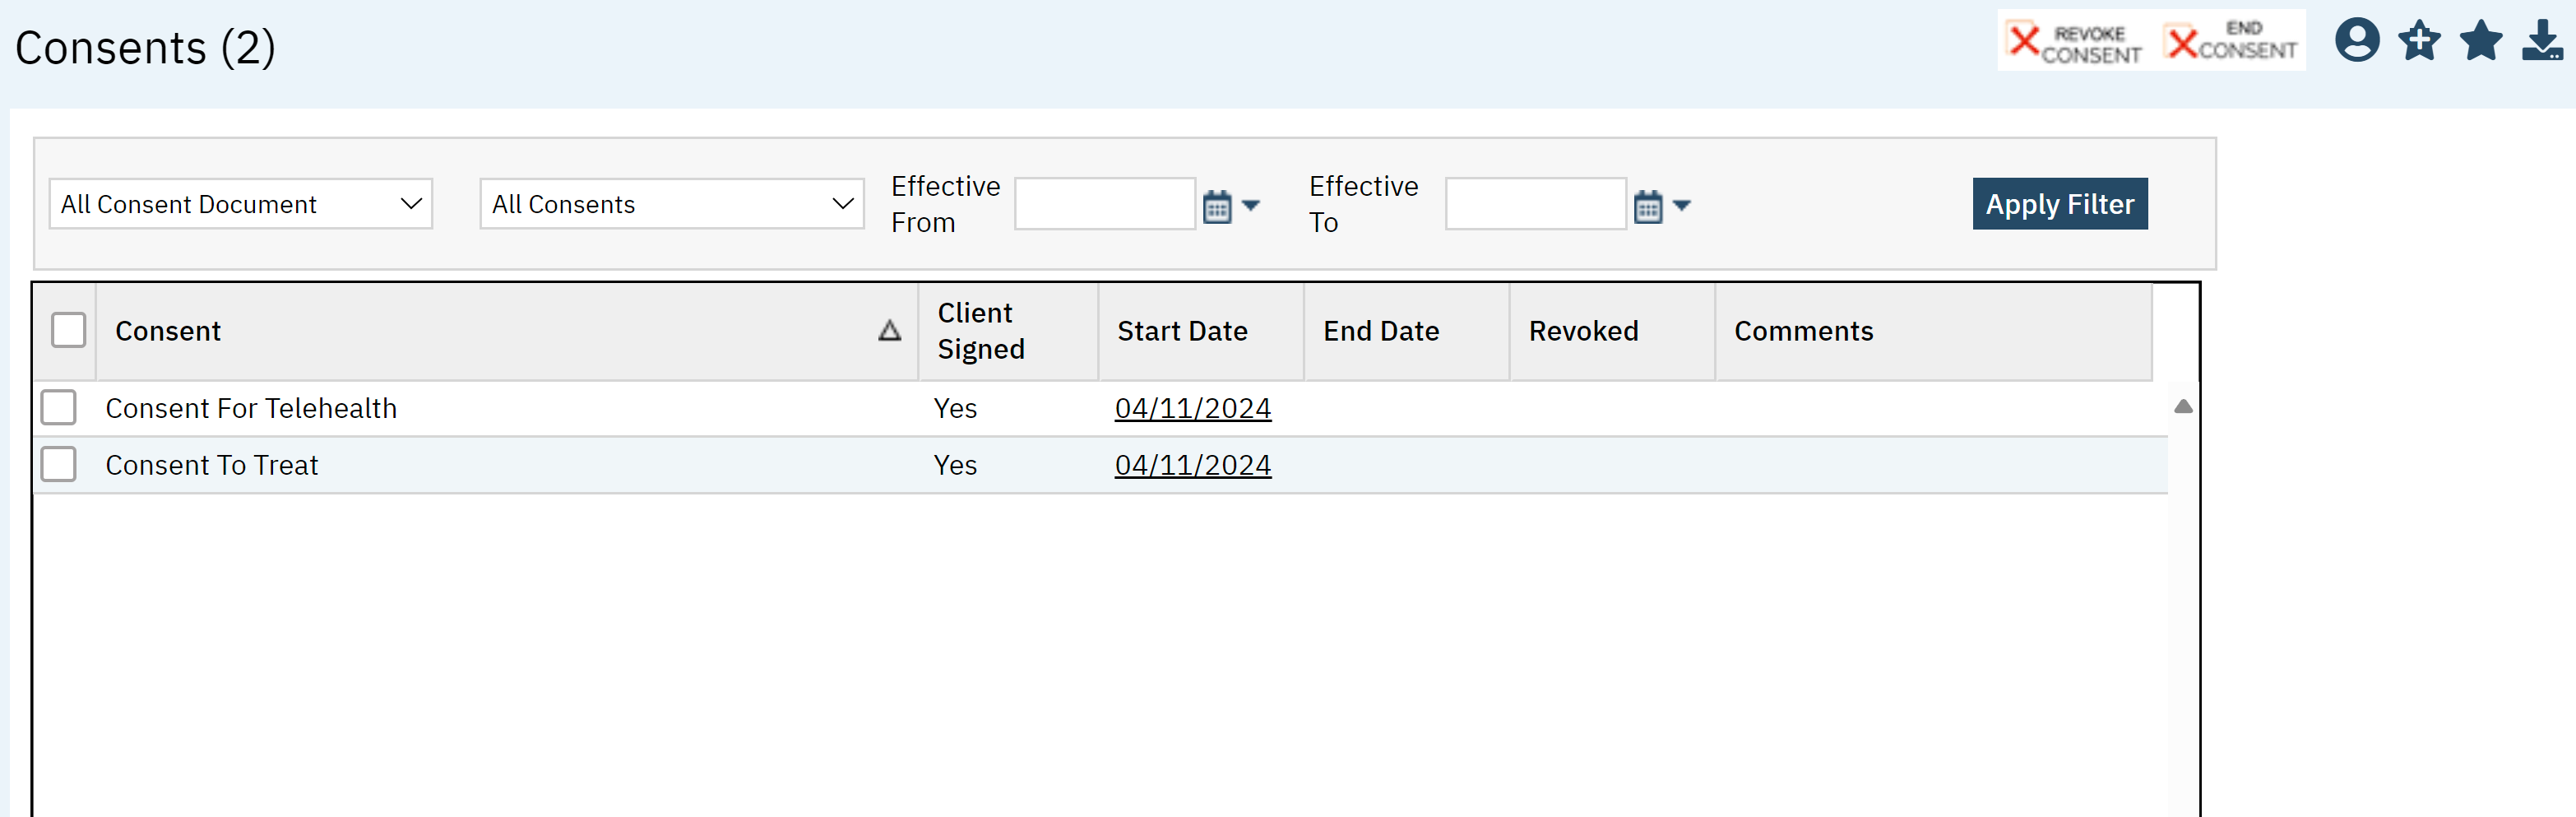
The Consents list page shows a list of all consents that have been generated for a client. The consent documents that show on this screen include those for treatment, texting, telehealth, emailing, sharing of data, and appointment reminders. This page shows the start and end dates of the consent, whether the consent has been signed by the client, if the consent has been revoked, and any comments put on the document. This list page is useful for all staff that work with clients including clinicians and case managers.
- Click on the Search icon.
- Type “Consents” in the search bar.
- Select “Consents (Client)” from the search results.
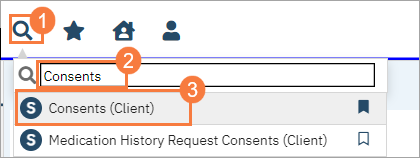
- This will bring up the Consents list page.
Filters:
The following filters are available:
- All Consent Documents: Consent to Treat, Consent for Telehealth, Consent for Text Communication, Consent for Email Communication, Consent to Share Date, and Opt-In Consent for Appointment Reminders
- All Consents: This will allow you to filter based on the status of the consent such as open, revoked, or ended.
- Effective From and To Dates: Choose a data range to show consents.
- Click Apply Filter once you have made the appropriate selections.

Columns
The following columns are available:
- Check Box (Used to revoke or end consent)
- Consent: Name of the consent
- Client Signed: Let you see if the client has signed the consent or not.
- Start Date: The start date of the consent. This hyperlink will take you to the consent.
- End Date: If there is an end date it will be listed here.
- Revoked: If the client has revoked the consent you can see it here.
- Comments: any comments will appear here.

Export Page Columns
Consent
Client Signed
StartDate
End Date
Revoked
Comments
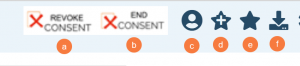
Upper Right-Hand Icons
- Revoke Consent: To revoke a consent, click the checkbox below and click the Revoke Consent button.
- End Consent: To end consent, click the checkbox below and click the End Consent button.
- SmartView: This icon is an overview of the patient’s medical profile. You can quickly view the patients’ vitals, medications, documents that need to be done, and much more.
- New Favorites Icon: Clicking on the “new favorites” icon will allow you to add this screen to your favorites for quick access.
- Favorites Icon: If you have this listed as your favorite already, when you hover over this icon, it will tell you the favorite name.
- Export Icon: This icon is available to admins. You will be able to export the data from this screen into an excel spreadsheet.