The Charges/Claims list page is primarily used to process billing claims which include original, rebill, replacement, and void claim types. One or more charge records can be selected and processed to generate paper claims or electronic claims. 837 Professional, 837 Institutional, CMS 1500. The Charges/Claims list page is also used for account research and internal/external collection activities.
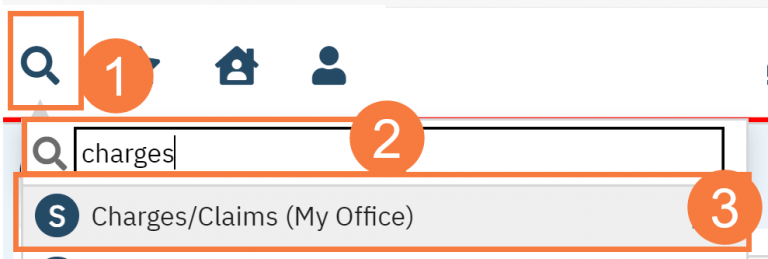
- Click on the Search icon.
- Type “Charges” in the search bar.
- Select “Charges/Claims (My Office)” from the search results.
- This will bring up the Charges/Claims (My Office) list page.
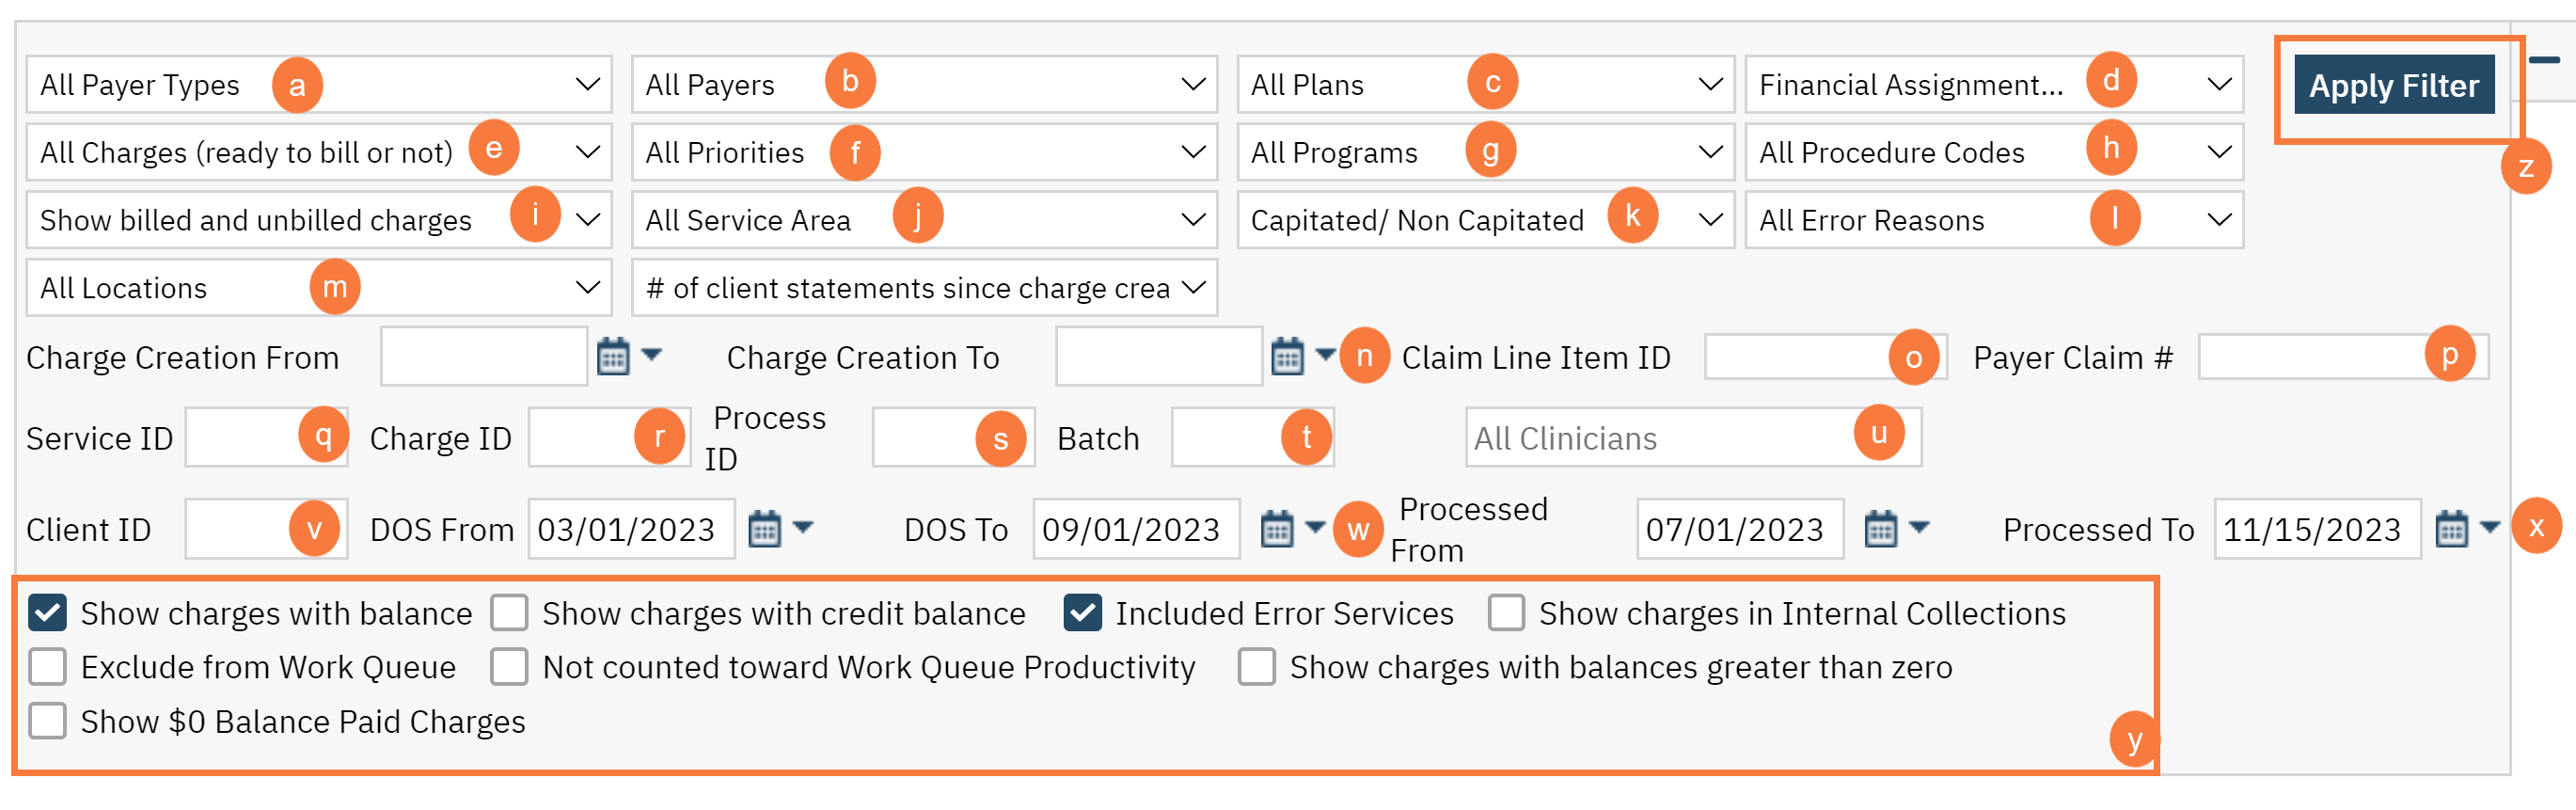
Filters:
The following filters can be used to narrow down the subset below:
- Payer Types: Use this to filter to filter by the type of payer. Such as 3rd party plans, Medi-Cal, Self Pay, etc.
- Payers: Use this to filter by payer type similar to the above option.
- Plans: Use this to filter by the plan, such as Blue Cross, Medi-Cal DMC, etc.
- Finacial Assignment: Use this option to filter by the financial assignments you belong to.
- Ready to Bill Status: This filter allows you to narrow down your charges based on if they are ready to bill or not. You can also leave it as all charges to not use this filter.
- Priorities: Use this to filter by Priority 1 or Grater then Priority 1. You can also leave it as ALL to not use this filter.
- Programs: Use this filter to see a list of charges based on the client’s program.
- Procedure Codes: Use this filter to see a list of charges based on a specific procedure codes.
- Billed or Unbilled: Use this filter to show charges based on if they are billed or unbilled. You can leave is as ALL to not use this filter.
- Service Area: Use this to filter based on DMC or MH
- Capitation: Use this to filter based on if the rates are capitated or not.
- Error: Use this to filter based on the Error Code Reason
- Location: Use locations to filter charges based on the location services were rendered.
- Charge Creation From & To Date Range: Use this to filter by the claim creation date or via a range of dates.
- Claim Line Item ID: Enter the number in this field to filter by the Claim Line Item Id number.
- Payer Claim #: Enter the Claim # here to view by payer claim number.
- Service ID: Enter the Service ID to view only charges with that service ID number.
- Charge ID: Enter the Charge ID to view charges associated with that Charge ID number.
- Process ID: Enter the process ID number to view charges with that process ID number.
- Batch: Enter the batch number to view all charges associated with that batch number.
- Clinician: Enter the name of the clinician to filter by clinician.
- Client ID: Enter the client ID number to filter charges by a specific client.
- DOS From and To: Use this to filter by Date of Service on a specific date or in a date range.
- Processed From and To: Use this to filter by the date the charges where processed or in a date range.
- Checkboxes: Using these checkboxes will allow you to filter further through the various checkboxes.
- Click Apply filter once the appropriate filters have been selected.
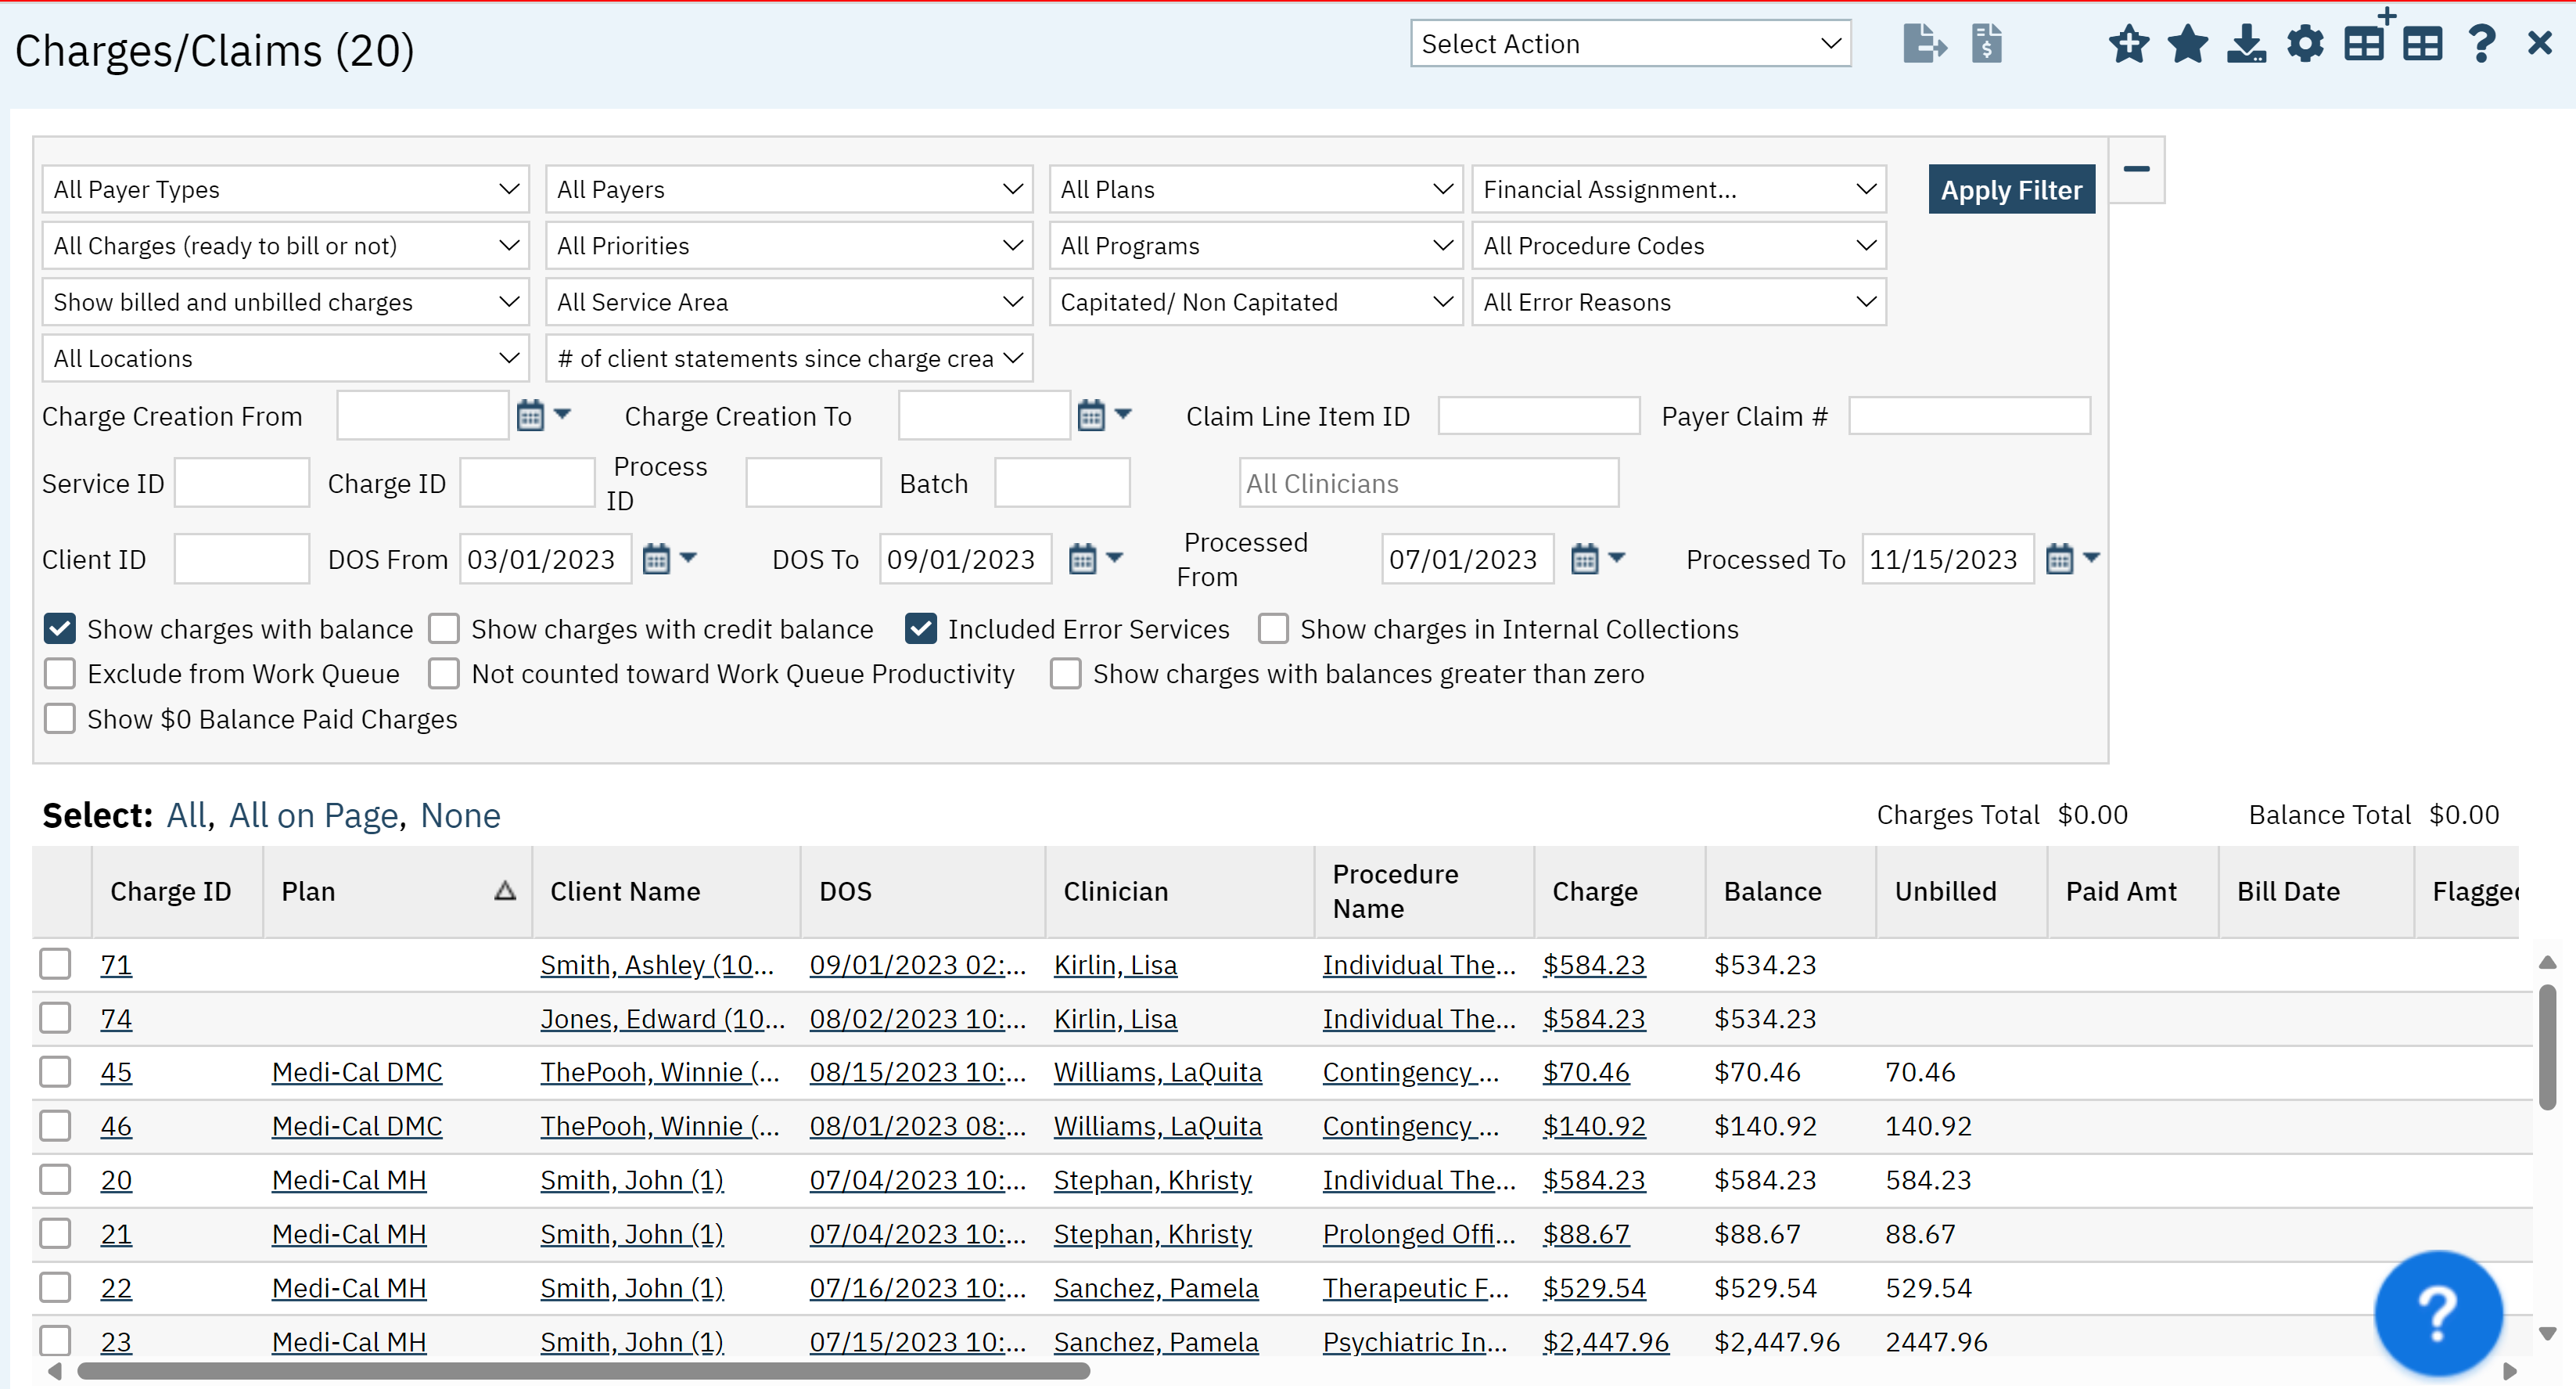
Columns
The following Columns will display below:
- Charge ID: This hyperlink will take you to the Charge Details screen.
- Plan: This hyperlink will take you to the Plan Details screen.
- Client Name: This hyperlink will take you to the Client Account screen.
- DOS: This hyperlink will take you to the Service Detail screen.
- Clinician: This hyperlink will take you to the Staff Details screen.
- Procedure Name: This hyperlink will take you to the Procedure Code Detail screen.
- Charge: This hyperlink will take you to the Ledger Entries screen.
- Balance: This shows the balance associated with the charge.
- Unbilled: Shows the unbilled amount associated with the charge.
- Paid Amt: Shows amount paid by payer.
- Bill Date: Show the date the charge was billed.
- Flagged: Shows if the charge is flagged.
- Process: This hyperlink will take you to the claims process window. (not pictured)
- Batch: This hyperlink will take you to the claims process window. (not picture)
- Claim Line-Item ID: this hyperlink will take you to (not pictured)
- Program Name: This will tell you the program the charge is associated with. (not pictured)
- Location Name: Location associated with the charge. (not pictured)
- Priority: will display 1 or higher (not pictured)
- Warning List: will show you any warnings associated with the charge. (not pictured)
- Service Area: Will display whether charge is associated with DMC or MH. (not pictured)
- Capitated: Shows whether the charge is capitated or not. (not pictured)
- Charge Error Date: If there is a charge error this will show you the date the error occurred. (not pictured)
- Comments: Comments will display here. (not pictured)
- Units: Number of units associated with the charge. (not pictured)
- Attending: (not pictured)

Export Page Columns
When using the export feature, the following columns will be in the exported:
- DOS
- Procedure
- Clinician
- Program
- Location
- Comment
- Charge (Rate ID),
- Failure to Complete Reason(s),
- Status
- Units
- Complete Error Message
- Service Units
- Add On Codes
- Group Name
Upper Right-Hand Icons
- Select Action: When charges are selected below, click this to see a list of actions.
- Ready to Bill actions: Charges that are in ready to bill status, chose this to send to electronic or paper claim process.
- New Favorites Icon: Clicking on the “new favorites” icon will allow you to add this screen to your favorites for quick access.
- Favorites Icon: If you have this listed as your favorite already, when you hover over this icon, it will tell you the favorite name.
- Export Icon: This icon is available to admins. You will be able to export the data from this screen into an excel spreadsheet.
- Column Configuration: Use these options to fix how the columns display below.
