Step by step video guide here:
While the problem list is a living record that can change from day to day, the diagnosis document represents a point-in-time record of the main clinical reasons for treatment. This is completed as part of the clinical assessment process. This record should be updated as needed when a client’s primary reason for treatment changes, or new information changes the clinical understanding of the client.
The diagnosis document also fuels part of the billing process, feeding information into the “Billing Diagnosis” tab of services. Every program the client is enrolled in should have their own corresponding diagnosis document. If a program does not have a corresponding diagnosis document, the Billing Diagnosis tab on any services associated with that program will be blank and must be filled in manually upon saving of the service itself. Diagnosis documents may differ across programs, as programs sometimes focus on different aspects of a client’s diagnostic profile. For example, a therapy program may have PTSD as the primary diagnosis whereas a medication support program may have bipolar disorder as the primary diagnosis, even though they serve the same client.
Any time a diagnosis is documented in the client’s record, whether an initial diagnosis or an updated diagnosis, a new diagnosis document will be created. Depending on the situation, this may involve creating a diagnosis document for each program working off of that diagnostic profile.
When updating a diagnosis, the previous diagnostic code information will pull forward from the previous diagnosis document from the same program. If you want to pull a diagnosis forward from a different program, see How to Pull a Diagnosis Forward from Another Program.
There are three main steps to creating a diagnosis document.
- Creating the document.
- Ensuring the diagnosis codes included in the document are accurate.
- Signing the document.
These steps are laid out in the sections below.
A. Create a New Diagnosis Document
- With the client open, navigate to the Diagnosis Document (Client) screen.
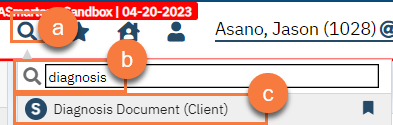
- Click on the Search icon.
- Type in “Diagnosis” in the search bar.
- Click to Select “Diagnosis Document (Client)” from the search results.
- This will bring up the most recent diagnosis document for the client in any program that you are allowed to see, based on your CDAG. Click on the New icon.

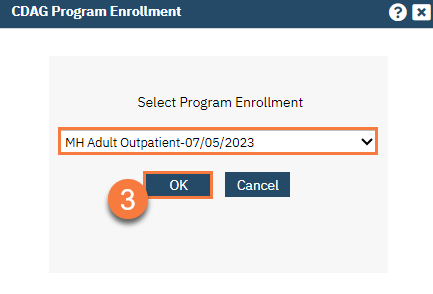
- This will bring up the CDAG popup window. Select your program from the dropdown and click OK.
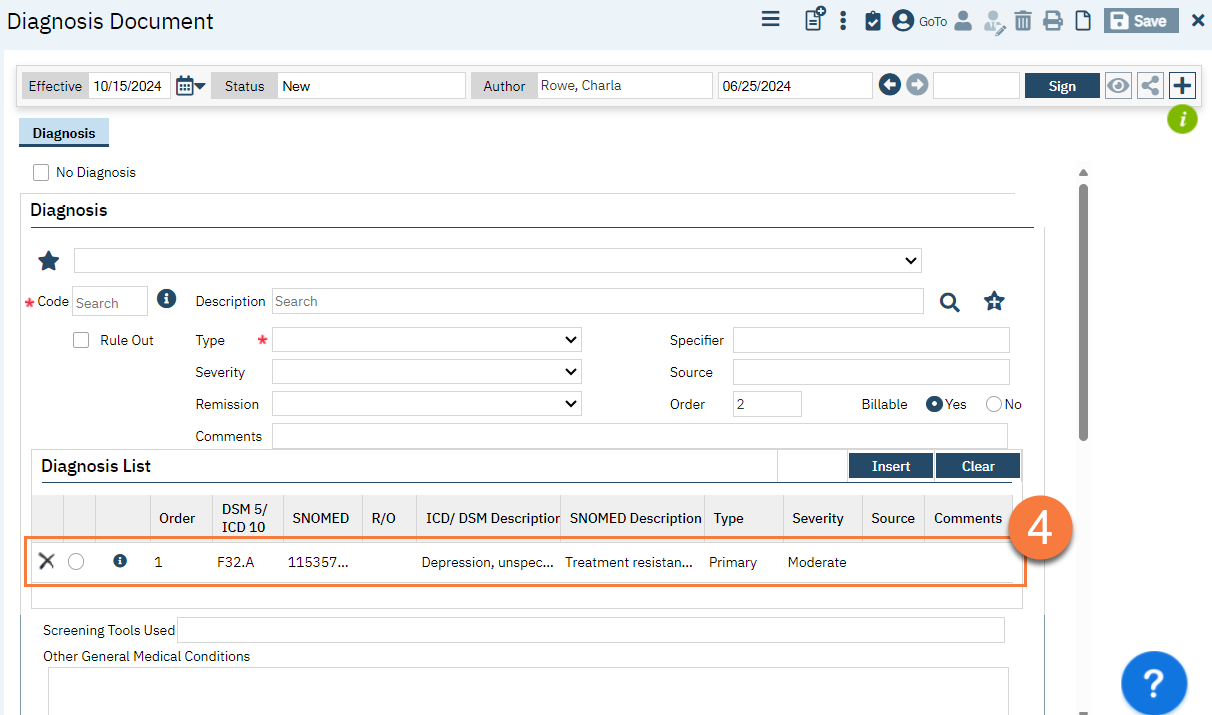
- This will bring up a new diagnosis document for this program. Any previous diagnosis codes associated with this program will pull forward from the most recent diagnosis document in this program. Make updates as needed (see below).
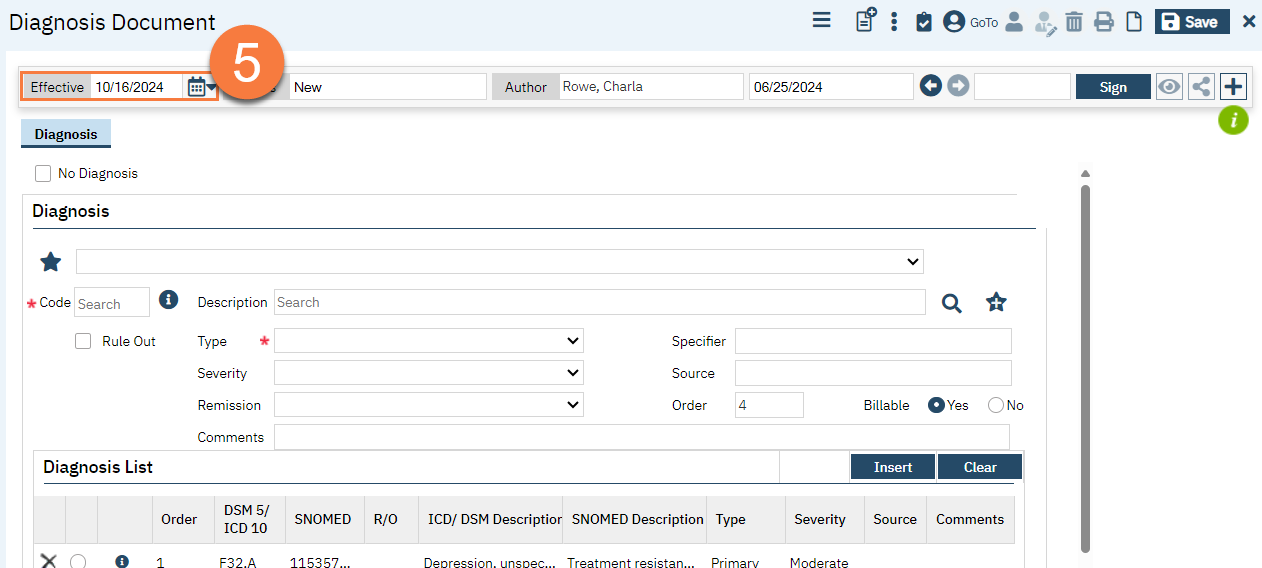
- Check the Effective Date of the document. The effective date of the document, seen in the upper left corner of the document, indicates the date that this document will start pushing to the Billing Diagnosis tab of service records. This date defaults to today’s date. If you are entering in a diagnosis record after the fact, you may consider changing the effective date of this diagnosis document. This is especially helpful around October 1st, when the Center for Medicare & Medicaid Services (CMS) makes changes to the ICD code list. See ICD-10 Annual Updates: What You Need to Know for more details. Update the Effective Date as needed.
Now that you’ve created the document, you’ll need to populate with the correct diagnosis codes. Move on to Step B.
B. Diagnosis Codes
Each diagnosis document can have multiple diagnosis codes: one primary diagnosis and any number of additional diagnoses. These diagnosis codes will have an order to them.
- Primary Diagnosis = 1
- Secondary Diagnosis (Additional Diagnosis) = 2
- Tertiary Diagnosis (Additional Diagnosis) = 3
- Etc.
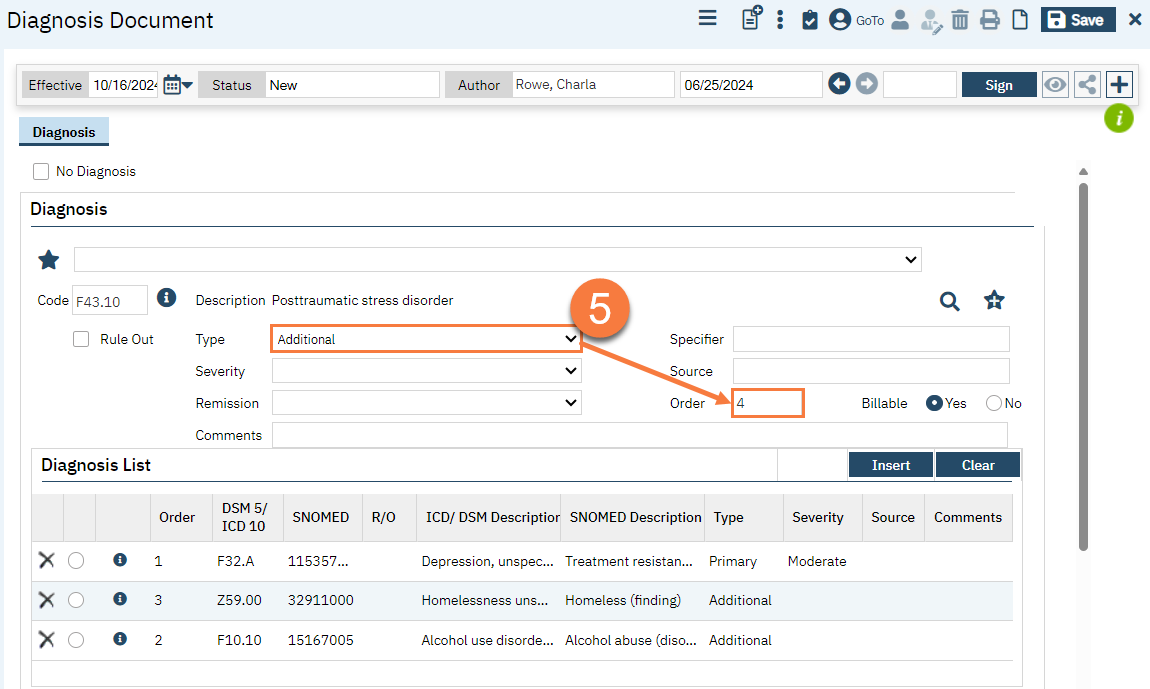
This order is set by the Order field, which will automatically populate. The first diagnosis code entered will have Order = 1, the second entered will have Order =2, etc. This order can be changed manually if needed.
All diagnosis documents must have at least one primary diagnosis, and the code designated as Primary in the Type field must have “1” in the Order field.
Orders cannot repeat and must be unique (e.g. you cannot have 2 diagnosis codes that are both Order 2).
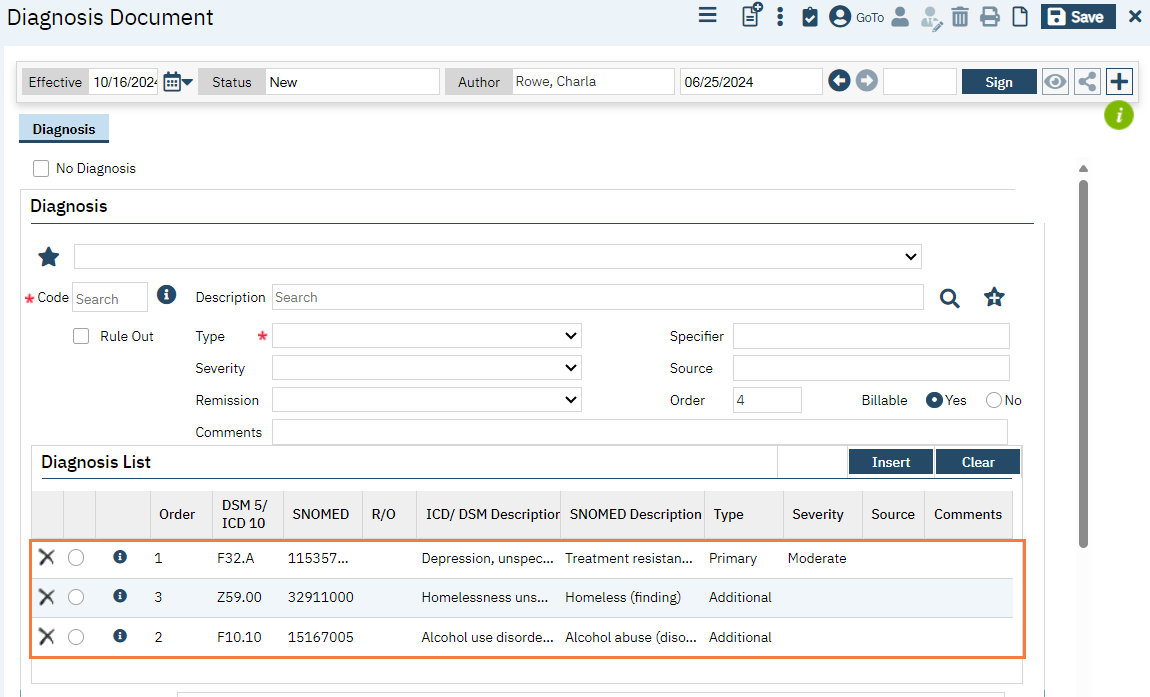
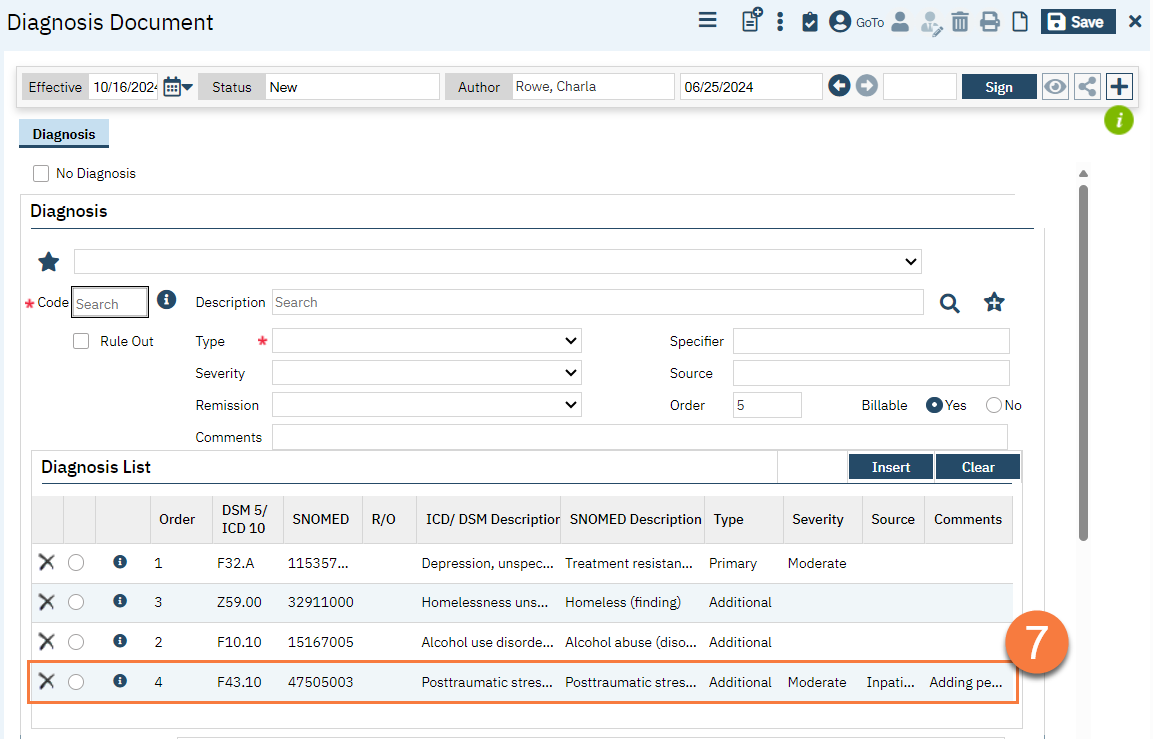
All diagnosis codes on your document will show up in the Diagnosis List section. Don’t worry if the diagnosis codes aren’t in numerical order. The system uses the Order field to ensure that they are ordered correctly.
Adding or modifying a diagnosis code will occur in the Diagnosis section.
Enter all diagnosis codes that should be included in this diagnosis document. Make sure the order is correct and any specifiers, severity levels, and/or remissions levels are included. If you are not the person who diagnosed this code, enter in the Source of the diagnosis (e.g. “Primary Care Physician”, or “Client Report”).
When creating an initial diagnosis, you’ll need to add all diagnosis codes (ICD-10 codes) to the document. When updating a diagnosis, make sure to add any new diagnosis code, update existing codes as needed, and remove any obsolete codes. Since this is a new document, deleting an obsolete diagnosis code from this document does NOT delete this from the client’s historical record; it only removes it from this current document.
Below are the steps on how to add, remove, modify, or re-order a diagnosis code within this document.
Adding a New Diagnosis Code
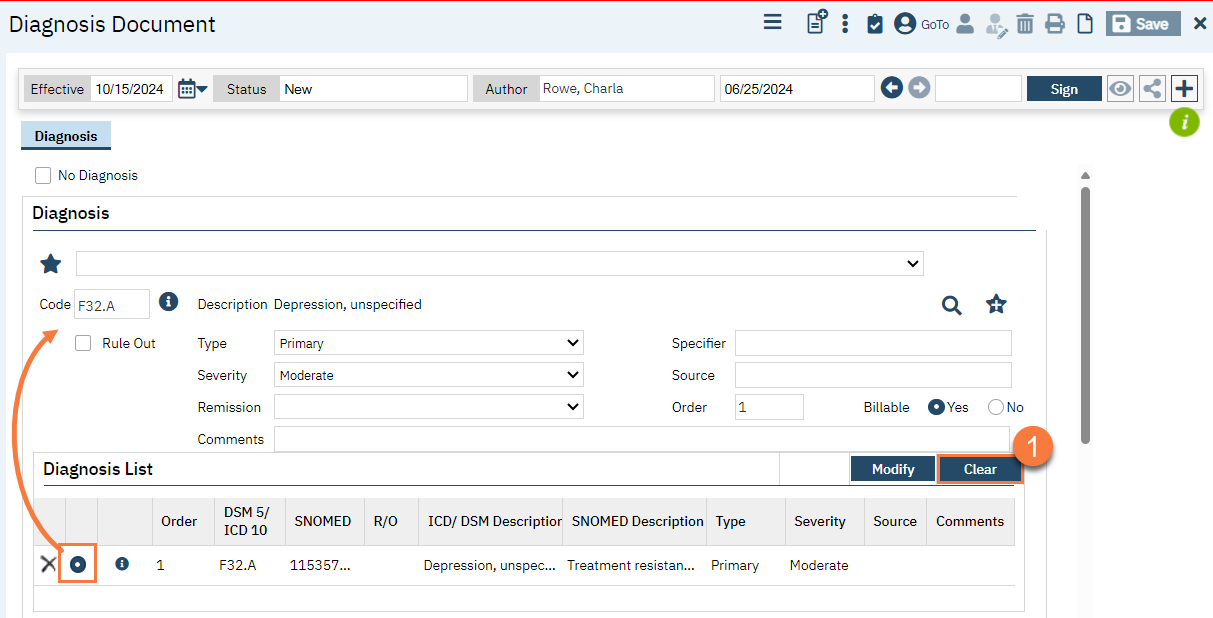
- To add a new diagnosis, make sure you don’t have any diagnosis code selected. If you do, click “Clear” to clear your current selection.
- Search for the ICD-10 code you want to add using either the code search (recommended) or the description search.
- You can also click on the search icon to bring up a pop-up window to see a more static version of the search results.
- You can also select a code from your favorites, if you have any saved. See How to Save a Favorite Diagnosis for more details.
- As you type, search results will popup. Click to select the appropriate ICD-10 code.
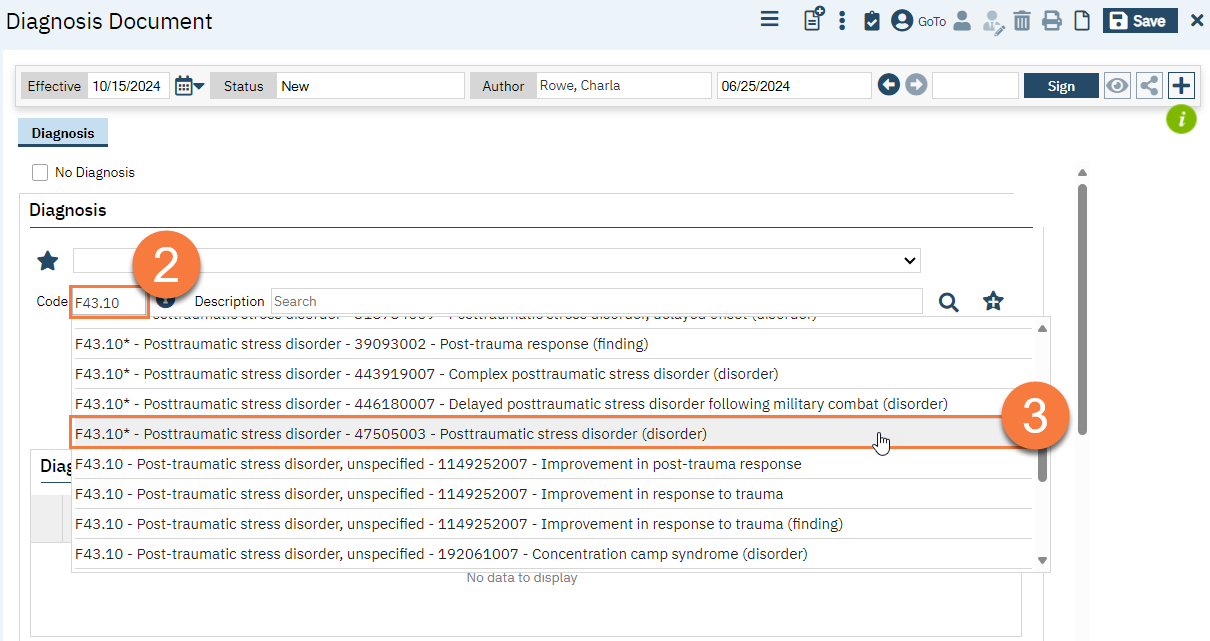
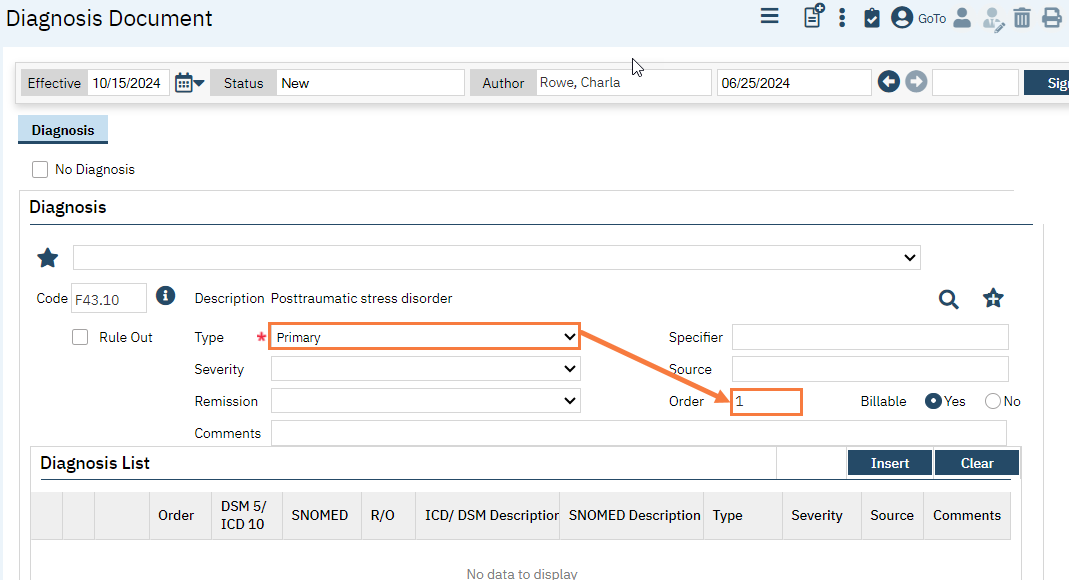
- This will bring the code and description into the Diagnosis section.
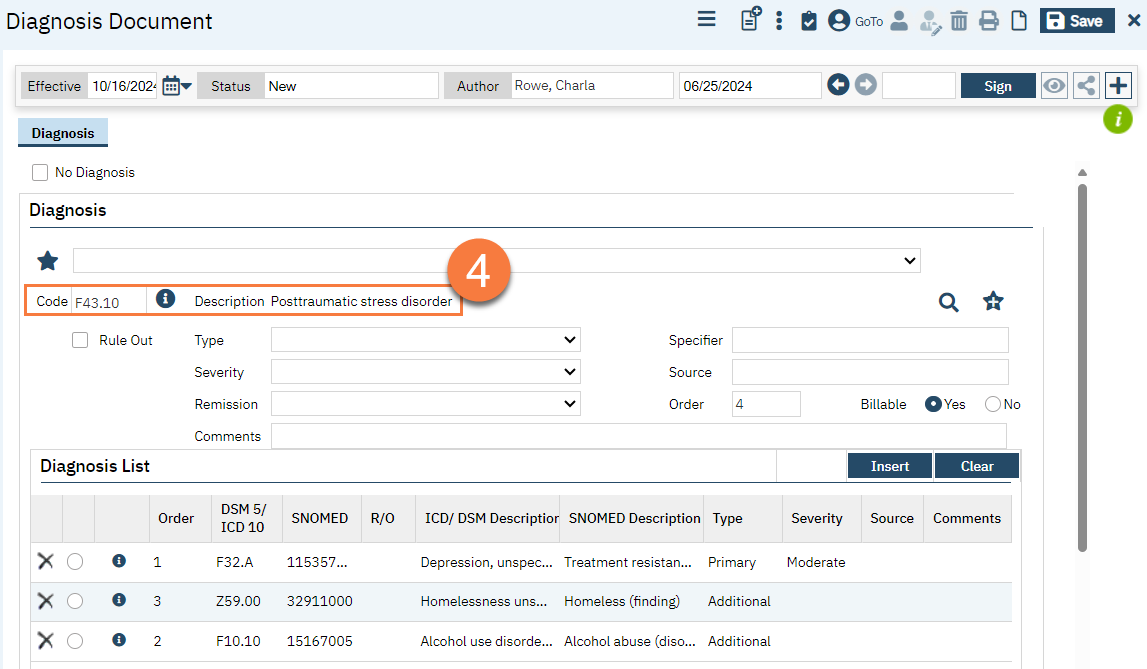
- Enter the Type. Change the Order as needed.
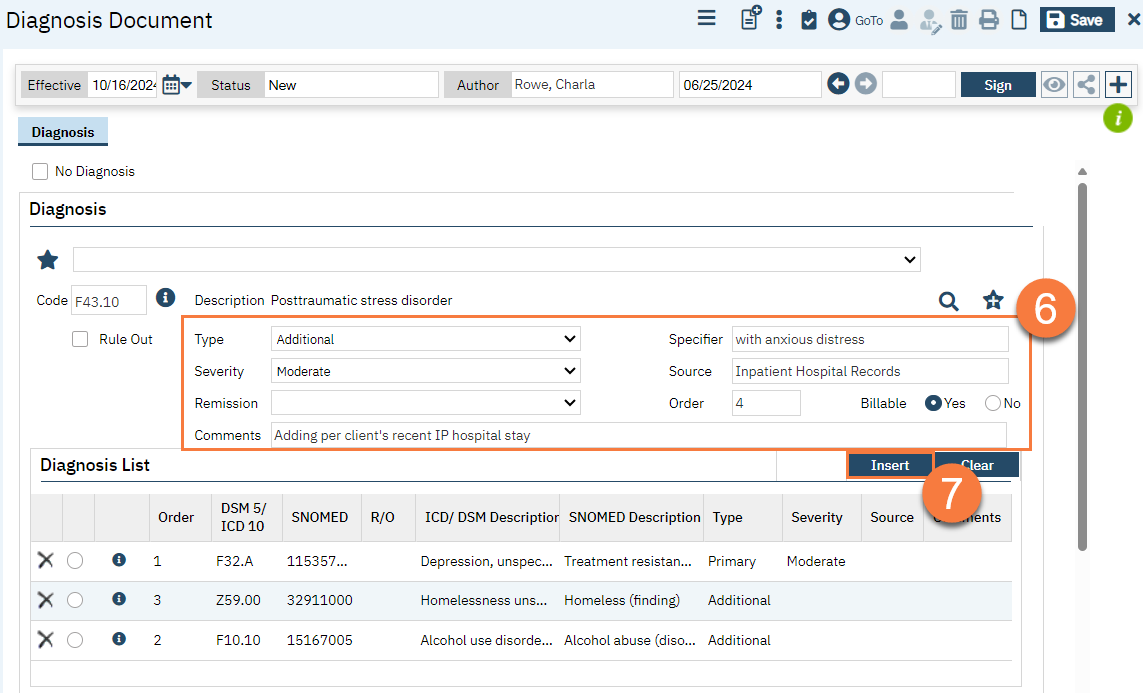
- Enter additional information as needed. This can include Severity level, Remission level, and Specifiers. If you are not the diagnosing clinician, you may want to enter the Source (e.g. another doctor’s name, the client’s report, etc.) Enter any Comments as needed.
- Most diagnosis codes are considered billable. If you are entering diagnosis codes that you will not be treating (e.g. medical conditions), you may mark these as not billable by clicking on the No radio button next to Billable. Any codes marked as not billable will not pull forward into services.
- Click Insert to add this diagnosis code to the Diagnosis List.
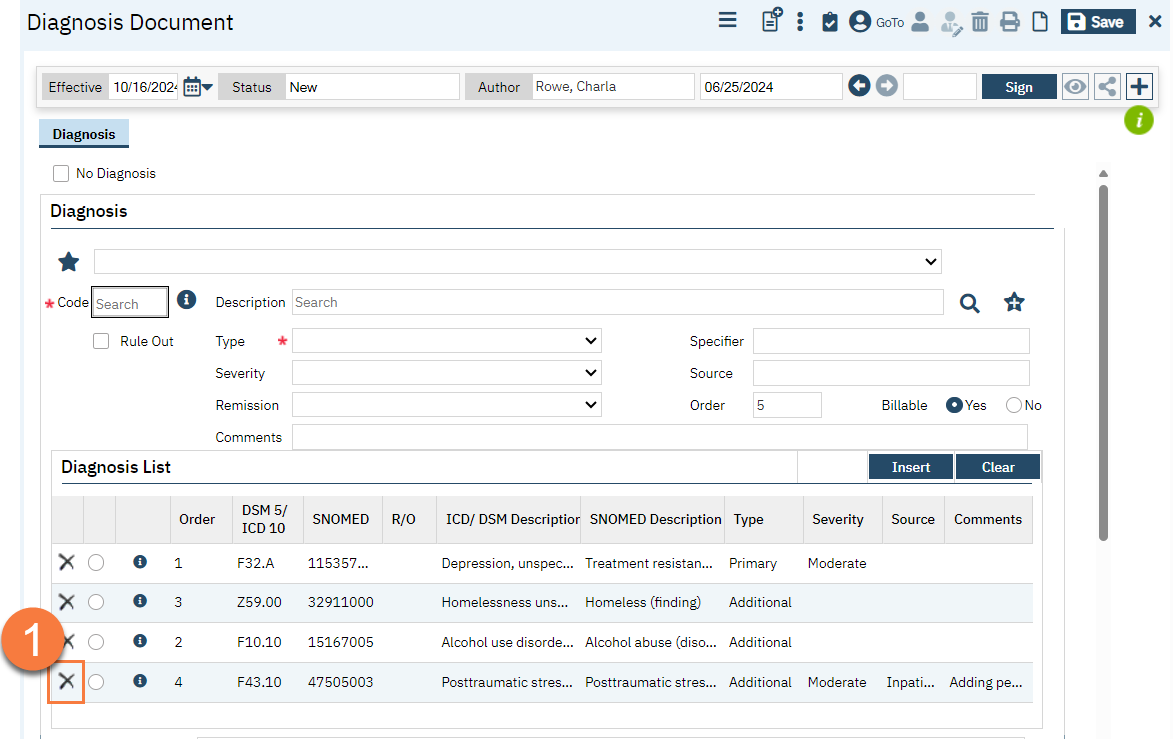
Removing Old Diagnosis Codes
- To remove a diagnosis (ICD-10 code) from a diagnosis document, in the Diagnosis List section, click on the Delete icon next to the code you’re wanting to remove.
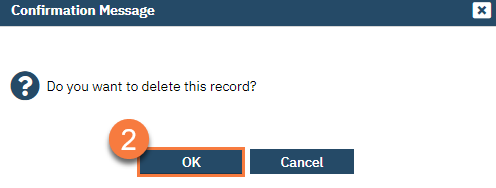
- A confirmation message will pop up. Click OK to continue.
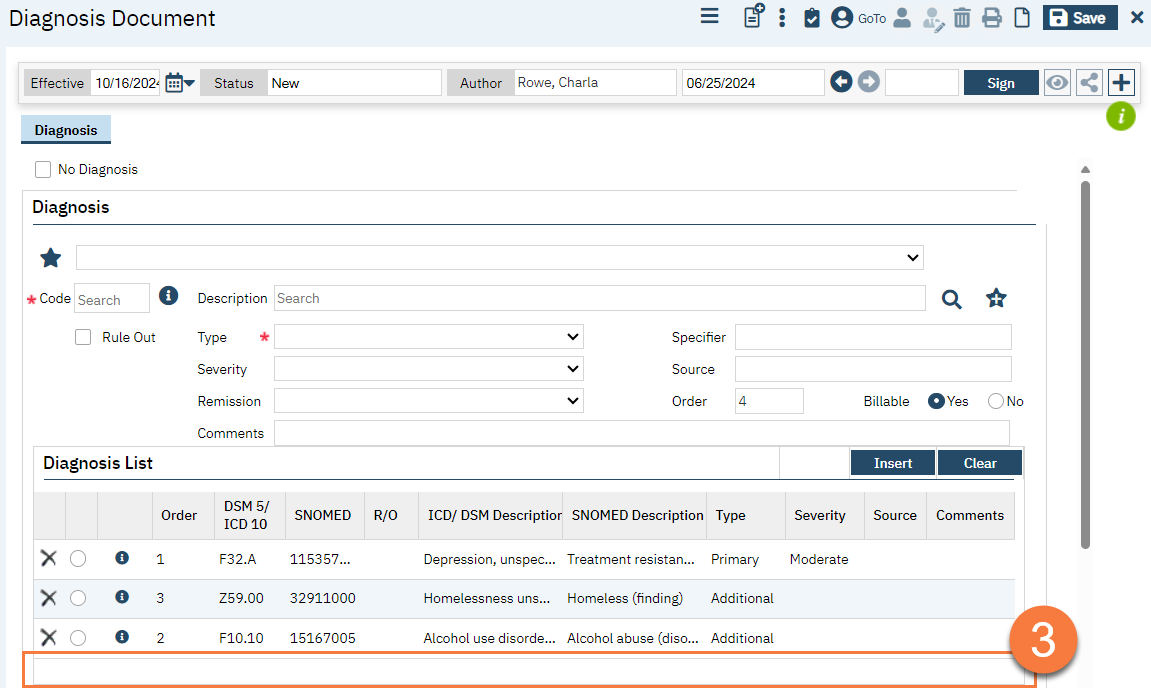
- This code is now removed from the Diagnosis List.
Modifying Diagnosis Codes
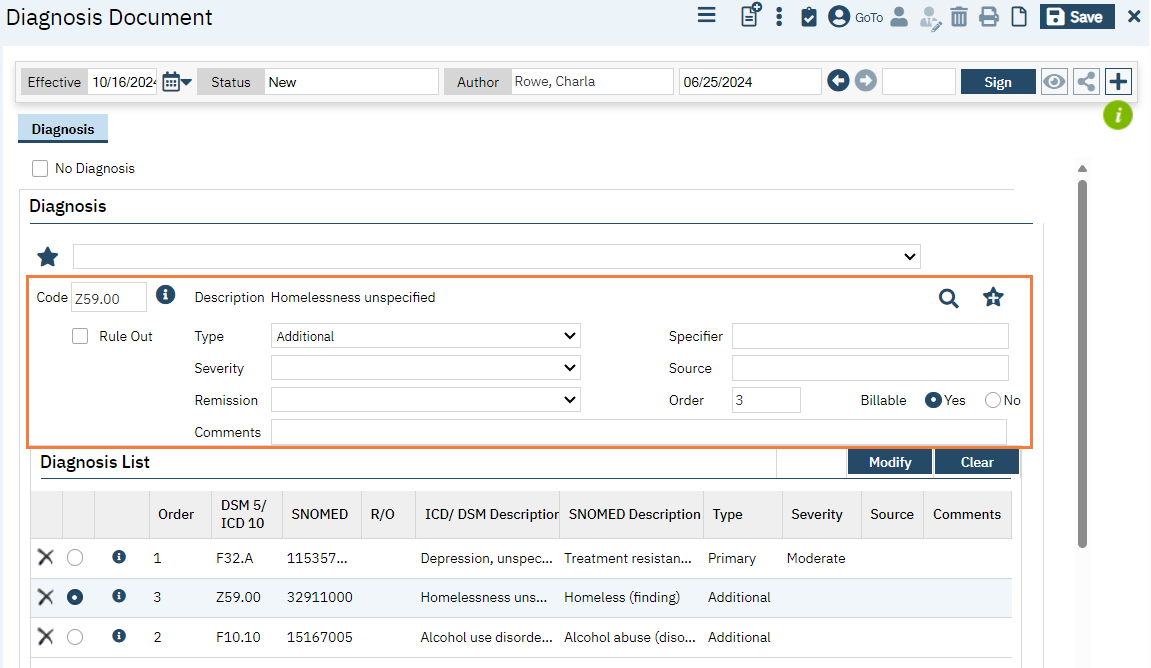
- To modify a diagnosis code that already exists on a diagnosis document, select the record from the Diagnosis List section by clicking on the radio button next to the diagnosis code you want to edit.
- This will pull the information into the Diagnosis section of the document. Make any changes as necessary.
- Click Modify to save these changes.
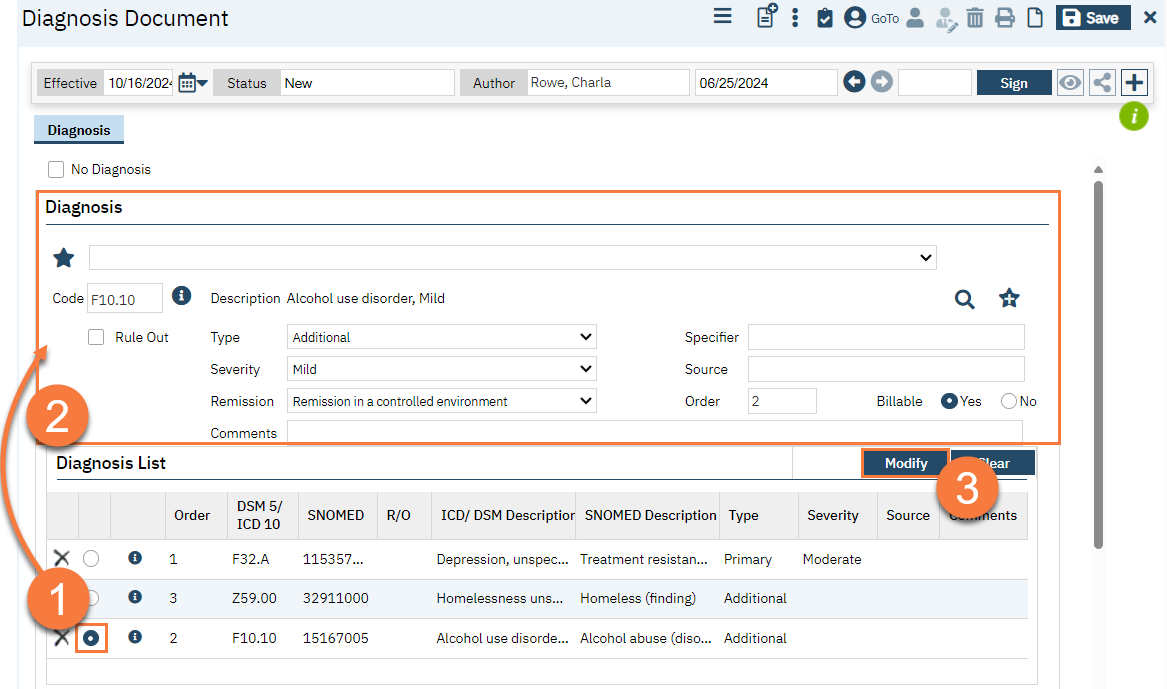
- Changes will show in the Diagnosis List section.

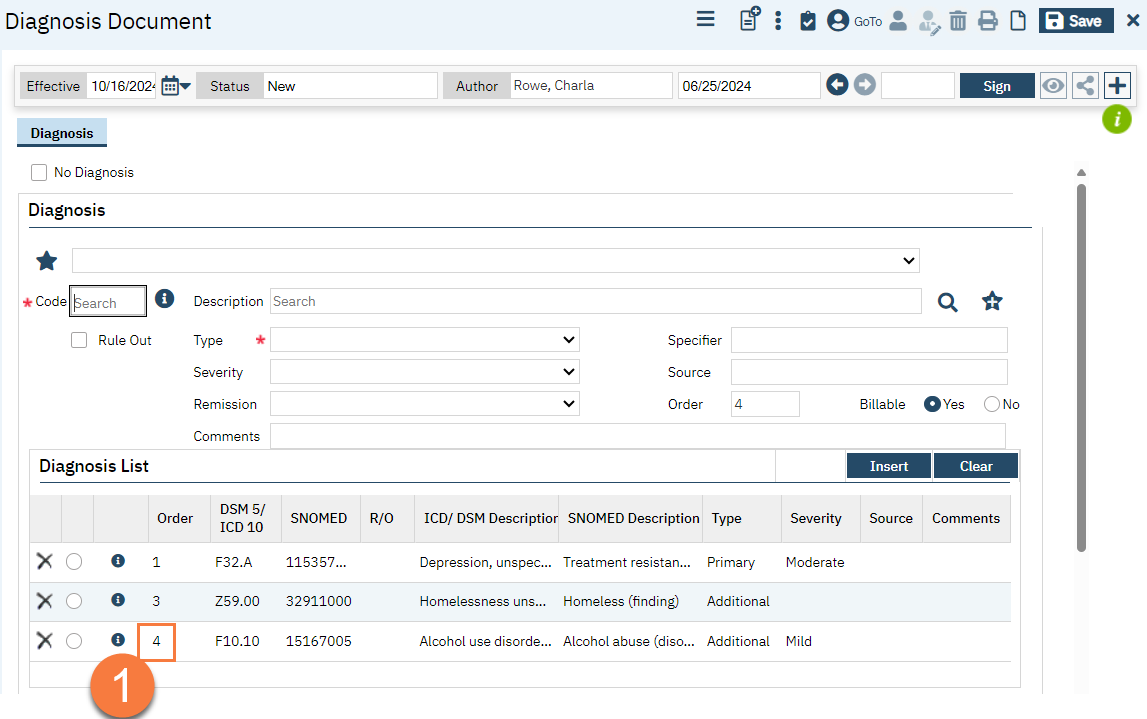
Re-Ordering Diagnosis Codes
Sometimes when updating a diagnosis document, you need to re-order the priority of the diagnosis codes. For example, you are adding a new primary diagnosis and moving your previous primary diagnosis to be a secondary diagnosis. This is handled using the “Order” field. Every diagnosis document must have a Primary diagnosis code that has an Order of “1”. Any secondary or tertiary diagnoses codes should be marked as “Additional” type, with Order of 2, 3, etc.
To re-order diagnoses, you’ll need to modify each diagnosis code that needs to be re-ordered. Since codes cannot have the same order, you’ll have to modify each of them separately. Use the steps above in the Modifying Diagnosis Codes section to modify each code.
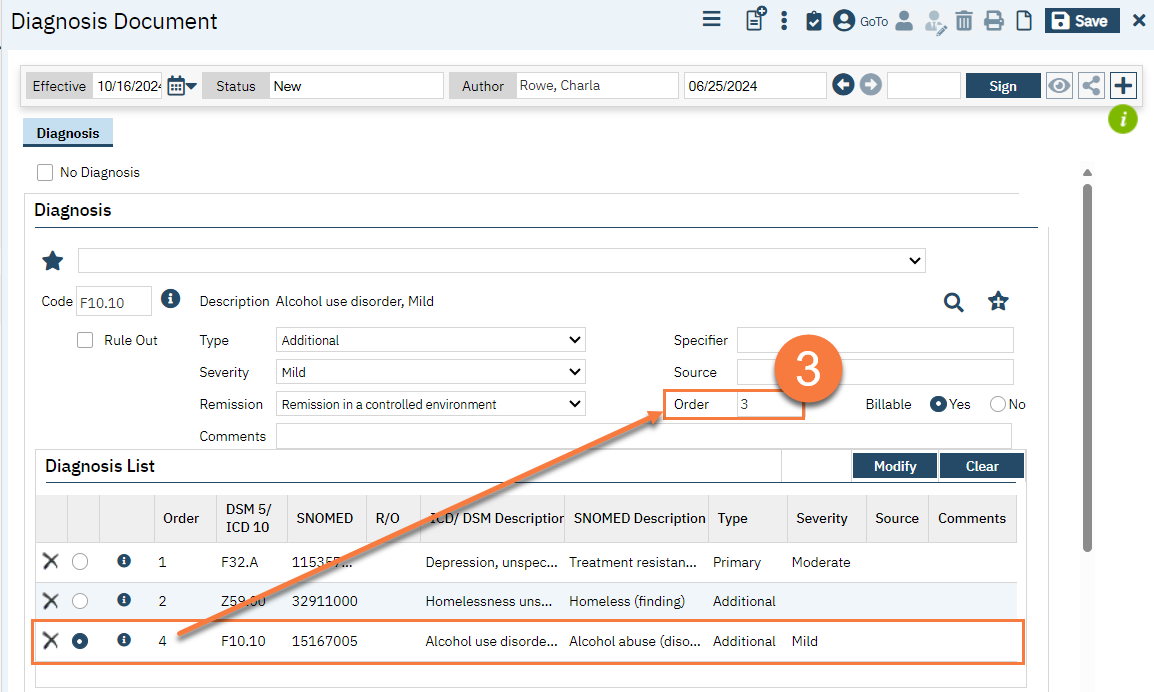
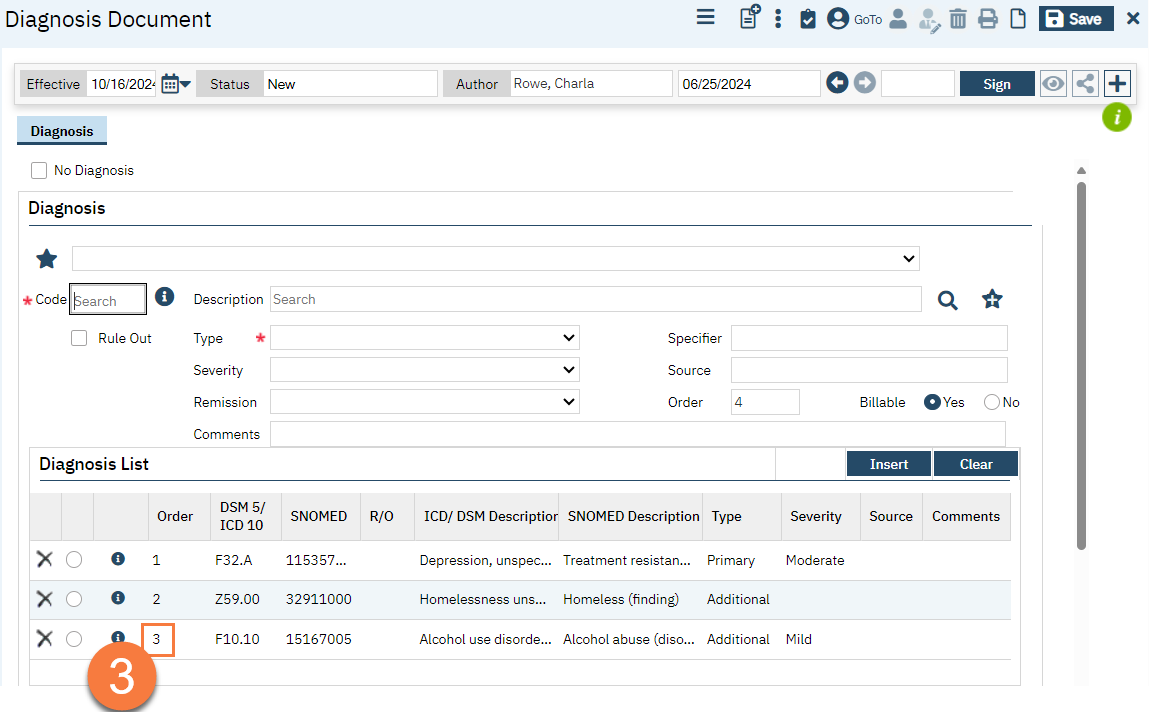
- Modify the order of one of the diagnosis codes to an order that does not currently exist in the document

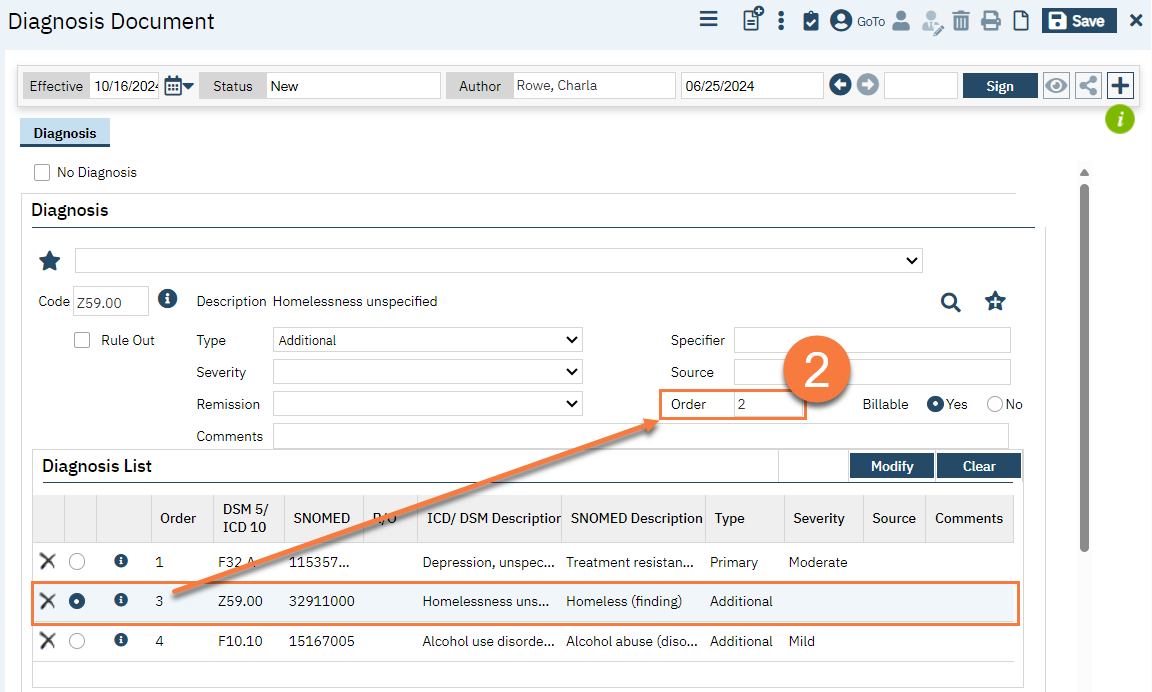
- Modify the other diagnosis code(s) to be the accurate order.
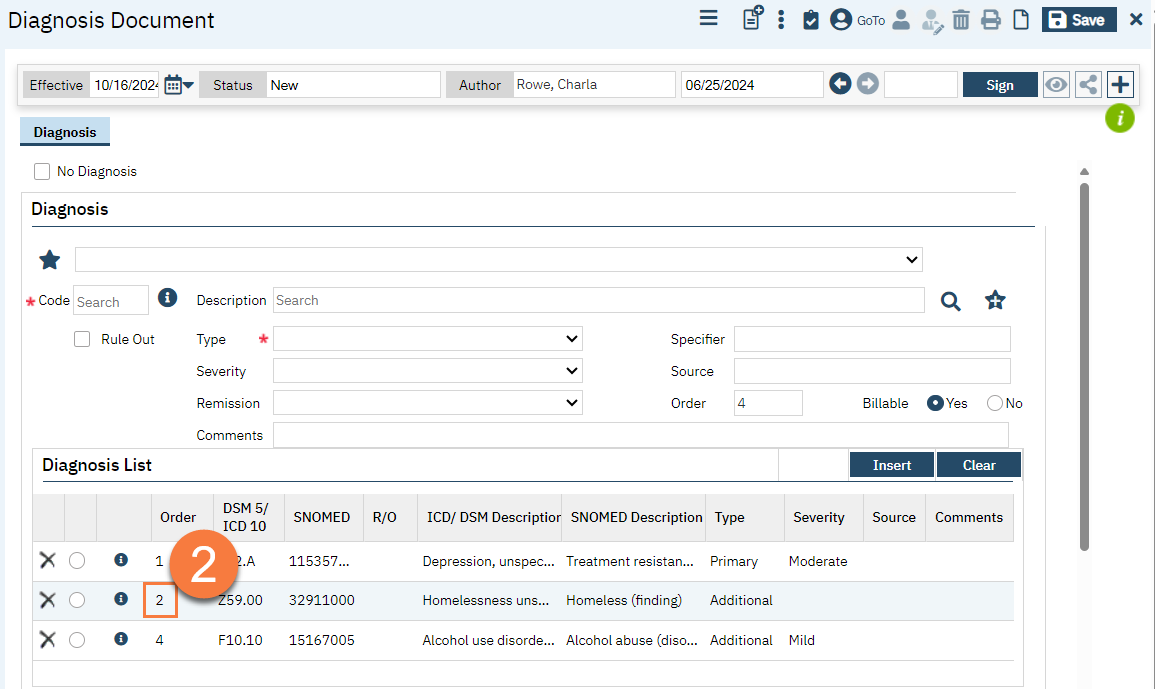
- Modify the diagnosis code in step 1 to be the accurate order.
C. Signing the Diagnosis Document
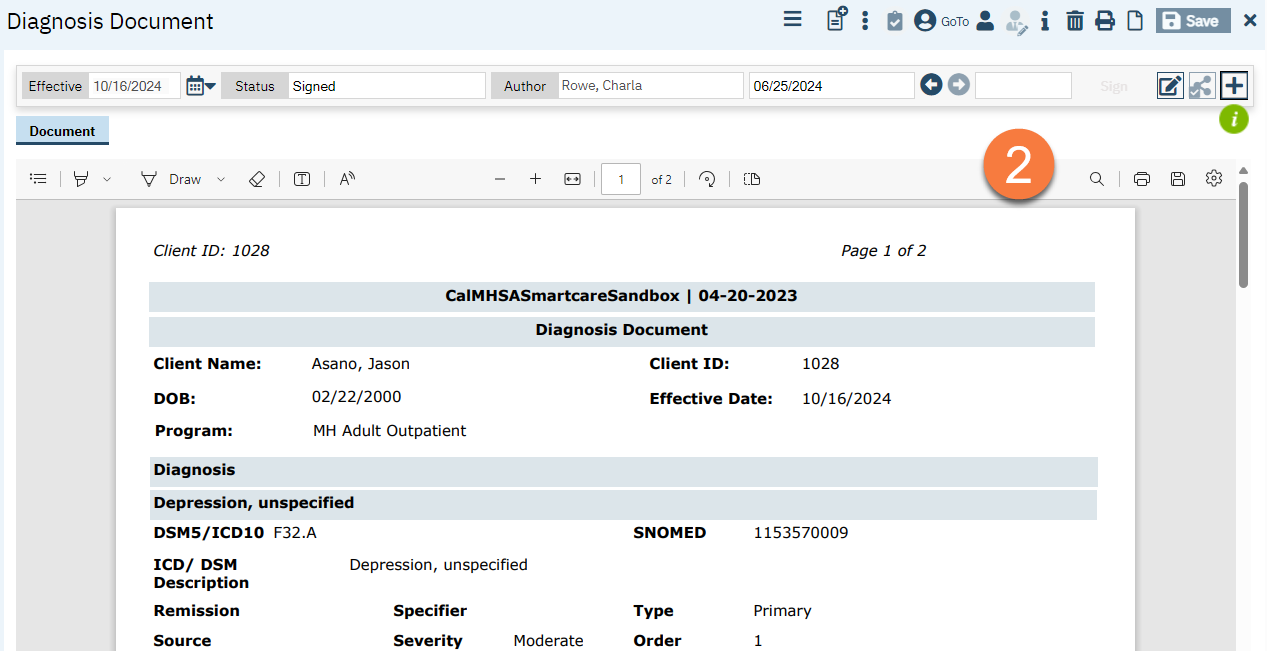
- Once you have ensured that your Diagnosis List matches the client’s current diagnosis profile, click Sign to finalize this document.

- This will create the PDF record of this diagnosis document.
Updated 10/15/24