Whether an initial service authorization request or a reauthorization request, the steps are the same.
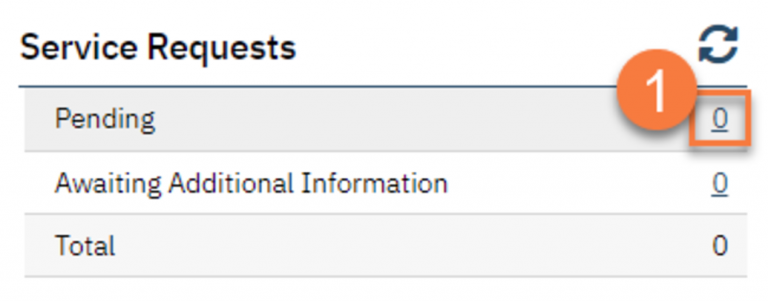
- With the client open, navigate to the My Service Request List either through the search feature or by clicking a link from the Service Requests widget.

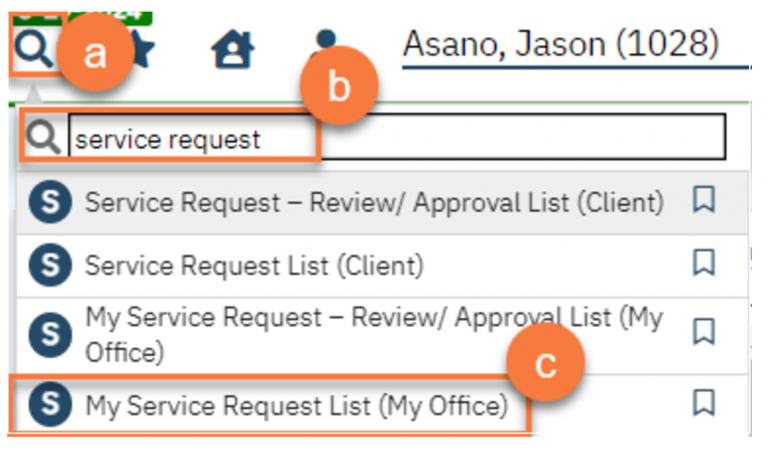
- To use the search feature, click on the Search icon.
- Type “Service Request” in the search bar.
- Click to select “My Service Request List (My Office)” from the search results.

- This takes you to the My Service Request List page. Click on the New icon.

- This takes you to the Service Request Detail screen. In the General section of the Request tab, select the type of service you’re requesting authorization for.
- Enter the person or workgroup that will be reviewing and approving this service authorization request. Only one of these fields can be completed, but one must be completed. These are search fields, so typing in the name of the staff member or workgroup will bring up search results. Click to select the one you want.
- Document if the service authorization request is urgent or not. This will default to “No”.

- Complete the Service Request Details section.
- Auth Code: (required) Select the appropriate code for the service or group of services you’re requesting authorization for.
- Program Requested: (optional) Select the program you are requesting will provide these services, if approved. This field will be limited based on the service type you selected in step 3 above.
- Units: (required) Enter the number of units you’re requesting service authorization for.
- $: This would be used to request a specific amount of money, rather than a specific amount of units. To use this field, check the box next to the $ and enter the amount in the field. The checkbox for this field is defaulted to unchecked, as most people will be requesting units of service rather than a specific cost.
- From/To: (required) Enter the date range you’re requesting service authorization for.
- Frequency: (required) Enter the frequency of units/$ you’re requesting service authorization for.
- Units Total: (formula, no entry required) This field will automatically populate based on the units, frequency, and date range entered in steps c, e, and f above. For example, 5 units with a daily frequency for the date range 1/1/24-1/10/24 will result in 50 total units (5 units per day for 10 days).
- $ Total: (formula, no entry required) This field will automatically populate based on the $, frequency, and date range entered in steps d, e, and f above. For example, $5 with a daily frequency for the date range 1/1/24-1/10/24 will result in $50 total ($5per day for 10 days).
- Justification: (optional) Enter the justification for your service authorization request.
- Click Insert to add this service request authorization to the Auth List section.


- Repeat steps 6-7 until all your service authorization requests have been entered and show in the Auth List section.
- If you need to modify any of your requests, select them from the Auth List using the radio button. This will bring the information into the Service Request Details section.
- Make your changes and then click Modify to save these changes.

- Click Save to save your changes.

- Attach any documents as necessary.
- Click on the Attachments tab.
- To scan/upload documents directly into this request that aren’t yet in SmartCare, click on the Scan or Upload button. This will take you to the Scan or Upload File Detail screen. This works just like the scanning/upload feature. See How to Scan a Document Into the Client’s Record for detailed instructions.
- To attach documents that are already in SmartCare, click on the “Attach Documents…” button. This works just like the associating documents feature. See How to Associate Two or More Documents for detailed instructions.
- After you’ve attached all relevant documents, click Save.

- Submit your request by changing the Request Status on the Request tab from “Pending” to “Submitted”.
- Click Save.

- This will effectively “sign” or “submit” the request, which will lock down the fields. You can now close.

How to See the Status of a Submitted Service Authorization Request
The My Service Request List is a list page that will show you all Service Requests that you’ve created. Make sure to scroll to the right to see additional information, such as the status of the review.


You can also use the filters on the list page to only show requests with a certain status.
- Pending – This is a request that you have created but not yet submitted for review and approval.
- Submitted – This is a request that you have submitted for review and approval.
- Awaiting Additional Information – This is a request that has been sent back to you by the reviewer because they need more information from you before they can process the request.
- Re-Submitted – This is a request that you have re-submitted back to the reviewer after providing them with the requested additional information.
- Completed – This is a request that has been full reviewed and is either approved or denied.

How to Resubmit a Service Authorization Request
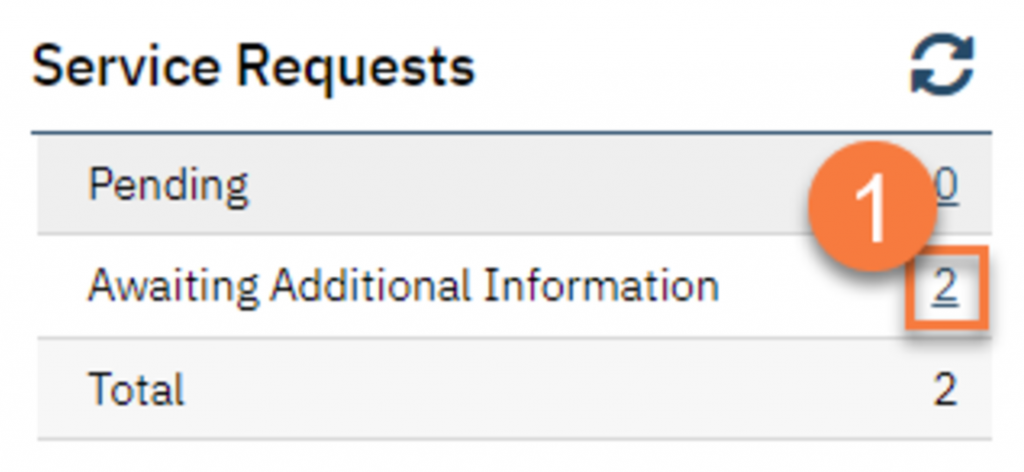
Sometimes a reviewer needs additional information before they can make a final decision about your request. When this occurs, they will send the request back for more information. This will be shown on the Service Requests widget under “Awaiting Additional Information”.
- Click on the link for Awaiting Additional Information in the Service Requests widget.

- This will take you to the My Service Request List page. Click on the link in the ID column for the request that you need to resubmit.

- This will take you to the Service Request Detail screen. Most of the fields will be locked. Select the Auth from the Auth List section by clicking on the corresponding radio button. This will bring the request information into the Service Request Details section, including the reviewer’s reason for requesting more information.
- Add more information in the Justification field to address the reviewer’s concerns.
- Click Modify to save the changes to the Justification field.
- Attach any additional documents as needed. See step 10 above for more detailed instructions.
- When you’re finished with your changes, change the Request Status from “Awaiting Additional Information” to “Re-submitted”.
- Click Save. This will resubmit the service request.

Updated 3/13/25
