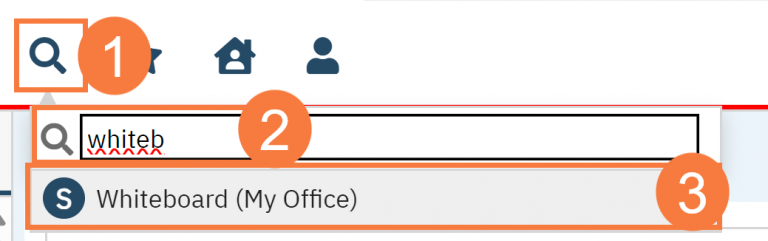
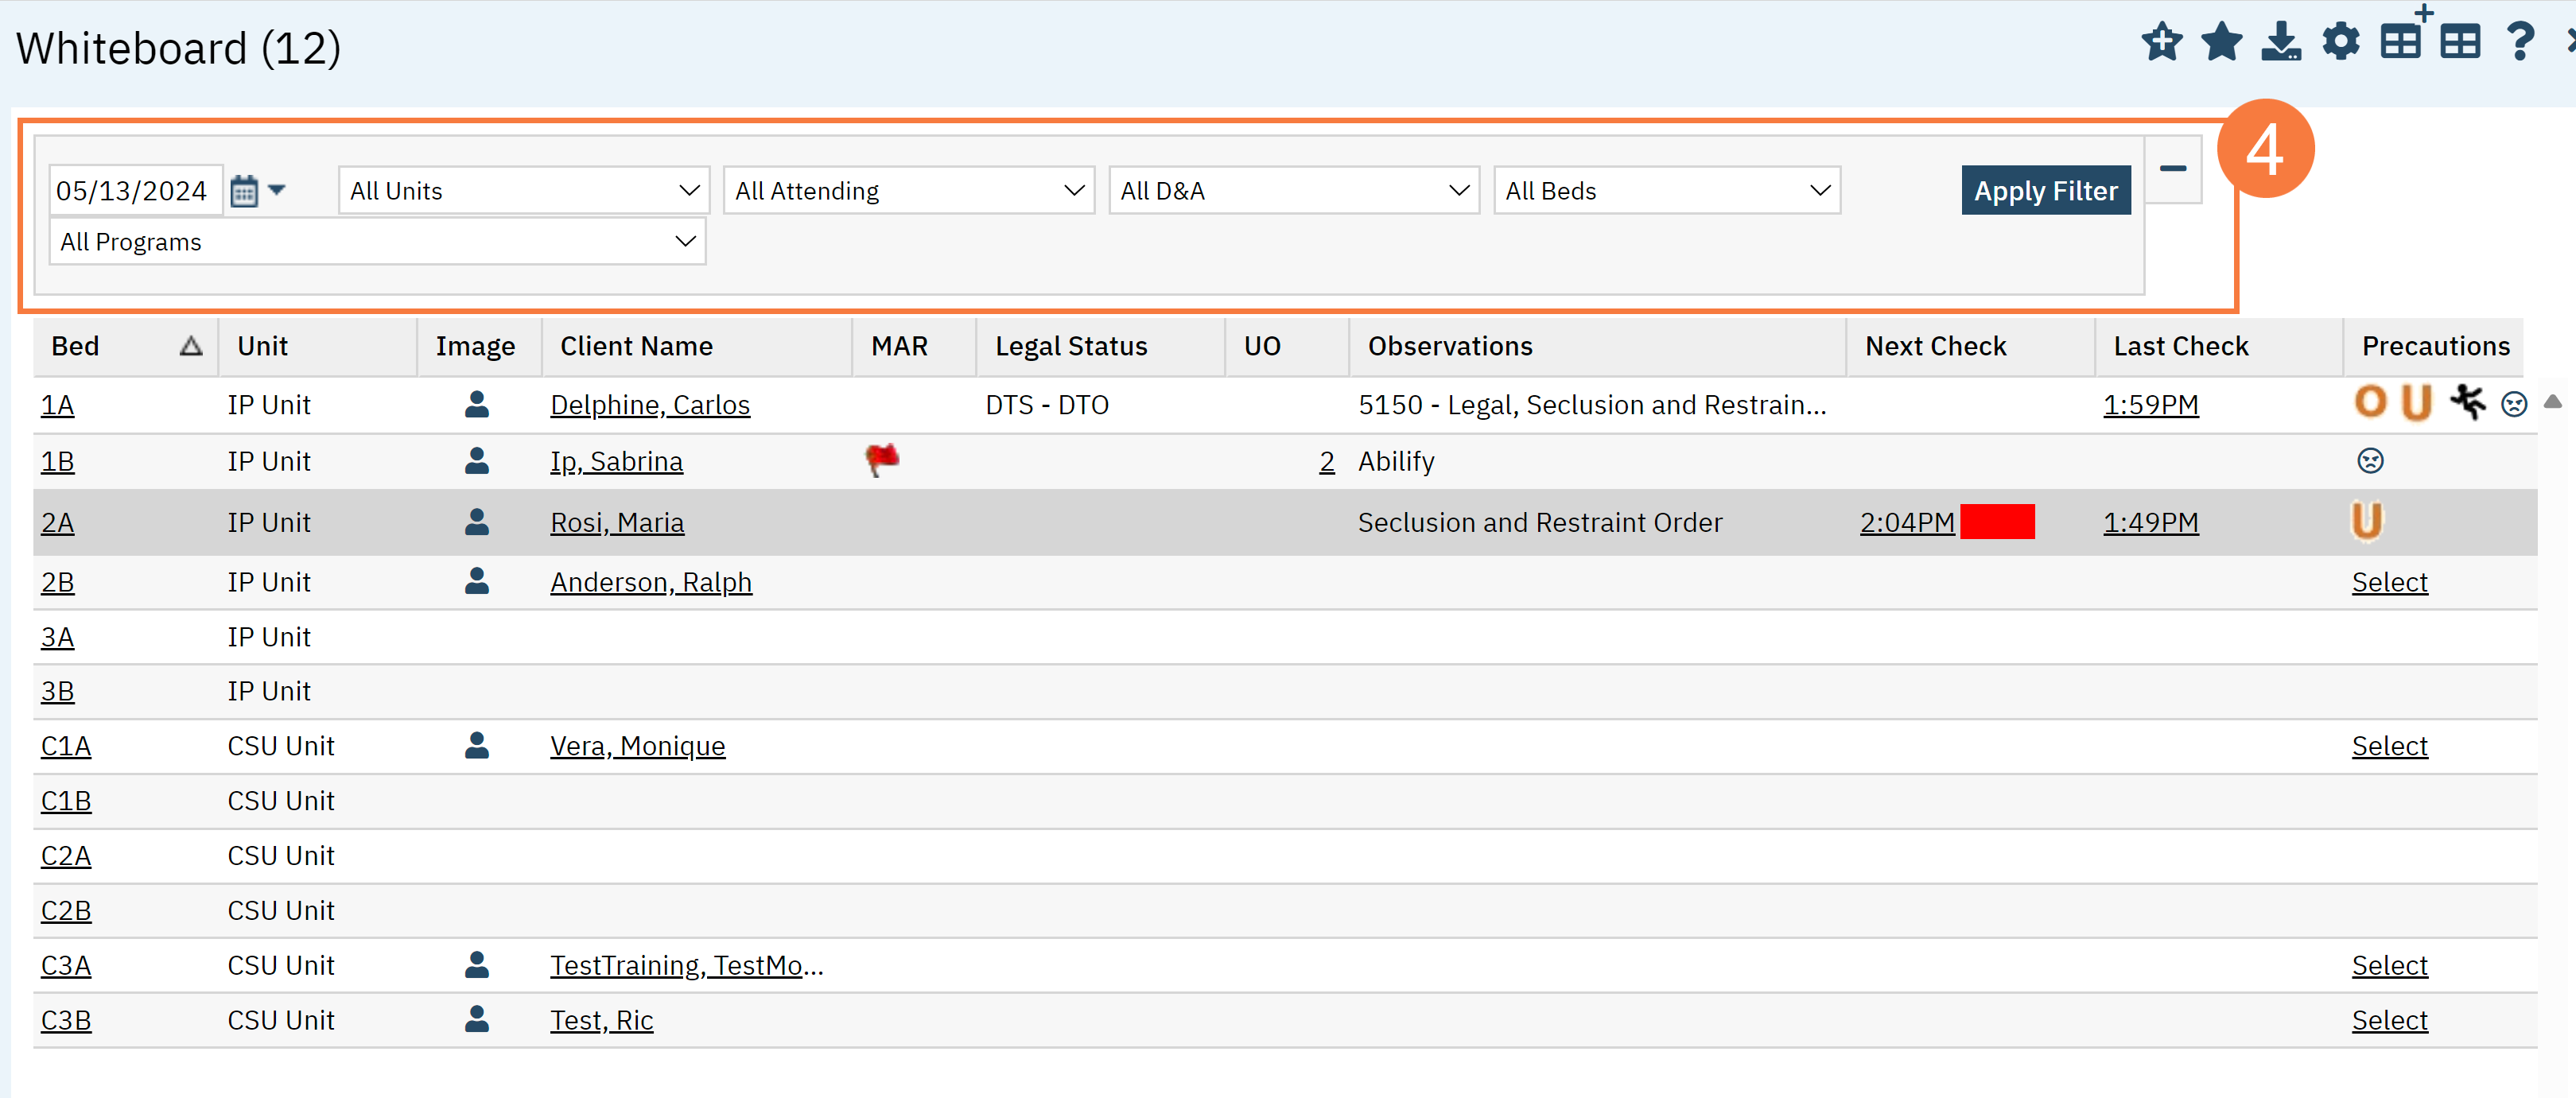
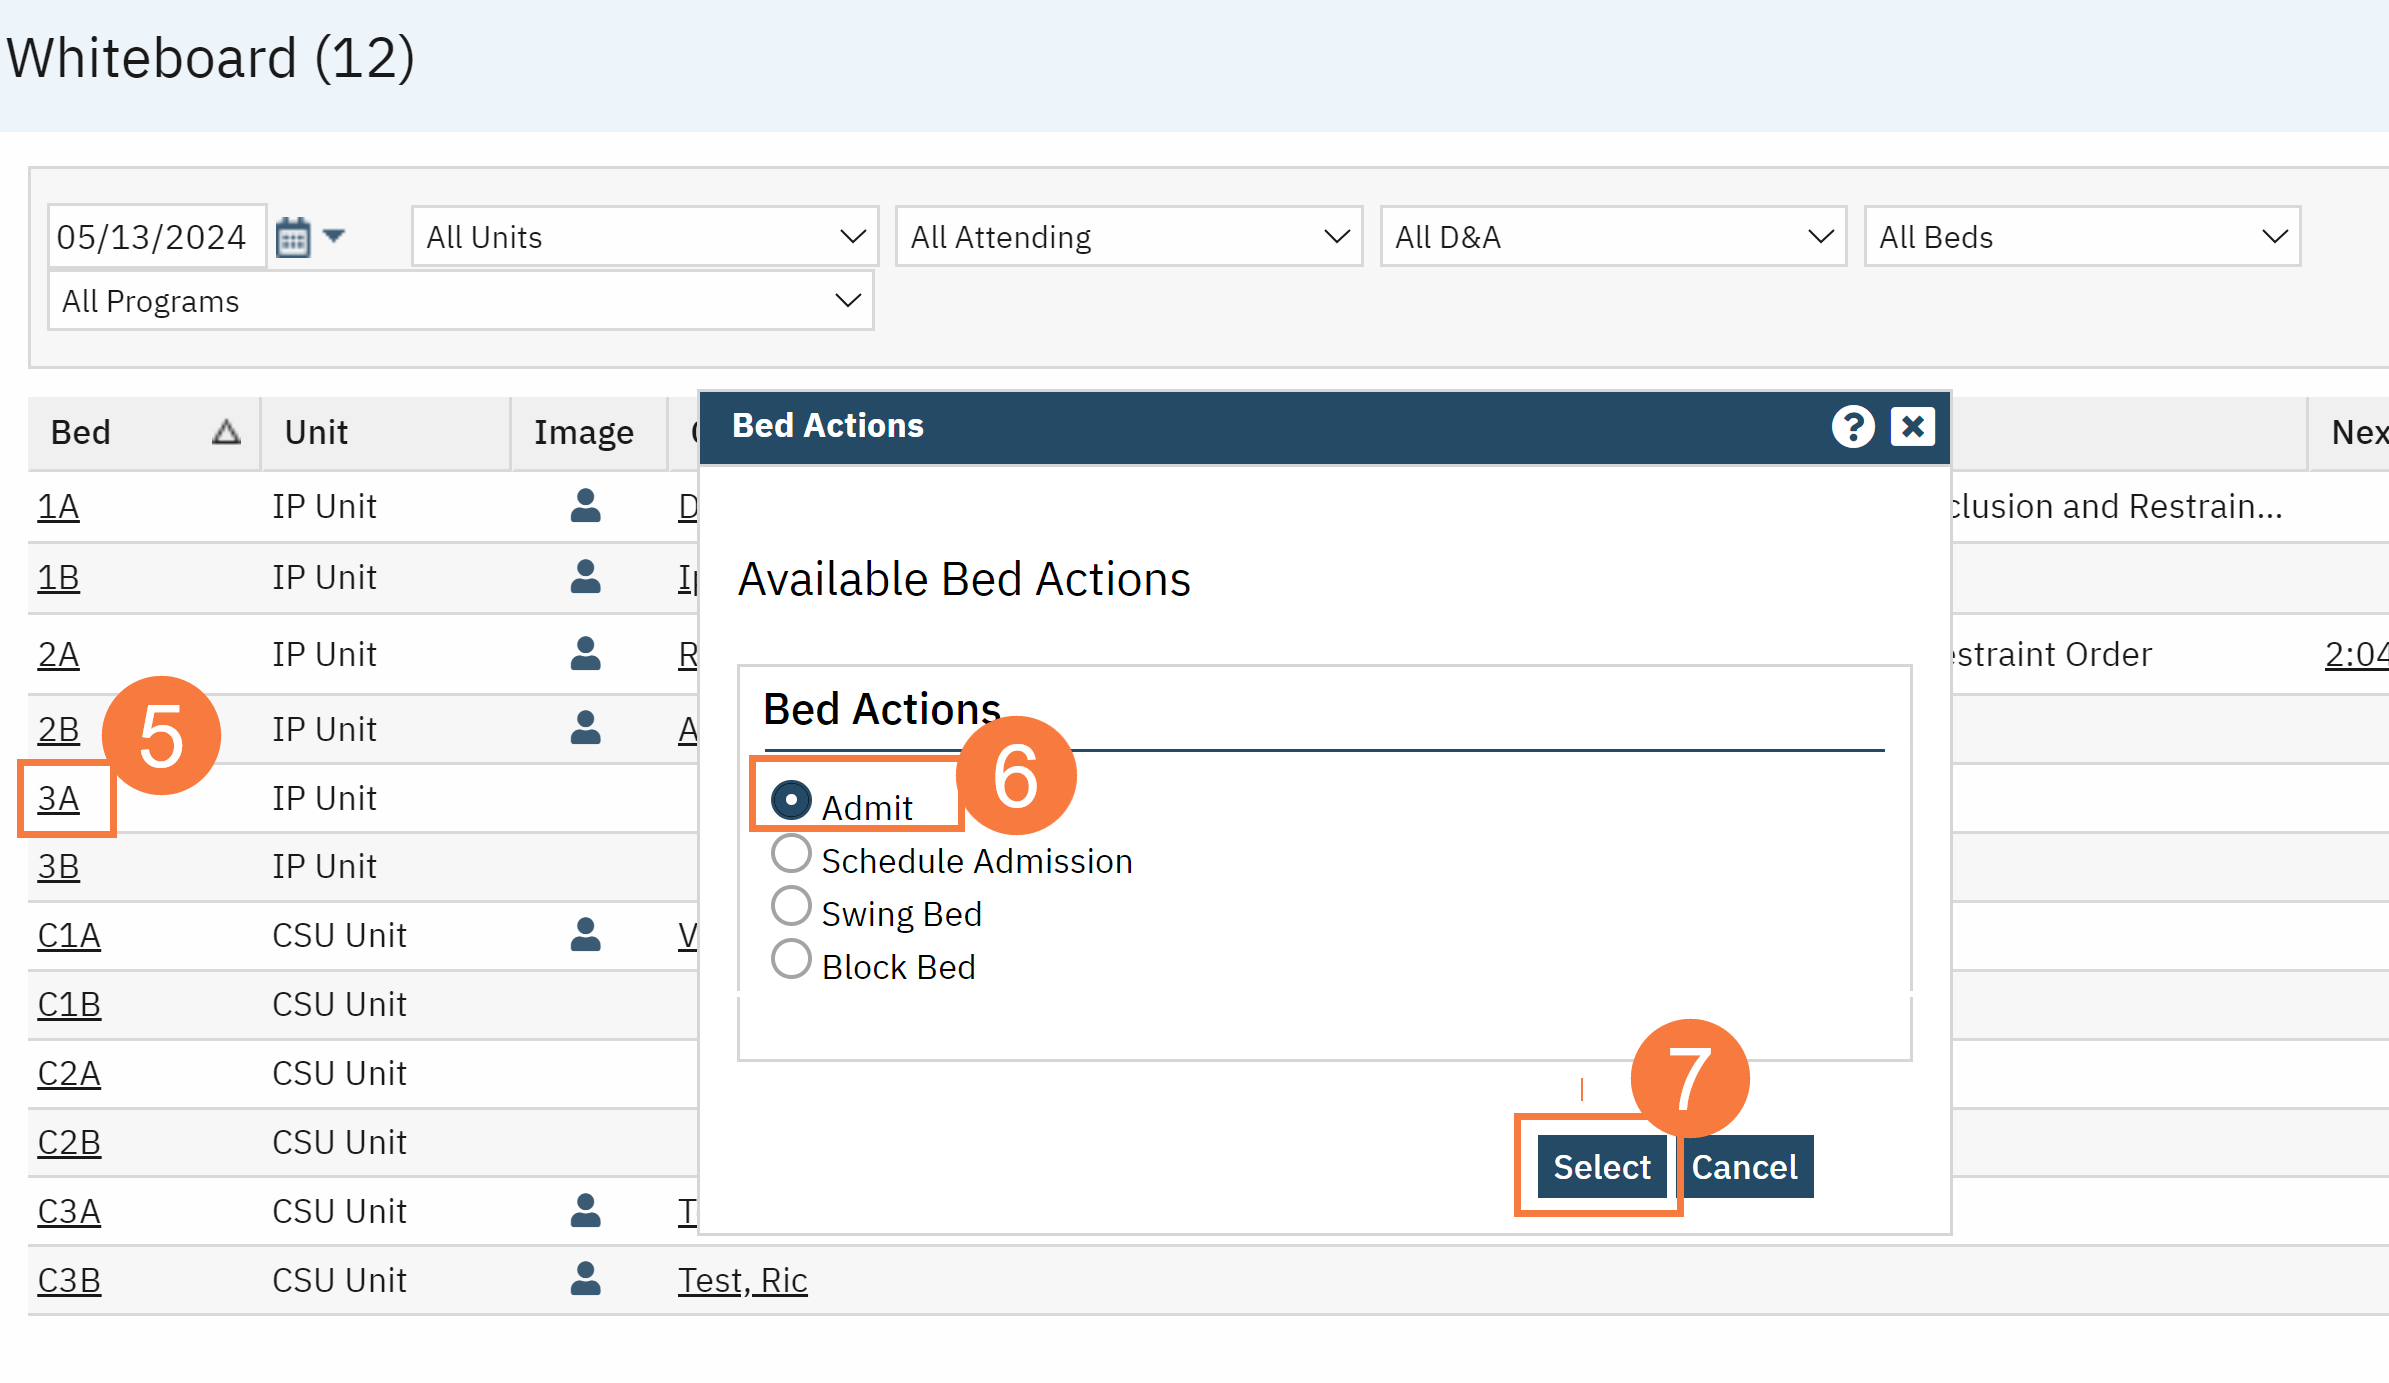
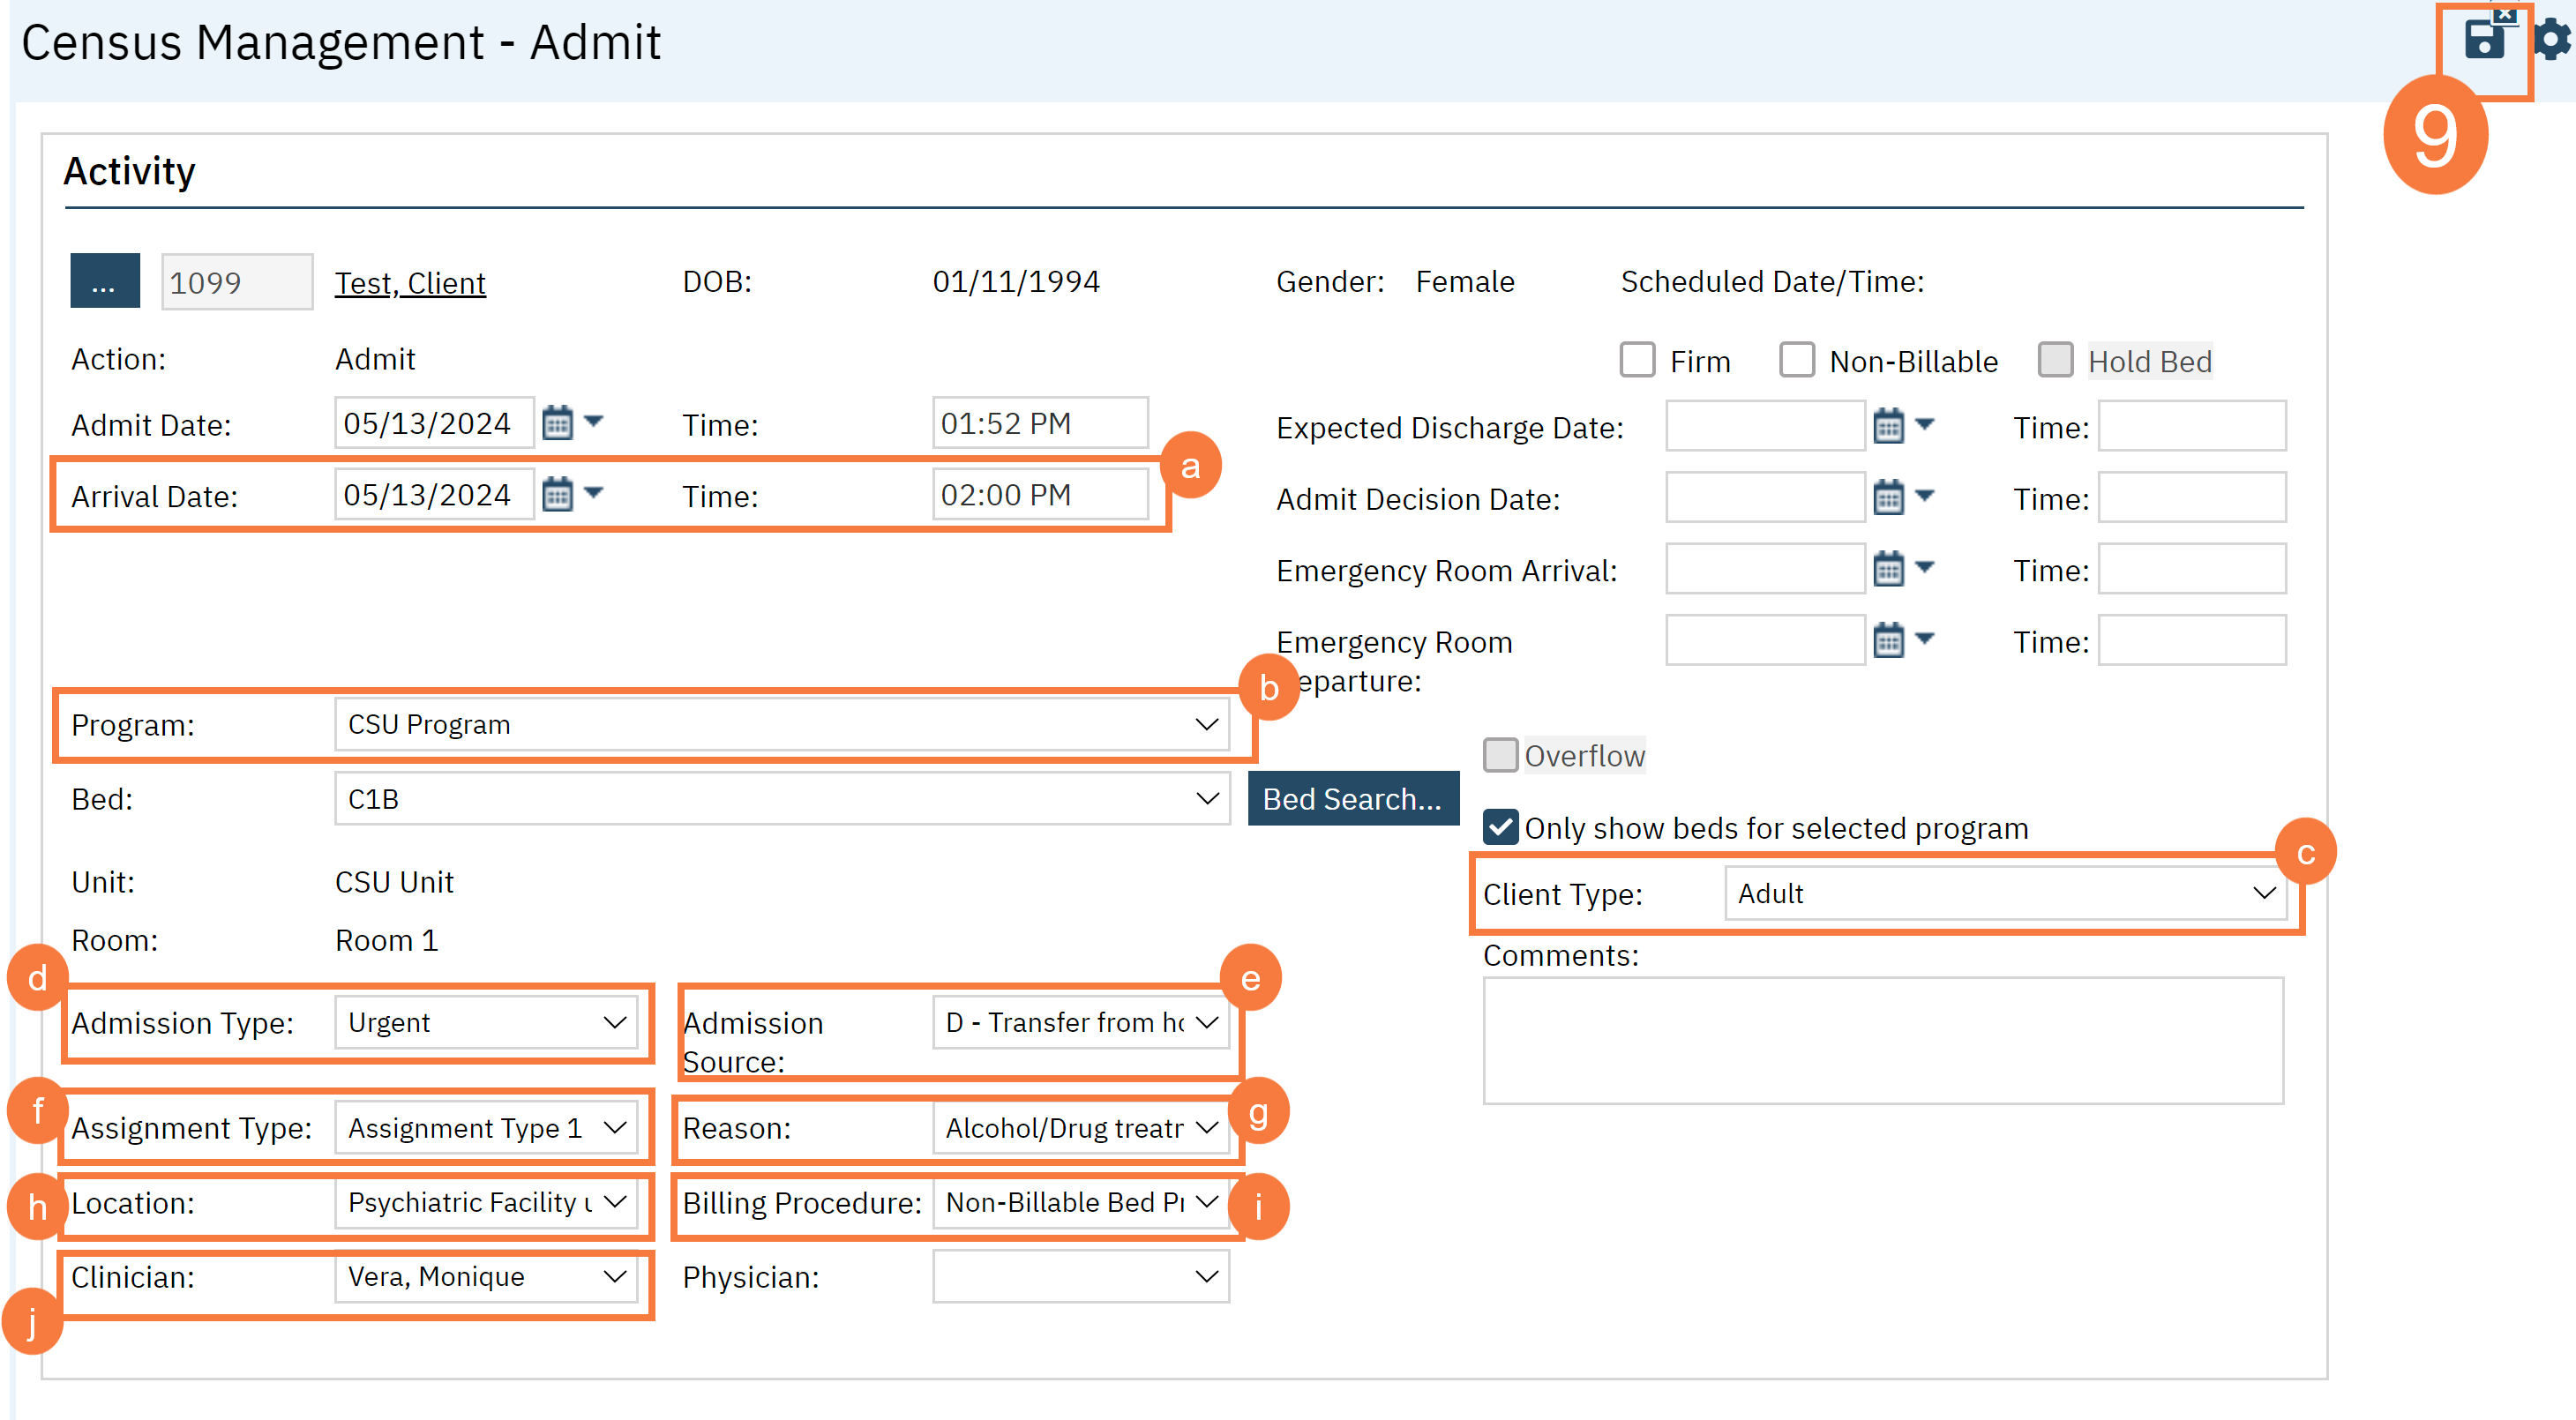
To process a quick admission, follow the steps below:
- Click on the Search icon, with the client open.
- Type Whiteboard in the search bar.
- Click to select Whiteboard (My Office) from the search results.
- This will bring up the Whiteboard (My Office) list page. Use the filters as needed.
- Click on the hyperlink for the Bed to be used for the admission.
- In the pop-up, select the Admit radio button.
- Click Select.
The Census Management – Admit screen opens.
- Complete the required and necessary fields on the Census Management – Admit screen.
-
-
- Arrival Date & Time
- Program
- Client Type
- Admission Type
- Admission Source
- Assignment Type
- Reason
- Location
- Billing Procedure
- Clinician
-
- When the screen is complete, click the Save button.
