As a reminder, Units, Rooms, and Beds can be converted. Decision to do data conversion versus manual entry is based on the level of effort for either option. Below will incideate steps needed for set up. This will also include the corresponding sheet and reference for conversion.
- Navigate to Units/Rooms/Beds (Administration).
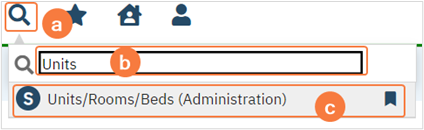
- Click on the Search icon.
- Type Units.
- Only three characters are required before options display.
- Select Units/Rooms/Beds (Administration) from the options.
Unit needs to be set up for every type of setting (inpatient, CSU, and residential).
- Click the New Unit icon in the tool bar to open Unit Details.
CSU
- Enter the Unit Name. This will automatically copy over to Display As.
- If you would like the display as to be different feel free to change it. This is the name the end user will see.
- Corresponding conversion file: Setup_Data_Units
- Column Name: UnitName and DisplayAs
- Active checkbox would default to be checked. This should remain as is.
- This would only be deselected if the Unit is no longer utilized.
- If deselected you should enter an Inactive Reason.
- Corresponding conversion file: Setup_Data_Units
- Column Name: Active and InactiveReason
- Active: Y indicates the checkbox would be selected or leaving this blank would indicate the checkbox is not selected.
- InactiveReason: CodeId associated to UNITINACTIVEREASON global code.
- Licensed Bed Capacity should be completed if there is a bed capacity.
- This will show in parentheses next to bed capacity.
- Corresponding conversion file: Setup_Data_Units
- Column Name: LicensedBedCapacity, enter integer.
- Select Show on Bed Board and Show on Whiteboard checkboxes.
- Corresponding conversion file: Setup_Data_Units
- Column Name: ShowOnBedBoard and ShowOnWhiteBoard
- Y indicates the checkbox would be selected.
- Leaving this blank would indicate the checkbox is not selected.
- Corresponding conversion file: Setup_Data_Units

- In the Availability section enter a Start Date, this is the date the unit has become active.
- You can backdate this date.
- End Date should only be entered if the unit was no longer active.
- Click Insert. This information will not display in the Availability History section.

- Click Save in the tool bar, upper right hand corner.
- If additional units are needed click New icon and repeat the steps above.
