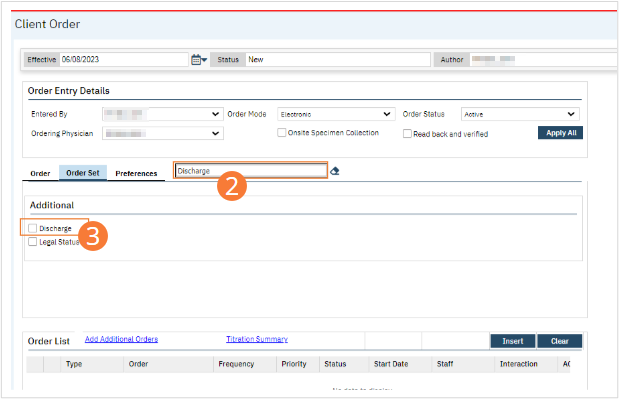
- Create a New Order, using the steps under Order Sets.
- When selecting the Order Set, select Discharge as the Order type.
- Click the checkbox next to the Discharge order.

- Complete all required fields for the Discharge order.
- Set Frequency to “Once” in the dropdown. Other fields are optional

- Click the checkbox next to the Legal Status order
- Complete all required fields for the Legal Status order.
- Be sure a status is selected under the Legal dropdown.

- Select the Insert button. The Orders will be added to the Order List.
- Click the Save button.
- Sign the Orders, following the steps under How to Sign a Document.

