When a seclusion and/or restraint episode occurs, the documentation should be uniformly captured within Client Orders and Seclusion and Restraint Safety Check (whiteboard and/or flowsheet). This is important because any report data about seclusion and restraints will pull from these fields.
If there was a preceding safety or observation check of any kind, it will be important to discontinue because the EHR system can only demonstrate one safety check at a time on the whiteboard. Therefore, create a safety check for the most restrictive scenario. If there is data that needs to be captured in a secondary type of check, then that entry can be inputted into associated flowsheet rather than from the whiteboard.
Lastly, if there is a need to extend a seclusion and restraint order that is going to expire or has expired, we recommend that providers order a new seclusion and restraint order, rather than change the start and end time/date of an existing order.
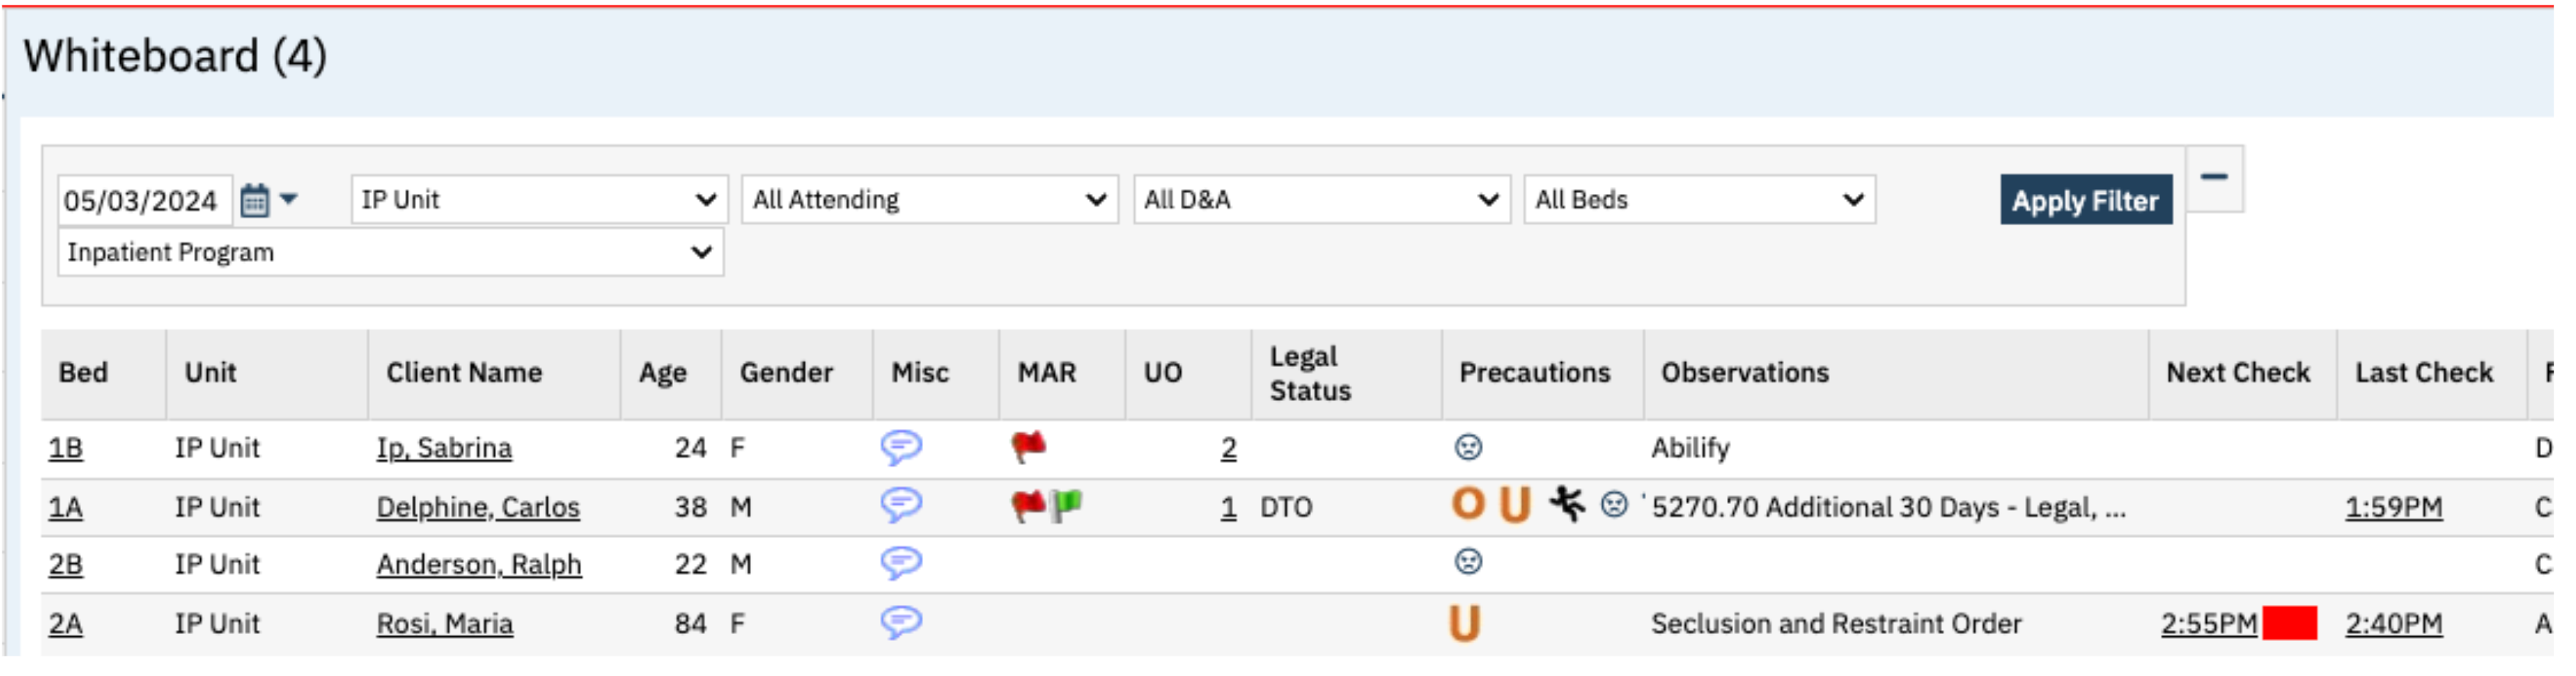
Signed Seclusion and Restraint orders will populate on the Whiteboard, allowing assigned staff to easily see when check times are approaching.
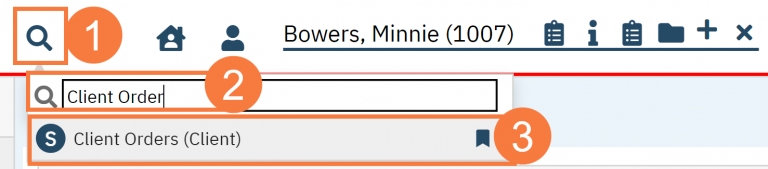
- With an active client selected, click the Search icon.
- Type ‘Orders’ into the search bar.
- Click to select Client Orders (Client).
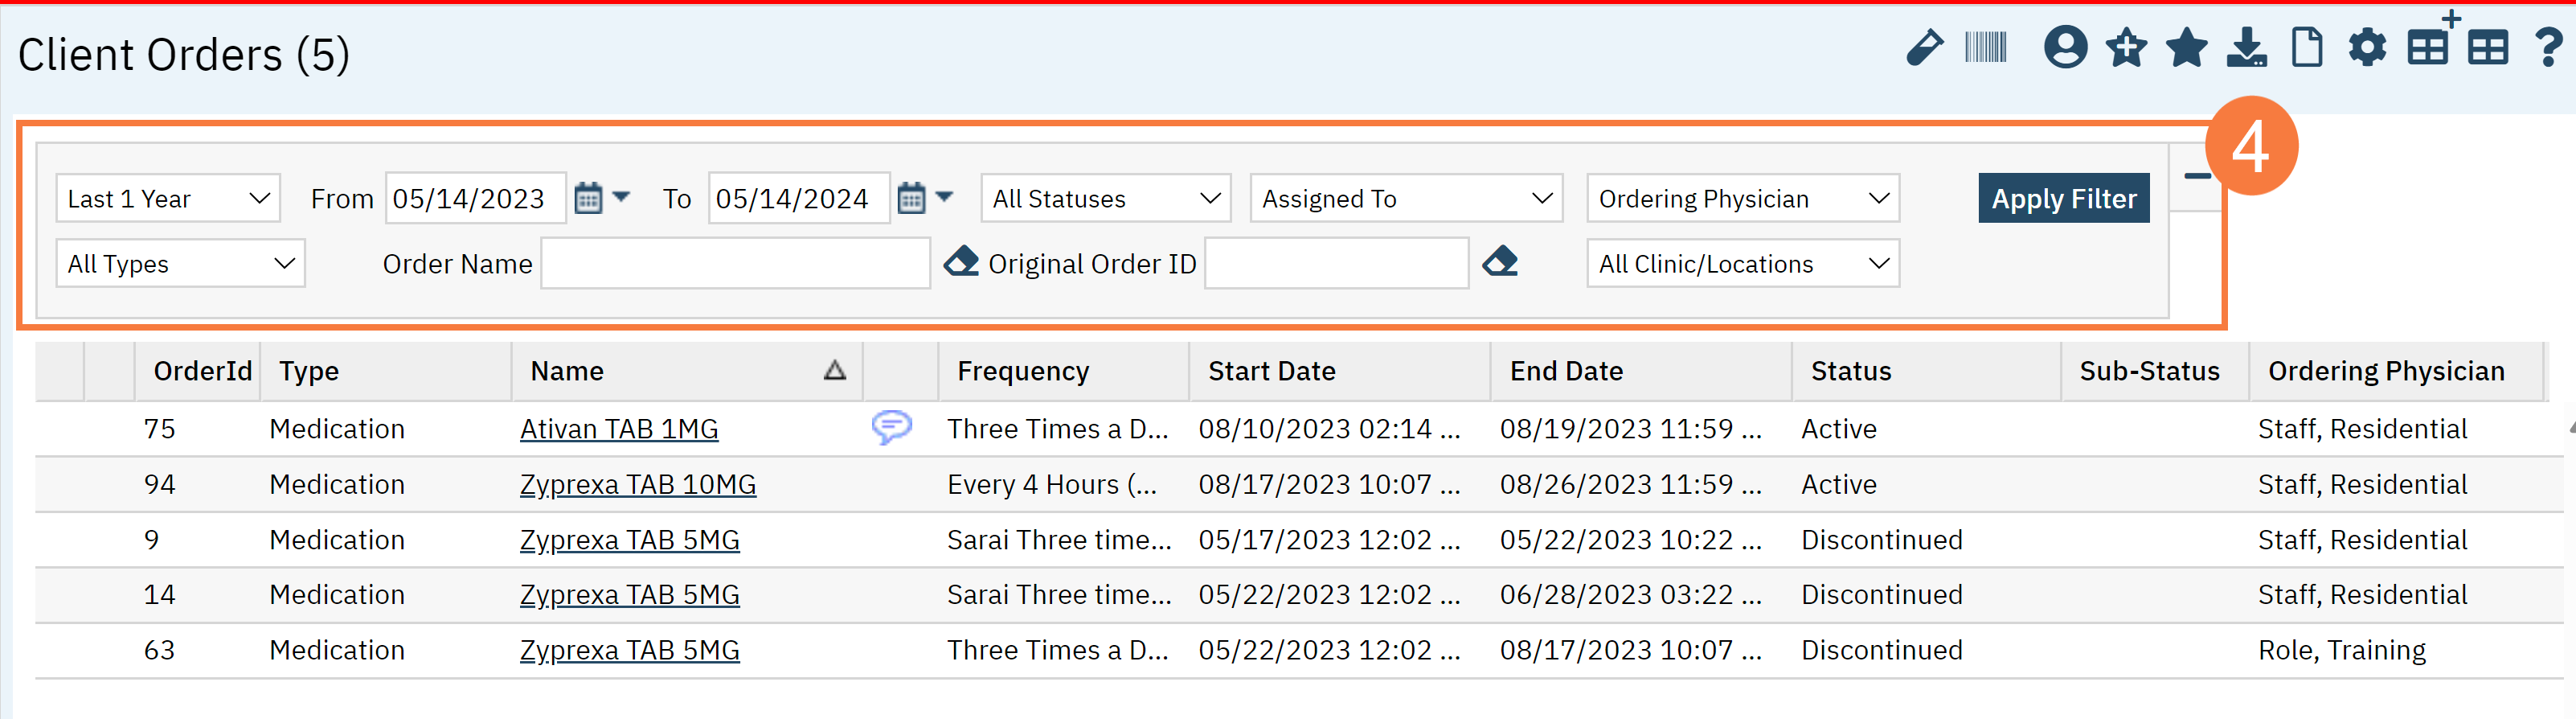
- This will bring up the Client Orders (Client) list page. Use the filters as needed.
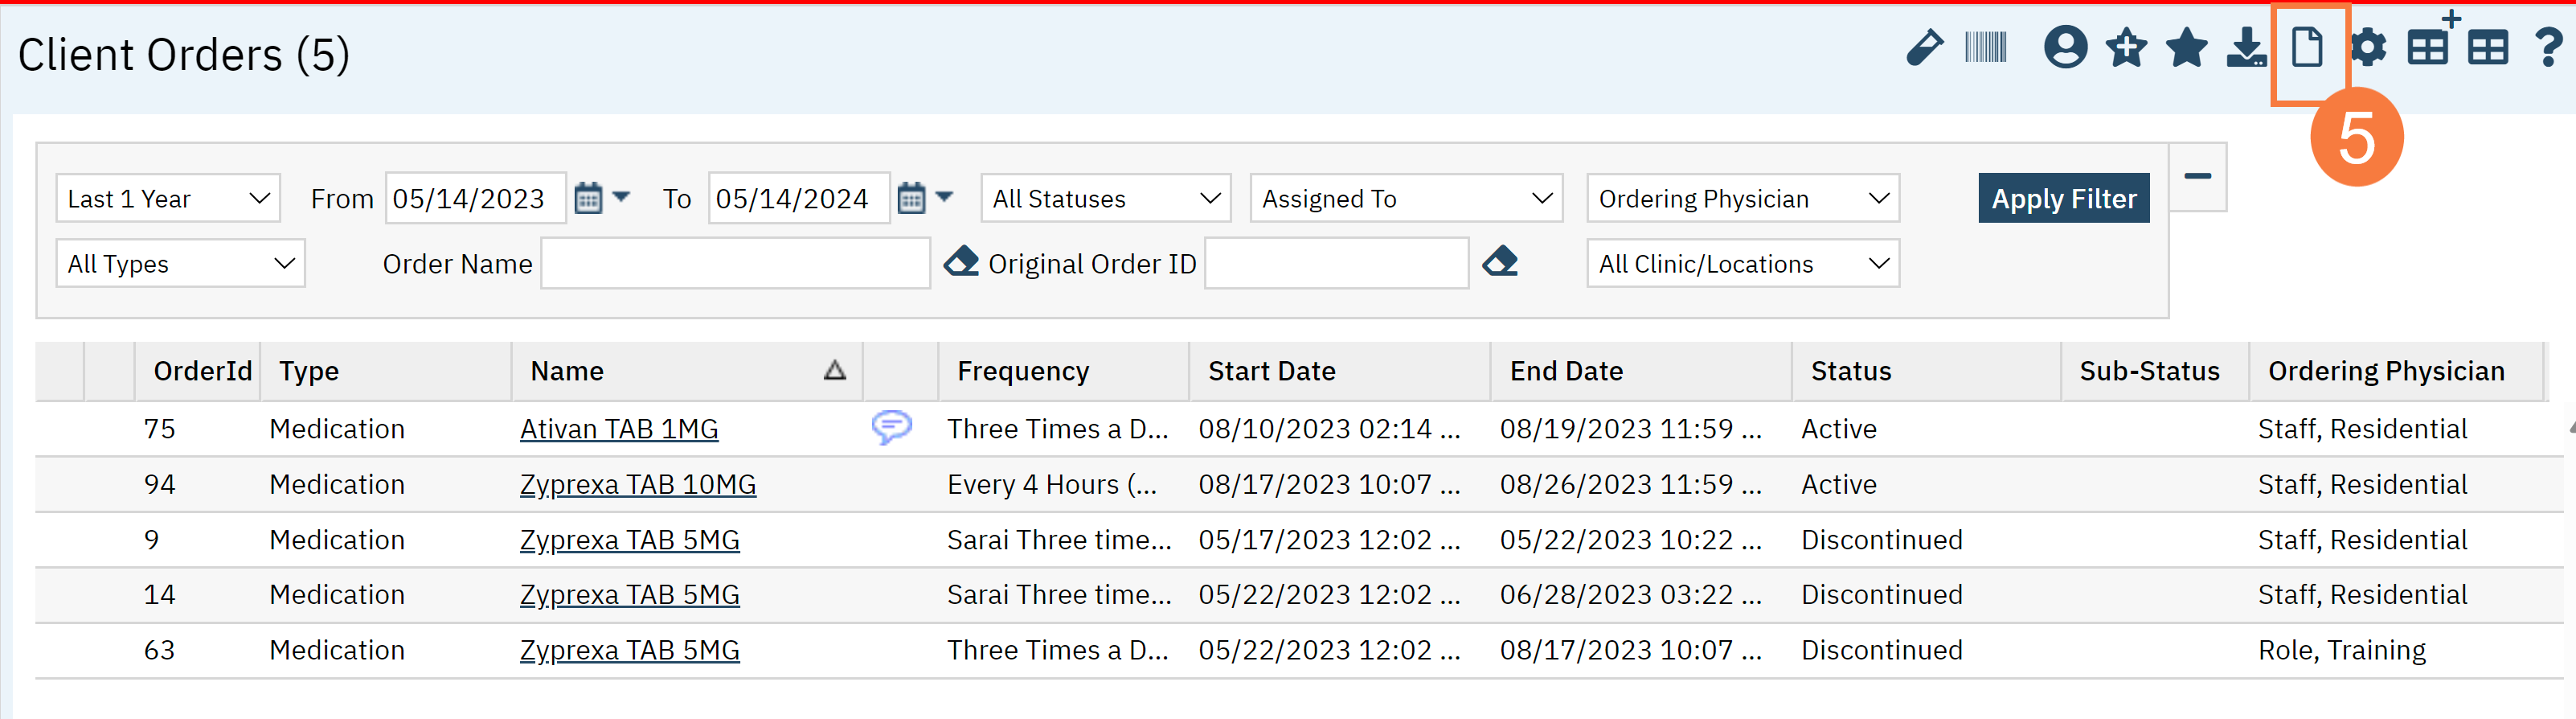
- Click the New button in the top right.
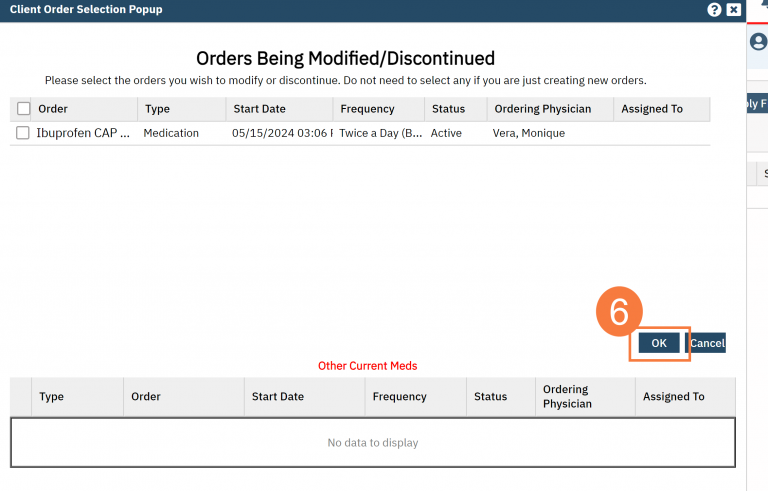
- The Client Order Selection window will pop up. Click OK.
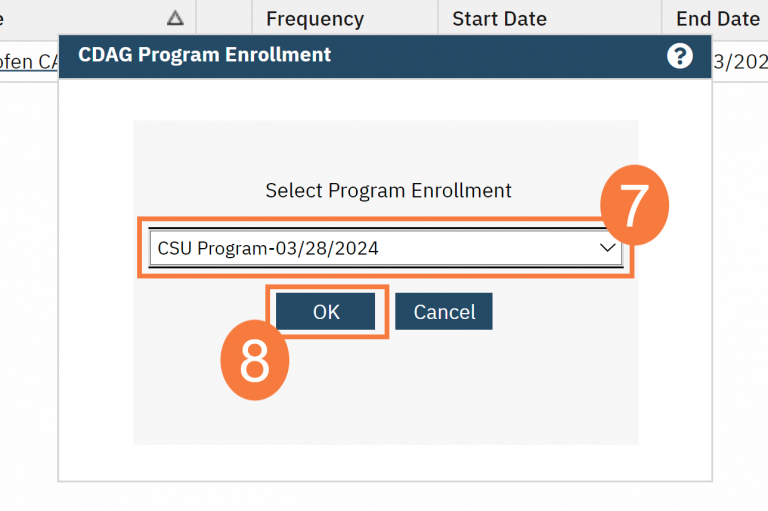
- The CDAG Program Enrollment window will pop up. Select the correct Program Enrollment from the available options.
- Click OK.
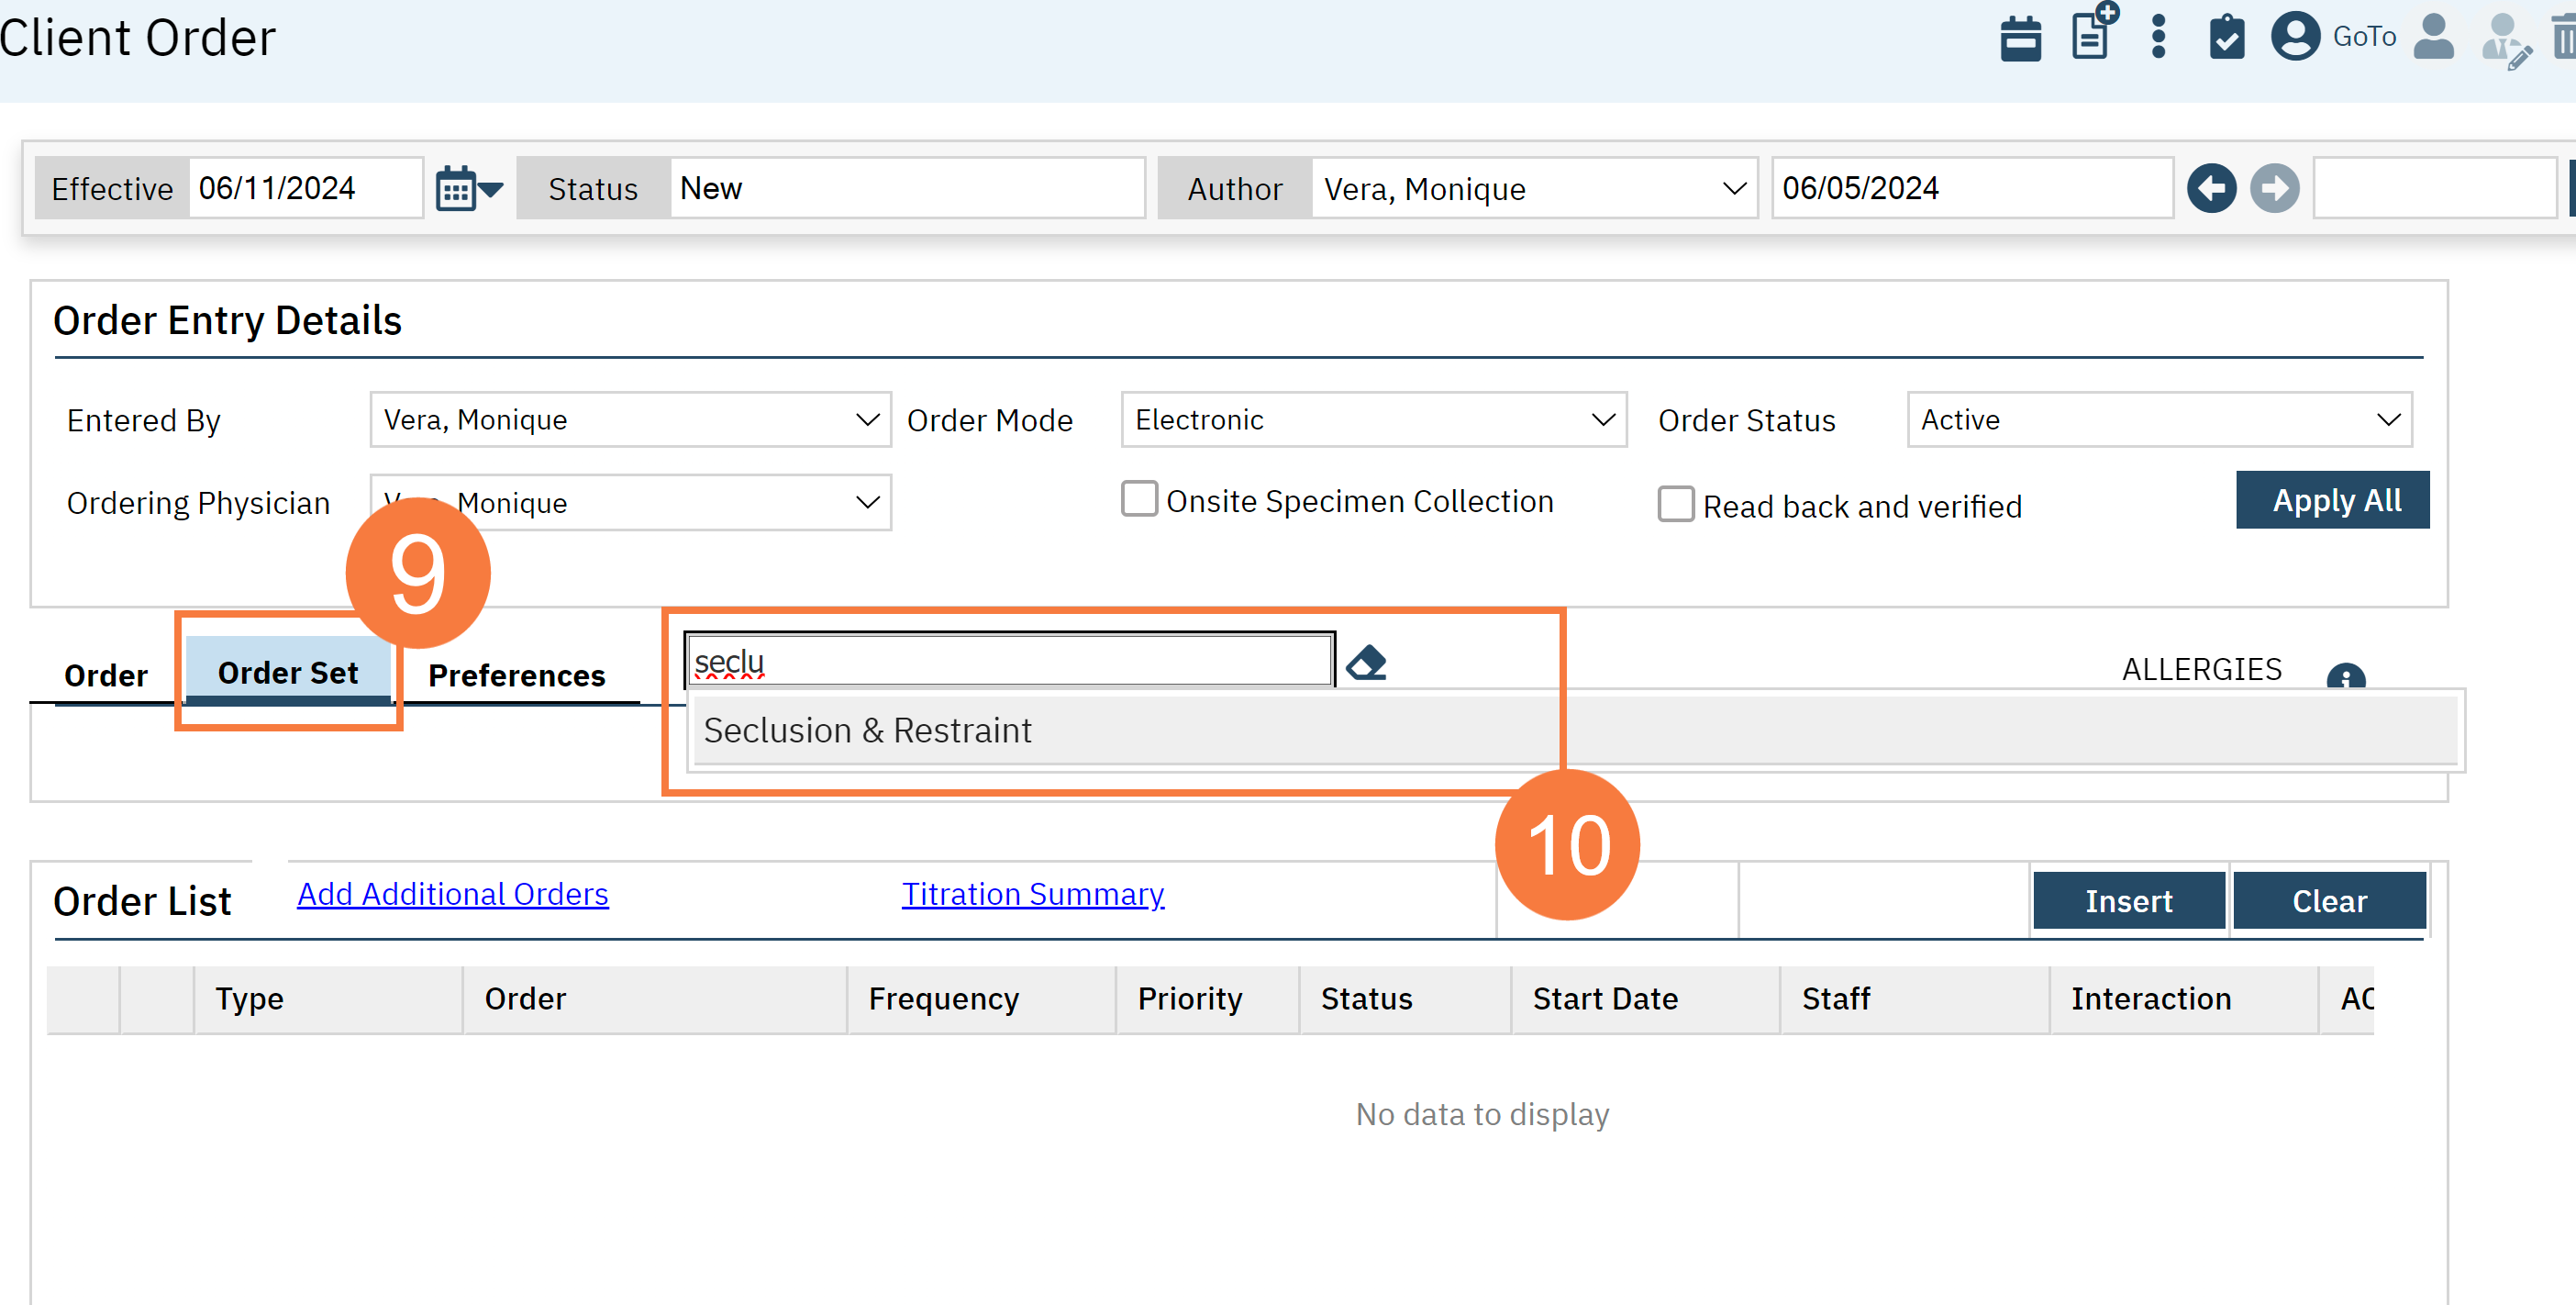
- Click the Order Set tab.
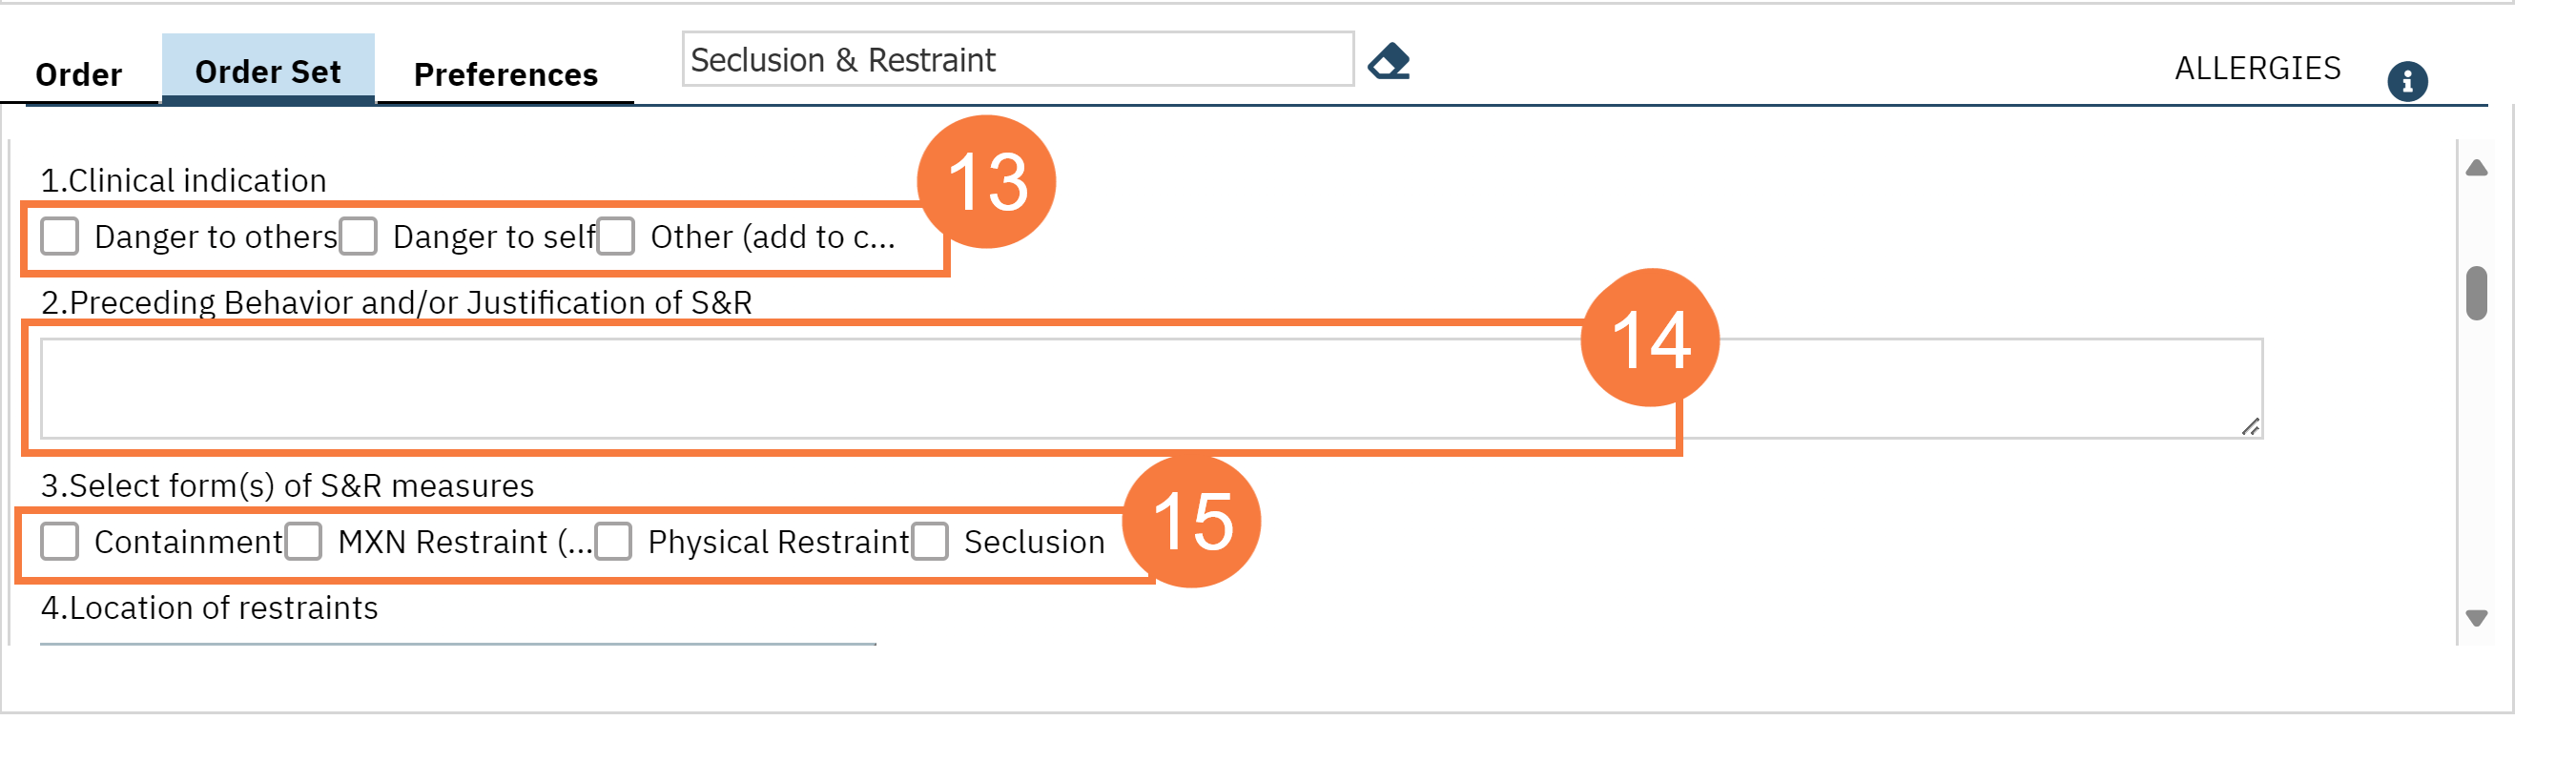
- While each of the orders can be ordered separately, in the Order Set Search field, type ‘Seclusion and Restraint’ and select the option when it appears. This is will give the whole set of seclusion and restraint-related orders.
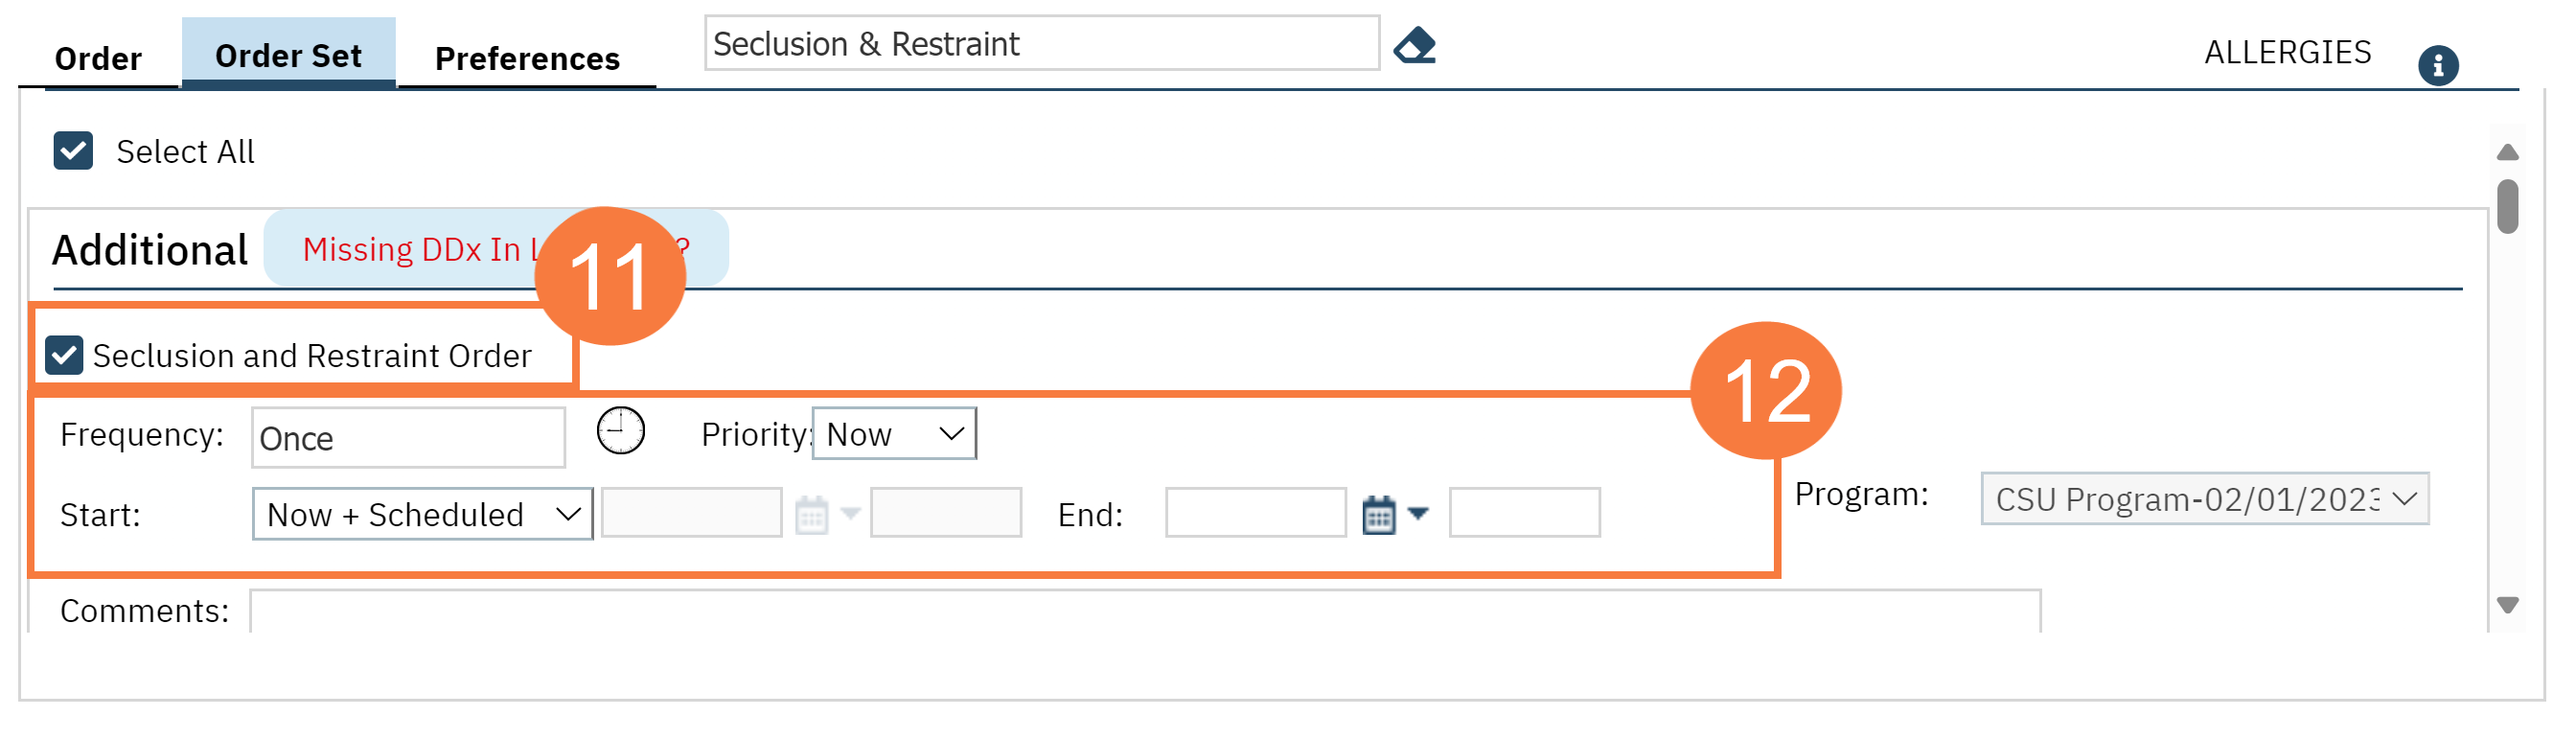
- Click the Seclusion and Restraint Order checkbox. This order is used to capture information about the initiation of a seclusion and restraint episode.
- Complete all applicable order fields.
- Select a frequency by searching for a frequency in the search box. Typically, the frequency is set to “Once.”
- Select a priority from the dropdown. Typically, the priority to set to “Now” to indicate to the nurse that they should start the seclusion and restraint immediately.
- Select the Start Date/Time to represent the time that Seclusion and Restraints episode began. This information will be included as part of the DHCS Report
- At the time of ordering, select End Date/Time to represent the maximum time that a Seclusion and Restraint episode can be for based on age. This will help your staff keep track of how much is left before the seclusion and restraint order expires
- Select the appropriate reason for seclusion and restraint.
- In the Preceding Behavior and Justification of S&R, textbox, provide the necessary information to support the case for seclusion and restraints.
- Select checkboxes for the seclusion and restraints being used.
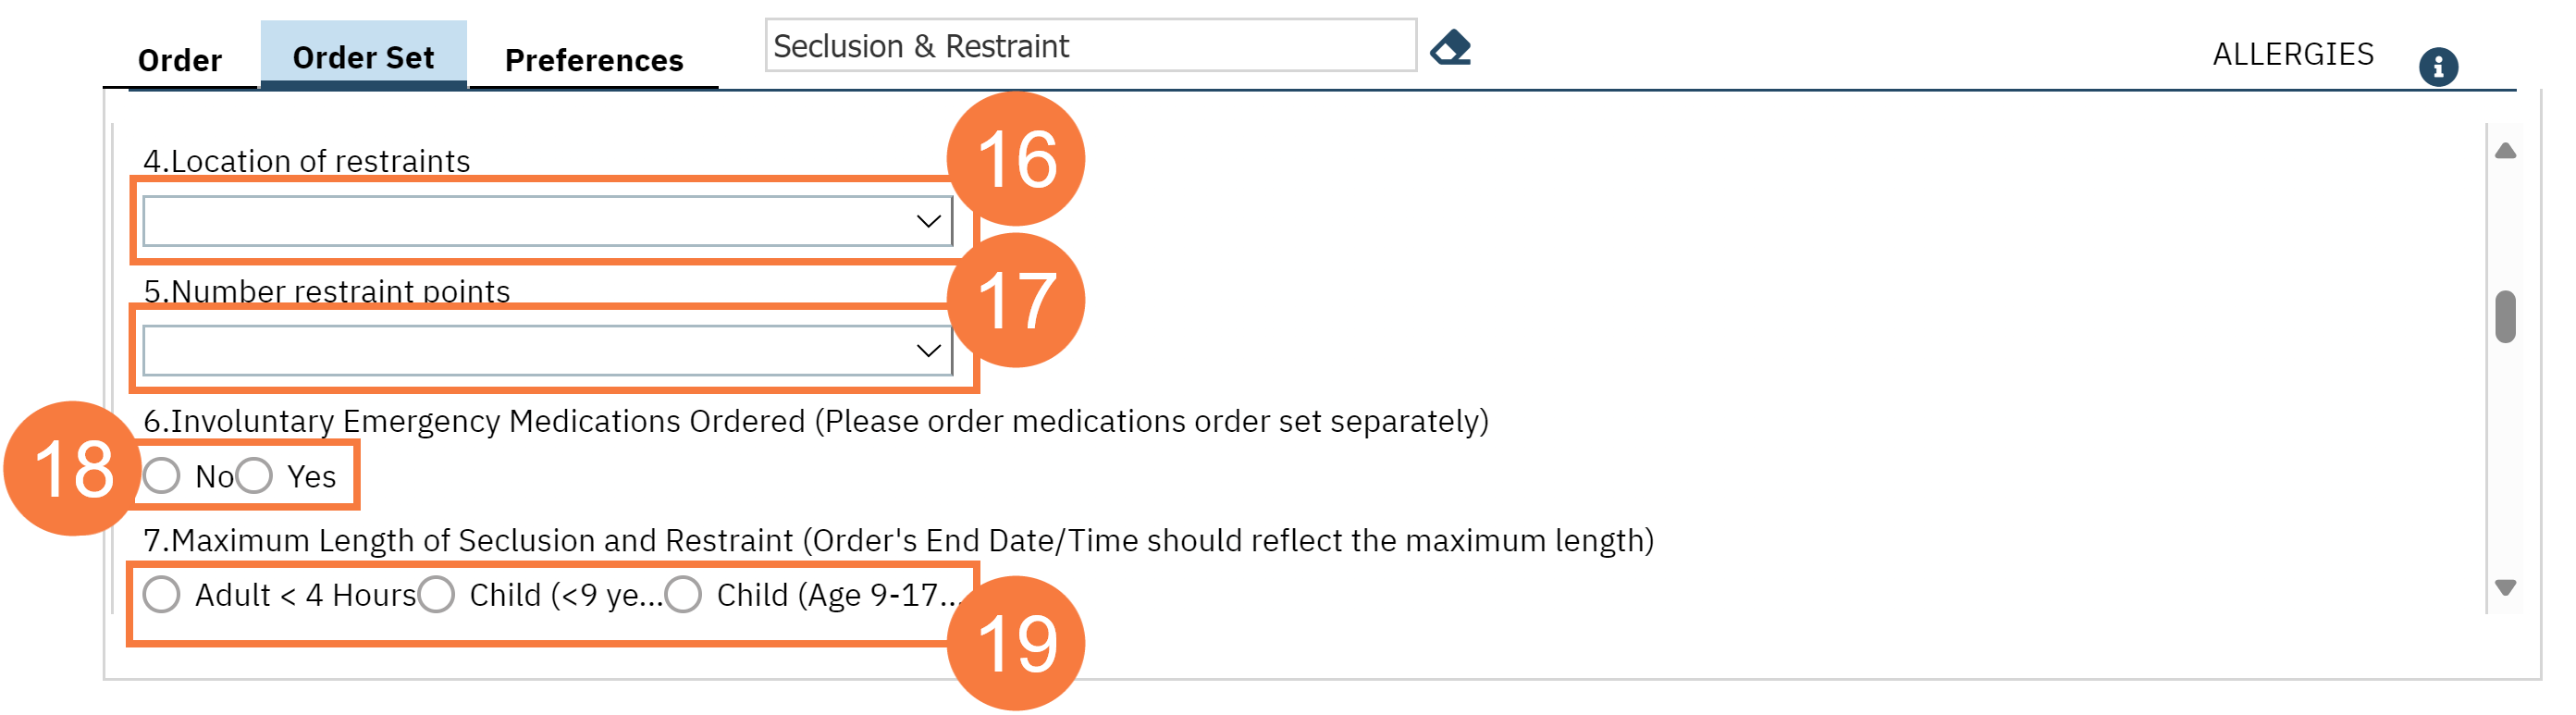
- Click the drop-down menu and select the location of the restraints.
- Click the drop-down menu and select the number restraint points.
- Select the appropriate radio button indicating if involuntary emergency medications are ordered or will be ordered as part of the Seclusion and Restraint episode.
- Note: Involuntary emergency medications should be ordered separately This may be part of this Order Set or separate depending on your county’s workflows.
- Indicate the maximum length of the seclusion and restraint order. This should match your order’s End time/date.
Seclusion and Restraint Check
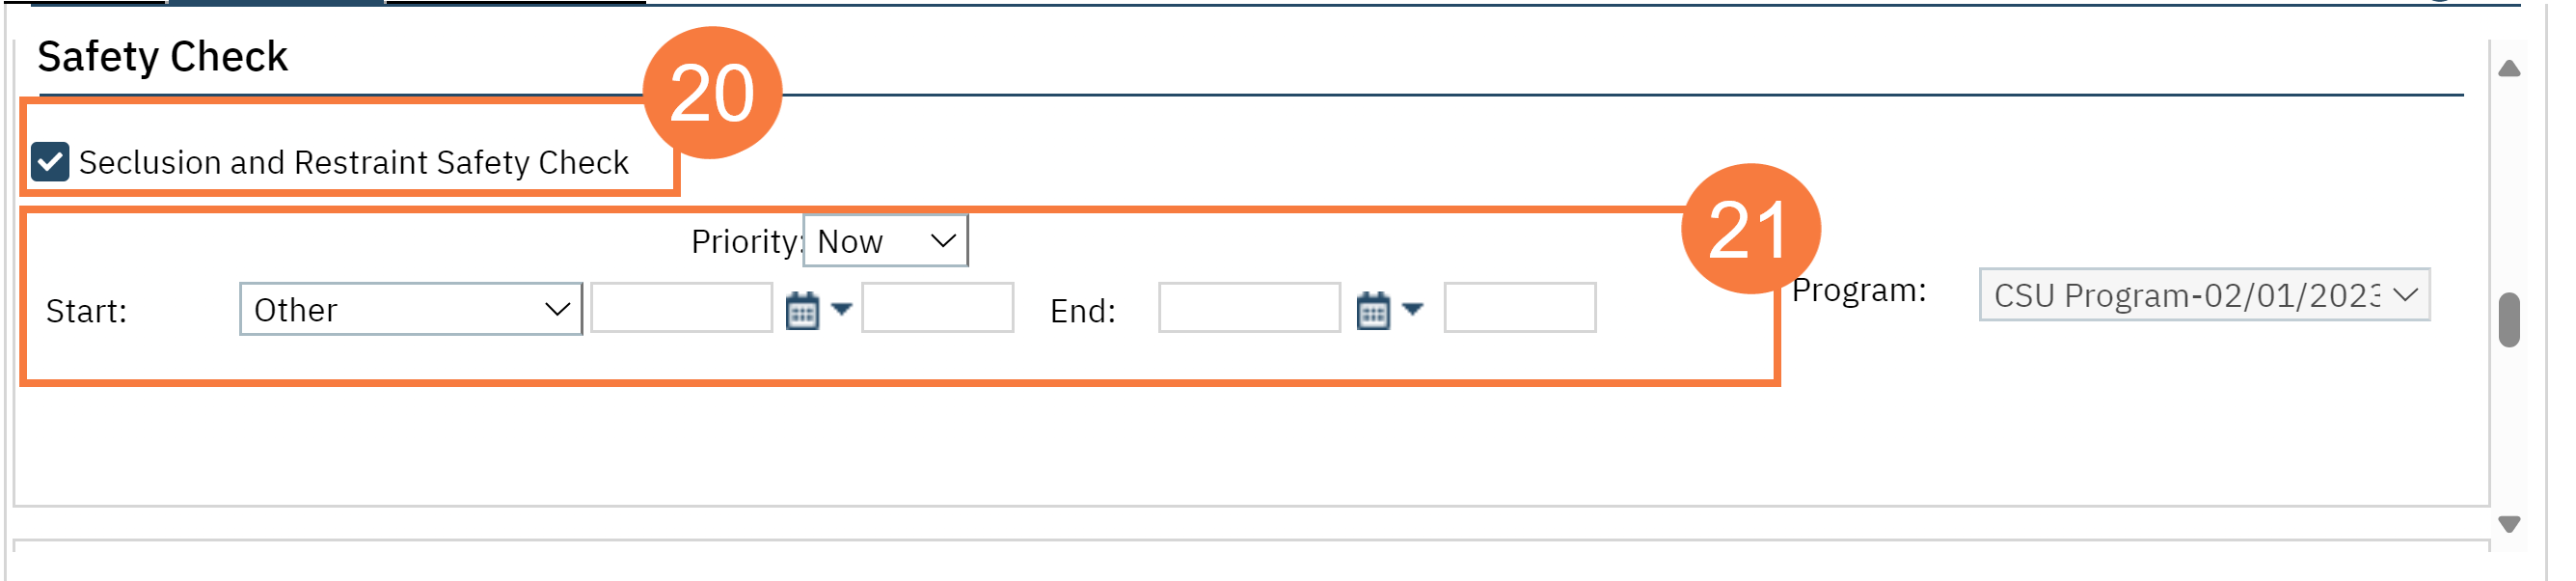
- Next, order Seclusion and Restraint Safety Check, select the checkbox from the order set. This will allow the order to show up on the Whiteboard to facilitate communication and for efficiency of documentation of the Seclusion & Restraint Safety Checks from the Whiteboard under “Safety Check,” (Any information captured from the popup for Safety Checks will automatically populate the Seclusion & Restraint Safety Check Flowsheet).
- Select a priority from the dropdown. Select a start date and time and an end date and time. (Note: Safety Checks usually coincide with the length of the Seclusion & Restraint Order)
Additional Orders
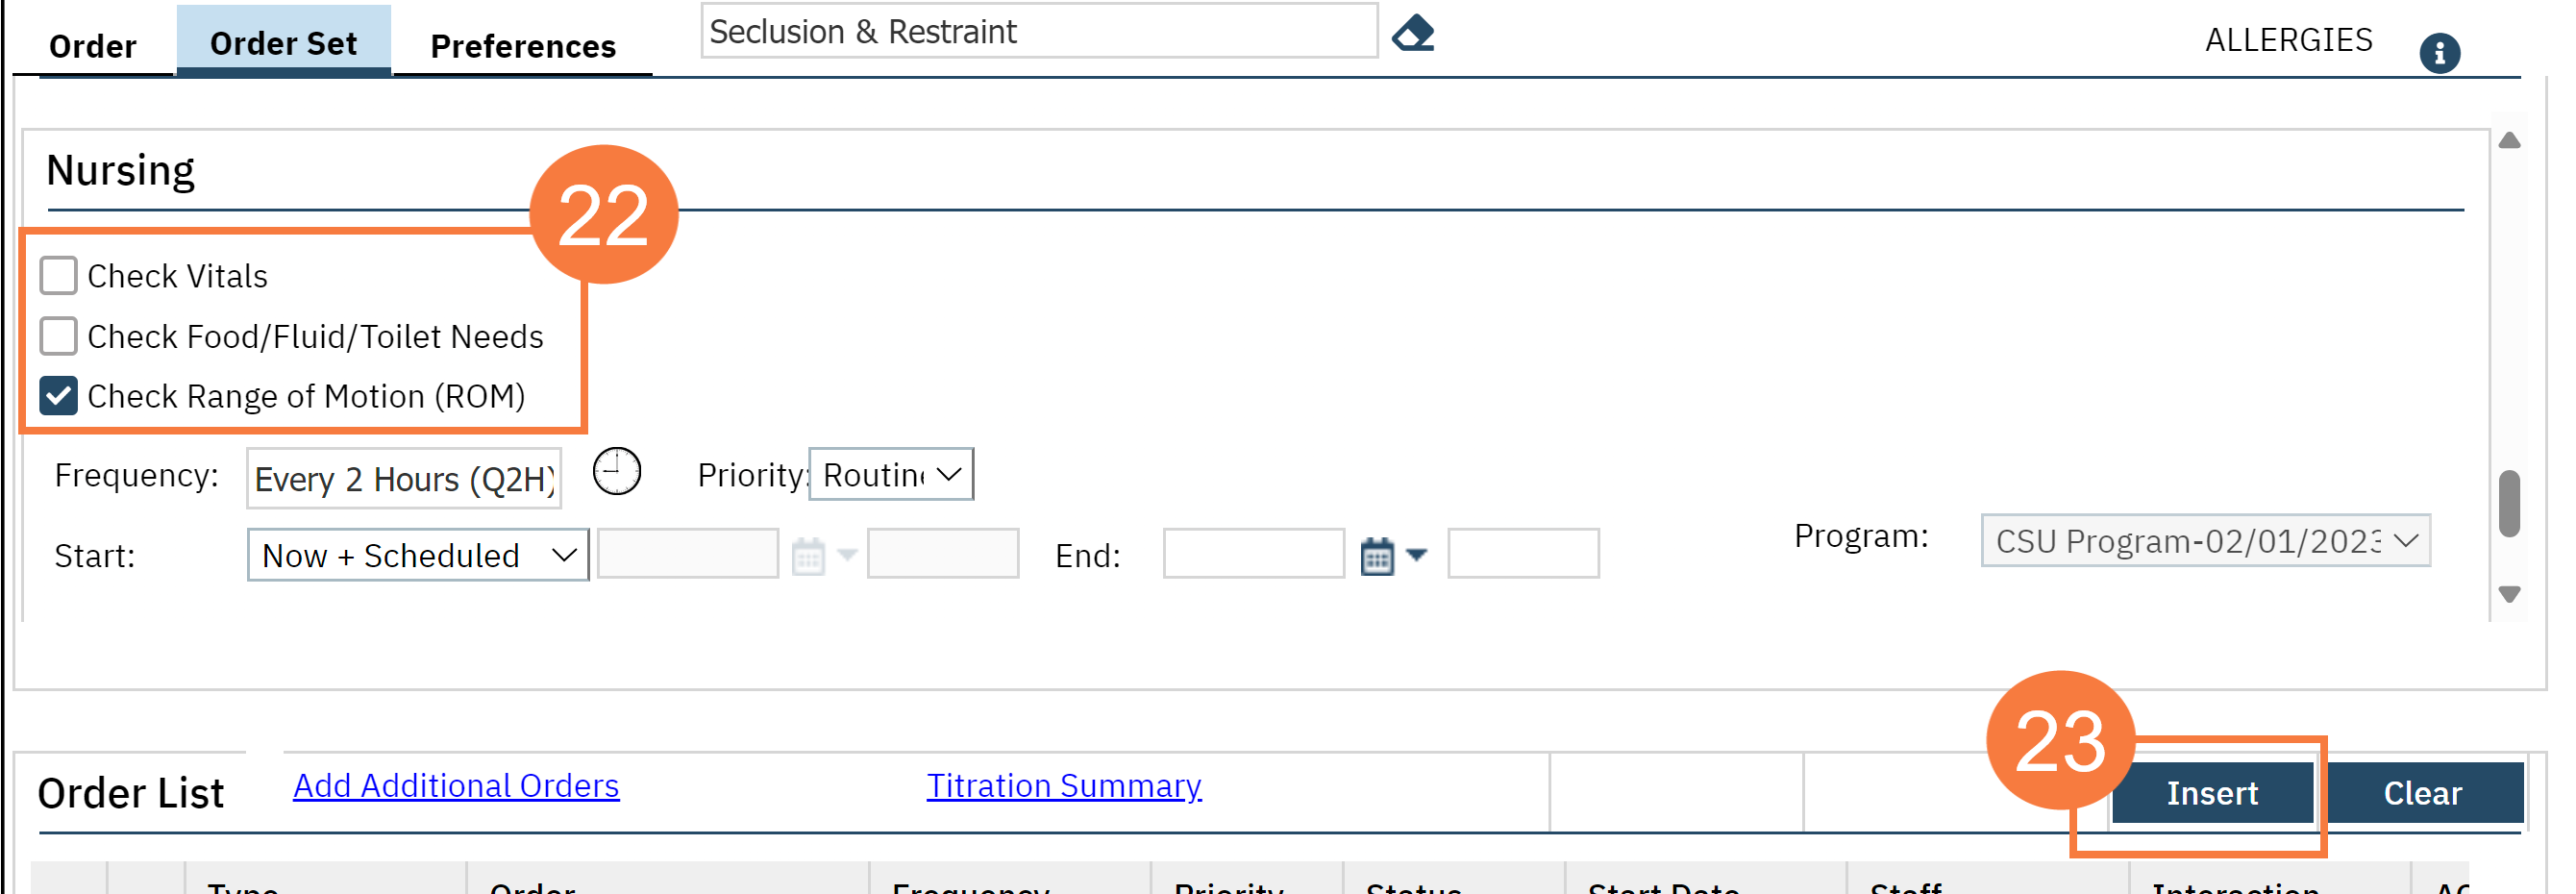
- Depending on the needs of the client and your workflow, optionally select one or more of the nursing order checkboxes, and fill out the necessary fields.
- Click Insert.
- Click Sign.

Note: On the Whiteboard, under Observations, staff will see that the patient has an active “Seclusion and Restraints”. The “Next Check” will indicate when the next safety check is due, and when the last check has been completed.