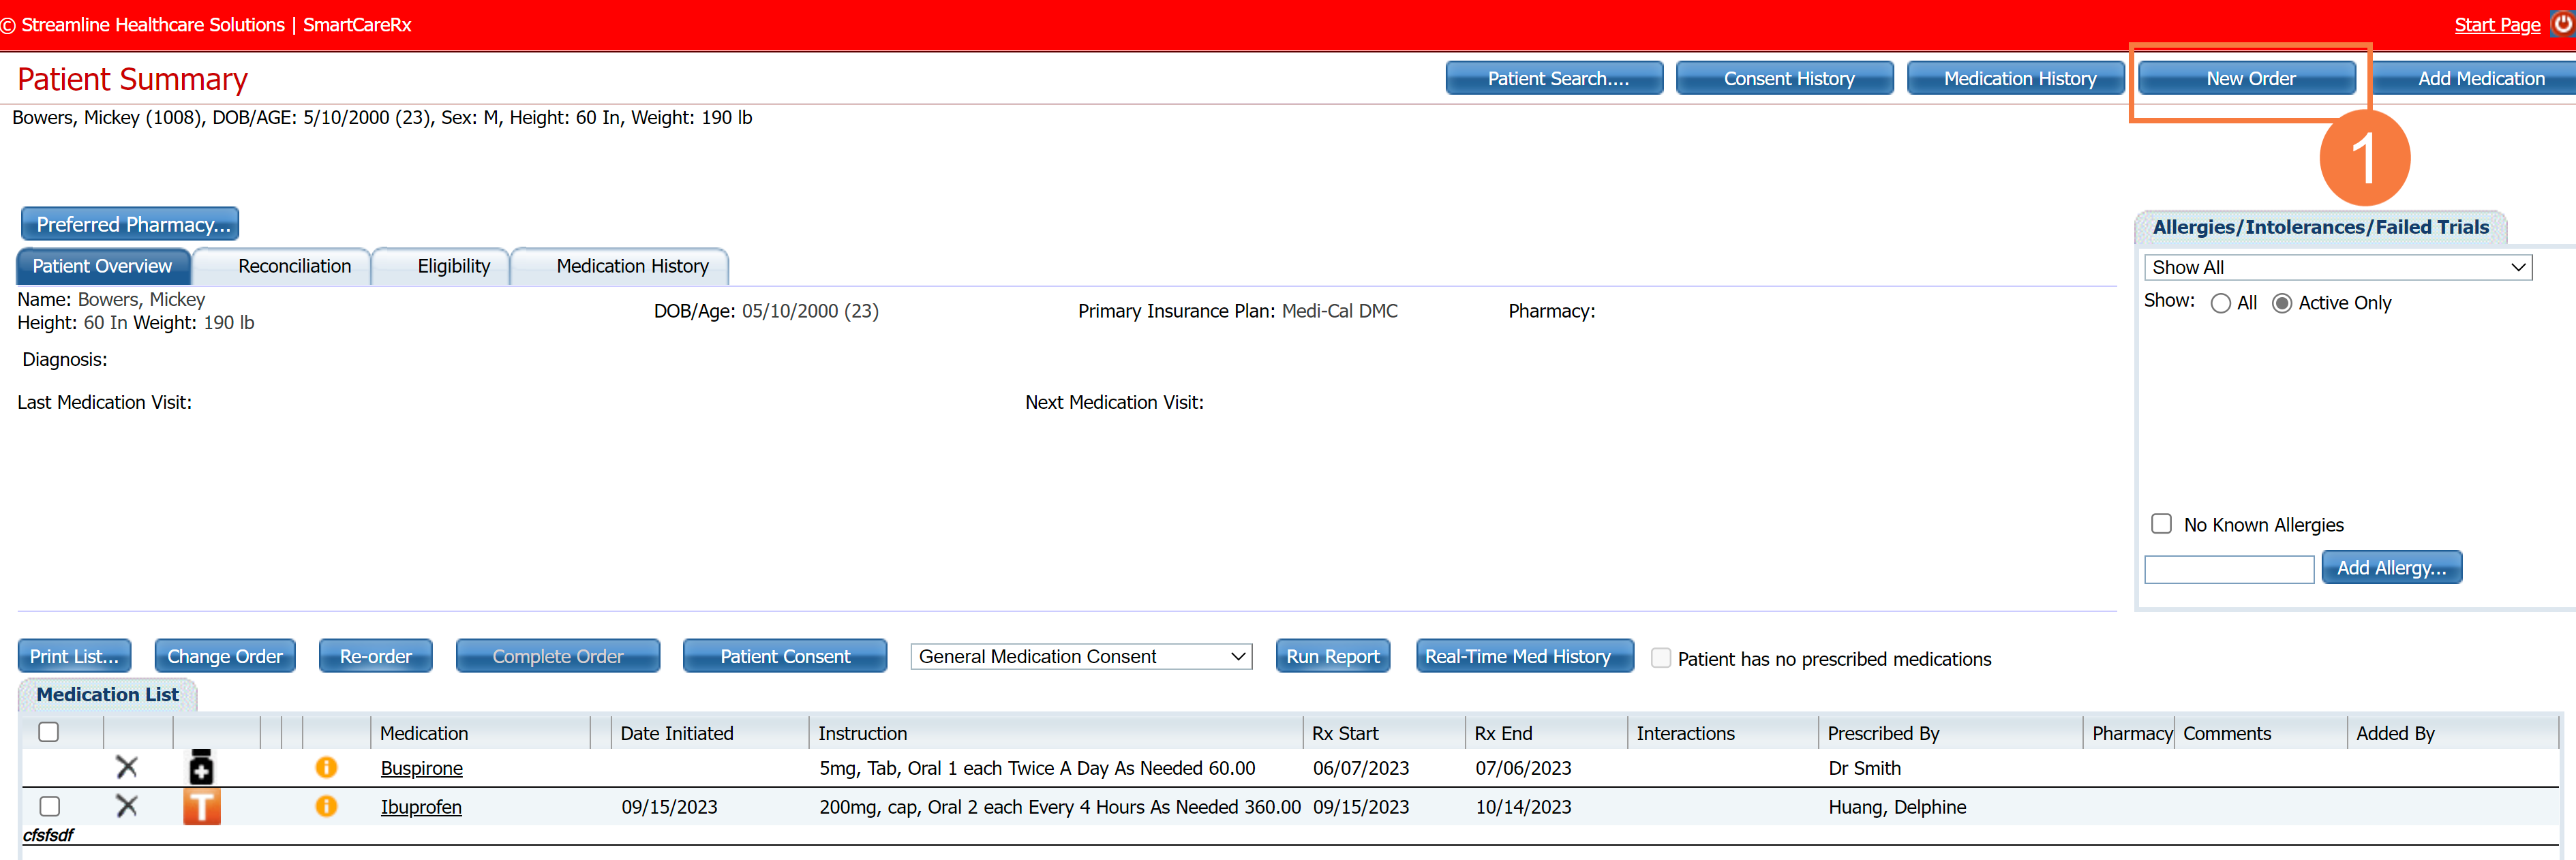
In this section we will be creating a New Order (Prescription). We will be starting from the Patient Summary Screen.
- Click New Order.
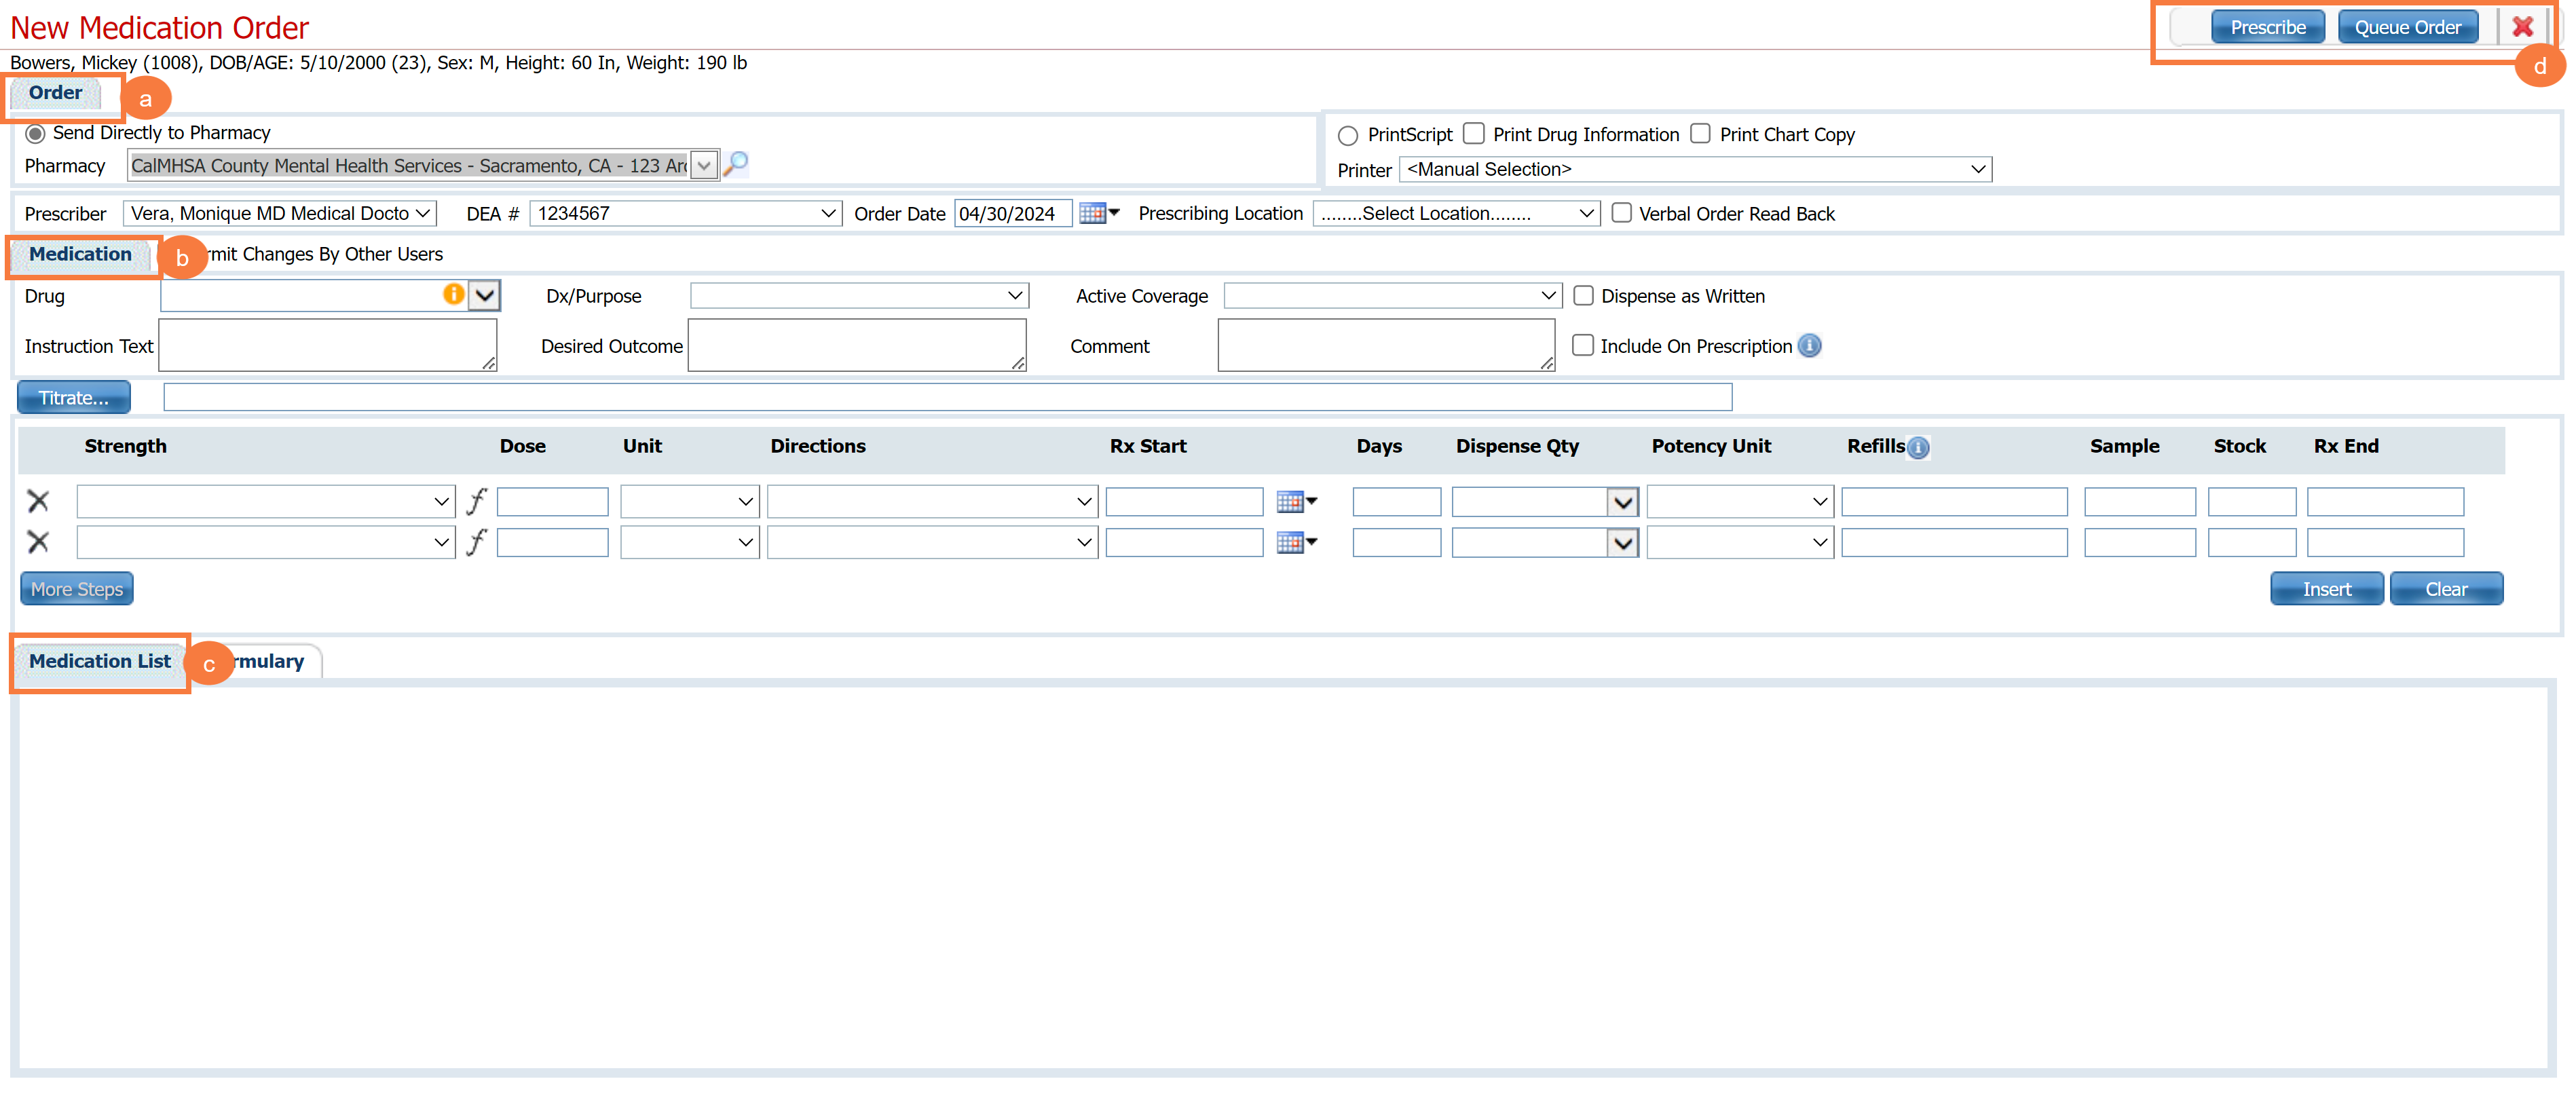
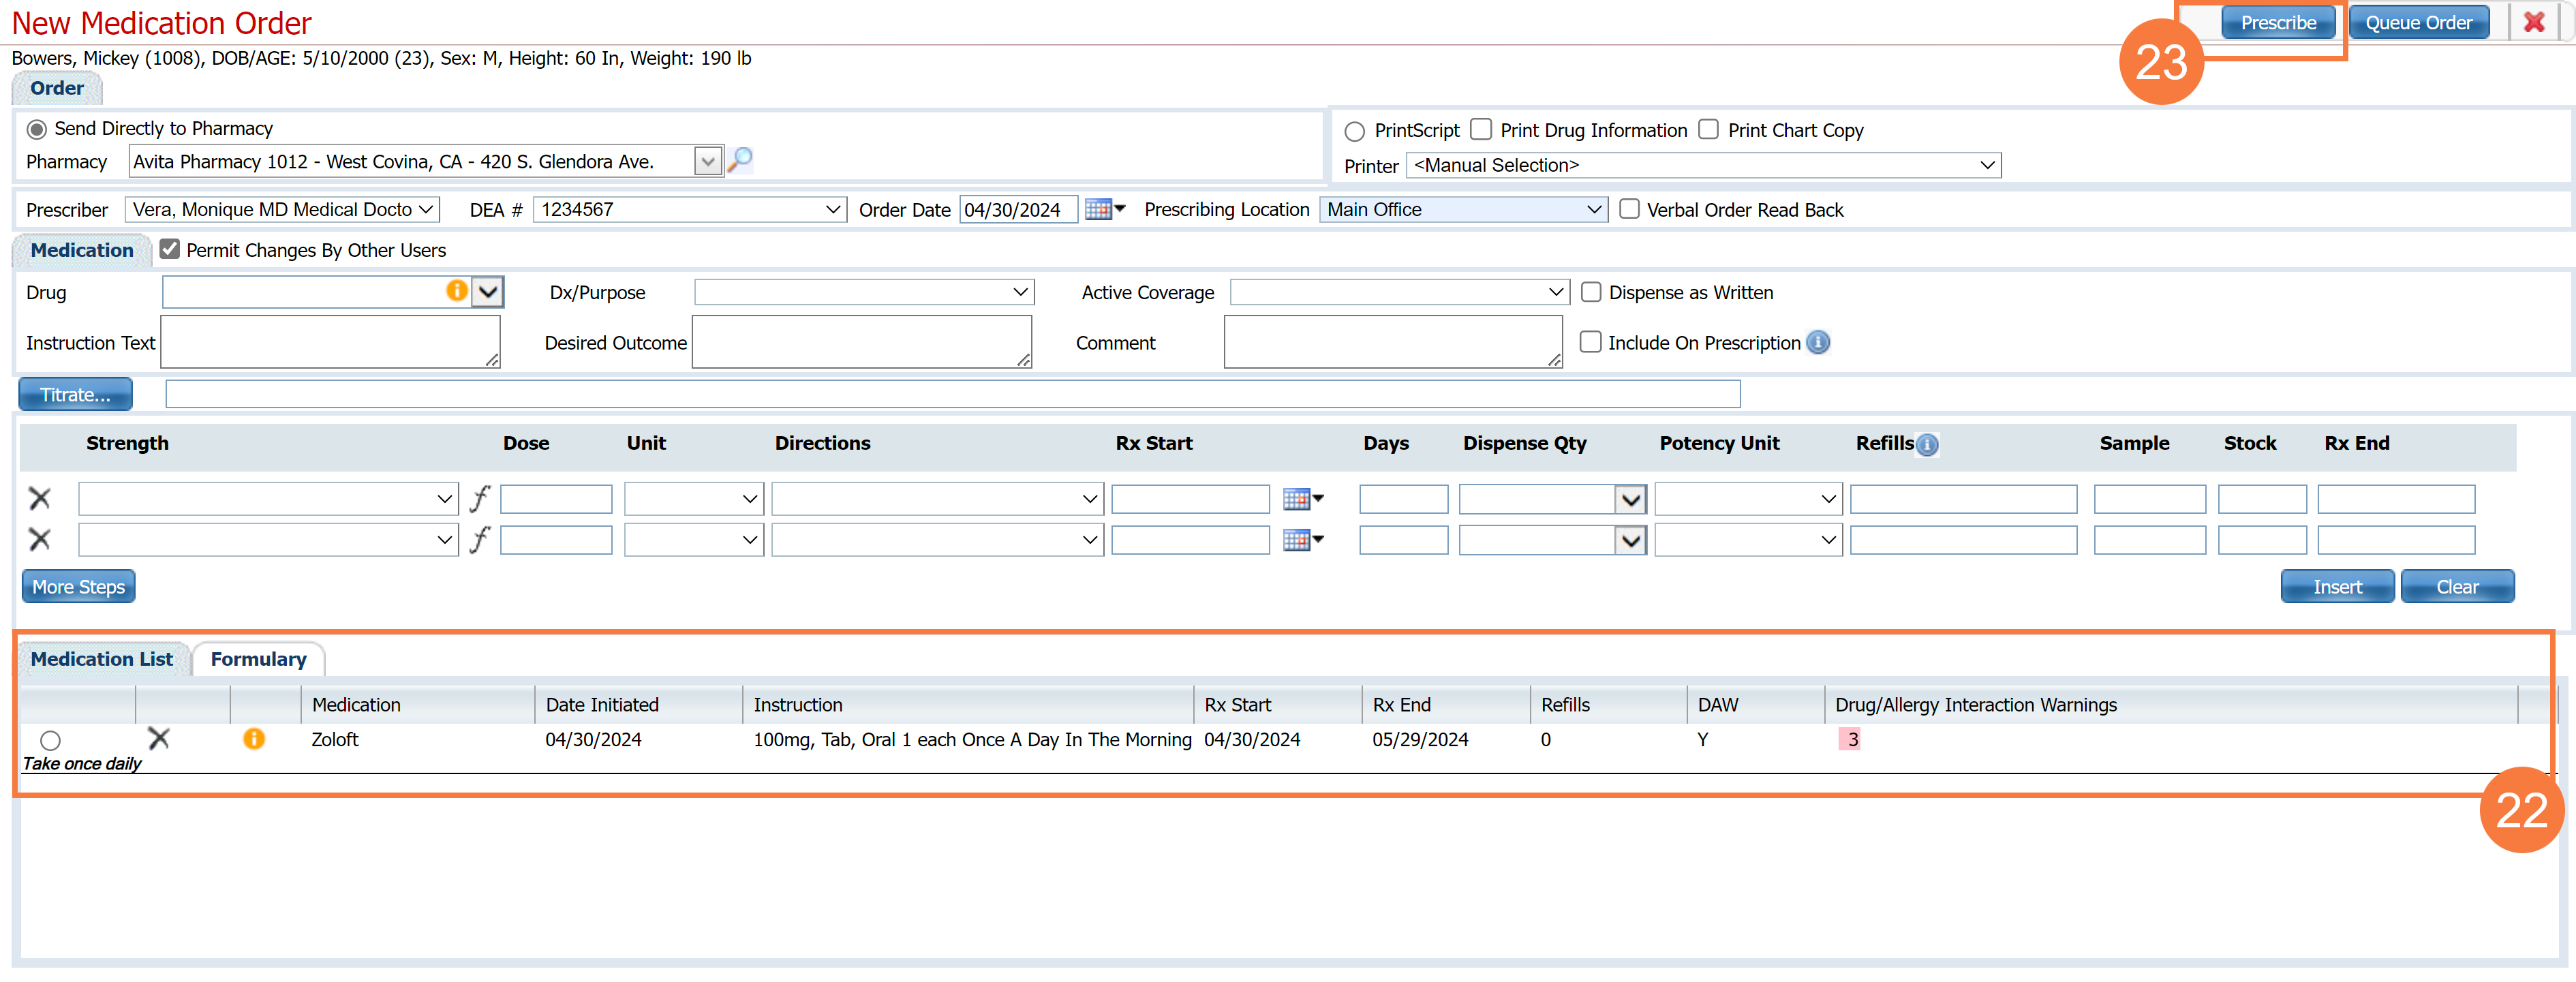
New Medication Order Screen
- Order: Section to select ‘Send Directly to Pharmacy (default) or Print Script. Also shows prescriber information including DEA # and Prescribing Location.
- Medication: Section that allows for searching and selecting of medication, diagnosis/purpose, and instructions/comments. Here we also add/adjust strength, dose, qty, etc. of medication
- Once medication is finished it gets inserted in this screen for review.
- Prescribe or Queue Order: Buttons to choose to prescribe now or put in queue to prescribe later.
New Medication Order (Continued)
- Click the Pharmacy drop-down menu and select a preferred pharmacy.
- You can also click the Magnifying glass icon to search for a pharmacy if needed.
- The default option will be to send the prescription electronically. To print the prescription instead. Use the options to right.
- Your information should populate in the Prescriber, DEA #, and the order date will default to today’s date (you cannot back or future date a prescription order).
- Click the Prescribing Location drop-down menu and select the correct location.

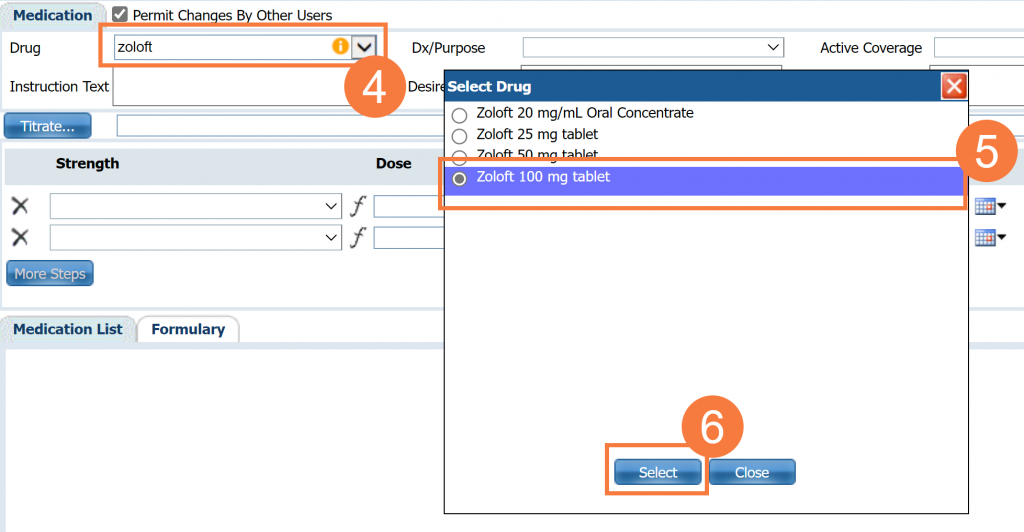
- Click and enter the first few letters of the drug name in the corresponding field.
- A Select Drug pop-up window will open. Click the radio button for the appropriate medication and dose.
- Click Select.
NOTE: Click orange circle with exclamation point near drug name to view drug definition from Medline which can be printed.
NOTE: The following fields will be auto populated.
- Generic name
- Recommended doses
- Strength
- Unit
- Rx Start Date
- Potency Unit

- Permit Changes By Other Users – on by default.
- Select drop-down and choose Diagnosis or Purpose if wanting to associate medication to diagnosis or other.
- Select drop-down and choose Active Coverage (if formulary is turned on).
- Check Dispense as Written.
- Select Save as Template – if wanting to save this configuration and use again.
- Enter Instruction Text for client put on bottle.
- Enter Desired Outcome for informational purposes if wanted.
- Enter Comment – Not put on bottle. Used to communicate with pharmacy. Select Include On Prescription. Comment changes to Note to Pharmacy.

- Enter the Dose.
- Click the Directions drop-down menu and select the appropriate option.
- Enter the Days
- Dispense Qty will automatically calculate.
- Enter Refills if applicable.
- Rx End date will auto populate.
- Click Insert.

NOTE: If this medication will be administered in a unit that uses the MAR, you must select the days of the week to proceed. If you are in the Rx Module, this will not show on prescription to an outpatient pharmacy.

- We will now see the prescription in the Medication List section. We can either prescribe the medication now or select Queue Order, which puts the medication in a queue to be prescribed later. For now, we will prescribe.
NOTE: We still will have one more screen to review and confirm prescription before actually prescribing.
- Click Prescribe.
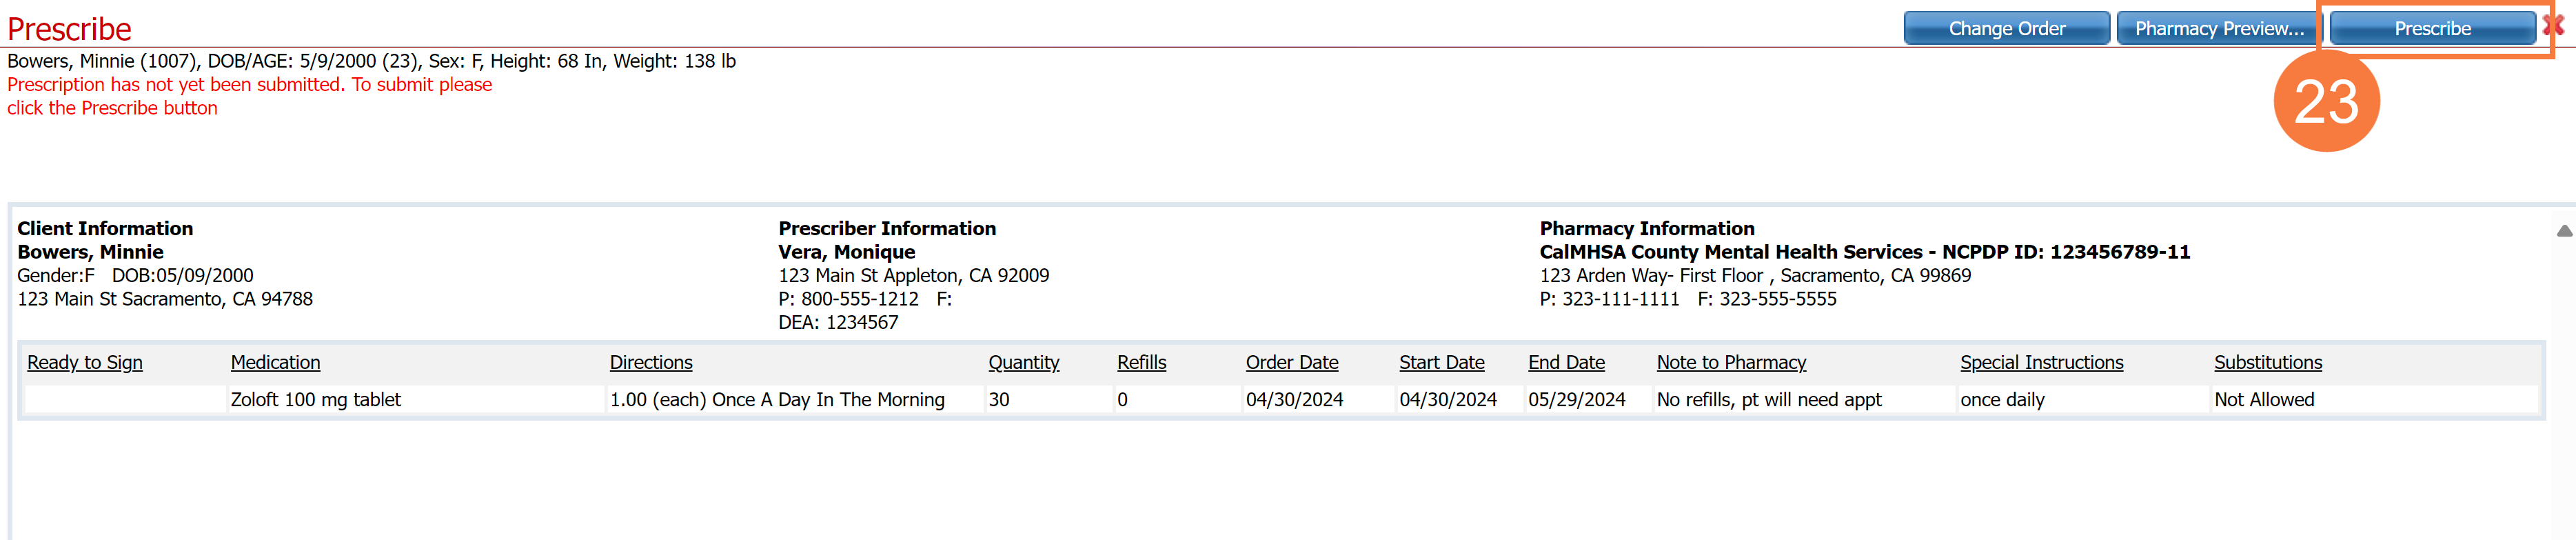
This is the last screen to review the prescription. This section contains the patient information, prescriber information, and pharmacy information. It shows the medication(s) that will be prescribed.
- Here we can go back and change the order, see a preview of what the pharmacist will see, or finally submit the prescription. Click Prescribe.