This list page is where you can see all groups for your organization in one place. The information you see displayed is what is currently marked on the group service. This page is used most often by counselors, sys admins, social workers.
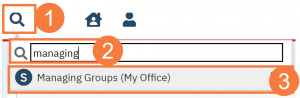
- Click on the Search icon.
- Type “Managing Groups” in the search bar.
- Select “Managing Groups (My Office)” from the search results.
This will open the Managing Groups (My Office) List page.
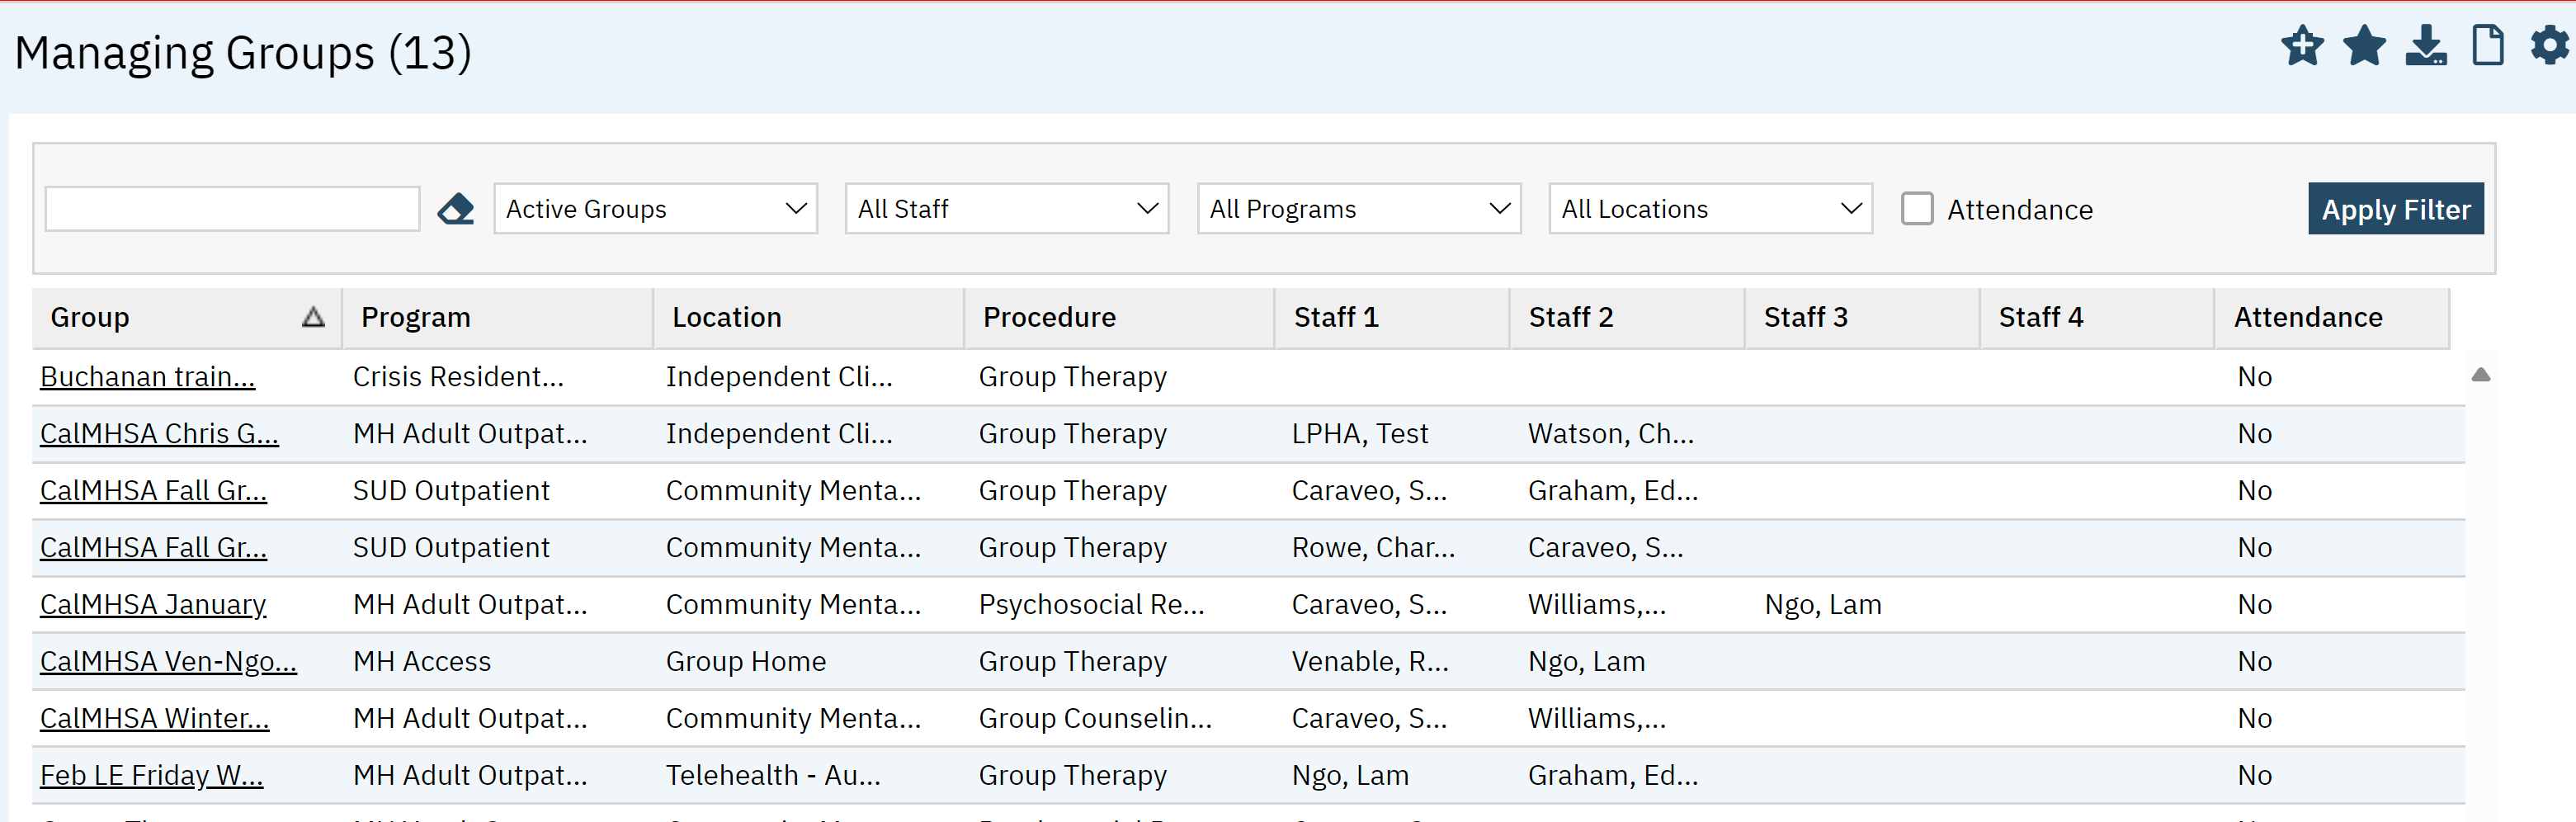
Filters
- The blank text box will allow you to type in the name of the group. If you don’t know the entire name of the group, you can type in what you know. For example, group name = “Monday School Based Class”, you can type in “Mon” and you will see “Monday School Based Class” appear in your results.
- Active Groups Filter: Use the drop-down menu to move between “Active” and “Inactive” groups. Inactive groups will show you any groups that had “active” unchecked when editing the group service.
- All Staff: Use the drop-down menu to select the name of a staff member you know to be on the group service. Whether they are the author or co-facilitator, if they are actively on the group this will allow you to find the group this way. This will not work if they were previously on the group but removed from the group service at the current time.
- All Programs: Use this drop-down menu to filter this list page by programs. This is not referring to programs that may have been assigned to individual clients in the group but instead, this filter is referring to what is set in the group service screen itself.
- All Locations: Will allow you to filter based on the location where services were rendered.
- Attendance: Check box, CalMHSA is not using this feature.
- Click Apply Filter once the appropriate options are selected.

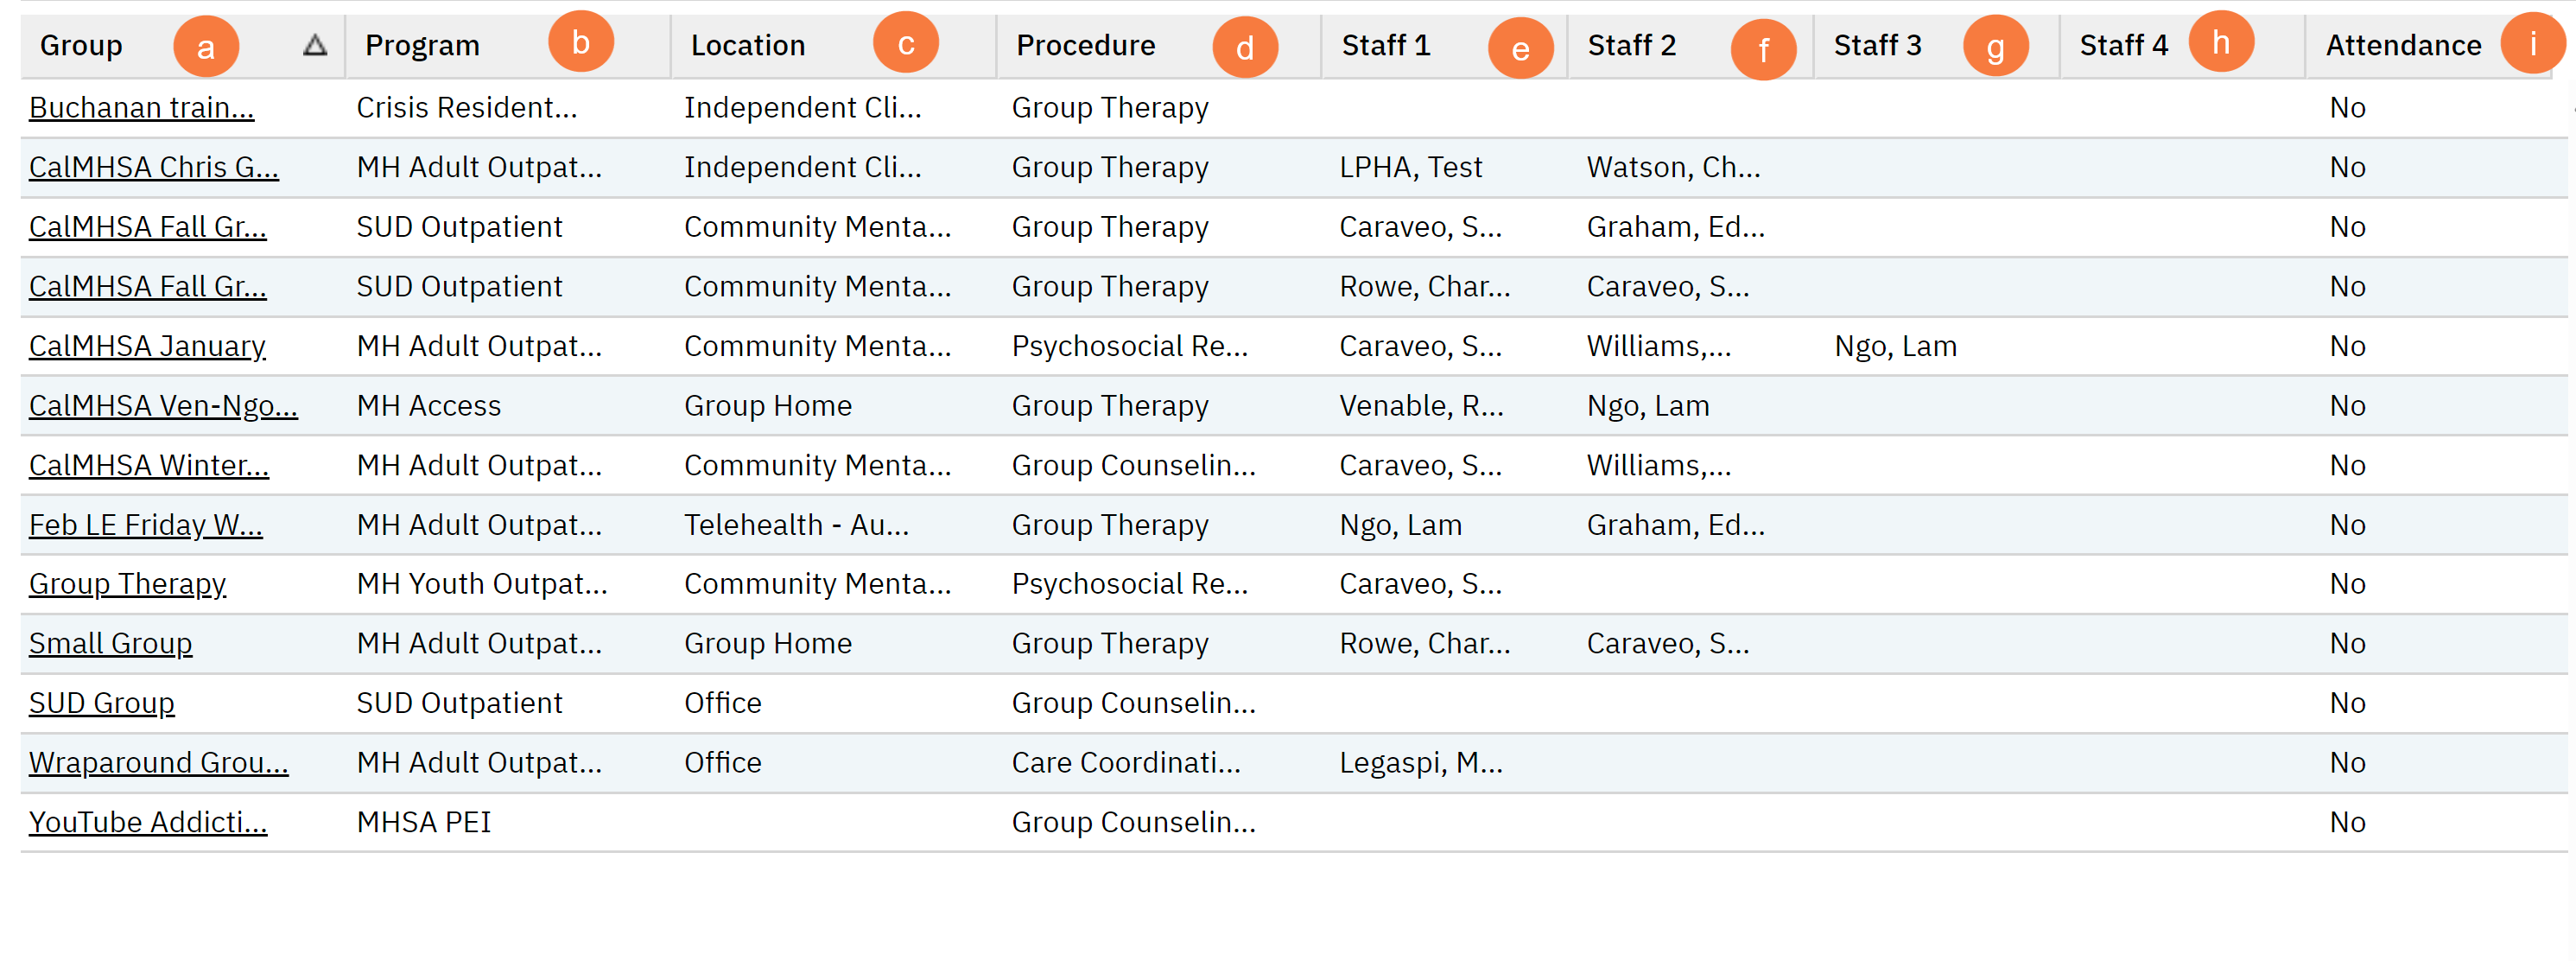
Columns
- Group: This column is a hyperlink that will take you into the group service screen. In the group service screen, you will be able to edit group service information and adjust any information you see in the other columns. You will also be able to access your Group Schedule Screen through the Group Service Screen.
- Program: This column will show you what Program has been selected for the group. This information is pulled in from the Group Service Screen and not an individual group appointment.
- Location: This column will show you what Location has been selected for the group. This information is pulled in from the Group Service Screen and not an individual group appointment.
- Procedure: This column will show you what Procedure has been selected for the group. This information is pulled in from the Group Service Screen and not an individual group appointment.
- Staff 1: Staff 1 refers to the Author marked on the group. Within the Group Service screen, you will see a staff list, the person that has the radio button selected next to their name is the Author of the group.
- Staff 2: Co- Facilitator, this person cannot document until the Author of the group has completed their work.
- Staff 3: Co- Facilitator, this person cannot document until the Author of the group has completed their work, they do not have to wait for other Co-Facilitators to finish documenting.
- Staff 4: Co- Facilitator, this person cannot document until the Author of the group has completed their work, they do not have to wait for other Co-Facilitators to finish documenting. Only 4 staff names will appear on the Staff Columns but you can have many staff in one groups service.
- Attendance: CalMHSA is not using this function. Please disregard.
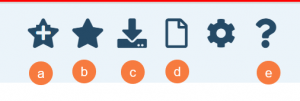
Upper Right Icons
- New Favorites Icon: Clicking on the “new favorites” icon will allow you to add this screen to your favorites for quick access.
- Fill out the favorite filter name, this can be whatever is easy for you to remember. When you click OK, you will see this screen under the start icon next to your search bar. Edit this by clicking by into the new favorite’s icon.
- Favorites Icon: If you have this listed as your favorite already, when you hover over this icon, it will tell you the favorite name.
- Export Icon: This icon is available to admins. You will be able to export the data from this screen into an excel spreadsheet.
- New Icon: This icon will allow you to create a new group service.
- Question Icon: Please do not use the question icon in the upper right corner, this takes you to generic material that is not used by CalMHSA. There is a Question button that is defaulted to display in the lower right corner. If you need assistance with creating groups / workflows, please use this instead.
- New Favorites Icon: Clicking on the “new favorites” icon will allow you to add this screen to your favorites for quick access.