How to Define a Group View
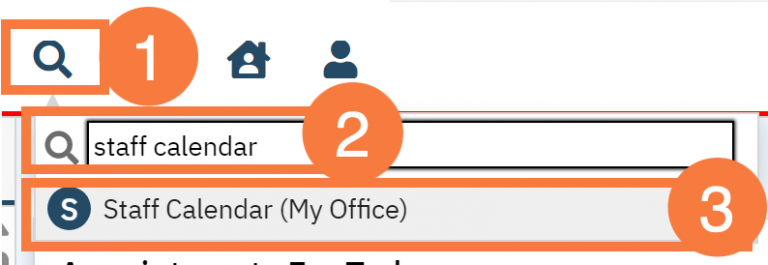
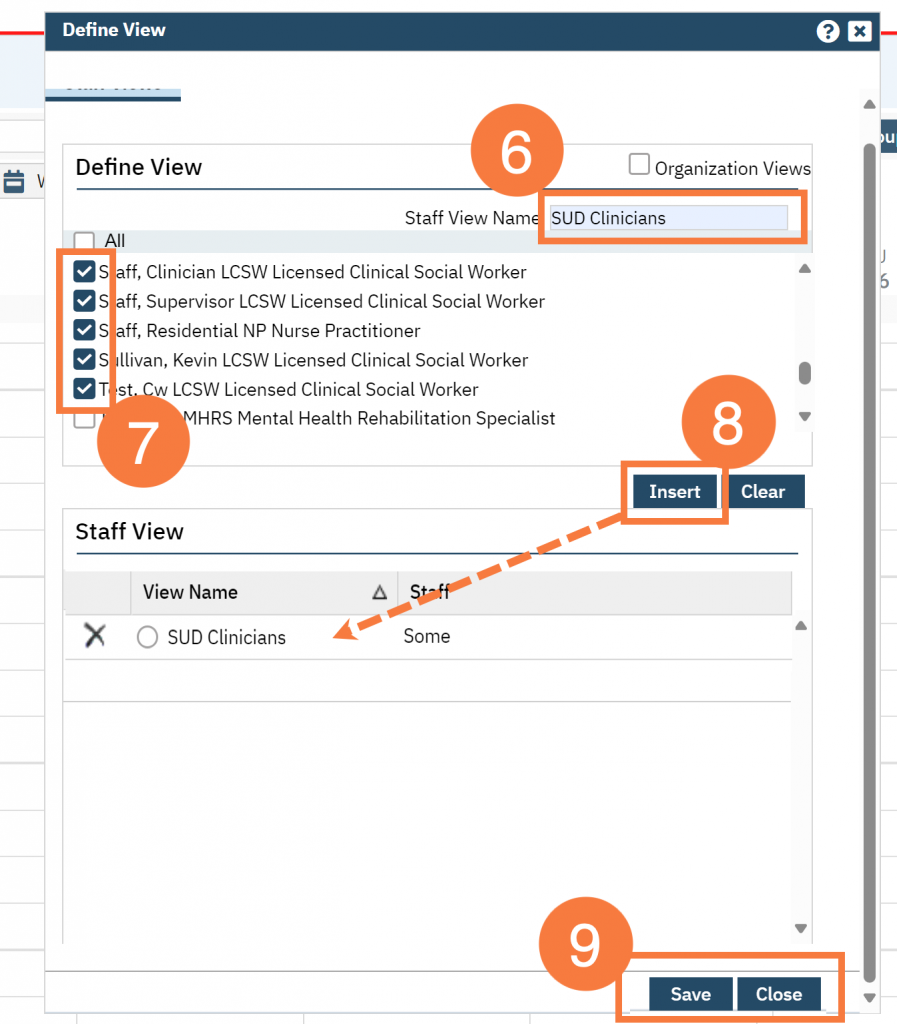
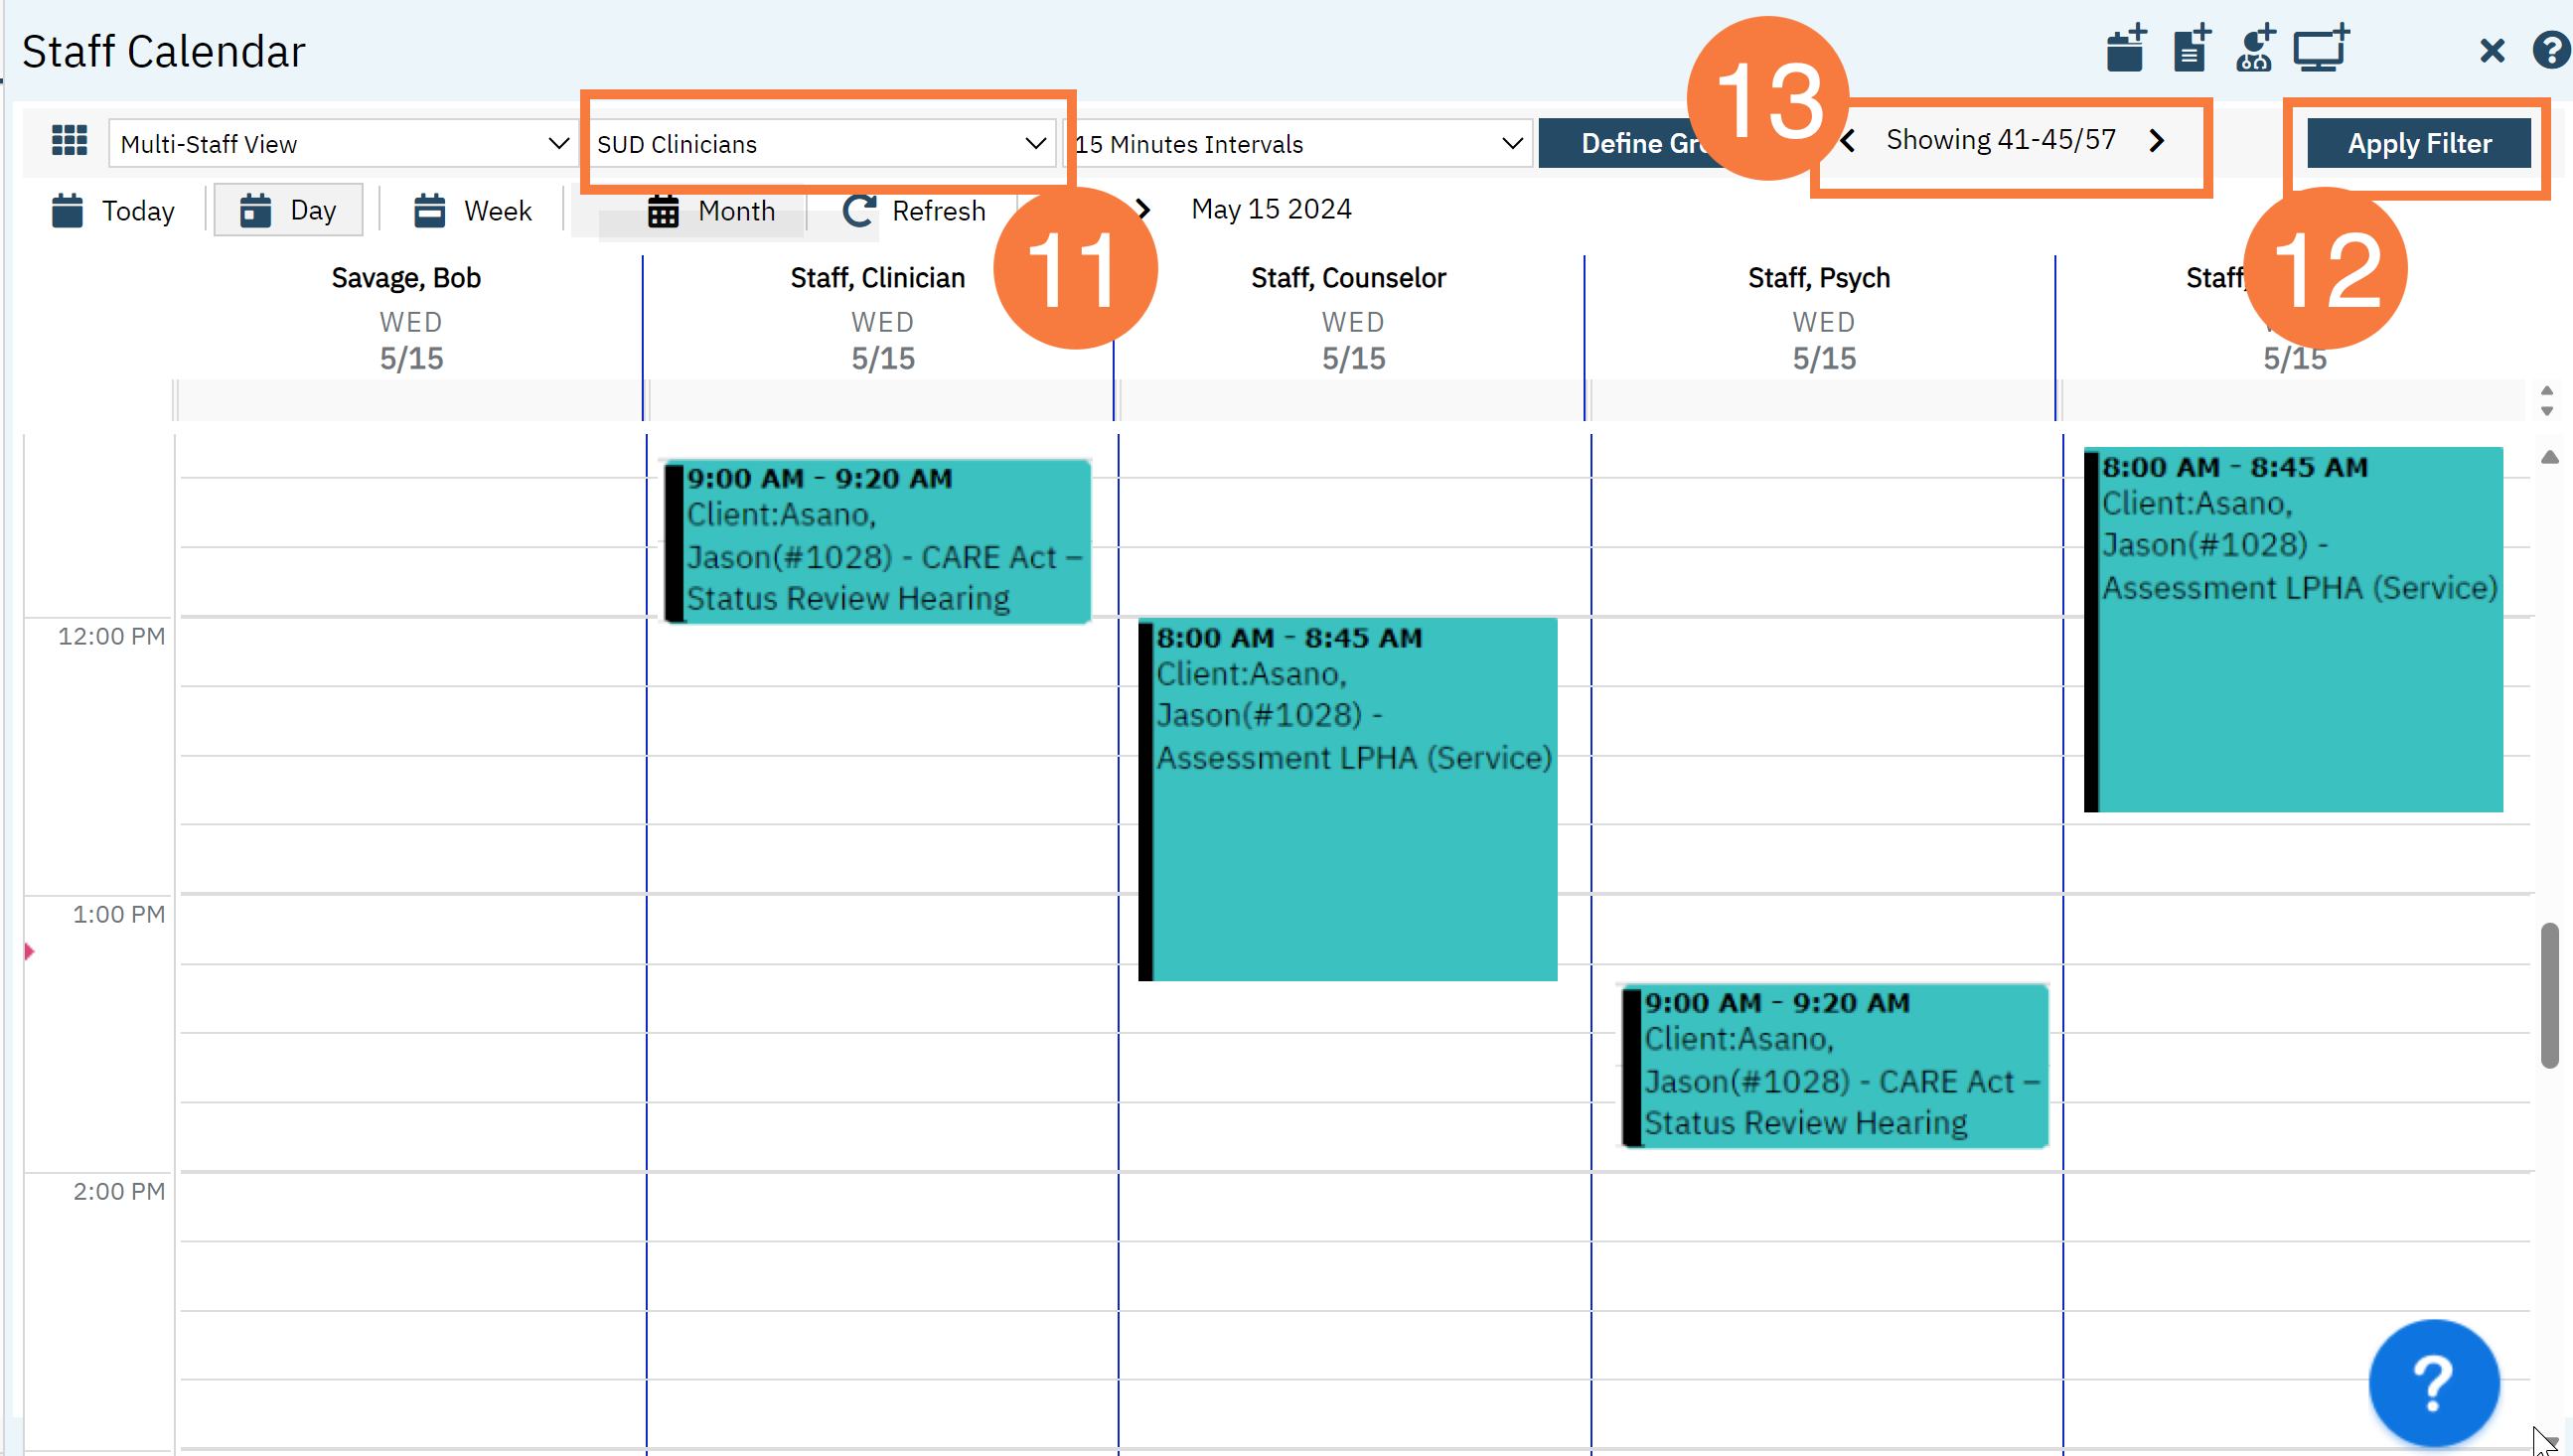
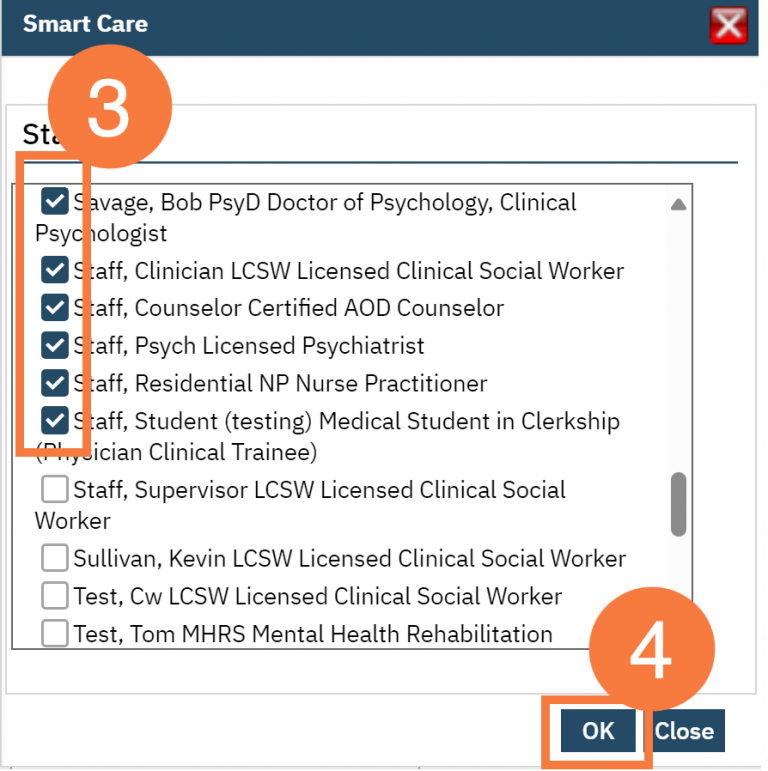
Use this workflow to create multi-staff views that you will use often.
- Click the Search icon.
- Type Staff Calendar into the search bar.
- Click to select Staff Calendar (My Office).
- The staff calendar will open. Click the Staff View dropdown arrow and select Multi-Staff View.
- Click Define Group.
- In the Define Group pop-up window, click into the Staff View Name field and enter a name for your group.
- Click the checkboxes for each staff member you want to add to this view.
- Click Insert. This will add it to the Staff View. Repeat steps 6-8 for each additional group.
- Click Save and click Close.
- Click the Select Group dropdown and select the appropriate group.
- Click Apply Filter.
- Use the arrows to move between schedules if you have more then available in a single screen.
How to Use Multi-Staff Selected
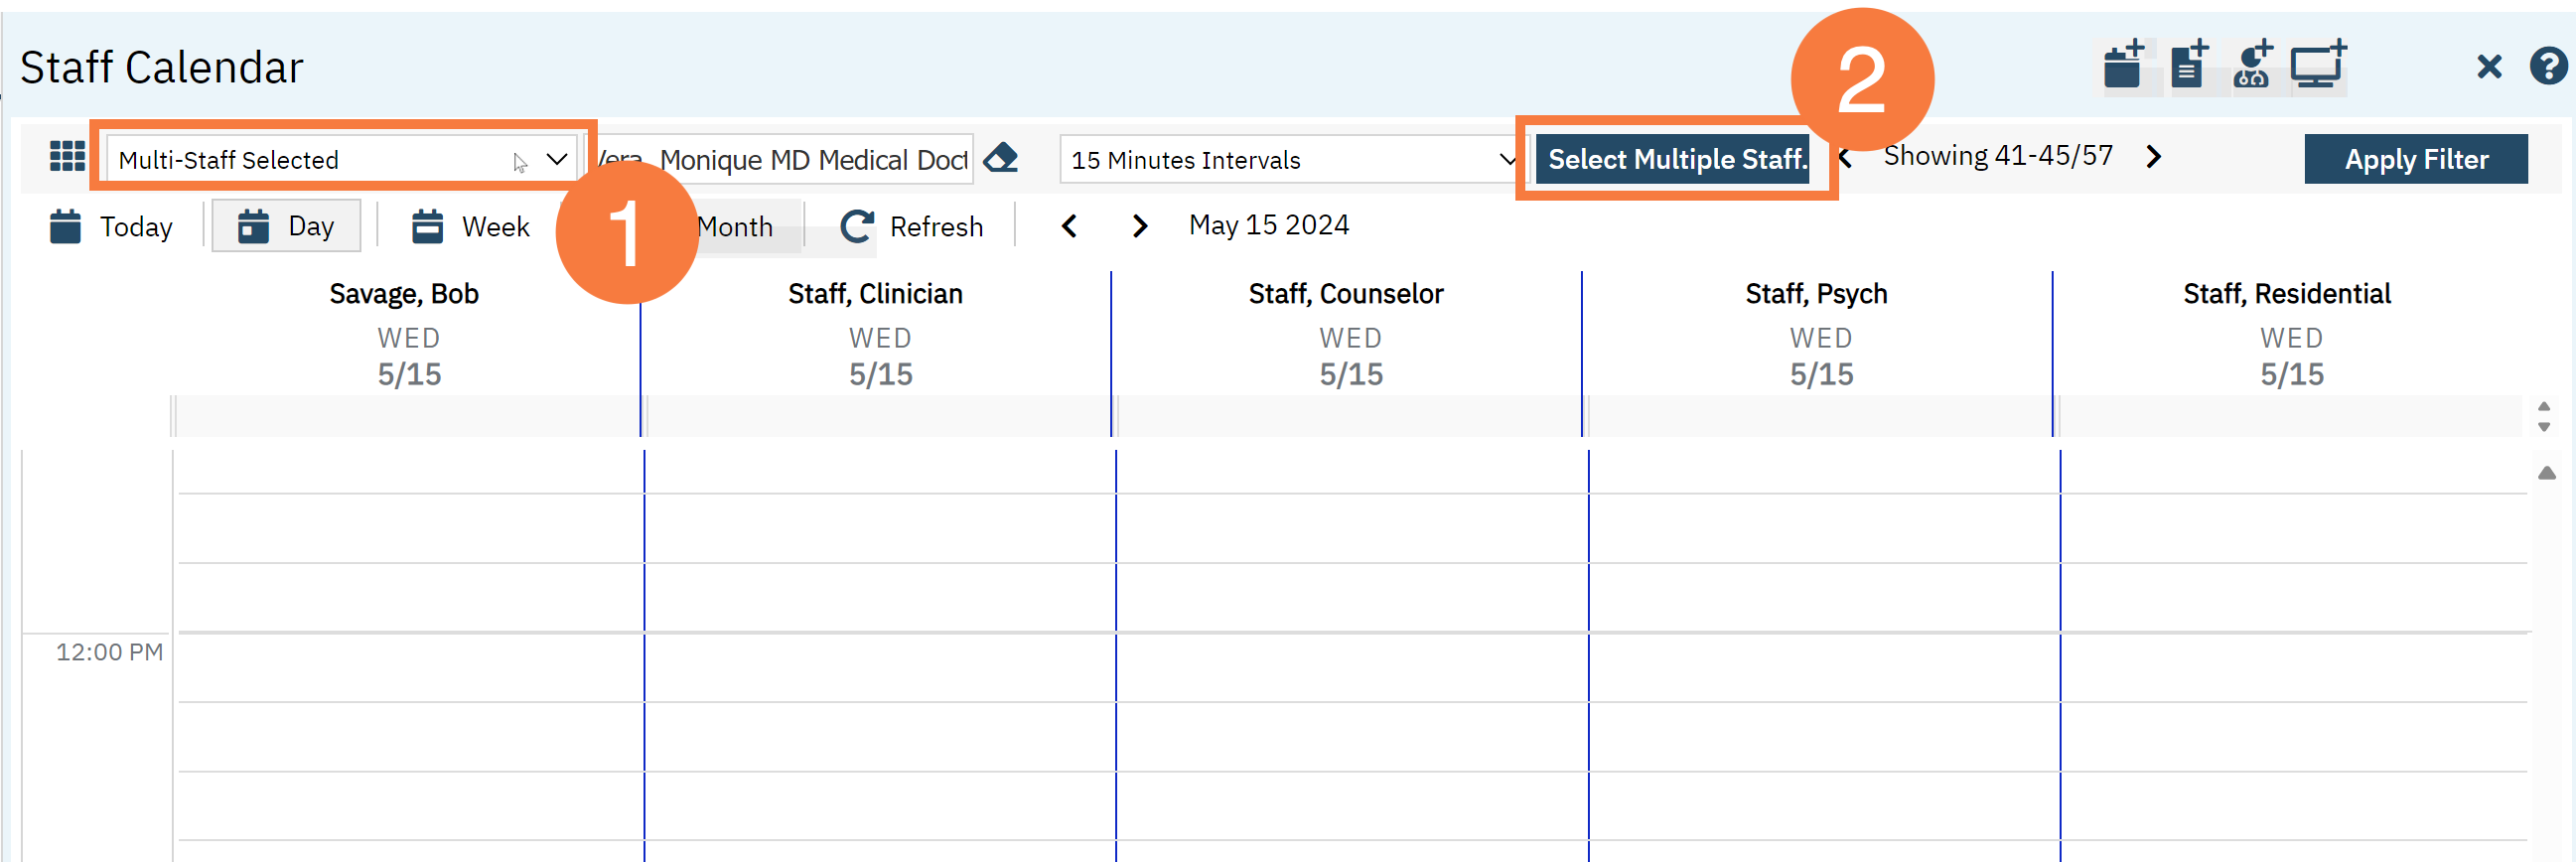
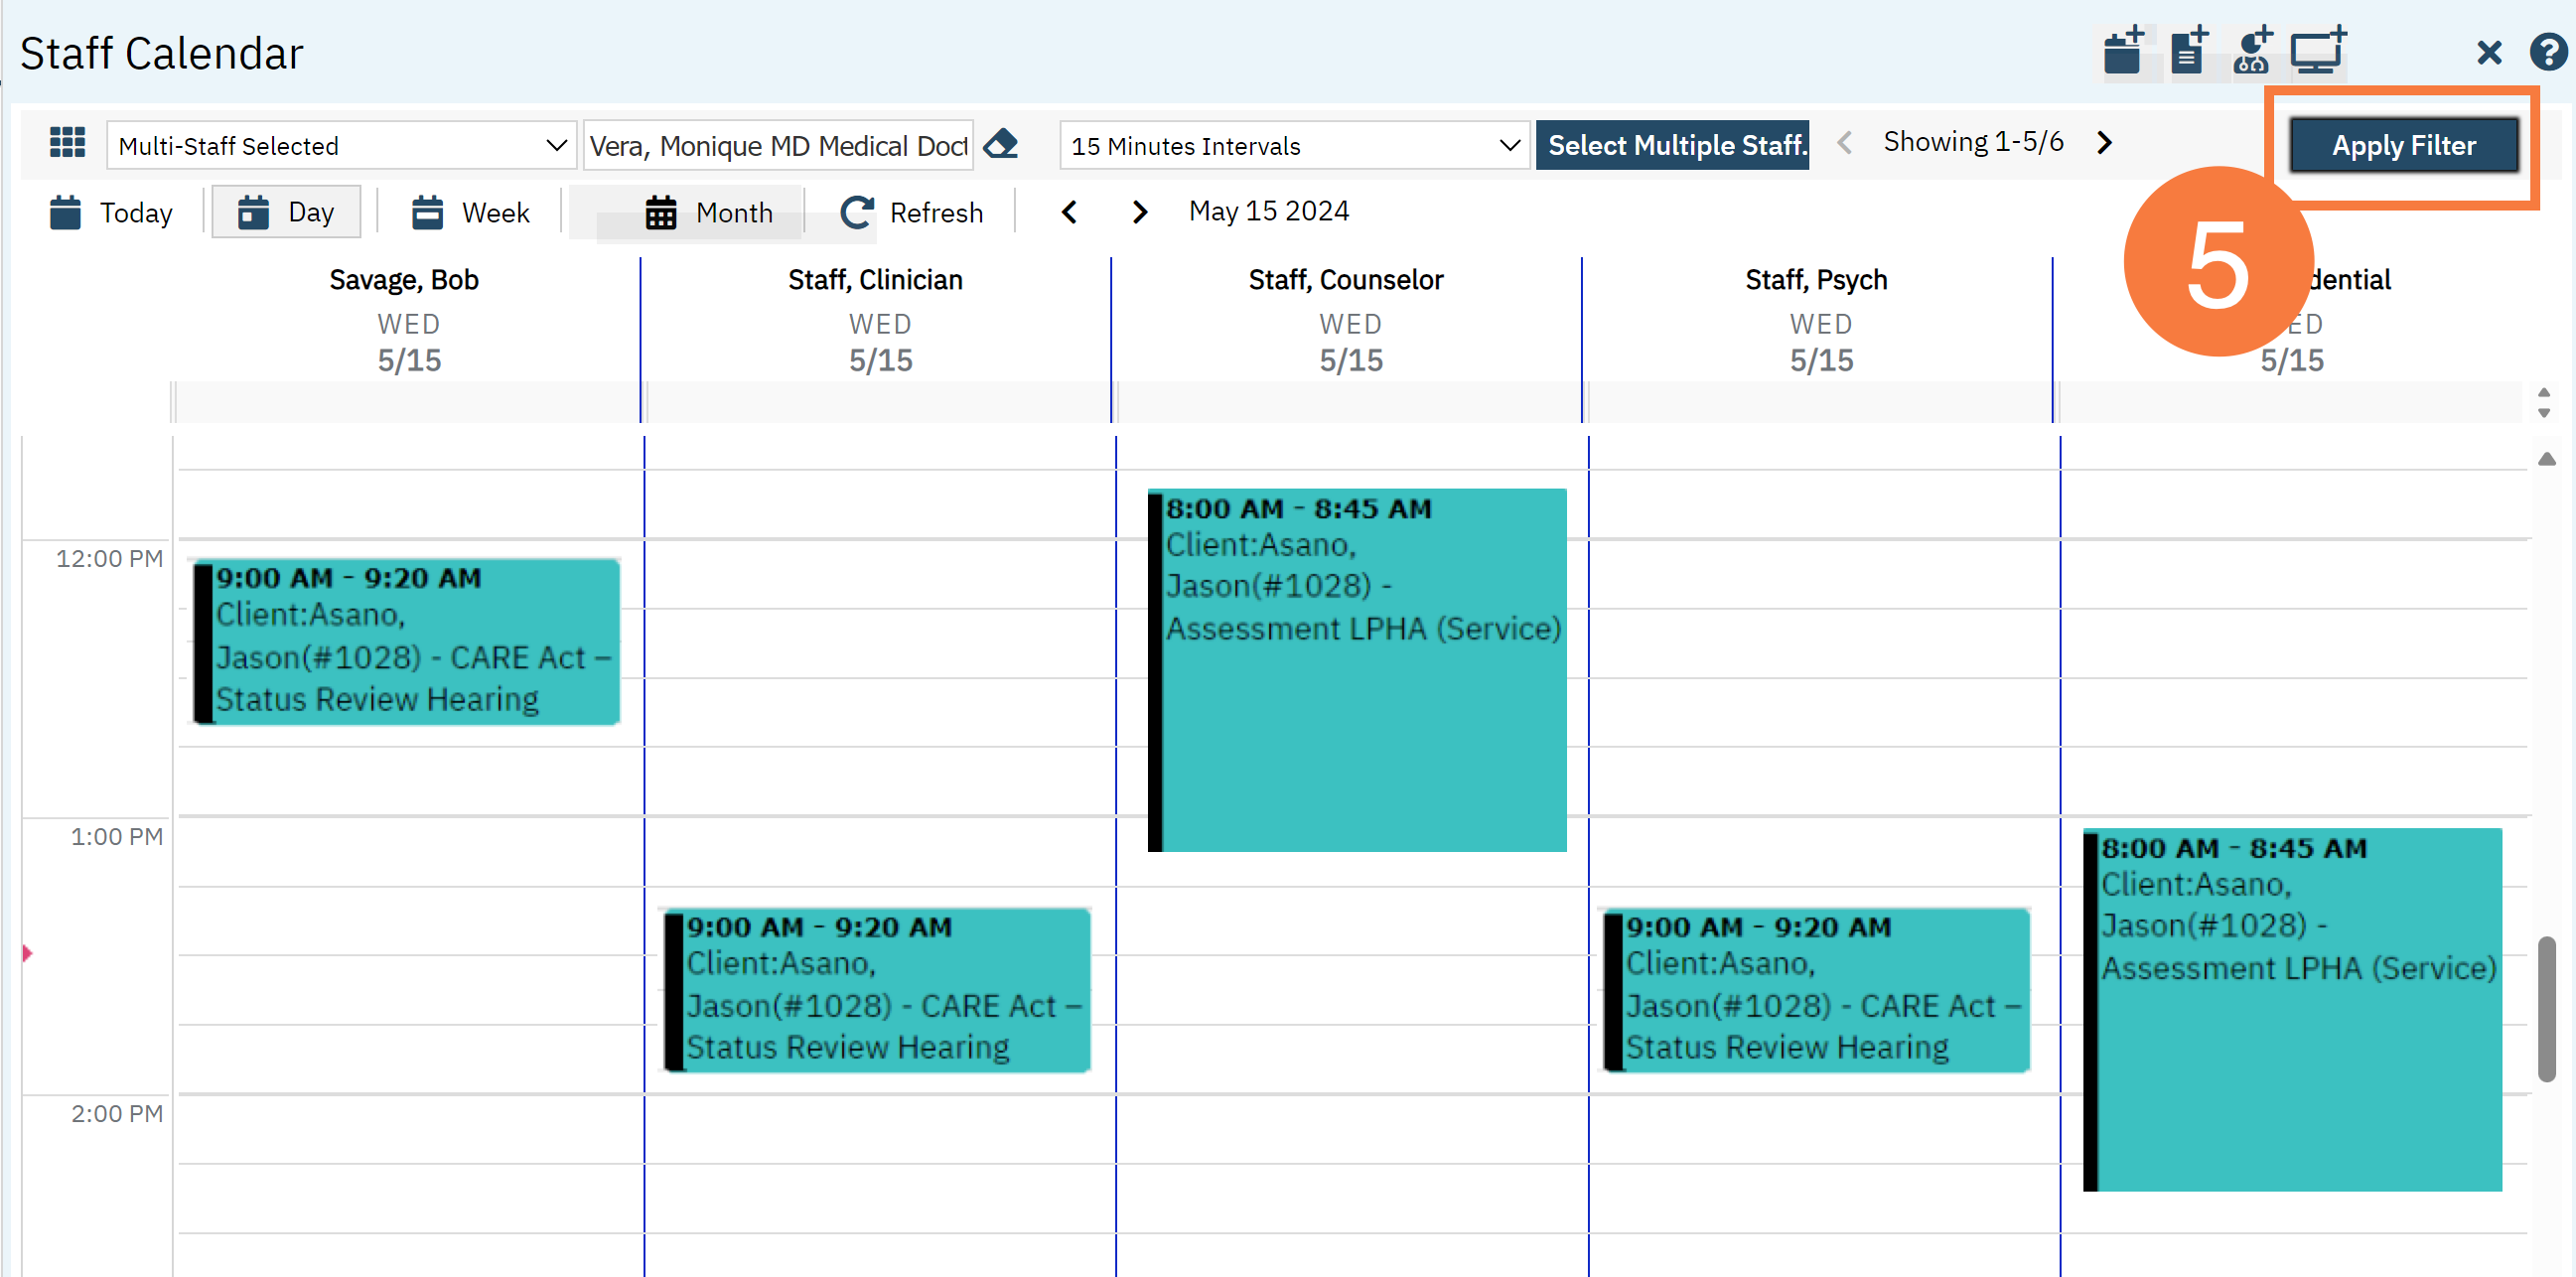
Use this workflow to view multiple schedules at once when you wouldn’t want to save it as a defined group. Follow the above steps 1-3.
- Click the Staff View dropdown arrow and select Multi-Staff Selected.
- Click the Select Multiple Staff button.
- In the window pop-up, click the checkbox for all staff you want to add to this view.
- Click OK.
- Click Apply Filter. The schedule will load below.
- Last Updated: January 22, 2025