Skip to content
CalMHSA Learn (LMS System)
Help Desk Ticket (Admin)
Customer Ticket Portal
EHR Bulletin
MENU
Home
Accessing Data in SmartCare
Billing Documentation
CalMHSA Connex
CalMHSA Rx
Clinical Documentation
Contract Provider Data Entry Only
CSU Documentation
EHR LMS Dashboard
Eleos
Events
Frequently Asked Questions
Front Desk Documentation
Inpatient Documentation
Nursing Documentation
Patient Portal
Prescriber Documentation
Policy Playbooks
Protocols
QA/QI and State Reporting
RCM Counties
Reporting System Administration
Residential Documentation
SmartCare Downtime Forms
SmartCare EHR Go Live Migration
SmartCare Known Issues
Substance Use Documentation
Supervisor Workflows
System Administration Documentation
Manage Account
Manage Account
Search
Last updated: April 7, 2025
How to Use Order Sets
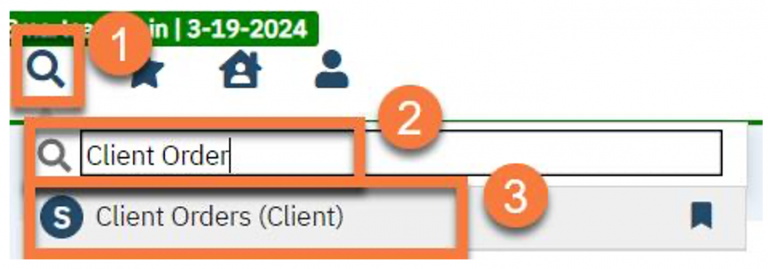
Click on the Search icon
.
Type “Client Orders (Client)”
in the search bar.
Select “Client Orders (Client)”
from the search results.
This will bring up the Client Orders page.
Click on New in the top right.
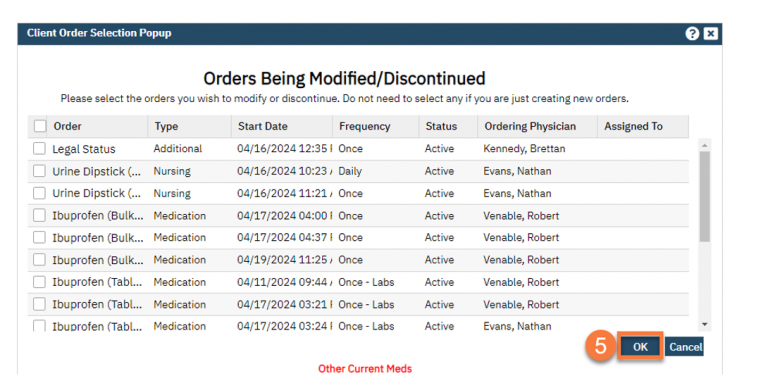
This will open the Client Order Selection Popup.
Click OK i
n the bottom right.
This will open the Client Order page.
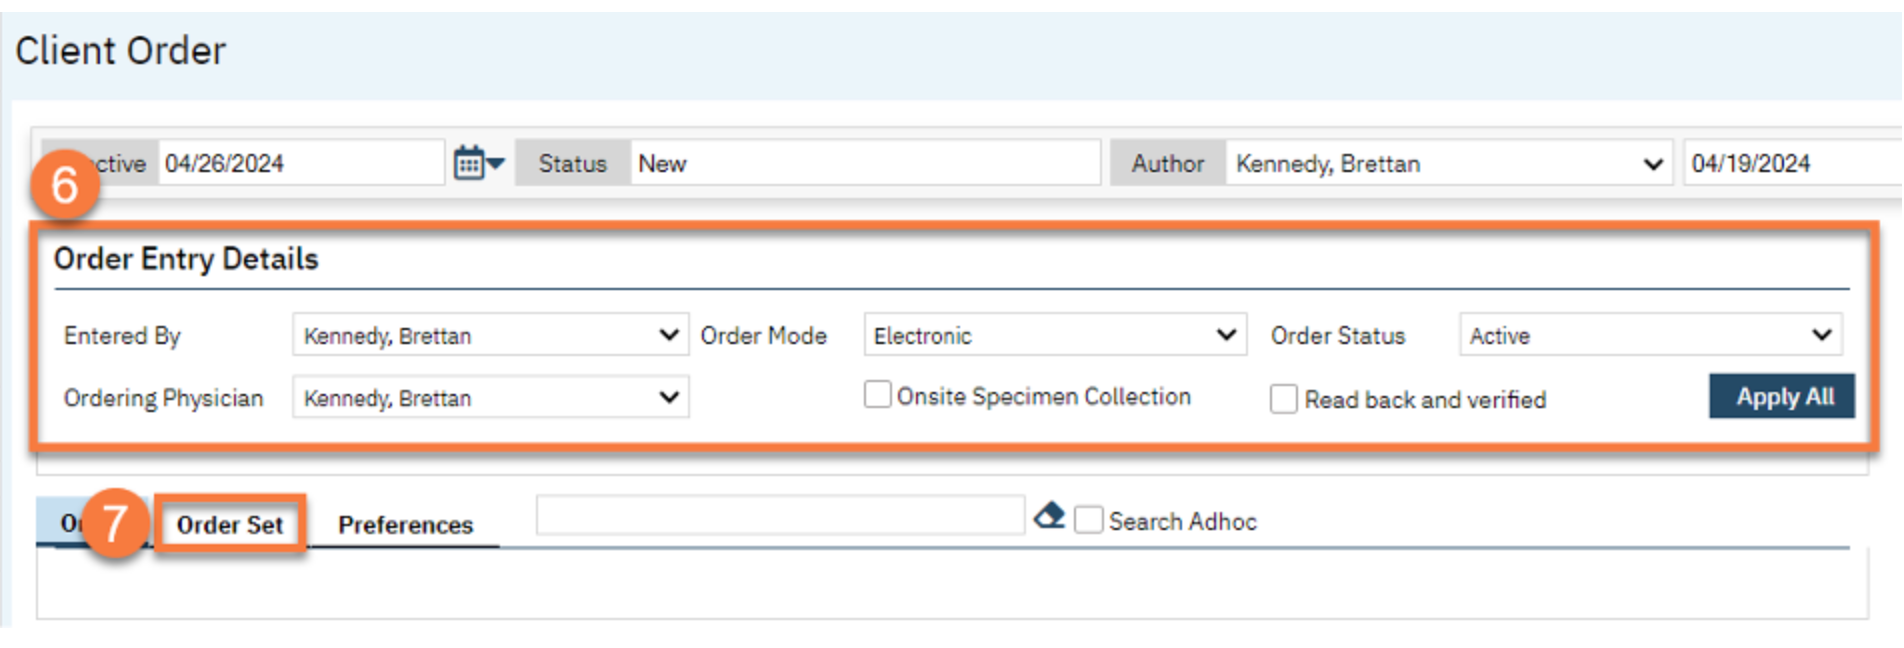
Verify the Order Entry Details are correct.
Click on the Order Set tab
.
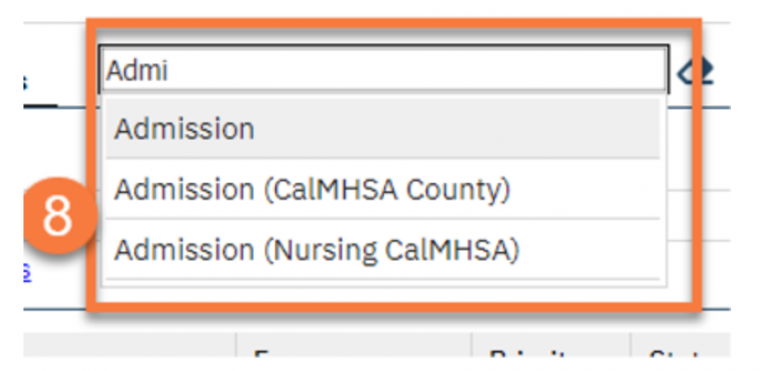
Search for the Order Set
you would like to use.
Note:
If you would like modifications to a set or for a new set to be made contact your sysadmin.
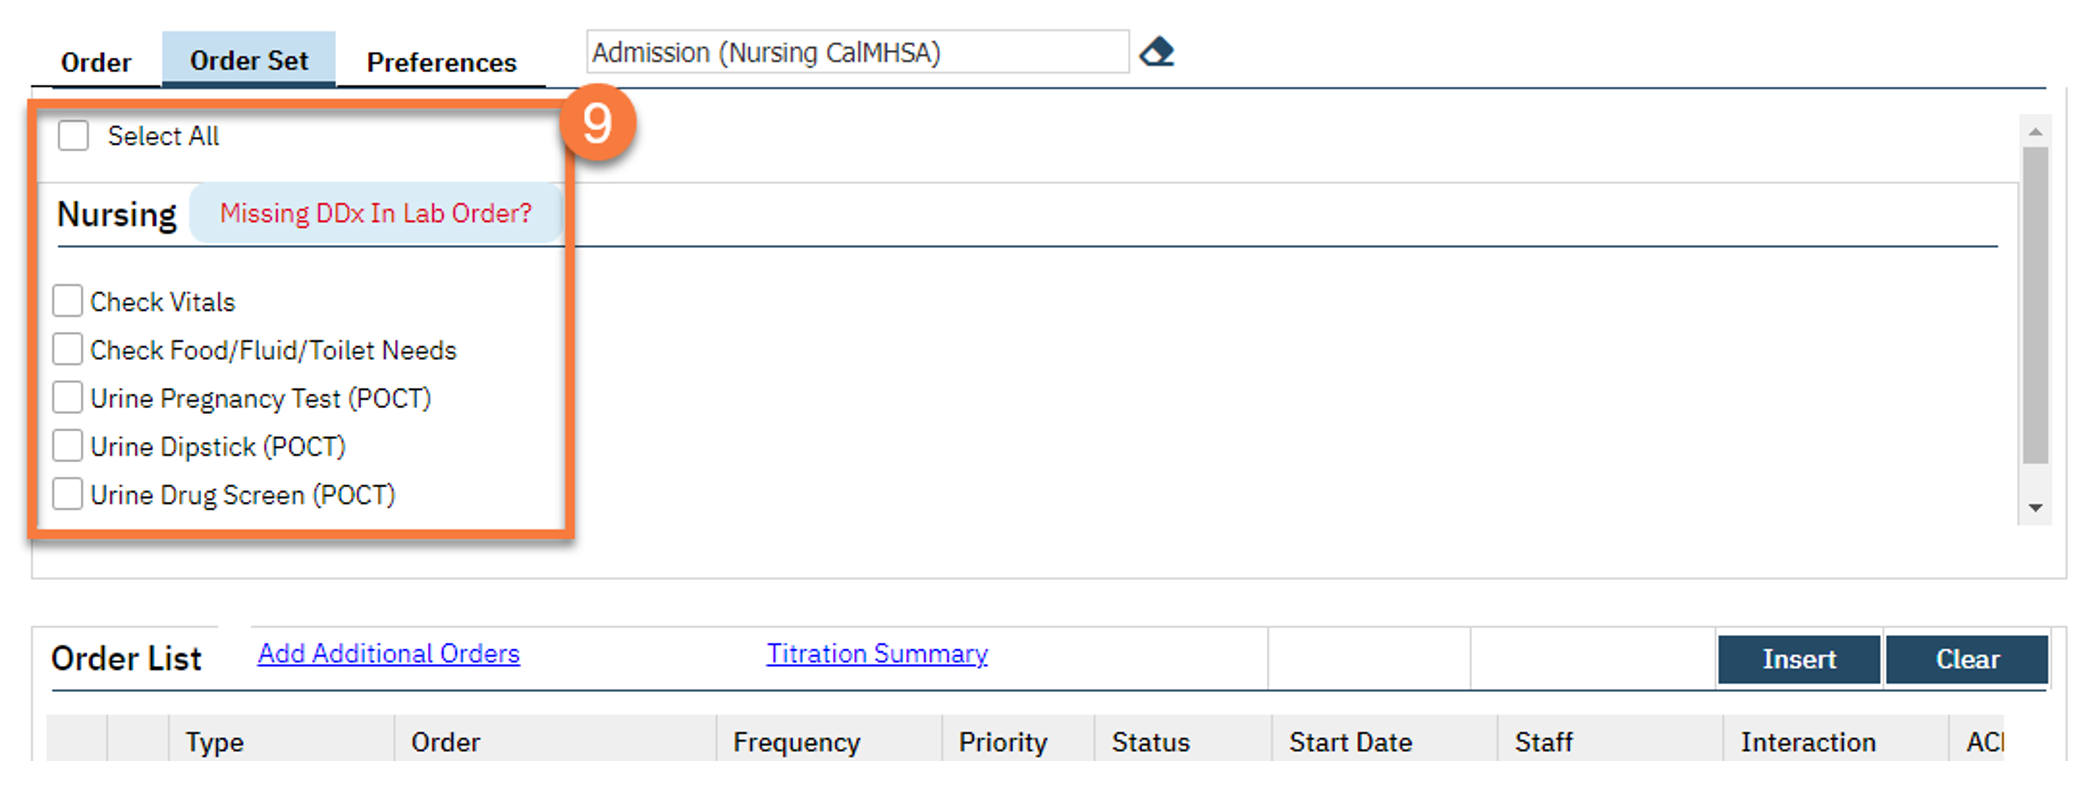
Select the options from the Order Set
that you would like to use or
click Select All
at the top if you wish to use all of them.
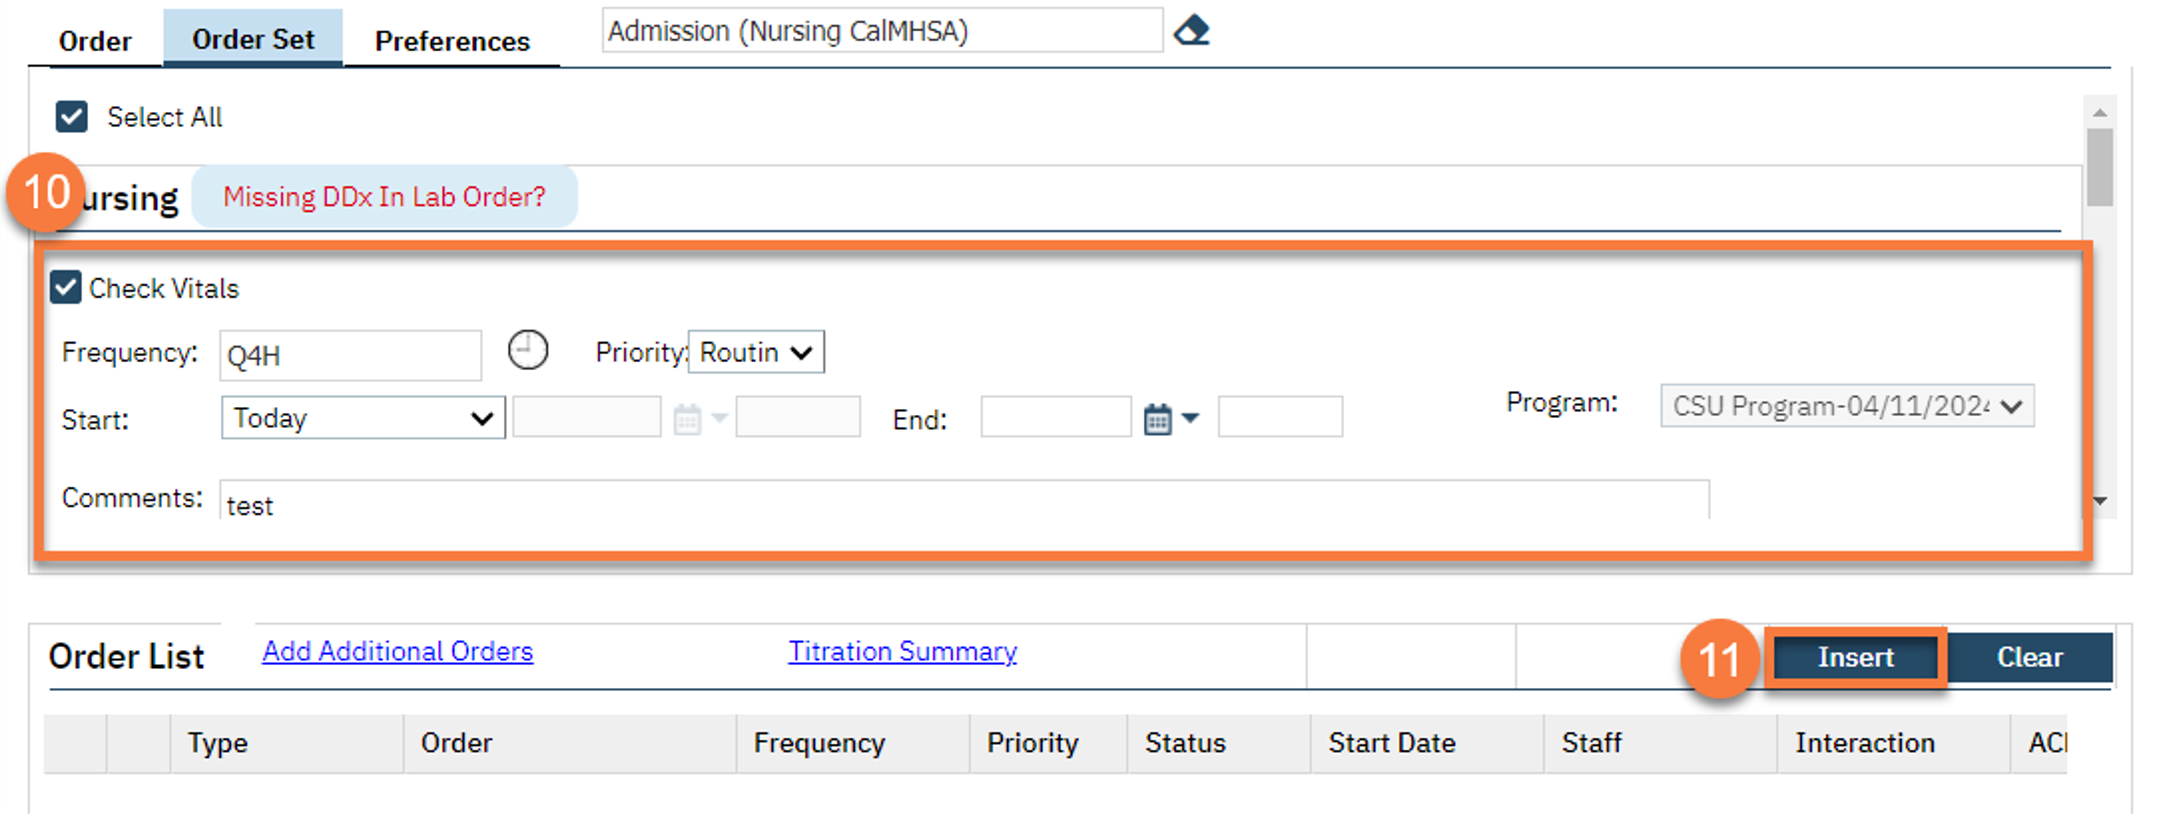
Fill out the need information
for each order.
Click Insert
to add them to the order list.
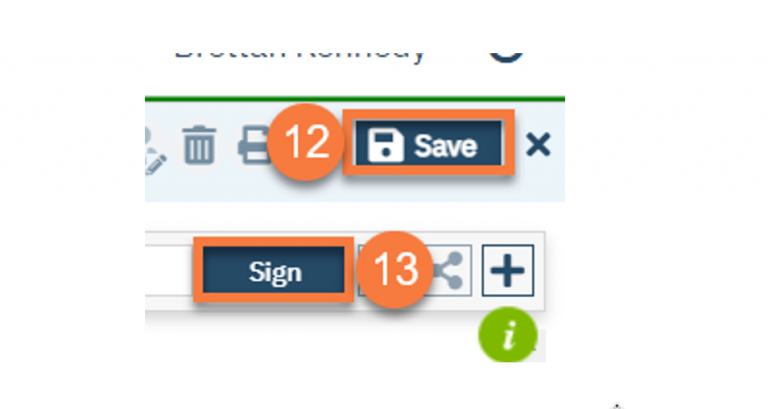
Click Save
in the top right.
Click Sign i
n the top right.
Last Updated:
April 7, 2025
Last updated: April 7, 2025