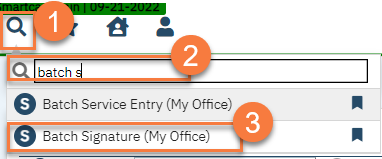
- Click on the Search icon.
- Type in “Batch Signature” in the search bar.
- Select “Batch Signature (My Office)” from the search results.
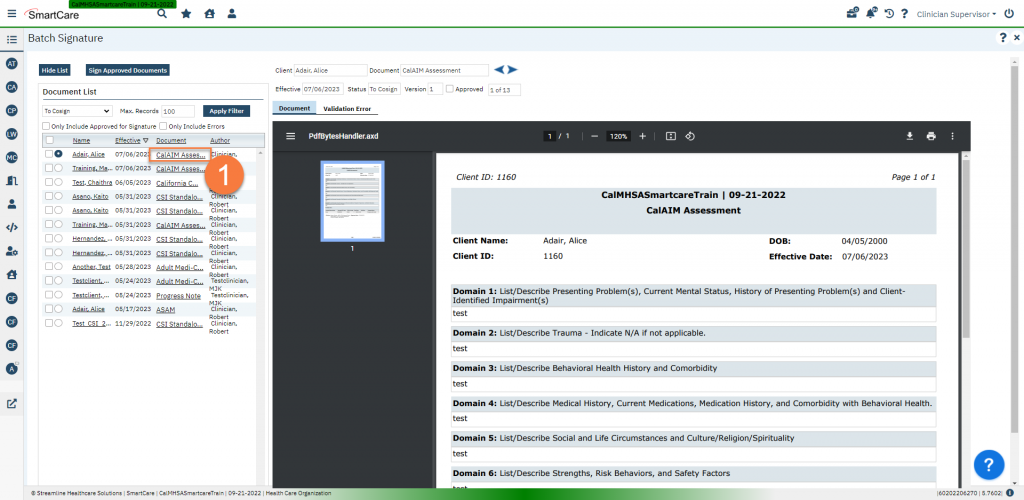
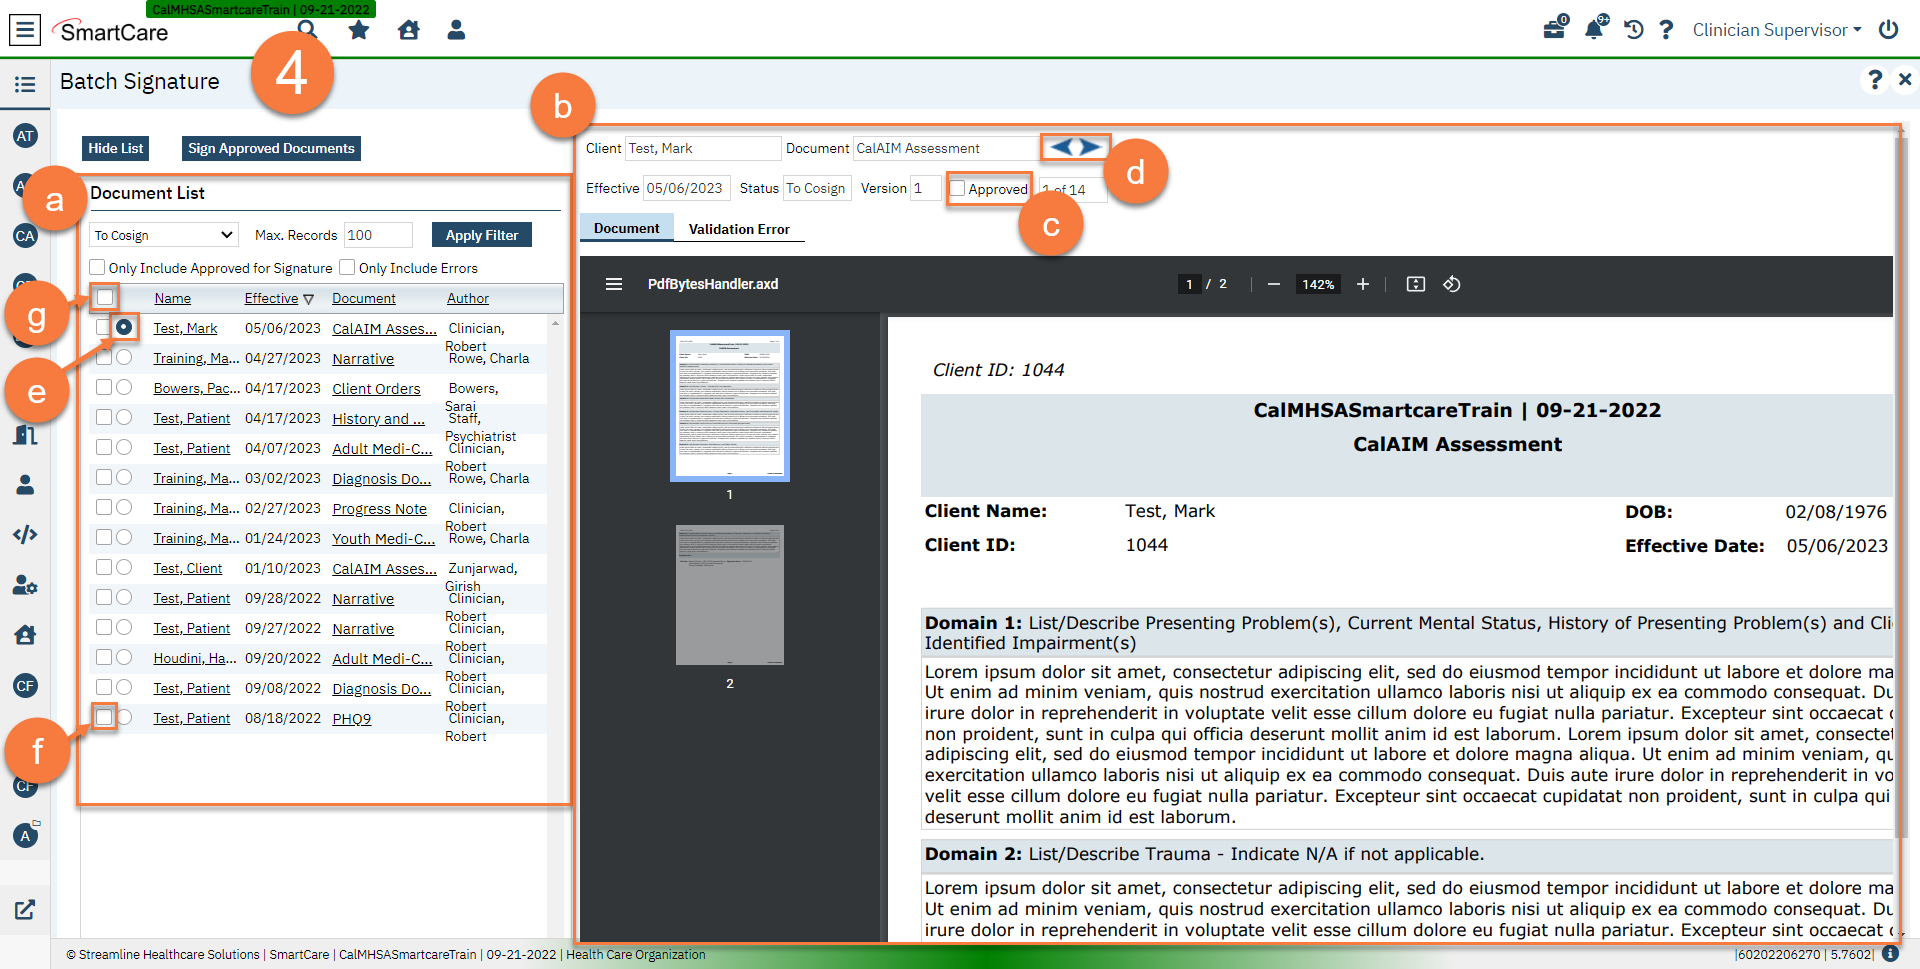
- This brings you to the Batch Signature screen.
- The document list will show you which documents need to be signed, co-signed, or approved. If you don’t see any documents on the list, change the filter.
- The document you have selected in the document list will show in the document viewer section. Here you can review the document before signing it.
- After reviewing the document, check “Approved” at the top of the document viewer. This will mark the document approved for signature.
- You can use the arrow icons in the document viewer section to easily move to the next document on the list.
- You can also select documents to view by clicking on the radio button next to them in the document list.
- If you’ve already reviewed the documents but didn’t mark “approved” in the document viewer, you can mark the documents as approved by clicking on the checkbox next to the document in the document list.
- To approve all documents, click on the checkbox in the header row of the document list section.
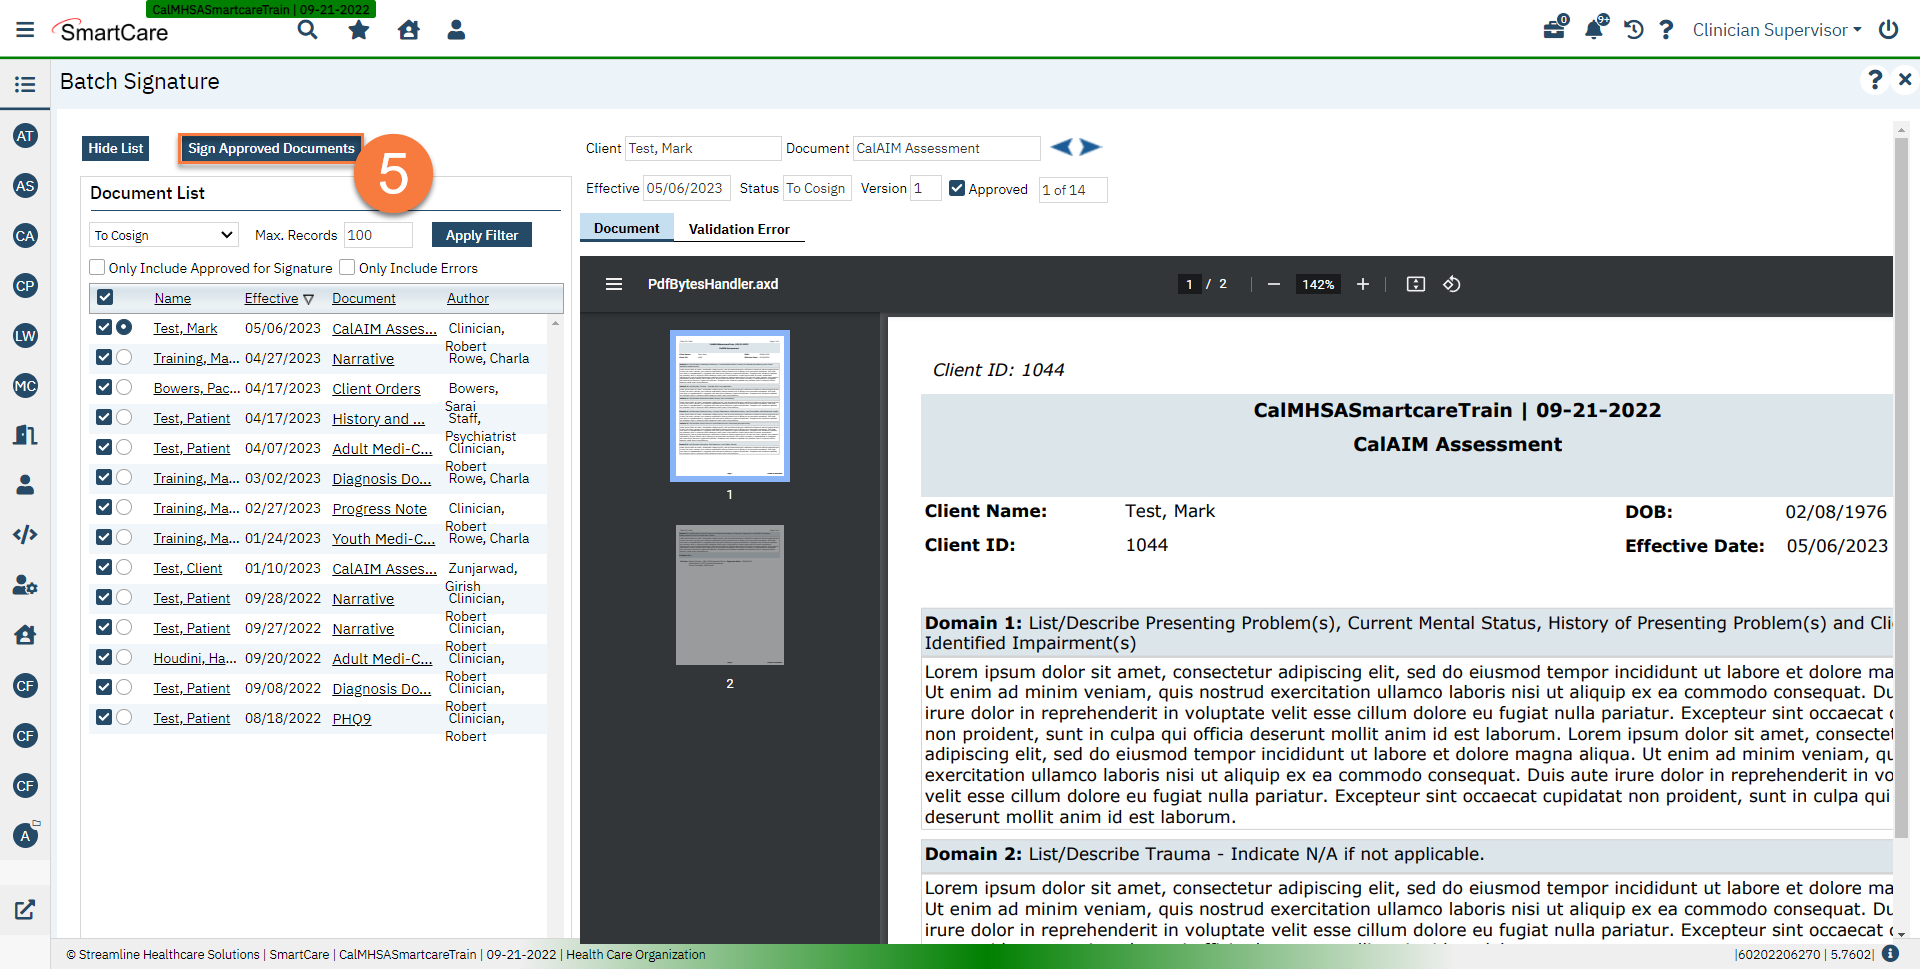
- Once you’re ready to sign your batch, click Sign Approved Documents.
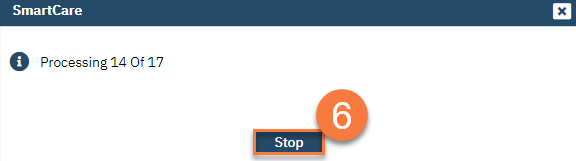
- This will initiate the batch signature process. You’ll see a pop-up with the status of the process. If you need to interrupt the process, you can click Stop.
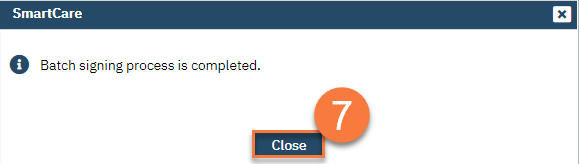
- When completed, you’ll see a pop-up indicating the signature process has been completed. Click Close. You are finished and can now navigate away from this screen.