Step One (Optional): Create/Designate a Program as an ECM Program
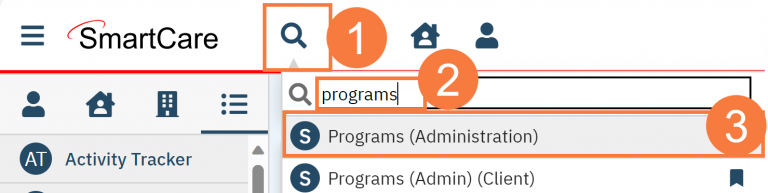
Click the Search icon.
Type Programs in the search bar.
Click to select Programs (Administration).
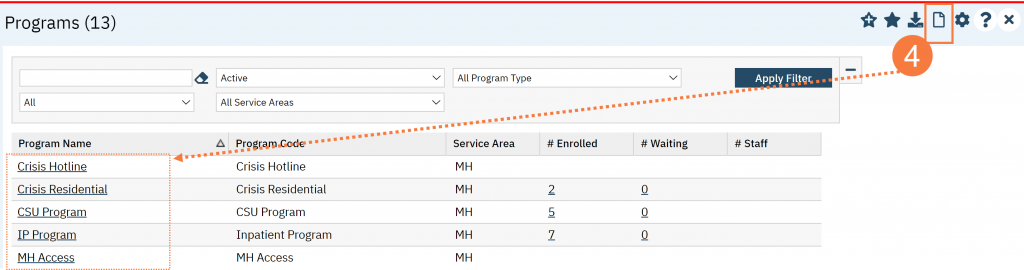
Click the New icon or select an existing program.
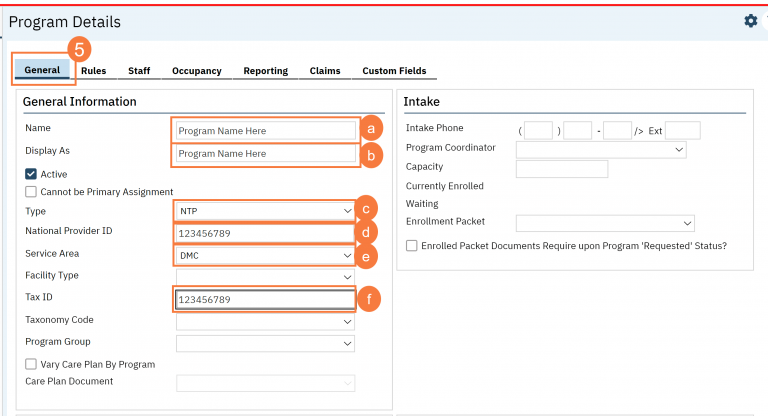
On the General tab, complete the following fields:
Name
Display As
Type
National Provider ID
Service Area
Tax ID
On the Rules tab, navigate to the Plans section.
Click the Add Plans button to add plans that cannot be charged.
It is recommended that you add Managed Care plans to this section to ensure ECM charges do not fall into those plans.
Click Save.
Step 2: Create/Designate a Plan as an ECM Plan for each ECM Program
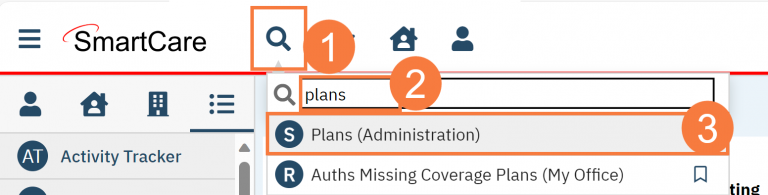
Click the Search icon.
Type Plan in the search bar.
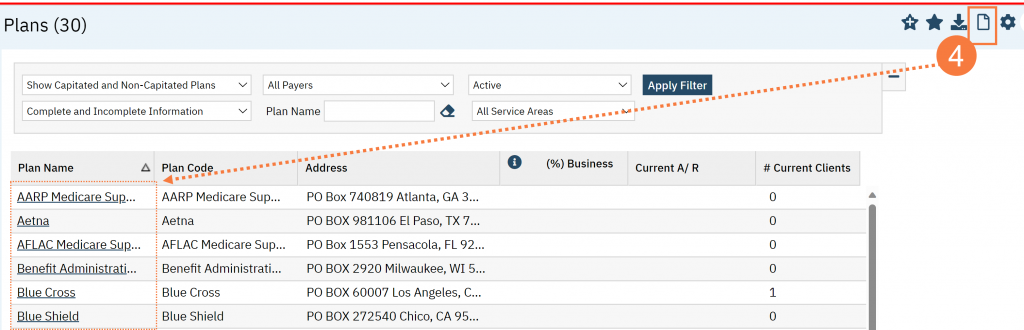
Click to select Plans (Administration).
Click the New icon or select an existing plan.
NOTE: You will need to create a new Plan for each ECM program.
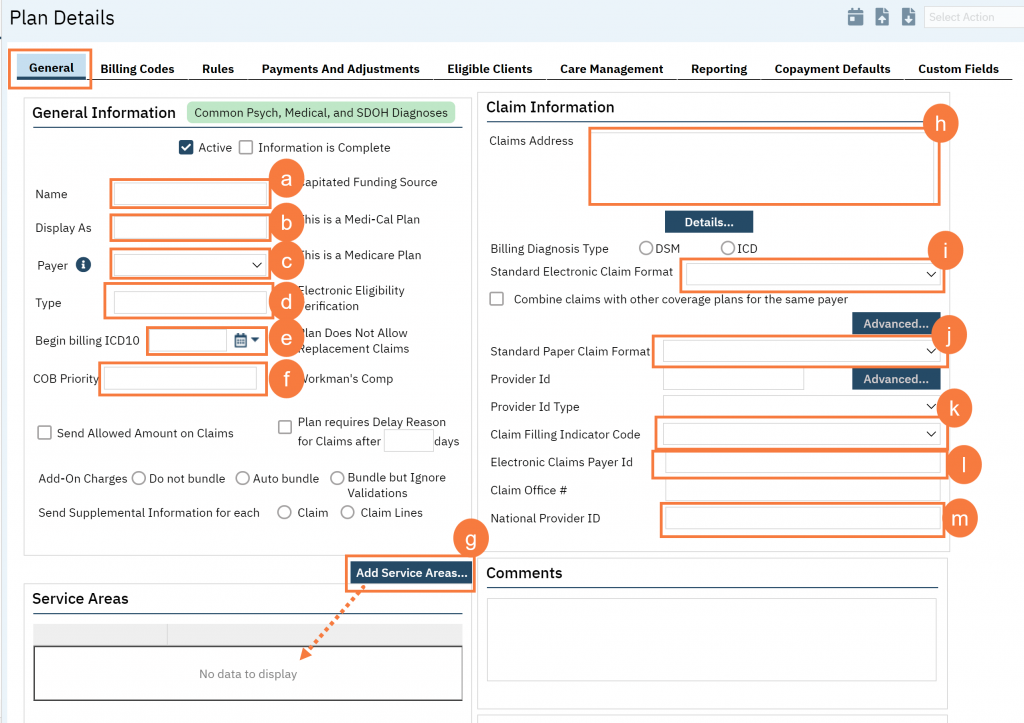
On the General tab, complete the following fields:
Enter a Name
Click in the Display As field to populate
Click the drop-down and select a Payer
Enter the Type
Click the Calendar icon to select a date to Begin ICD1O Billing
Enter the COB Priority
Click the button to Add Service Areas
Enter the Claims Address
Click the drop-down to select the Standard Electronic Claim Format
Click the drop-down to select the Standard Paper Format
Click the drop-down to select the Claim Filing Indicator Code
Enter the Electronic Claims Payer ID
Enter the National Provider ID
Step 3: Add a New ECM Payer Type
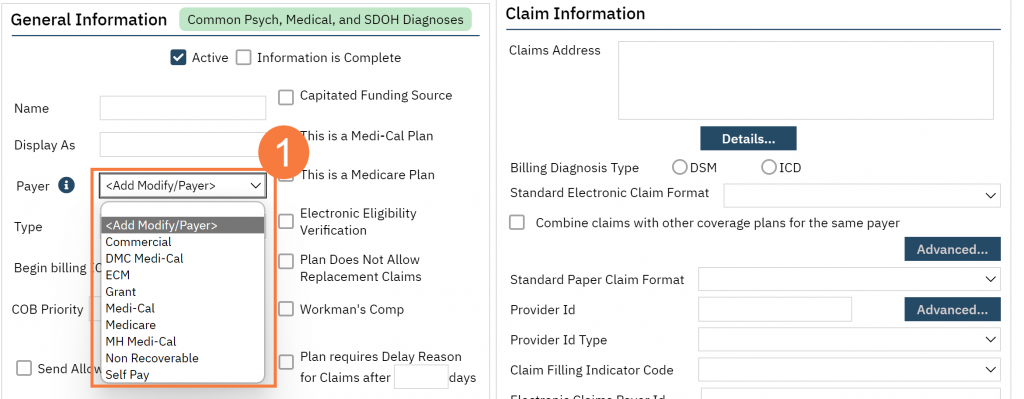
After you have created your Plan above, on the General tab, click the drop-down arrow in the Payer field and select <Add Modify/Payer>
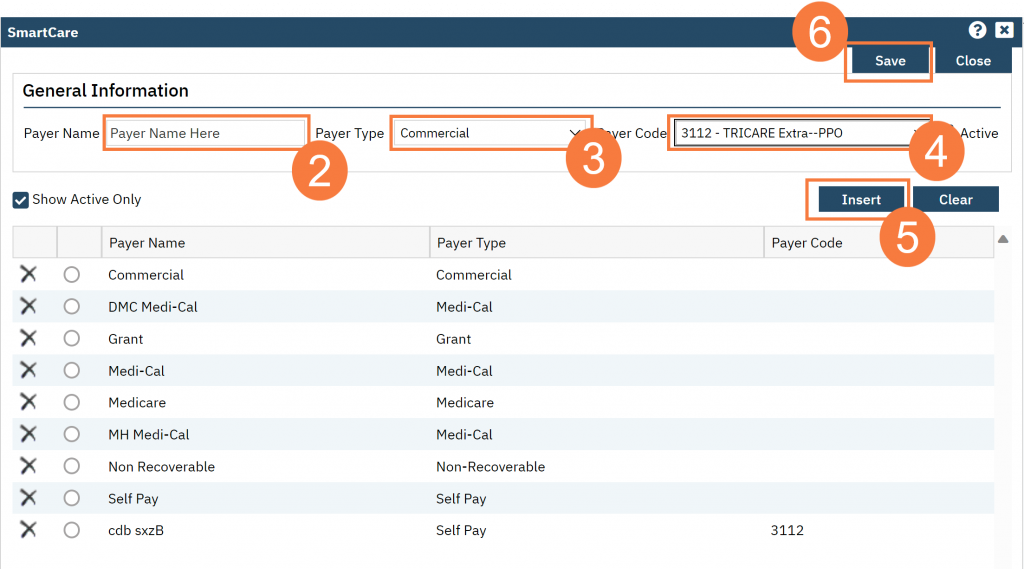
Enter the Payer Name
Click the drop-down arrow and select the Payer Type.
Click the drop-down arrow and select the Payer Code.
Click Insert.
Click Save.
Step 4: Create the Procedure Codes
NOTE:
Rates cannot be triggered Plan and can also vary by Plan, so recommendation is to create Procedure Codes for each ECM Plan. Example criteria for these Codes could be:
Procedure Code for Clinical Staff
Procedure Code for Clinical Staff (Outreach)
Procedure Code for non-Clinical Staff
Procedure Code for non-Clinical Staff (Outreach)
Instructions:
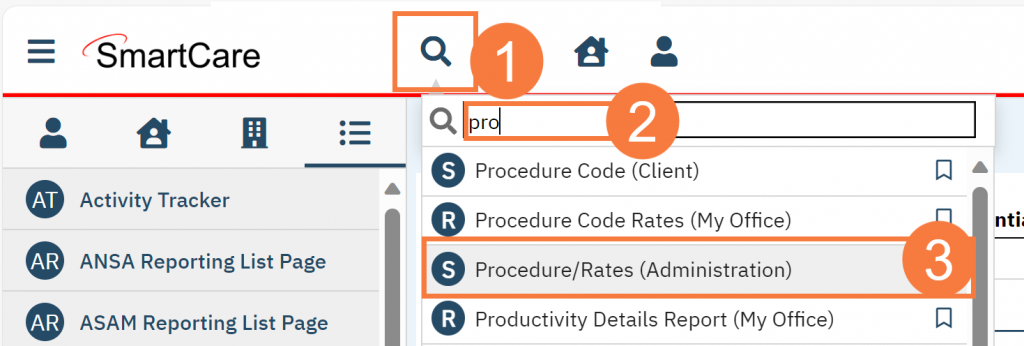
Click the Search icon.
Type Procedure in the search bar.
Click to select Procedure/Rates (Administration).
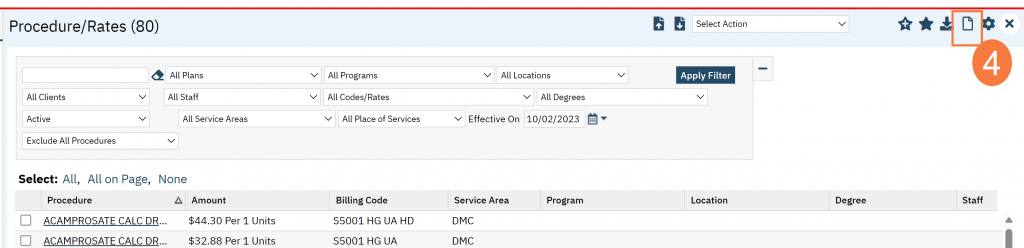
Click the New icon.
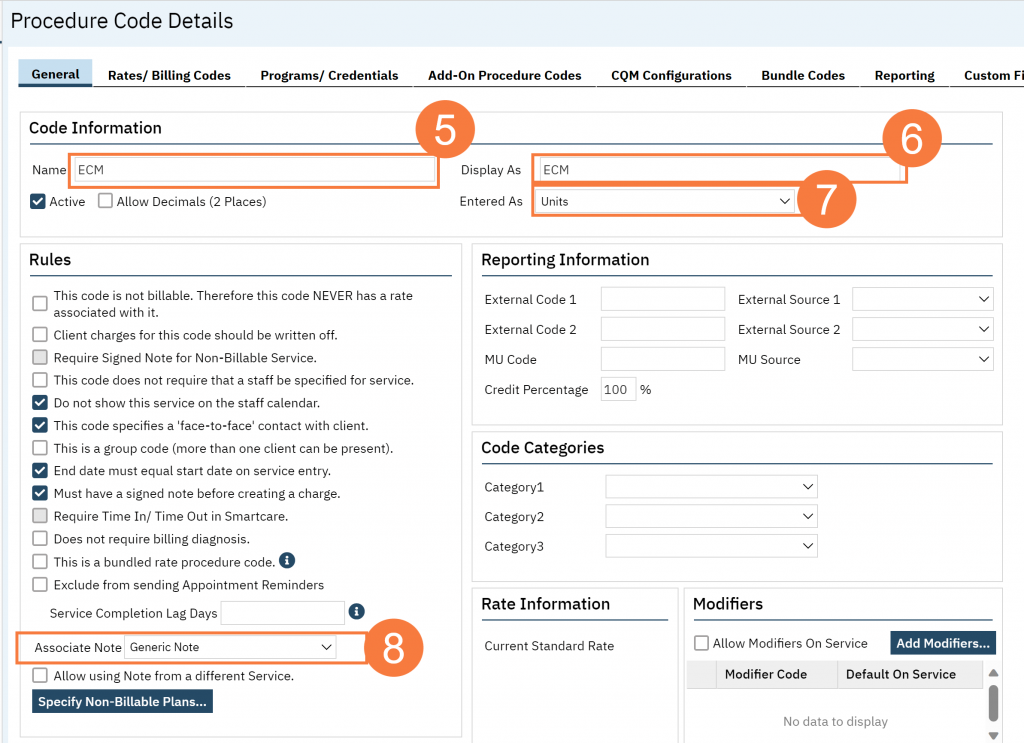
Enter a Name
Enter Display As
Click the drop-down arrow and select the Entered As
In the Rules section, select the Associated Note
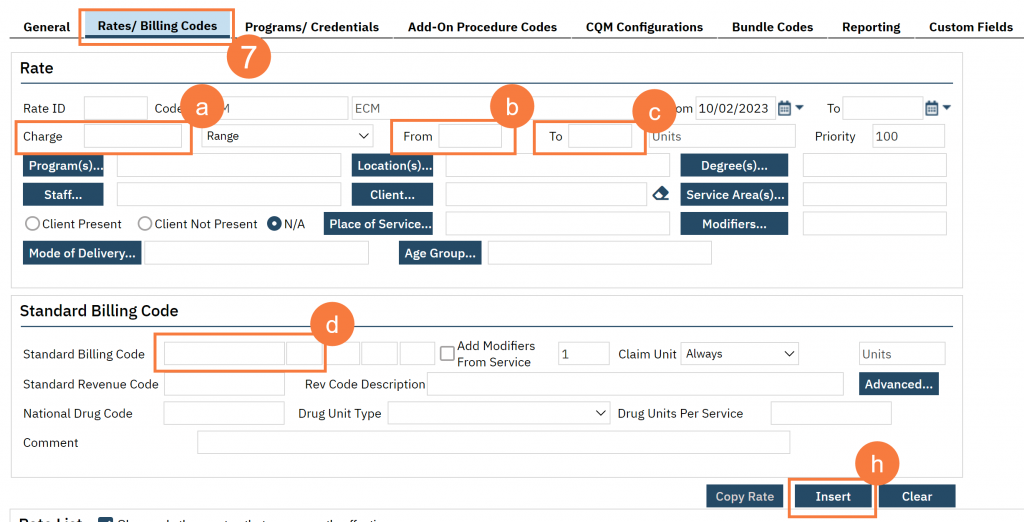
Click the Rates/Billing Codes tab and complete the following:
Charge
From
To
Standard Billing Code
Click Insert
NOTE: Multiple entries can be added to this tab based on specific criteria – such as inserting a row with a specific modifier for Telehealth Services. These specific criteria are determined by selecting options in the screenshot above (like Place of Service, Location)
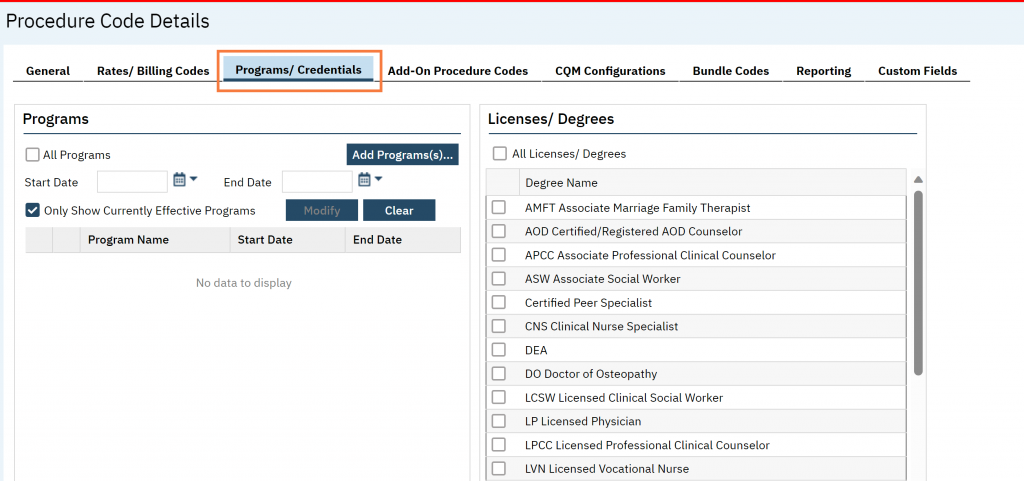
Click the Programs/Credential tab and associate the appropriate programs and Licenses/Degrees.