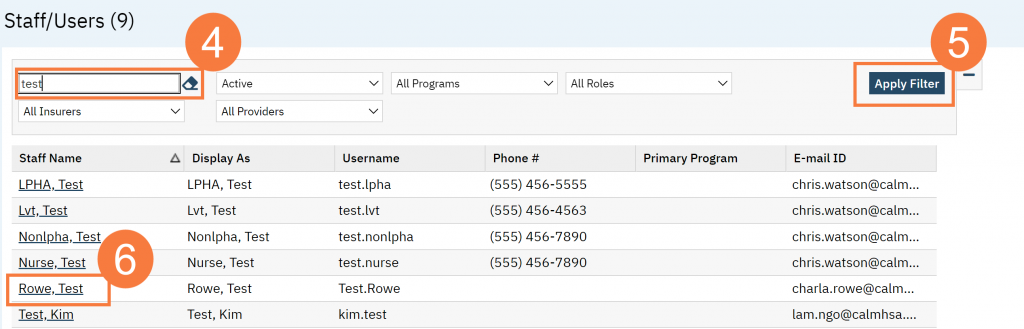
EnterStaff Name (last name or last name, first name)
Select Apply Filter.
Click to select the appropriate prescriber.
How to Add Prescriber’s Fax and Phone Number
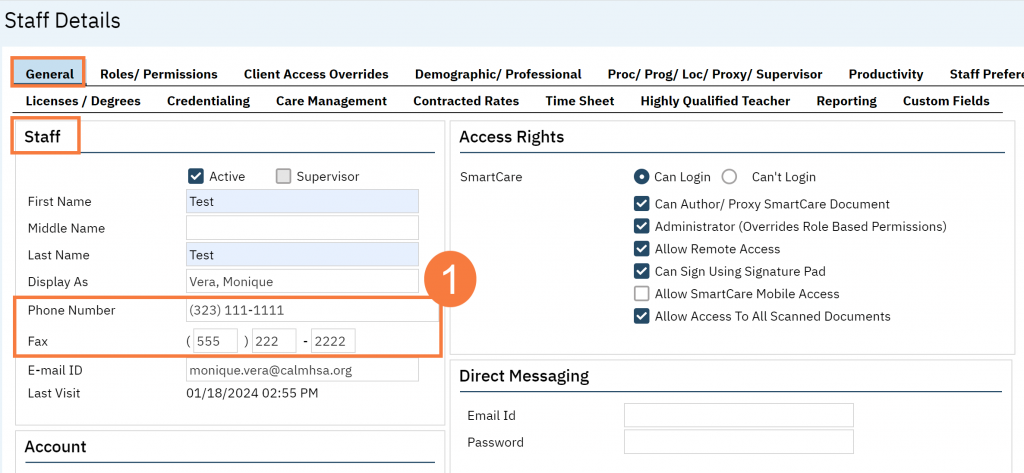
With the staff user newly created or searched for, you should be on the Staff Details screen. You want to make sure they have a phone and fax number. If not, enter them.
The first page you land on will be the General tab. Navigate to the staff section and enter the prescriber’s phone number and fax number in the corresponding fields.
How to Assign Prescribers the Proper Roles and Permissions
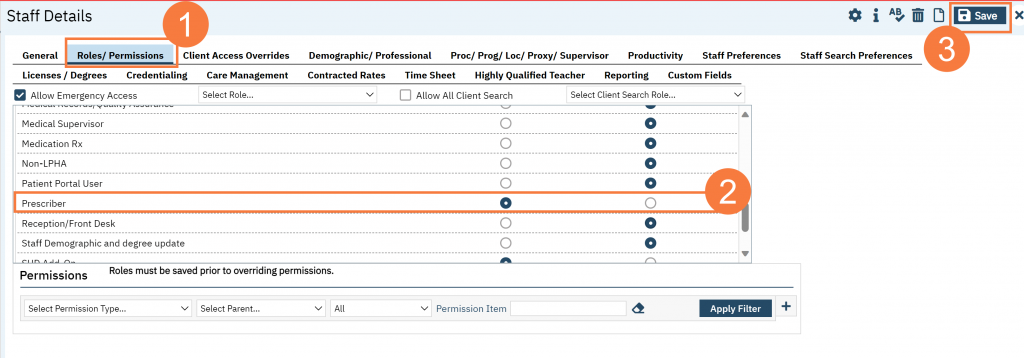
Note: Roles must be assigned and saved prior to assigning individual permissions.
Navigate to the Roles/Permissions tab.
In the Assign Roles section, locate Prescriber and set to Granted from Not Granted by clicking the radio button.
Click Save.
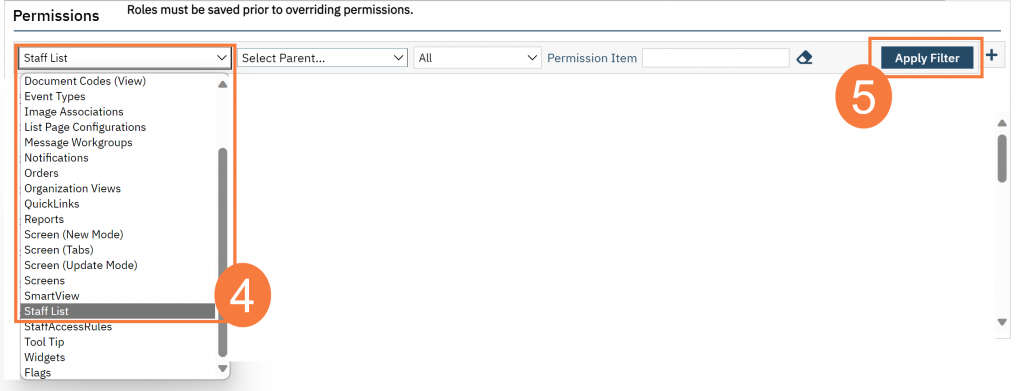
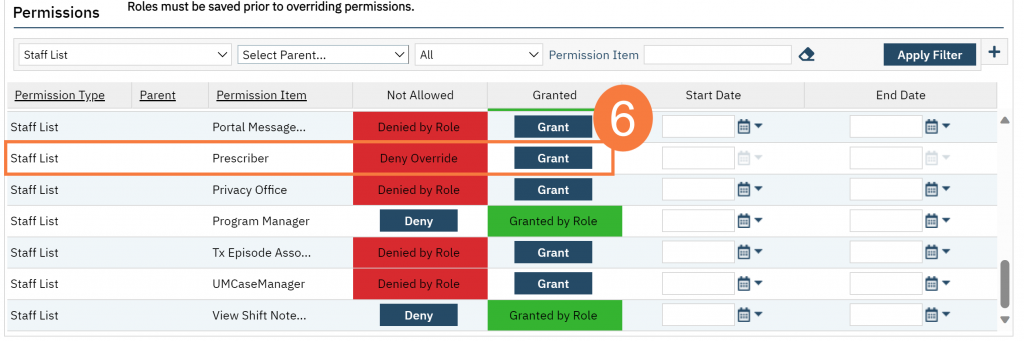
With the Prescriber Role saved, we need to go to permissions and grant the staff list permission type.
Navigate to the Permissions section below. Click the Select Permission Type drop down and select Staff List.
Click Apply Filter.
Find Prescriber in the filtered lost below. Click the blue Grant button.
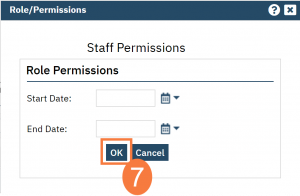
In the pop-up, click OK. You do not need to put in dates.
Click Save.
How to Add a Prescriber’s Addresses and Staff Hours
Note: This is required for every prescriber but especially for Controlled Substances)
Navigate to the Demographic/Professional tab
Enter the Prescriber’s mailing address
Enter the Staff Hours information.
Click Insert for each day of the week.
NOTE: Staff hours are required for Auditing E-Prescribing Controlled Substances.
Click Save.
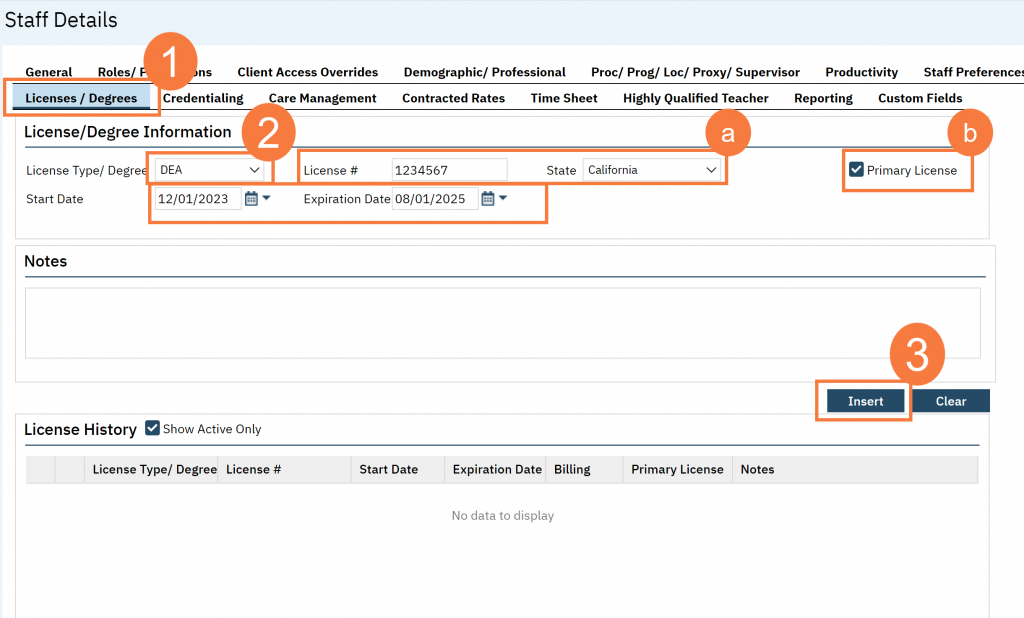
How to Add Prescriber’s Licenses/Degrees (DEA and NPI)
All licenses related to the prescriber should be added in the ‘Licenses/Degrees’ tab. These include MD, DO, DEA, NPI, NA DEA, etc. The two examples below are for DEA and NPI.
NOTE: DEA and NPI should be set as primary licenses. Degrees/Licenses like MD, DO should have ‘Billing’ selected. It should already be selected by default.
Navigate to the Licenses/Degrees tab.
Click the License Type/Degree drop down and select DEA.
Enter the DEA number, State, Start Date, Expiration Date.
Click to check the Primary License checkbox.
Click Insert. This will drop the information to License History section.
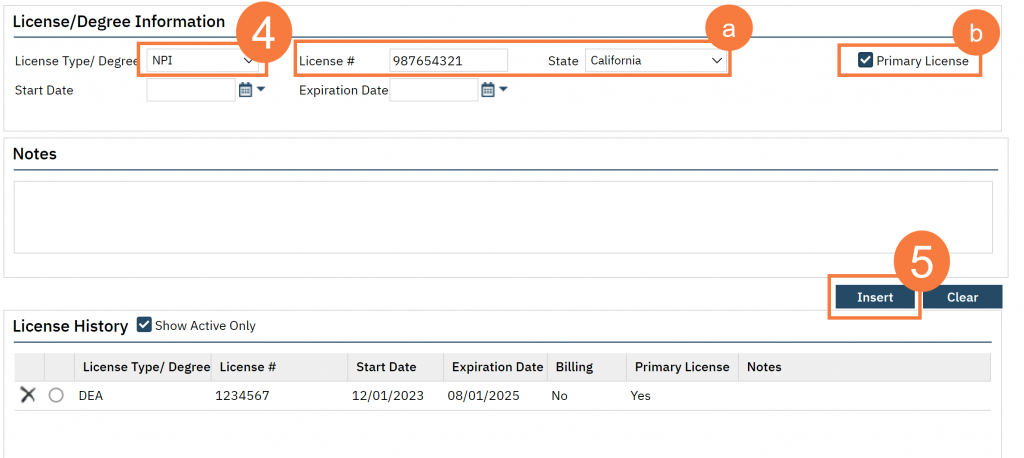
Click the License Type/Degree drop down and select NPI.
Enter the NPI number and State
Note: Start and Expiration Date are not required here.
Click to check the Primary License checkbox.
Click Insert.
Click Save.
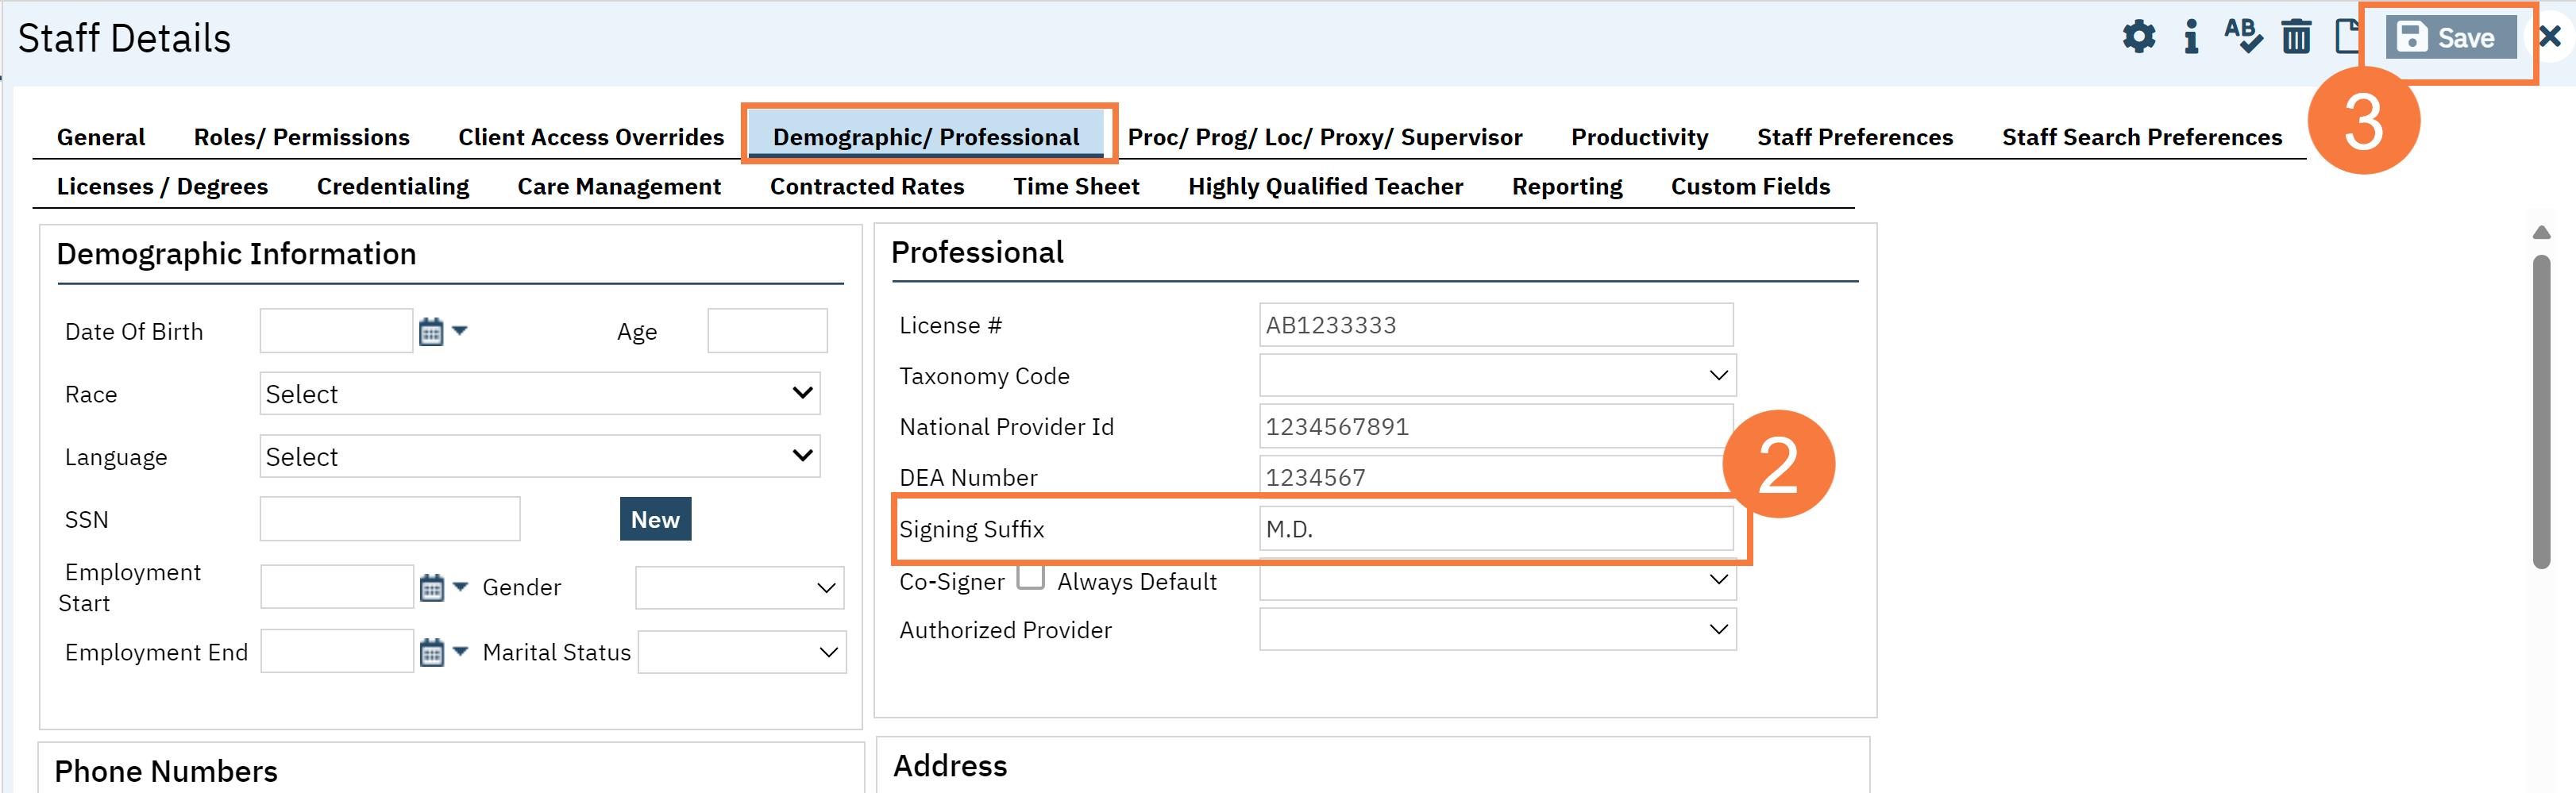
Demographics/Professionals Tab
When all the licenses and degrees have been properly entered, they will pull through to the ‘Professional’ section under the ‘Demographic/Professional’ tab in the prescribers ‘Staff Details’ screen. The License #, National Provider Id, and DEA number should be visible in their respective fields. The only thing left to add is the Signing Suffix (license degree) such as MD, DO, PA, etc. ‘MD’ is given as an example. This needs to be entered manually.
Navigate back to the Demographic/Professional tab.
Locate the Professional section, add the appropriate license/degree in the Signing Suffix section.
Click Save.
How to Add a Prescriber’s Signature
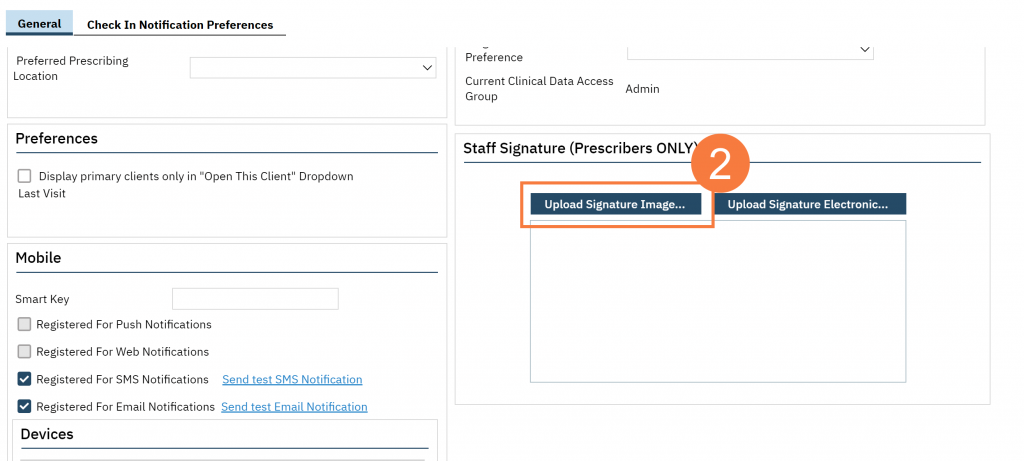
For staff to prescribe medication they need to either have a signature uploaded to the system in the form of an image or have the signature captured electronically. This needs to be done under the clinician’s login and stored in their preferences Note: Only supported signature image file formats are .gif, .jpg, .jpeg, .png.
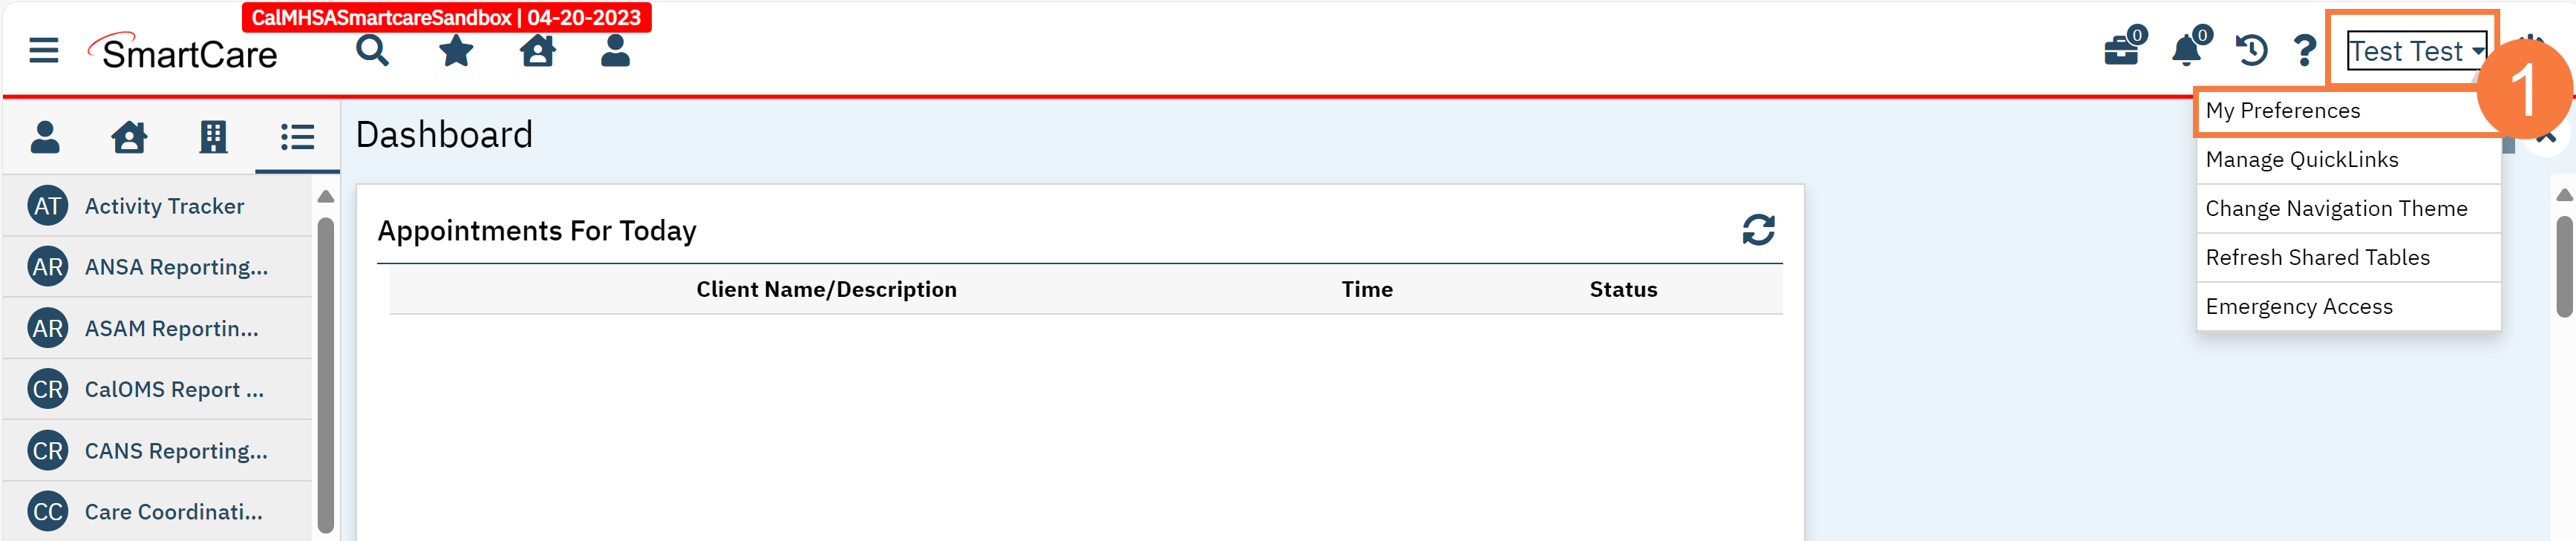
You may want to walk the prescriber through these steps.
Have the prescriber login to SmartCare. Click their name in the upper right-hand corner and select My Preferences.
On the General tab, in the Signature section, click Upload Signature Image.
Note: If you are uploading an image file of a signature and have one ready.
Follow the screen prompts to upload the image from their computer.
Click Save.
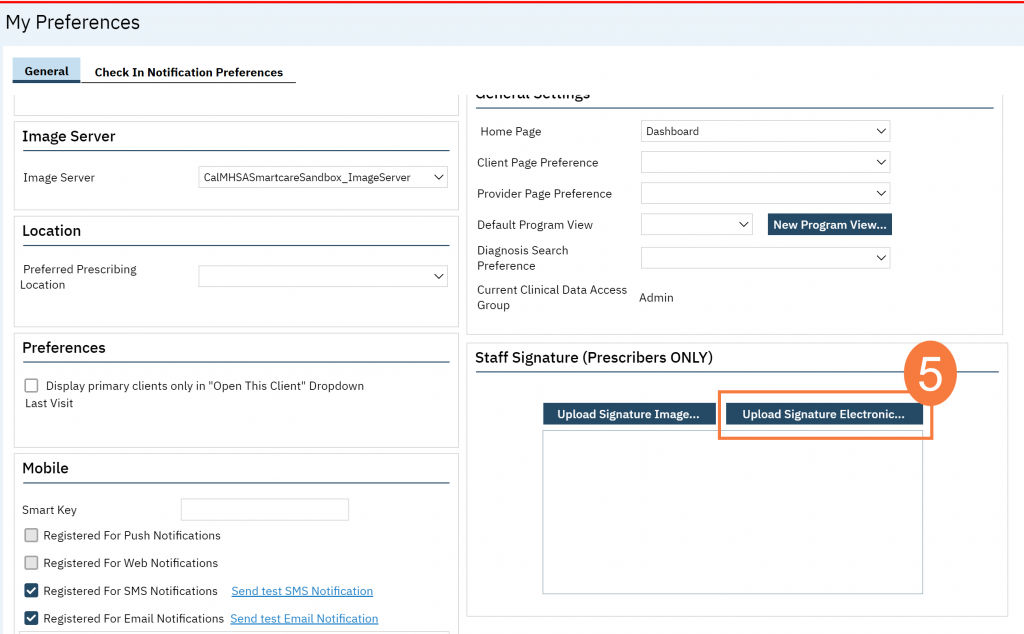
OR
Click Upload Signature Electronic to use a mouse or touchpad to upload signature.