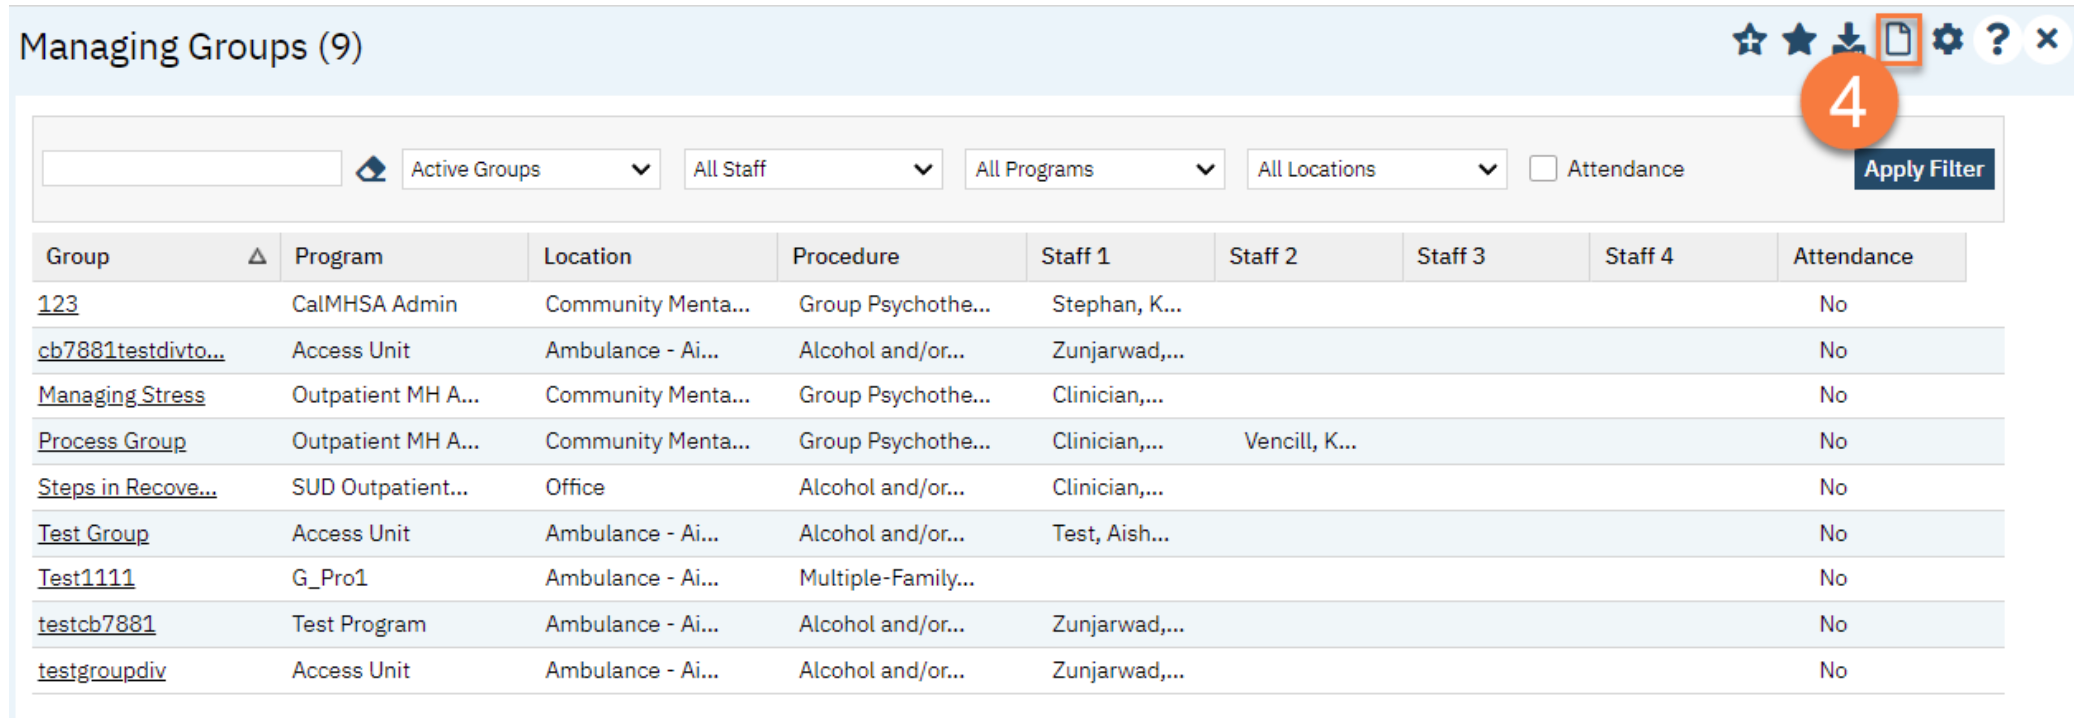
This takes you to the Managing Groups list page. Click the New icon.
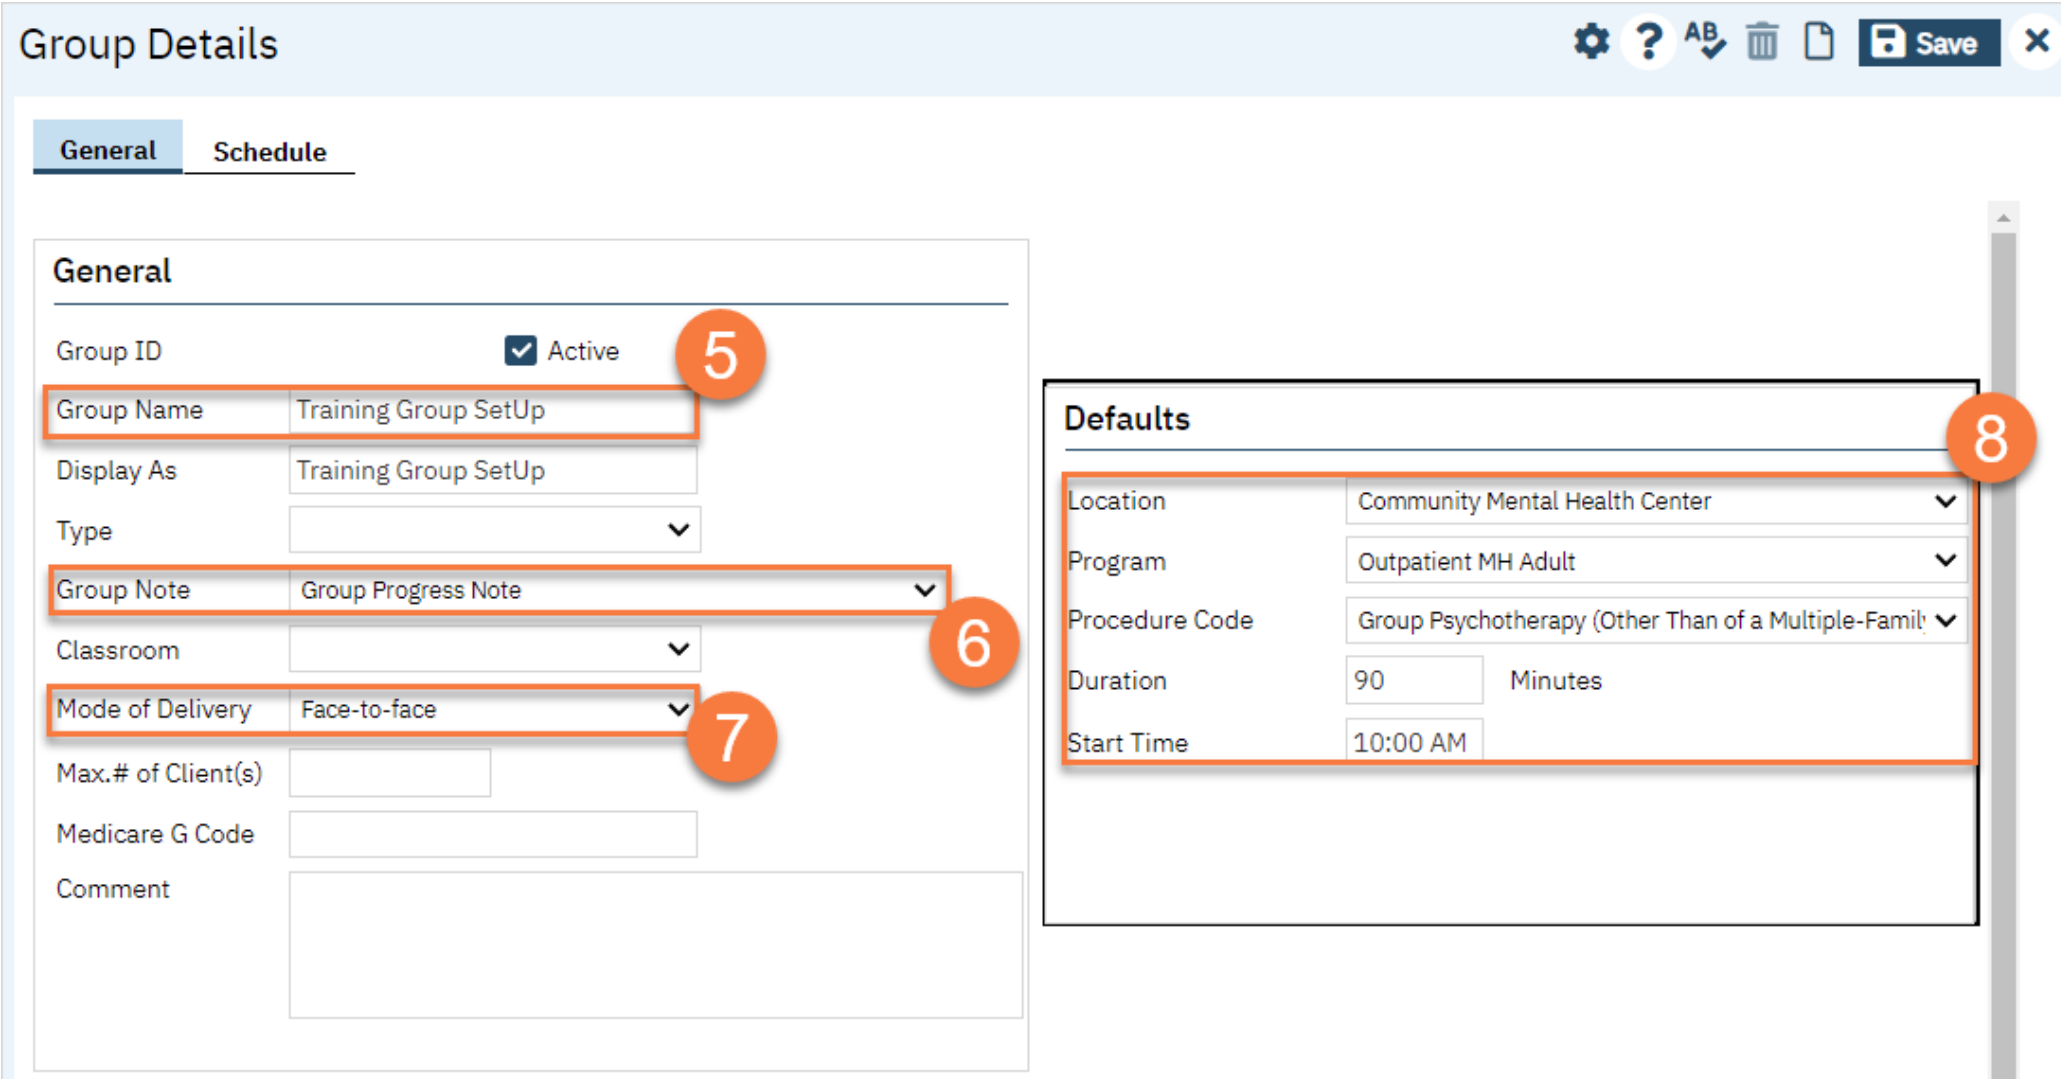
This takes you to the Group Details screen. Enter the group’s name. This will auto-populate the “Display As” field, which you can change if necessary.
In the Group Note drop-down, select “Group Progress Note”.
Enter the mode of delivery.
Enter the service information about the group in the Defaults section.
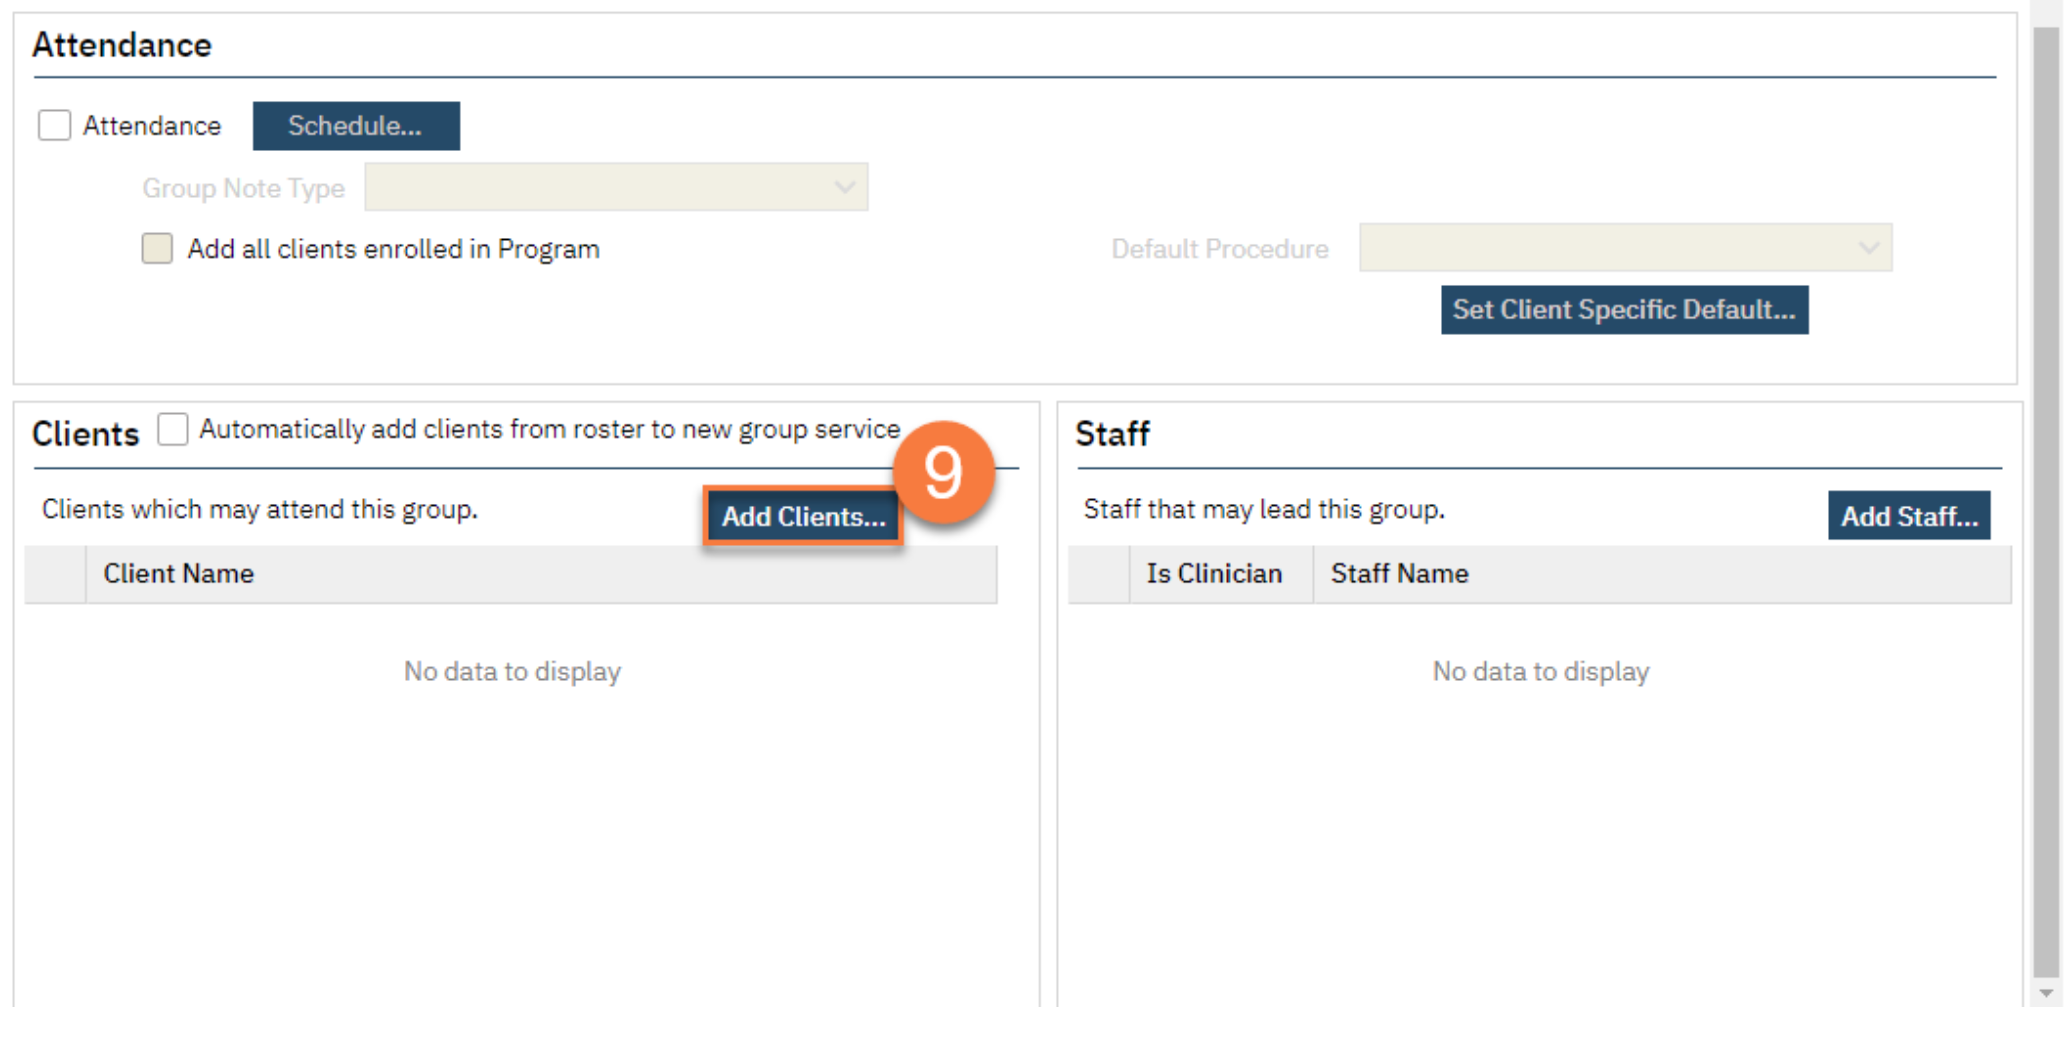
Add Clients, as applicable. For some groups that are drop-in, you may not have any clients to include. If this is a closed group, or an ongoing group, we recommend adding the clients here. Click Add Clients.
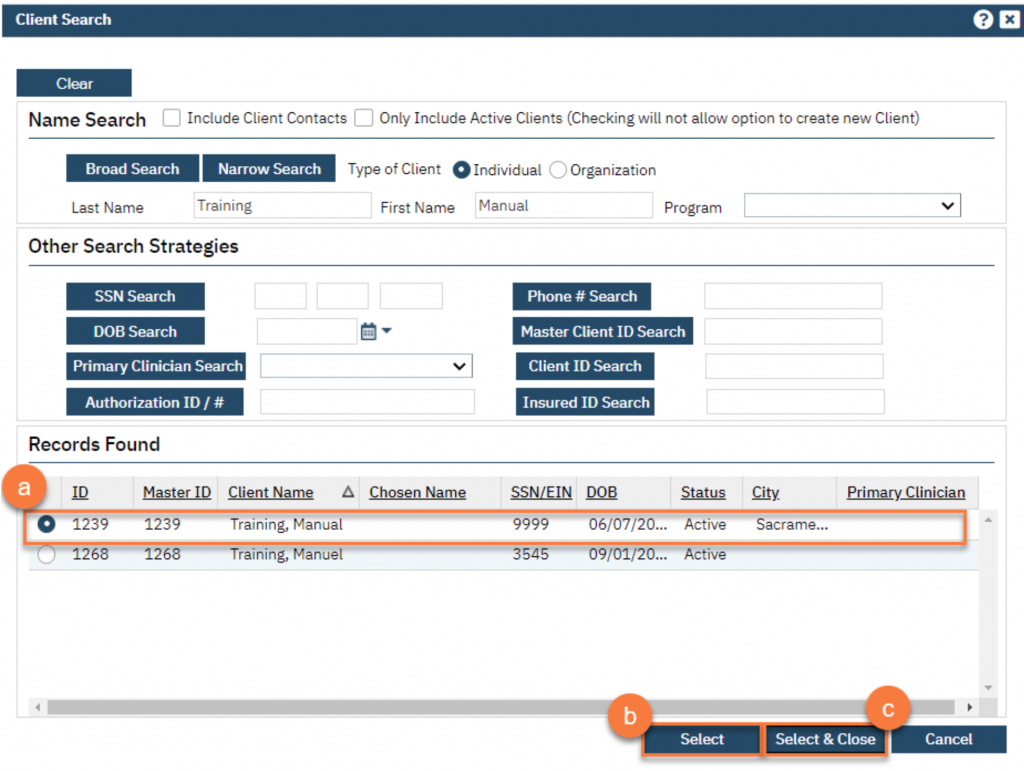
This brings up the client search pop-up. Search for the client you want to add to the group. Select the client from the Records Found section.
Click “Select.”
When you’ve finished adding all clients, you can click “Select & Close”.
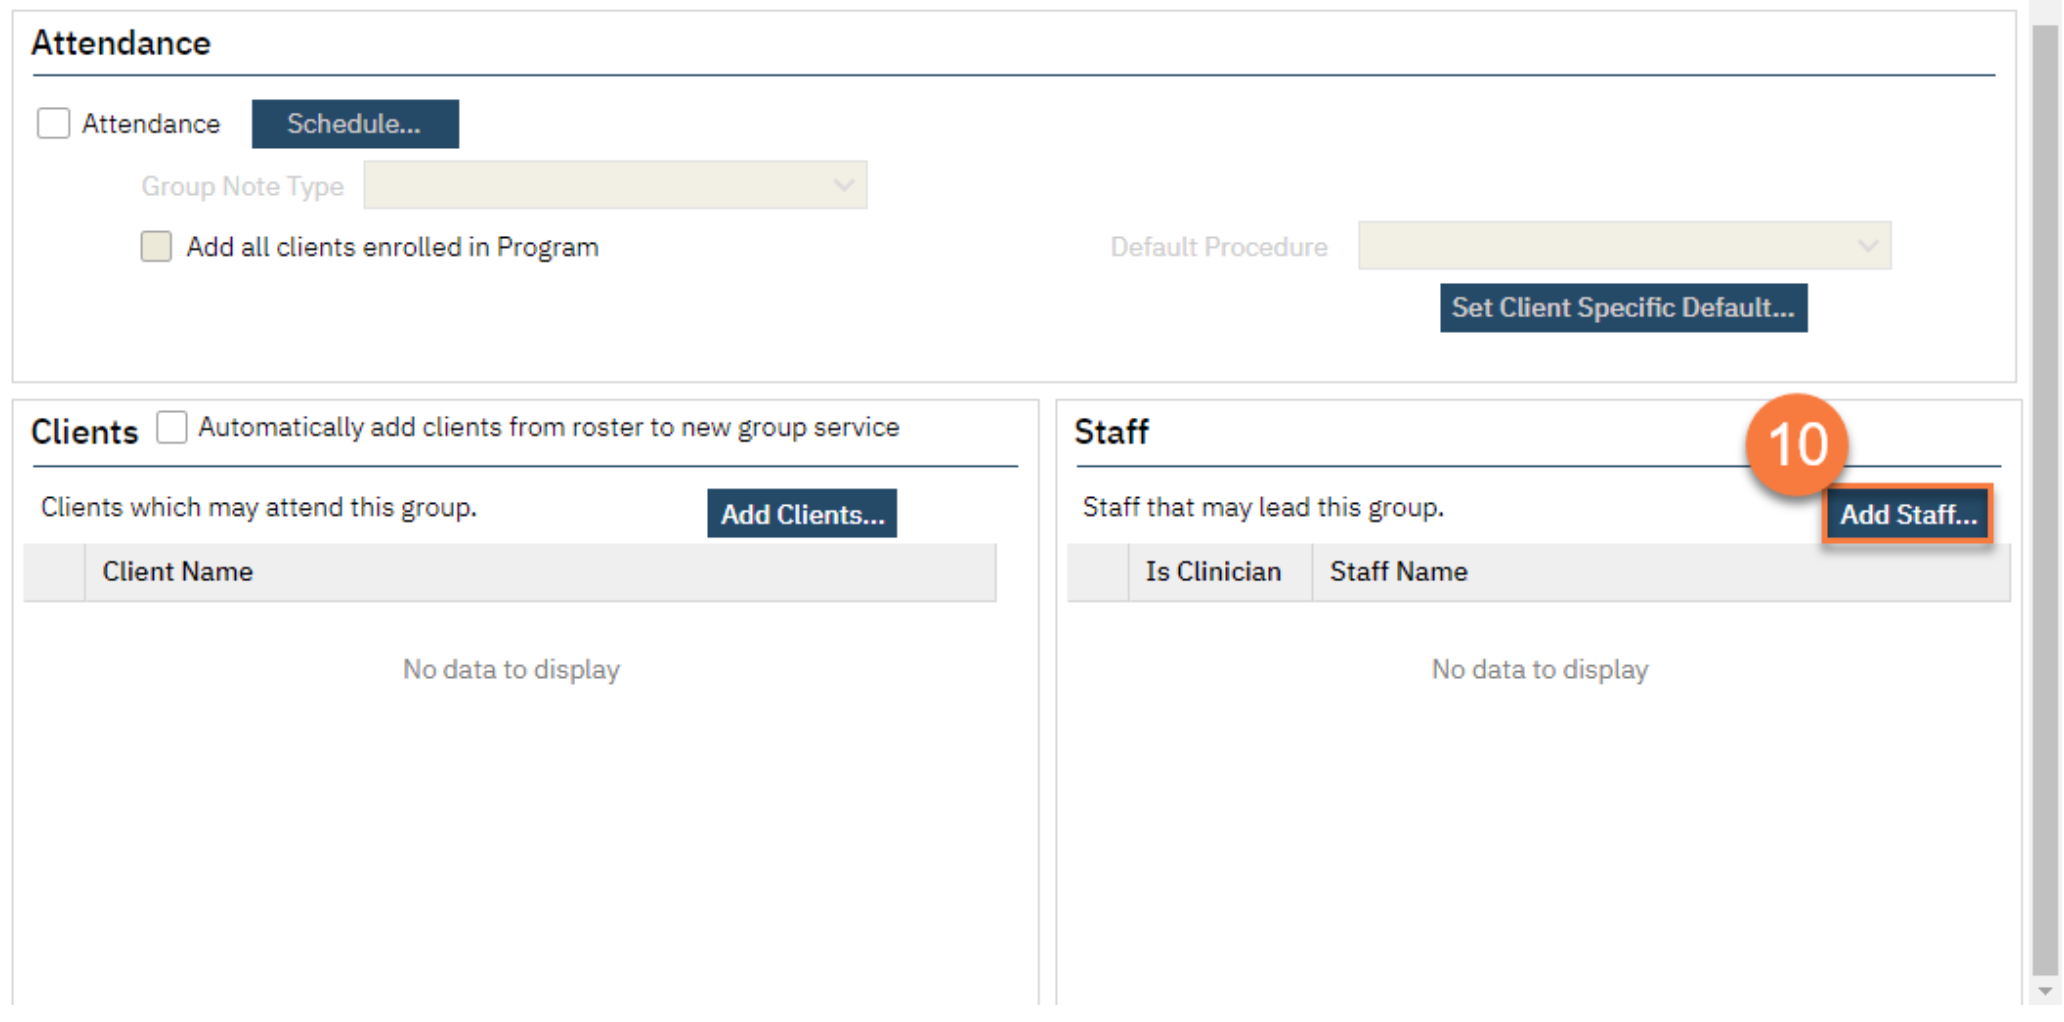
Add the group facilitators. You can have more than one facilitator. Click Add Staff.
This brings up the Group Services Staff Pop Up. Select the facilitator(s) from the list.
Click OK.
This takes you back to the Group Details page. Select the primary staff member by selecting them under “Is Clinician”.
Click Save.
To learn how to schedule group sessions click here and skip to step 5.