When admitting a client, users should follow these steps to use the Client Search feature when selecting the admitted client. Confirm that the admitted client is the correct client by comparing Date of Birth and other factors to other similarly named clients.
- Click the Client Search icon.
- Click the <Client Search> button in the Client Search bar. The Client Search pop-up will appear.

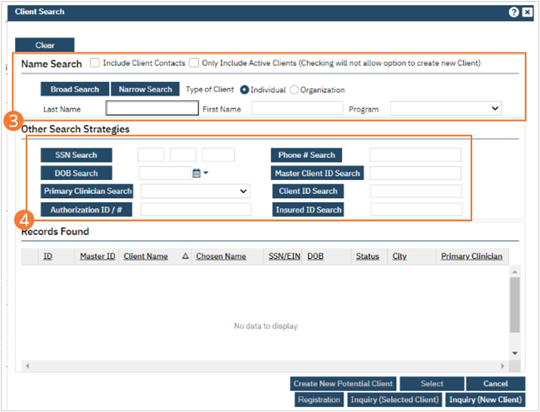
- If searching for an individual, type the desired name into the Last Name field. If known, enter a name in the First Name field. If searching only Active Clients, select the Only Include Active Clients checkbox. Click the Broad Search button to include clients with names similar to the entered name.
- Optionally, use other search strategies. Enter known information as text in a selected field, or select a date using the date selector next to the DOB search button. Click the button beside the field you entered information in.
- Enter a social security number in the format “XXX XX XXXX” beside the SSN button.
- Enter a Date of Birth beside the DOB Search button.
- Select a Primary Clinician from the dropdown beside the Primary Clinician Search button.
- Enter an Authorization ID Number beside the Authorization ID / # Search button.
- Enter a ten-digit phone number beside the Phone # Search button. Parentheses and hyphens are optional.
- Enter a Master Client ID number beside the Master Client ID Search button.
- Enter a Client ID number beside the Client ID Search button.
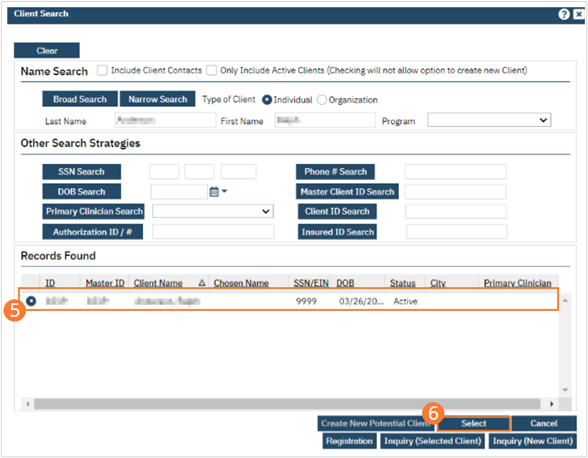
- The Records Found section will populate. Select the radio button beside the desired client.
- Click the Select button.