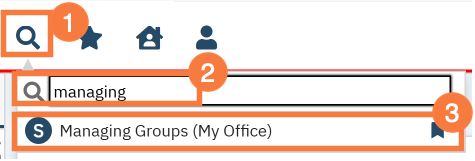
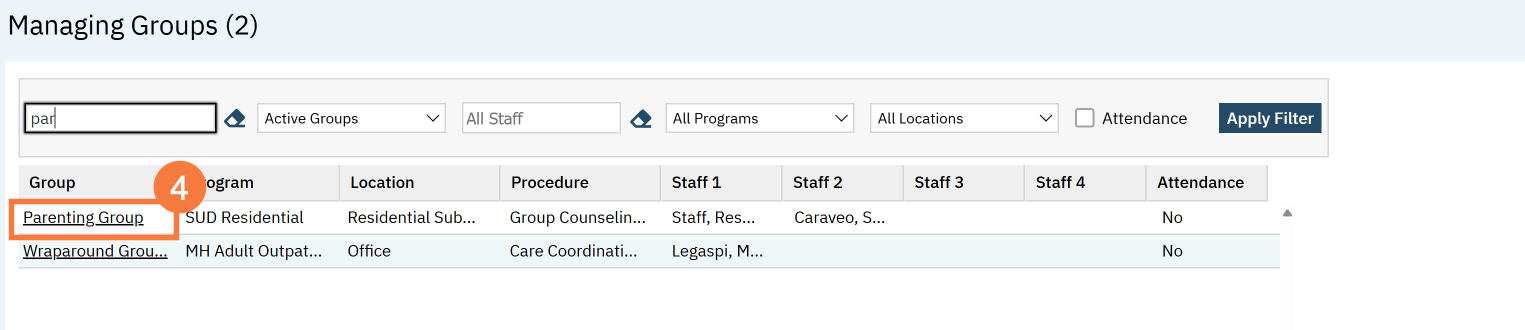
This takes you to the Managing Groups list page. Filter as appropriate and click the hyperlinked group name.
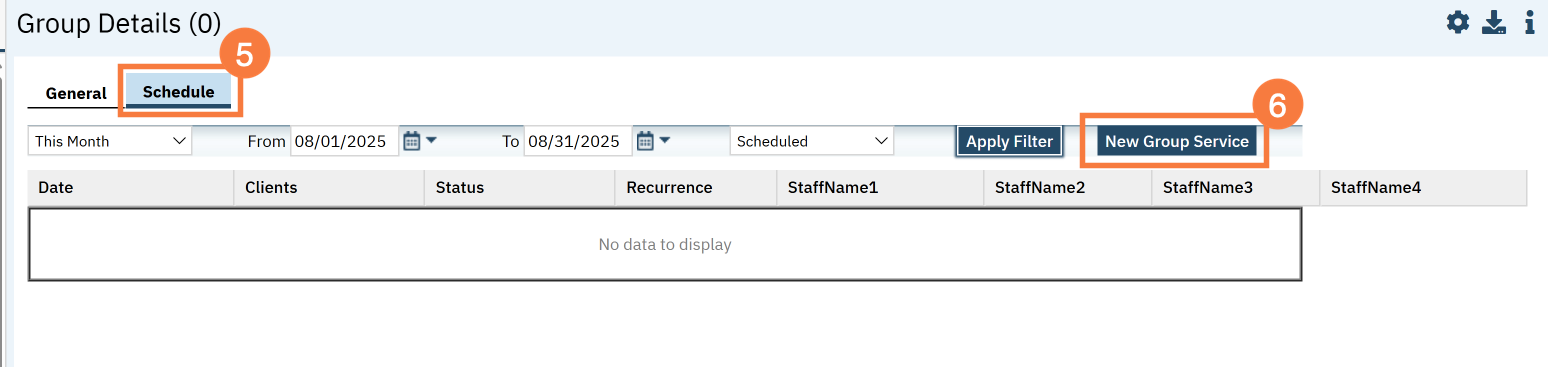
Navigate to the Schedule tab.
Click “New Group Service”
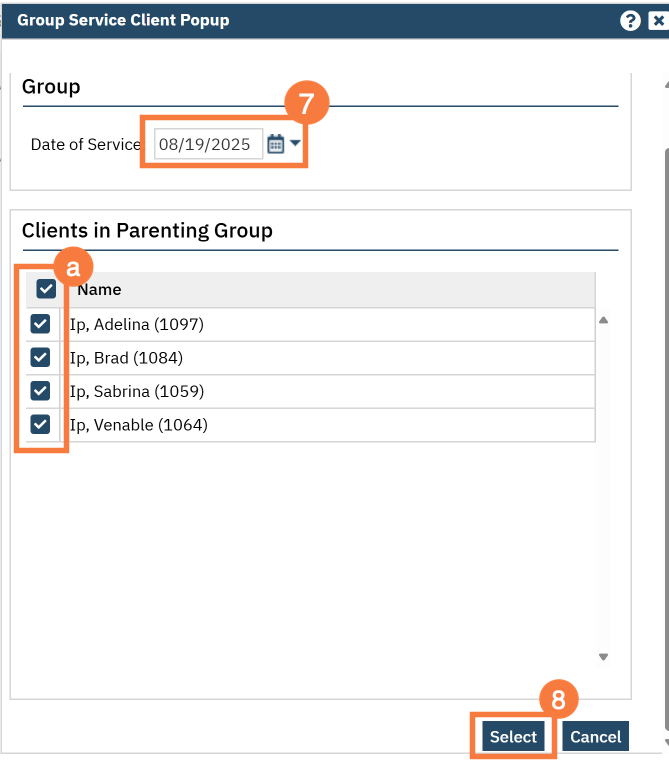
This brings up the Group Service Client Popup window. Enter the first date of the group.
Select the clients you’re expecting to attend. You can click the top-most checkbox to select all the clients.
Click “Select.”
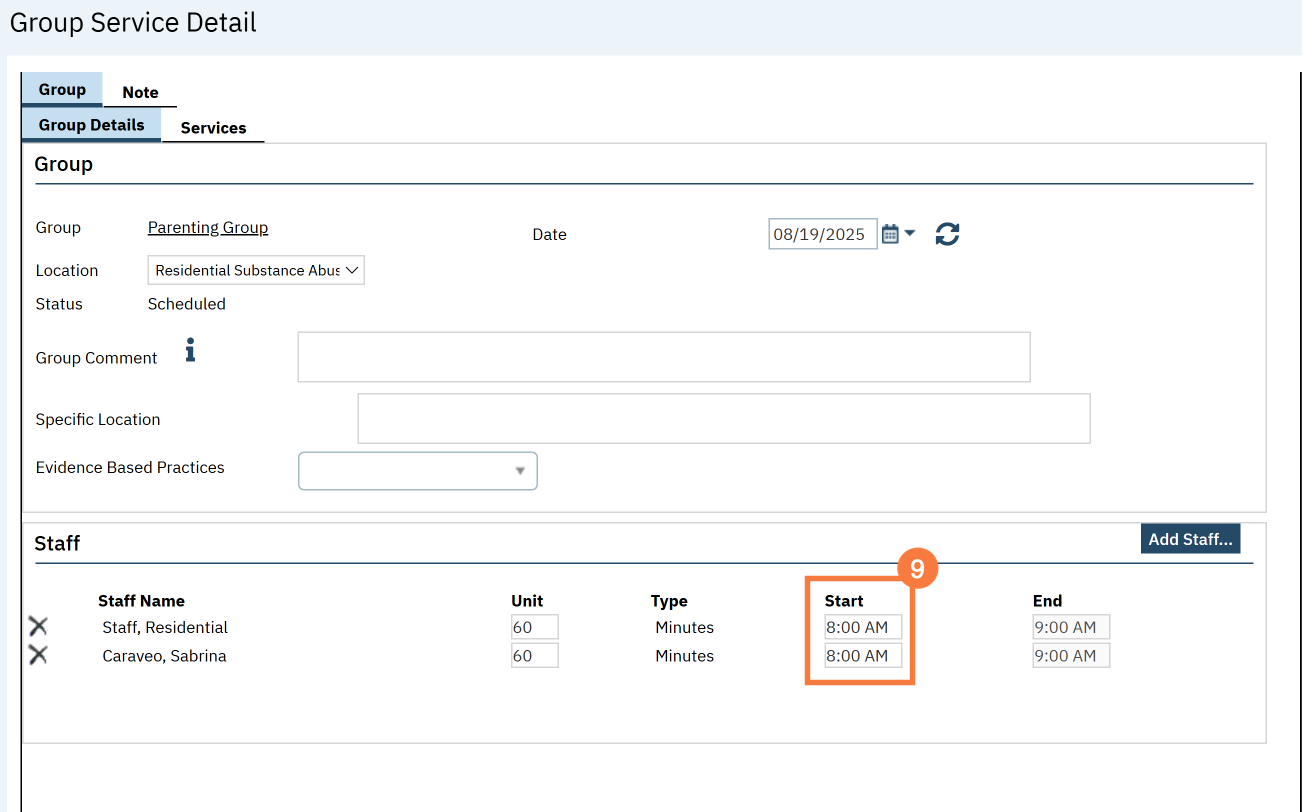
This takes you to the Group Service Detail screen. Confirm the group information. The staff’s start time for both facilitators will default to the start time; update if necessary.
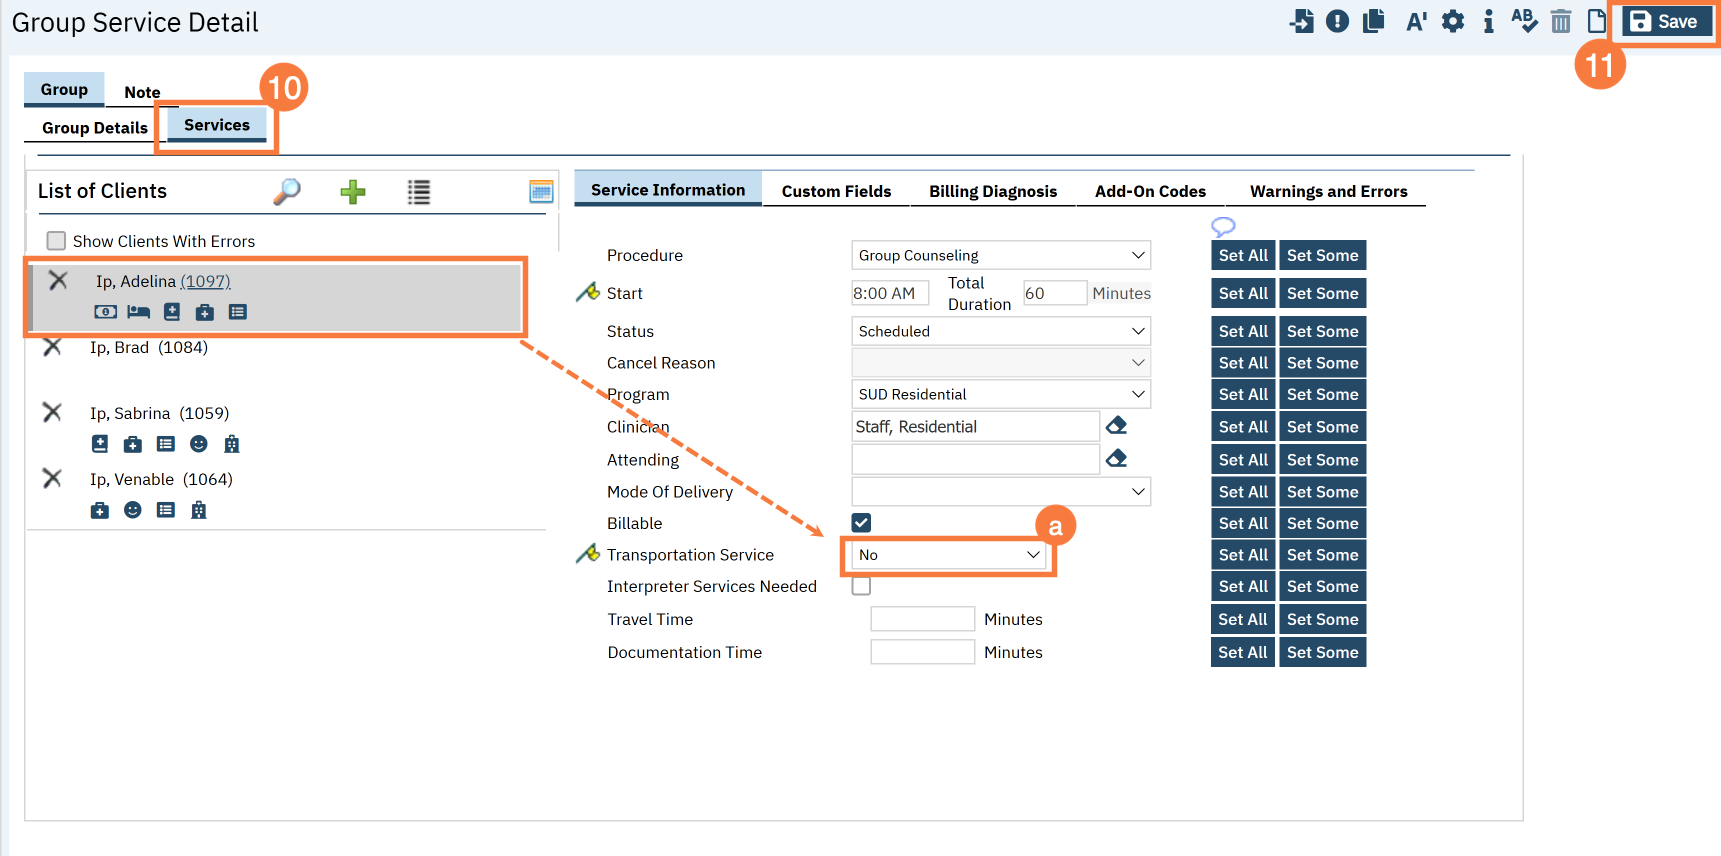
Click the Services tab.
If any of the clients require transportation, make sure to enter that by clicking on the client’s name and entering their specific information in the service information section
Click Save.
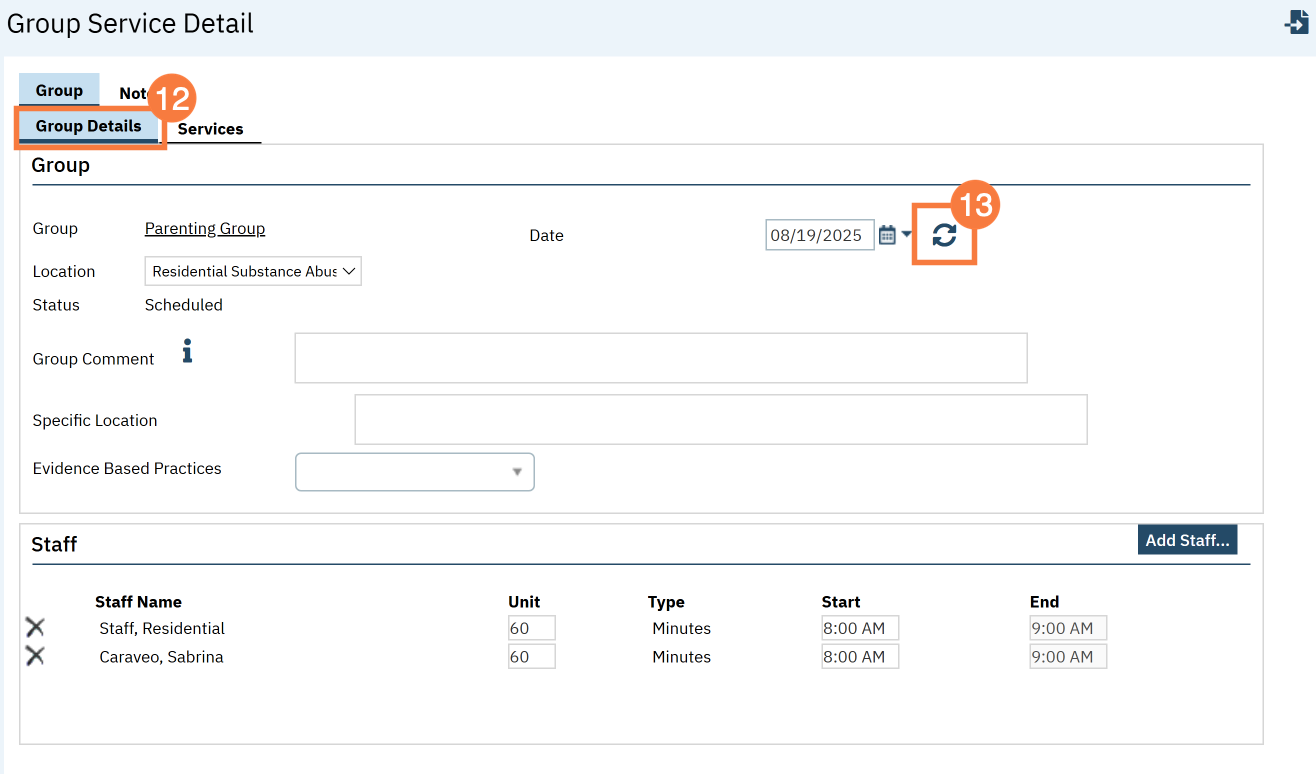
To set this up as a recurring group service, click back to the Group Details tab.
Click the recurrence icon
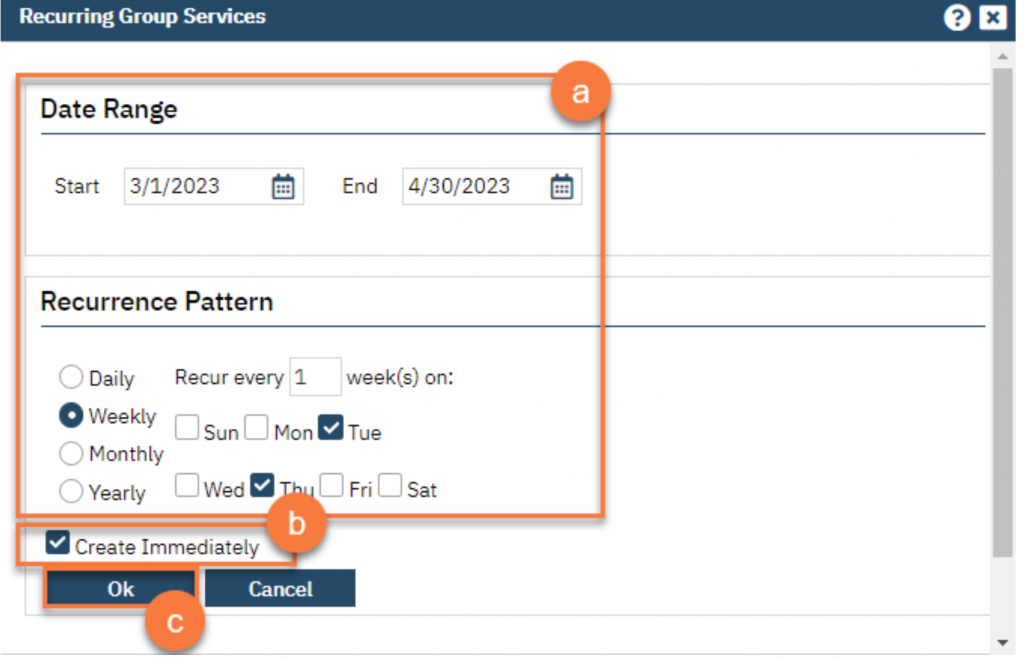
Important Note: If this is a closed group where group facilitators and group members will not often change then we recommend that you select the “Create Immediately” checkbox. This will create the specified series of events on the staff calendar. Keep in mind that by doing this any changes that need to be made to this series would need to be made individually and will not be pushed to the group recurrence.
If you anticipate this to be an open group and there to be many group member changes and/or staff member changes then you would want to leave this option unchecked. That way when you make changes they will be pushed to future events. In this case, a place holder will be on the staff calendar instead of the actual event.
Click OK.
You are finished and may now click the X icon to close.