This article will take you through all the necessary items for receiving, reviewing, and approving service authorization requests.
How to See Service Authorization Requests That Have Been Submitted
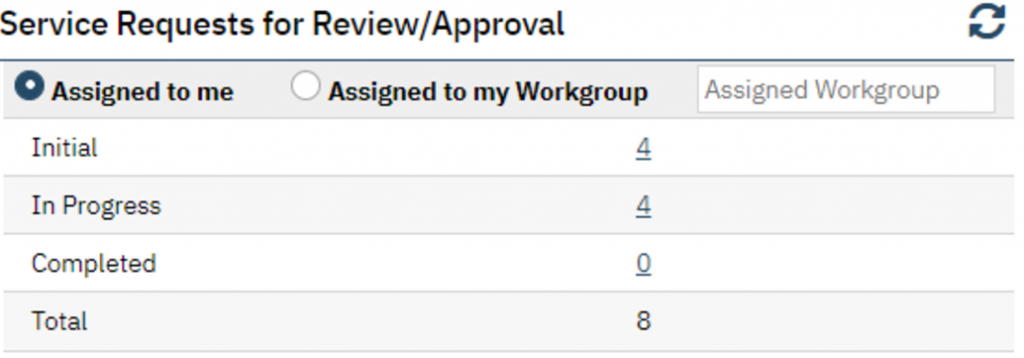
The widget “Service Requests for Review/Approval” will show you any requests that are assigned to you or a workgroup you’re a part of.
- Initial – Requests that have been submitted but have not yet been processed.
- In Progress – Requests that have started to be processed but are not yet completed.
- Completed – Requests that have been fully reviewed and authorizations have been created.

Clicking on a link in this widget will take you to the “My Service Request – Review/Approval List” list page. From here, you can use the filters to further search for requests that have been submitted. This list page is meant to be used like a work queue, so people who are responsible for reviewing requests can easily see which reviews still need work. Supervisors may use this list page to monitor the status of reviews that are assigned to their staff.

How to Review a Service Authorization Request for Approval/Denial
- From the My Service Request – Review/Approval List page, click on the link in the ID column of the request you wish to process.

- This takes you to the Service Request – Review/Approval Detail screen. The first two tabs were filled out by the requestor and are not editable once submitted. The Attachments tab will include all attachments the requestor has included as part of their service authorization request. The History tab will show you the full history of this request. Click on the Approval tab. Here, you can see the type of service requested as well as the status of the review.
- In the Service Request Details section, select an Auth from the Auth List by clicking on the corresponding radio button. This will bring the information into the fields below based on what was initially requested for ease of creating an authorization.
- Make any changes to create your authorization. For example, if you wish to change the dates the authorization will cover, change the From and To date fields. If you wish to change the frequency or amount of units authorized, make changes in these respective fields.

- Select the Program that you are authorizing to provide these services in the Program Approved field. The requestor may or may not have requested a specific program, which will show in the Program Requested field and is not editable.
- Select the appropriate service status (approved/denied).
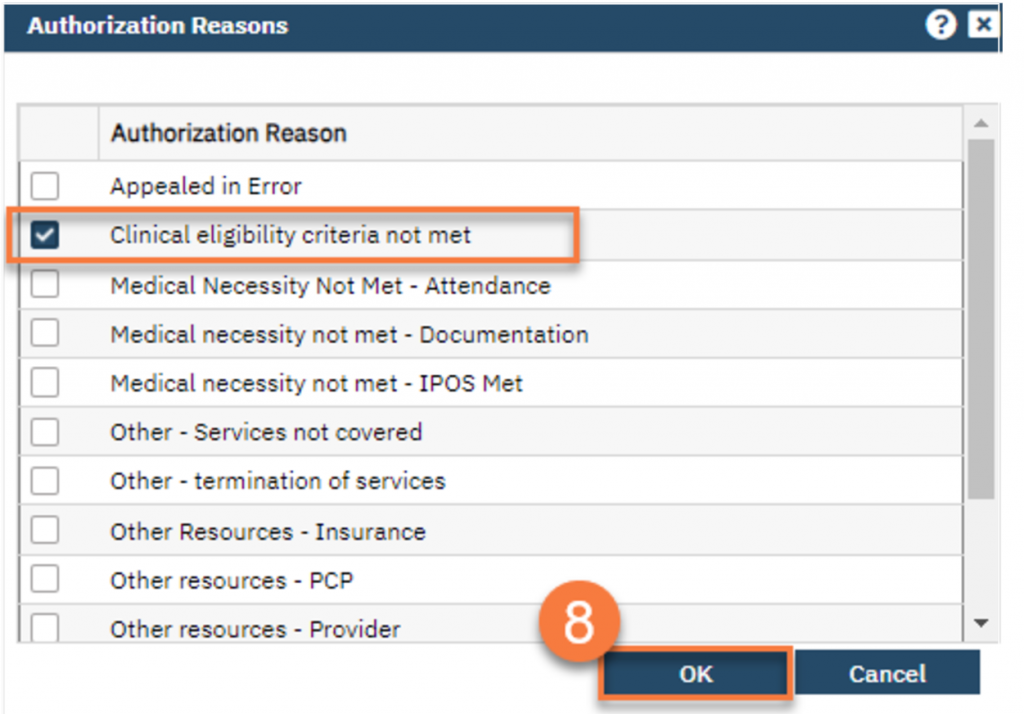
- Click on the Reasons button to add your reasons for the service status (why you approved/denied the request).

- This will bring up the Authorization Reasons popup. Select all the reasons that apply and click OK.

- Check the Generate Authorization checkbox. Do this even when you are denying the request. This will basically create a “denied authorization”. Once you have saved your changes, this will create an authorization for these services.
- Add any comments.
- Click Modify to save your changes to that Auth.

- If you need additional information from the requestor:
- Select “Pended” in the Service Status.
- Check the “Send back to requestor for more information” checkbox and add your “Reason for requesting more information”.
- Click Modify to save your changes to the Auth.
- Click Save to send the request back to the requestor for more information.

- Once all the Auths have been addressed, click Save. Once all Auths have been addressed and the authorizations are created, this will change the Review status to Complete. Note: a client must have Coverage information entered in order to generate the authorization.
How to Create a Service Authorization Without an Initial Request
Sometimes a county needs to create an authorization without receiving a request first. This is done in the Approval tab
- From the My Service Request – Review/Approval List page, click the New icon.

- From the Service Request Detail screen, click the Approval tab.
- Scroll down and begin with the Auth Code drop down. Complete the authorization information manually.
- NOTE: Be sure to click Generate Authorization checkbox.

- Click Insert.
- Repeat steps 4-5 until all authorizations are created.
- Click Save.

How to Document Doctor Approval of an Authorization Denial
In some instances, denying an authorization request requires a review by a medical doctor. This often includes a doctor-to-doctor consult between the requesting doctor and the reviewing doctor. If a non-doctor denies an authorization request that falls into this category, they should document in the comments their reasons. They should then assign the authorization to the reviewing doctor for final approval. The doctor can then document their notes, including any consultation information, in the comments section. The reviewing doctor can then finalize the authorization or re-assign it back to the original reviewer for finalization. If further clinical information needs to be documented as part of the consultation, this can be added in a progress note.
Updated 12/6/24
