- Click the Search icon.
- Type Client Account in the search bar.
- Click to select Client Accounts (My Office).

- The Client Accounts List Page will open. Filter the page as needed. Click Apply Filter once appropriate options are selected.
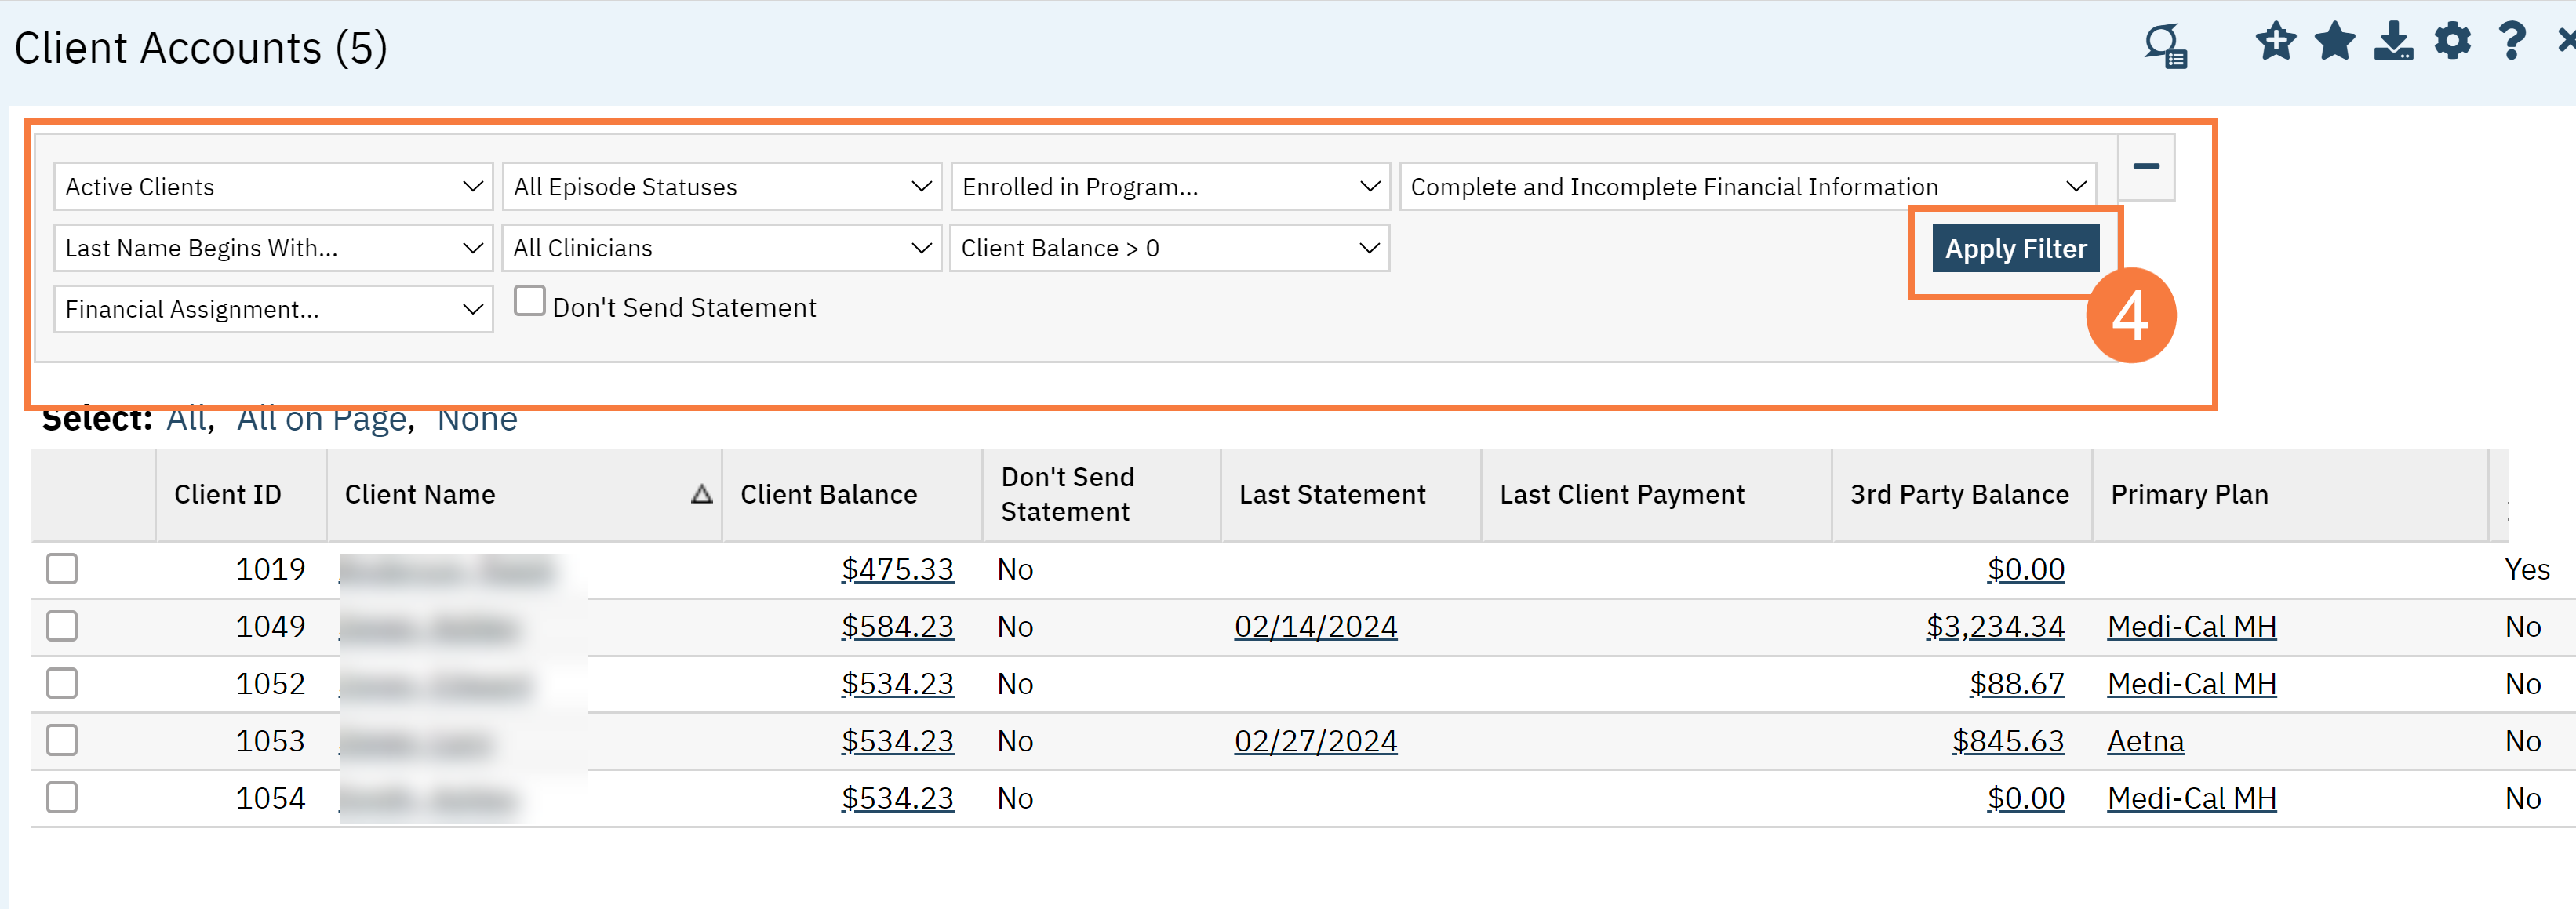
- Click to select the accounts you would like to generate the statements for.
- You can also click ALL.
- Click the Generate Statement button in the upper right-hand corner.

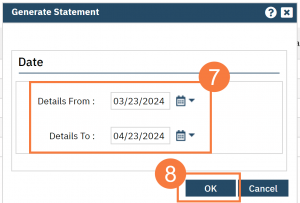
- The Generate Statement window will open. Click the Calendar icon to select the Details From & Details To dates.
- You can go month by month if needed or you can go by a larger date range. If you were to go month to month, you would enter the last day of the month you want to work within. (i.e. 7/1/2023-7/31/23)
- Click OK.
The Client Statement Printing window will open.
FYI: To view statements without printing, make sure you deselect the check mark next to “All Statement was Printed Successfully”, if you keep this box checked you will not be able to go back and print the statements for the specified time span you selected because the system thinks the accounts are in good standings. When you’re ready to print statements, you can leave that box checked.
- It is recommended that you uncheck the box that is labeled “All statements were printed successfully. The reason for this is, once you click the print button, it will tell the system that these statements are good to go and once printed, it is a hard print. You cannot redo. With this box unchecked, it is like a draft for you to review.
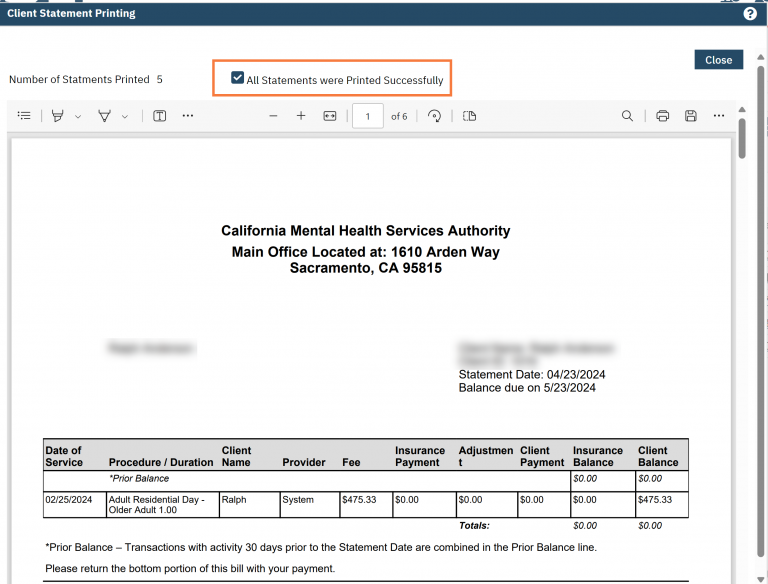
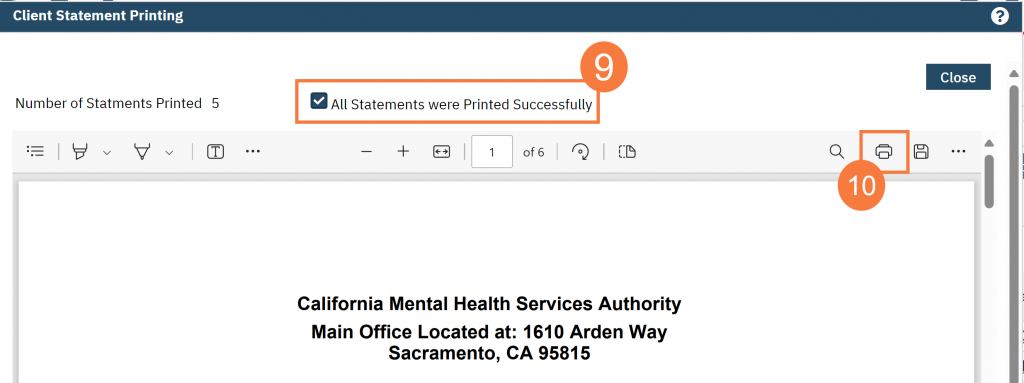
- Once you have confirmed all the statements are good to print, recheck the checkbox.
- Click the Print icon.
Additional Information
NOTE: Below are some enhancements and fixes that have been requested. At this time, there is no ETA on these. These enhancement/fixes are:
- Column “Adjustment” to re-align the T that is offset.

- Total on bottom shows “$0.00 (arrow) but the client balance is under total. (highlighted blue)
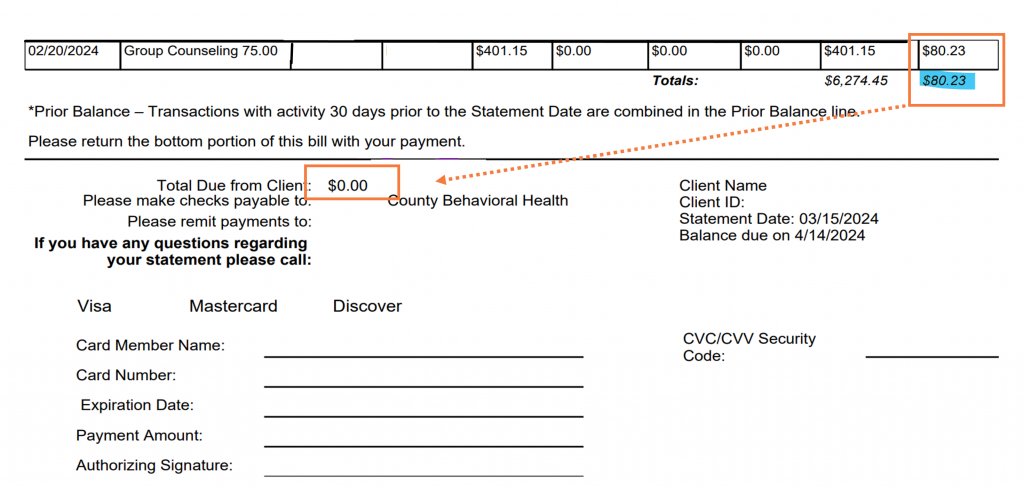
- Client balance is on ALL charge lines when it shouldn’t be.

