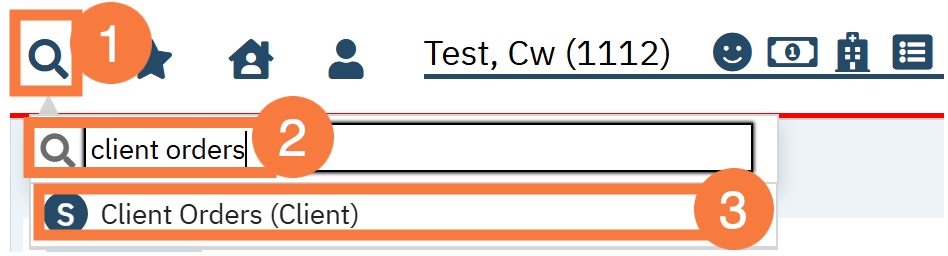
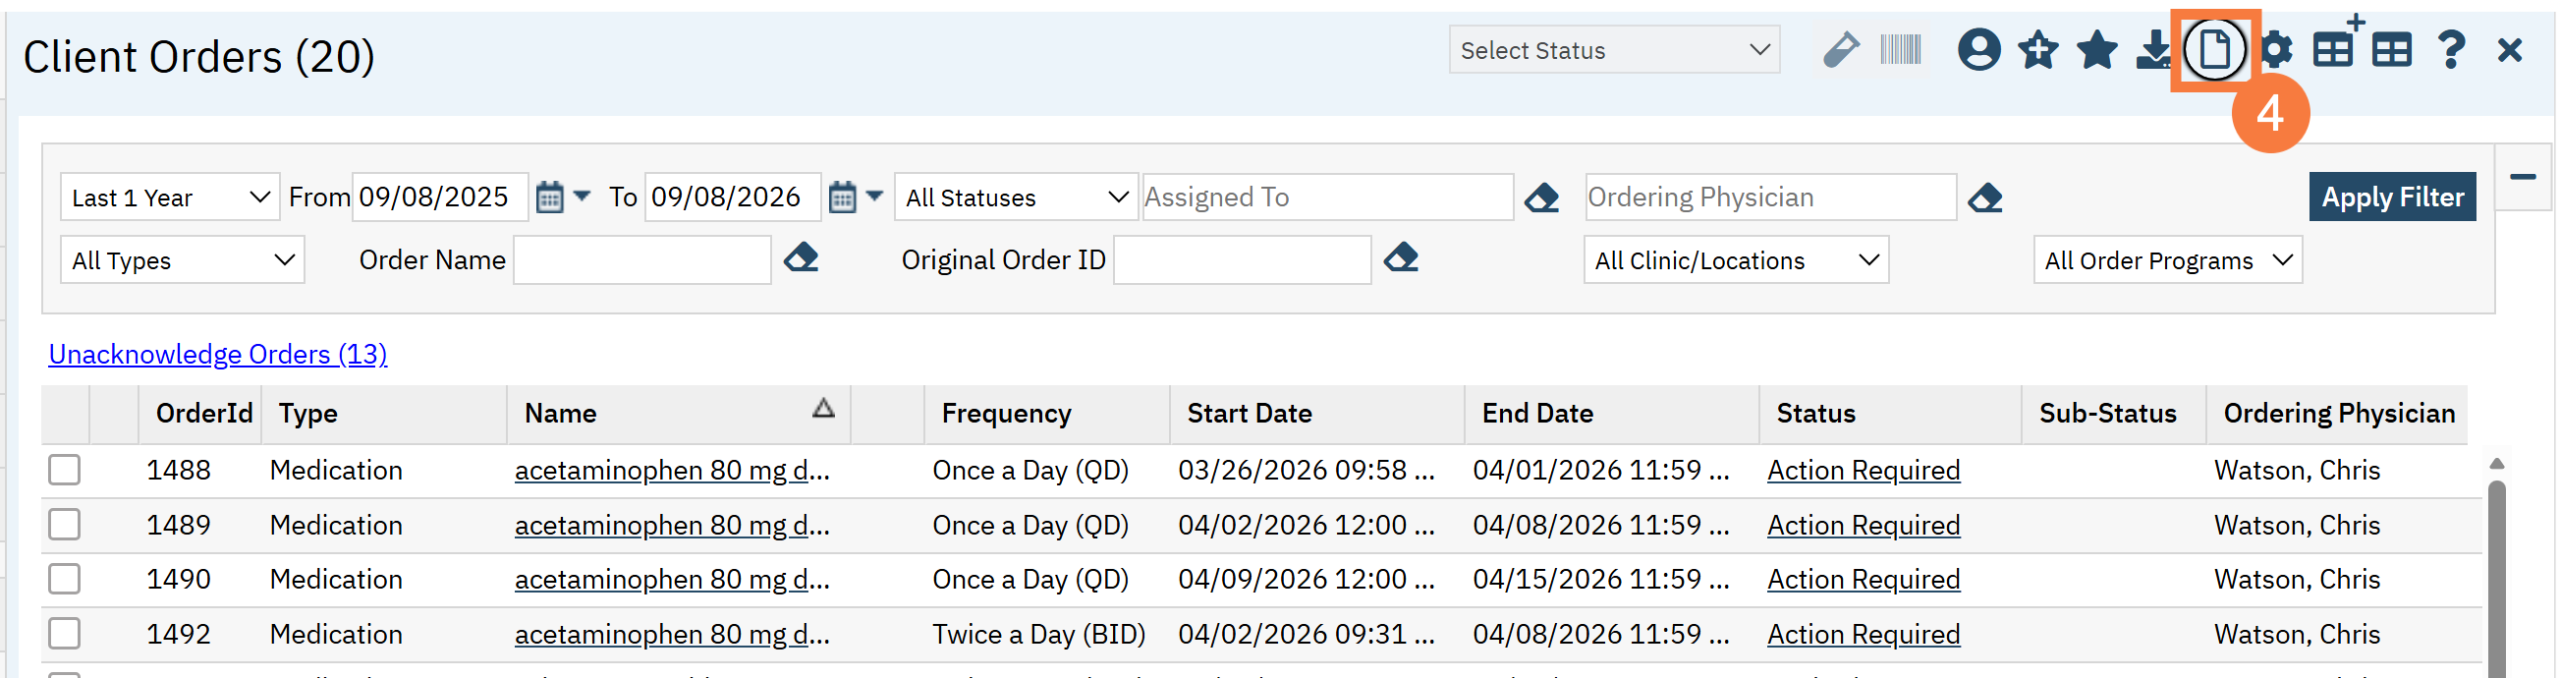
Select Client Orders (Client). This will take you to the Client Orders list page.
Click the New icon.
In the Client Order Selection Popup window, click OK.
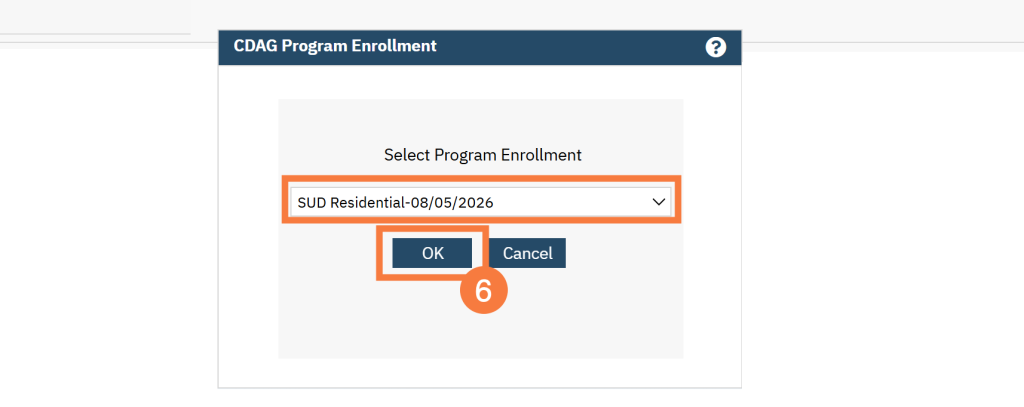
Select the appropriate CDAG and click OK.
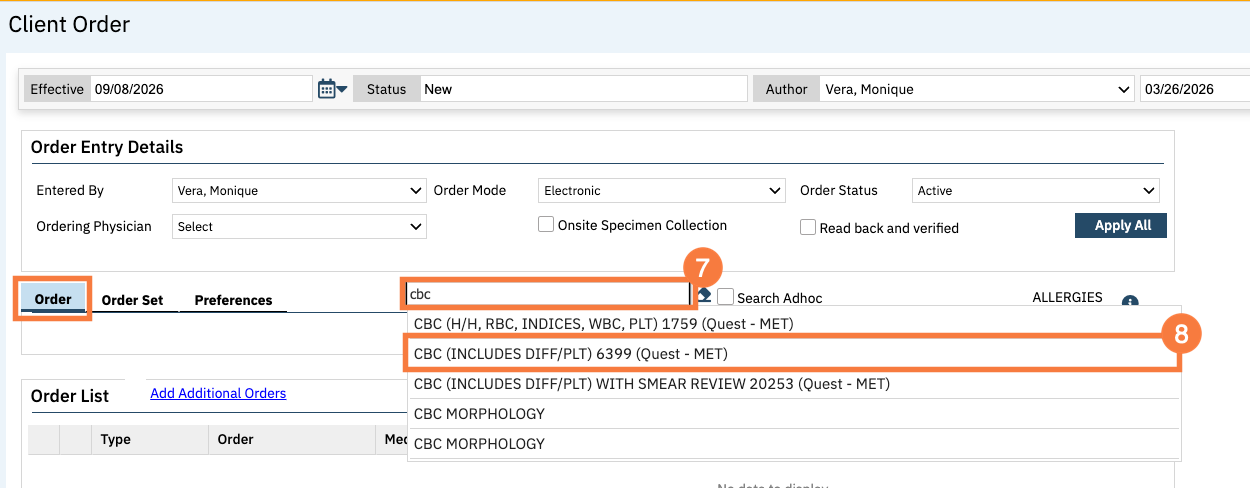
On the Order tab, click in the search text box to the right of Preferences and search for the lab order by:
Order Name
Order Number
Lab Vendor
Click to select the appropriate lab order from the search results with the correct vendor name in the parenthesis for example, CBC (Quest).
Note: The following fields should not be changed:
Order Mode: Leave as Electronic
Order Status: Leave as Active.
Lab: Leave as is to match the name of the order.
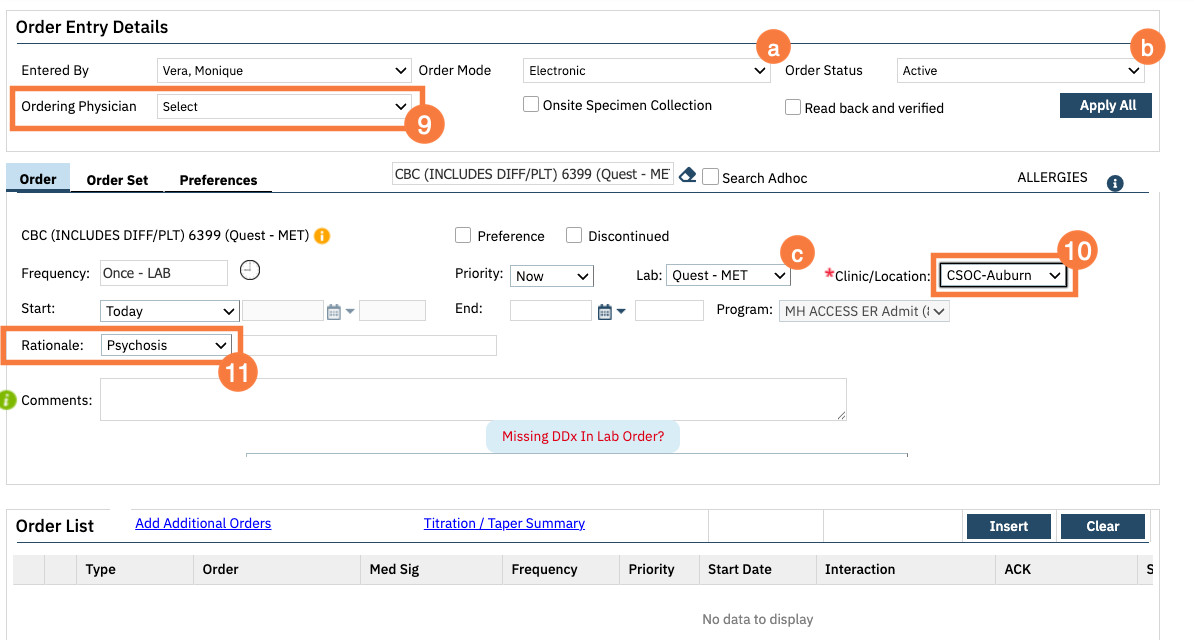
In the Order Entry Details section, Click the drop down menu in the Ordering Physician field and select the appropriate ordering provider.
Click the drop down menu in the Clinic Location field and select the appropriate location.
Click the drop down menu in the Rationale field and select the appropriate reason.
Now you’ll need to add a Diagnosis. Choose Option 1 or 2 depending on whether a Diagnosis Document already exists.
The Diagnosis Document Already Exists for the Selected Program- Option 1
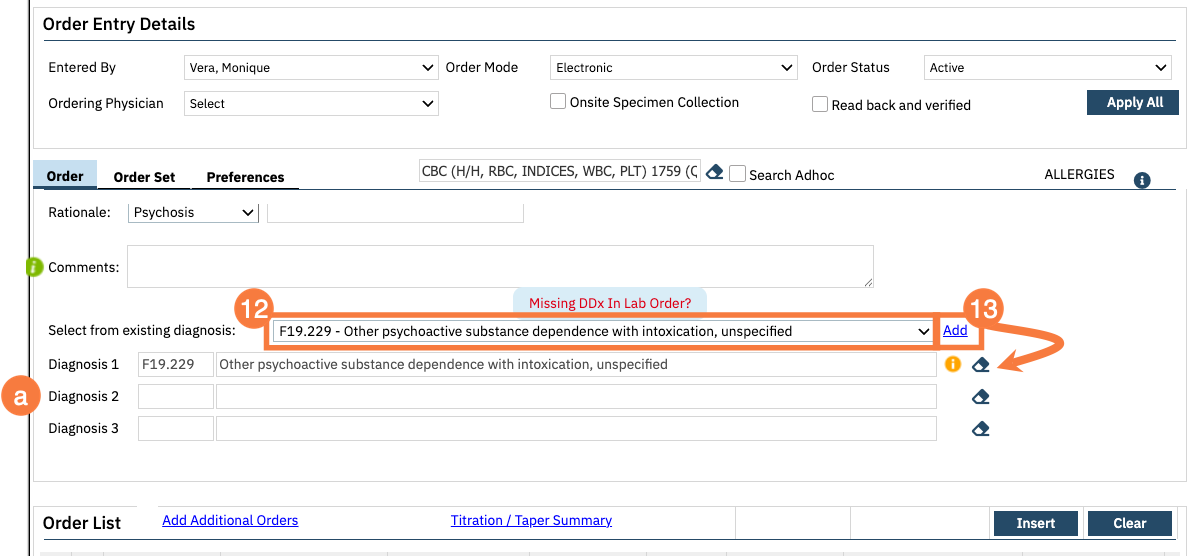
Scroll down to the Dx section. If a Diagnosis Document already exists for this program, click the drop-down arrow and select the appropriate Dx for this order.
Click Add.
You can associate up to 3 diagnoses.
No Diagnosis Document Exists for the Selected Program- Option 2
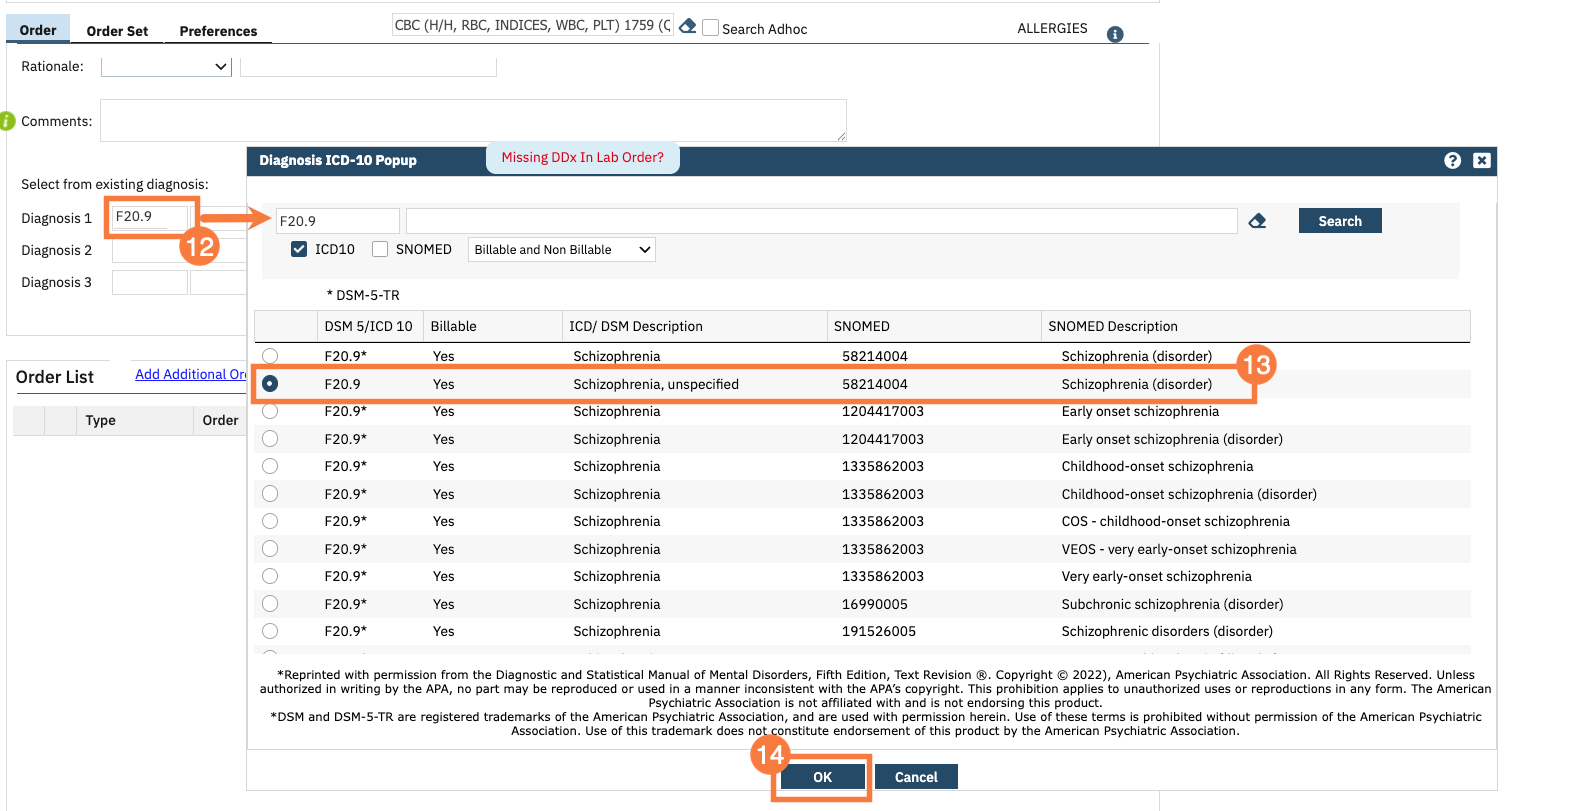
If there is no Diagnosis document for the selected program, in the Diagnosis 1 code box, type the name of the ICD10 code.
A pop-up will open with a matching list of diagnoses. Click the radio button for the appropriate Dx.
Click OK.
Complete the Lab Order
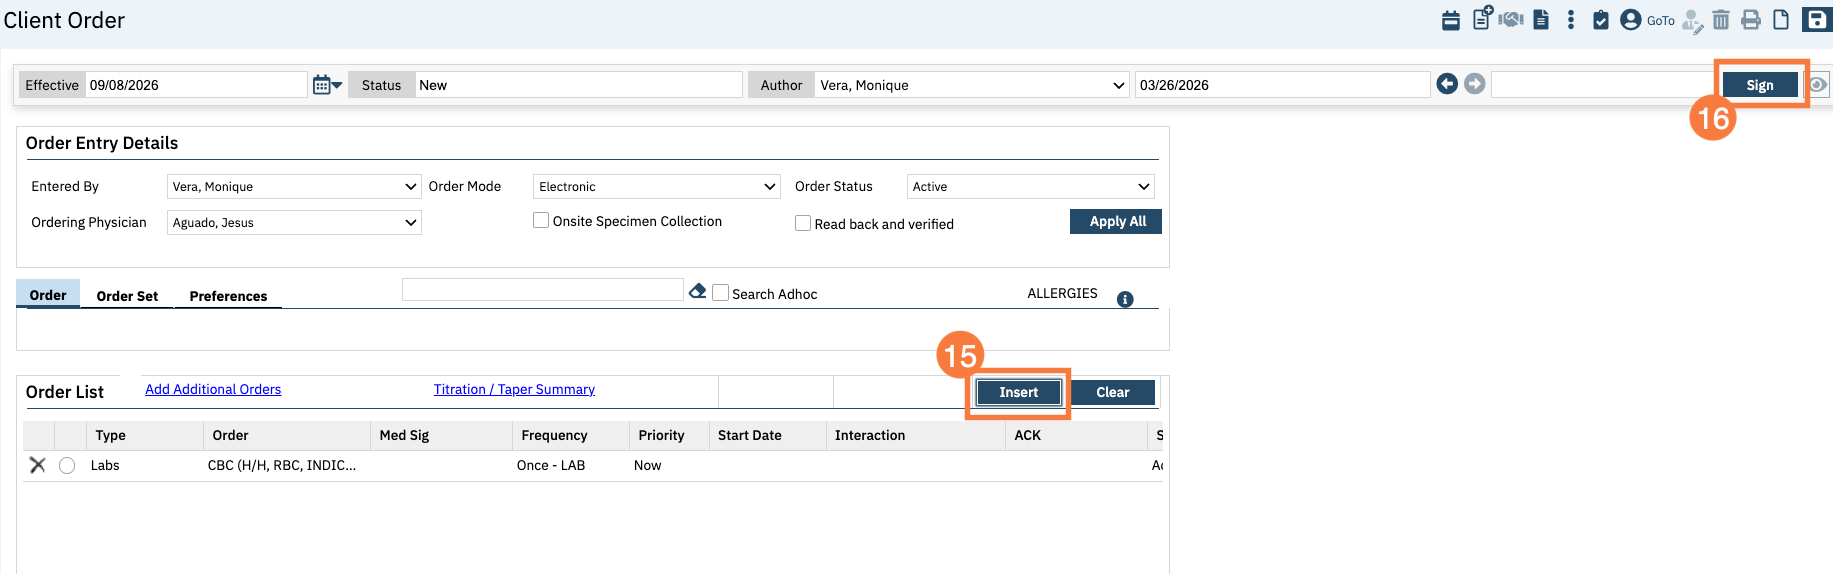
Click Insert. Repeat step 7-13 or 14, for each additional lab.