Safety Checks are used when the patient needs to be observed at time intervals to ensure their safety.
Signed Safety Check orders will populate on the Whiteboard, allowing assigned staff to easily see when check times are approaching.
If there was a preceding safety or observation check of any kind, it will be important to discontinue the order because SmartCare can only display one safety check at a time on the Whiteboard. Therefore, create a safety check for the most restrictive scenario. If there is data that needs to be captured in a secondary type of check, then that entry can be entered into the associated flowsheet rather than from the Whiteboard.
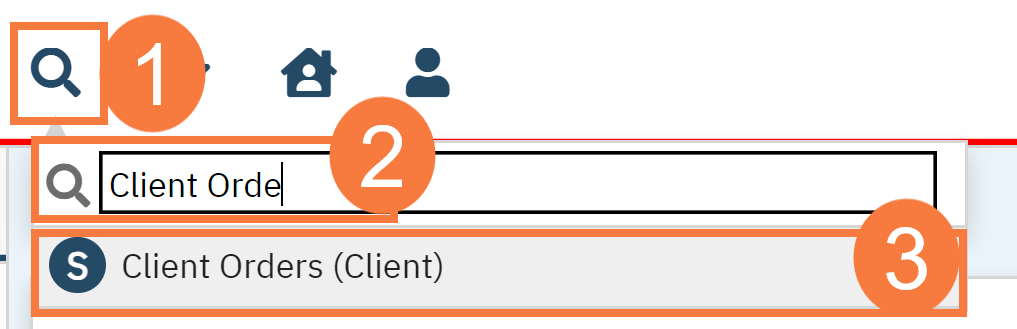
With an active client selected, click the Search icon.
Type ‘Orders’ into the search bar.
Click to select Client Orders (Client)
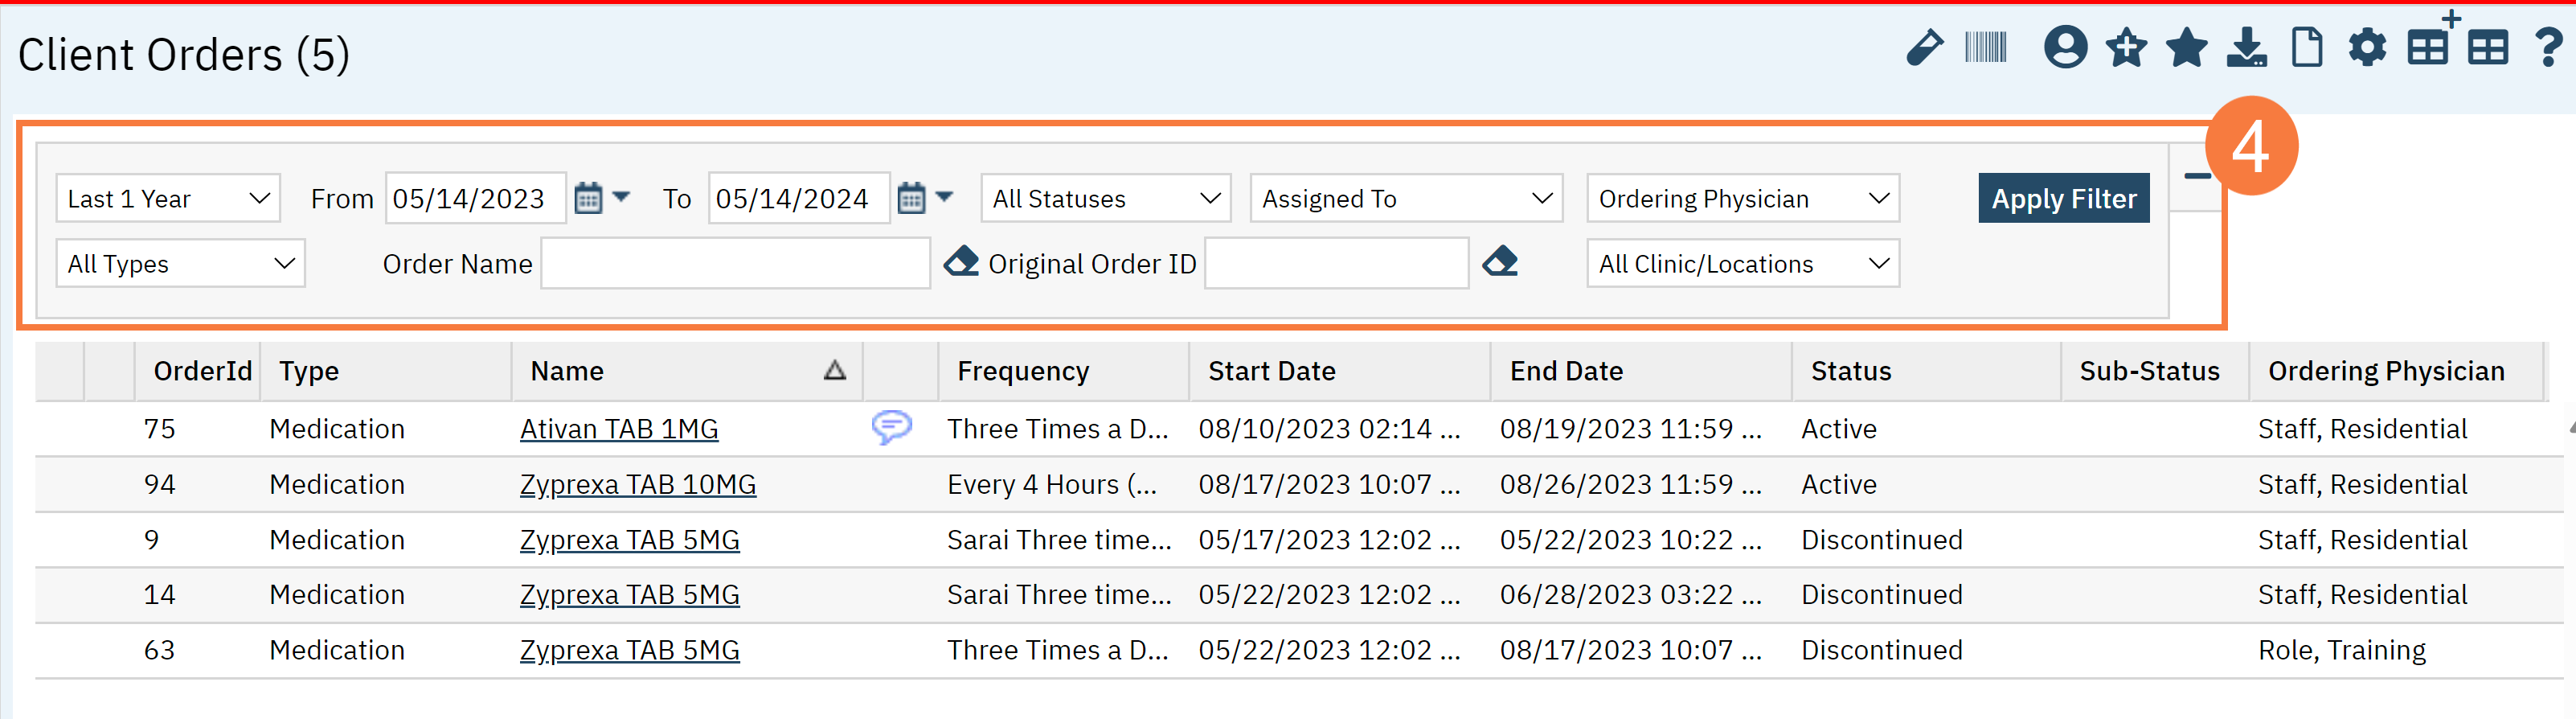
This will bring up the Client Orders (Client) list page. Use the filters as needed.
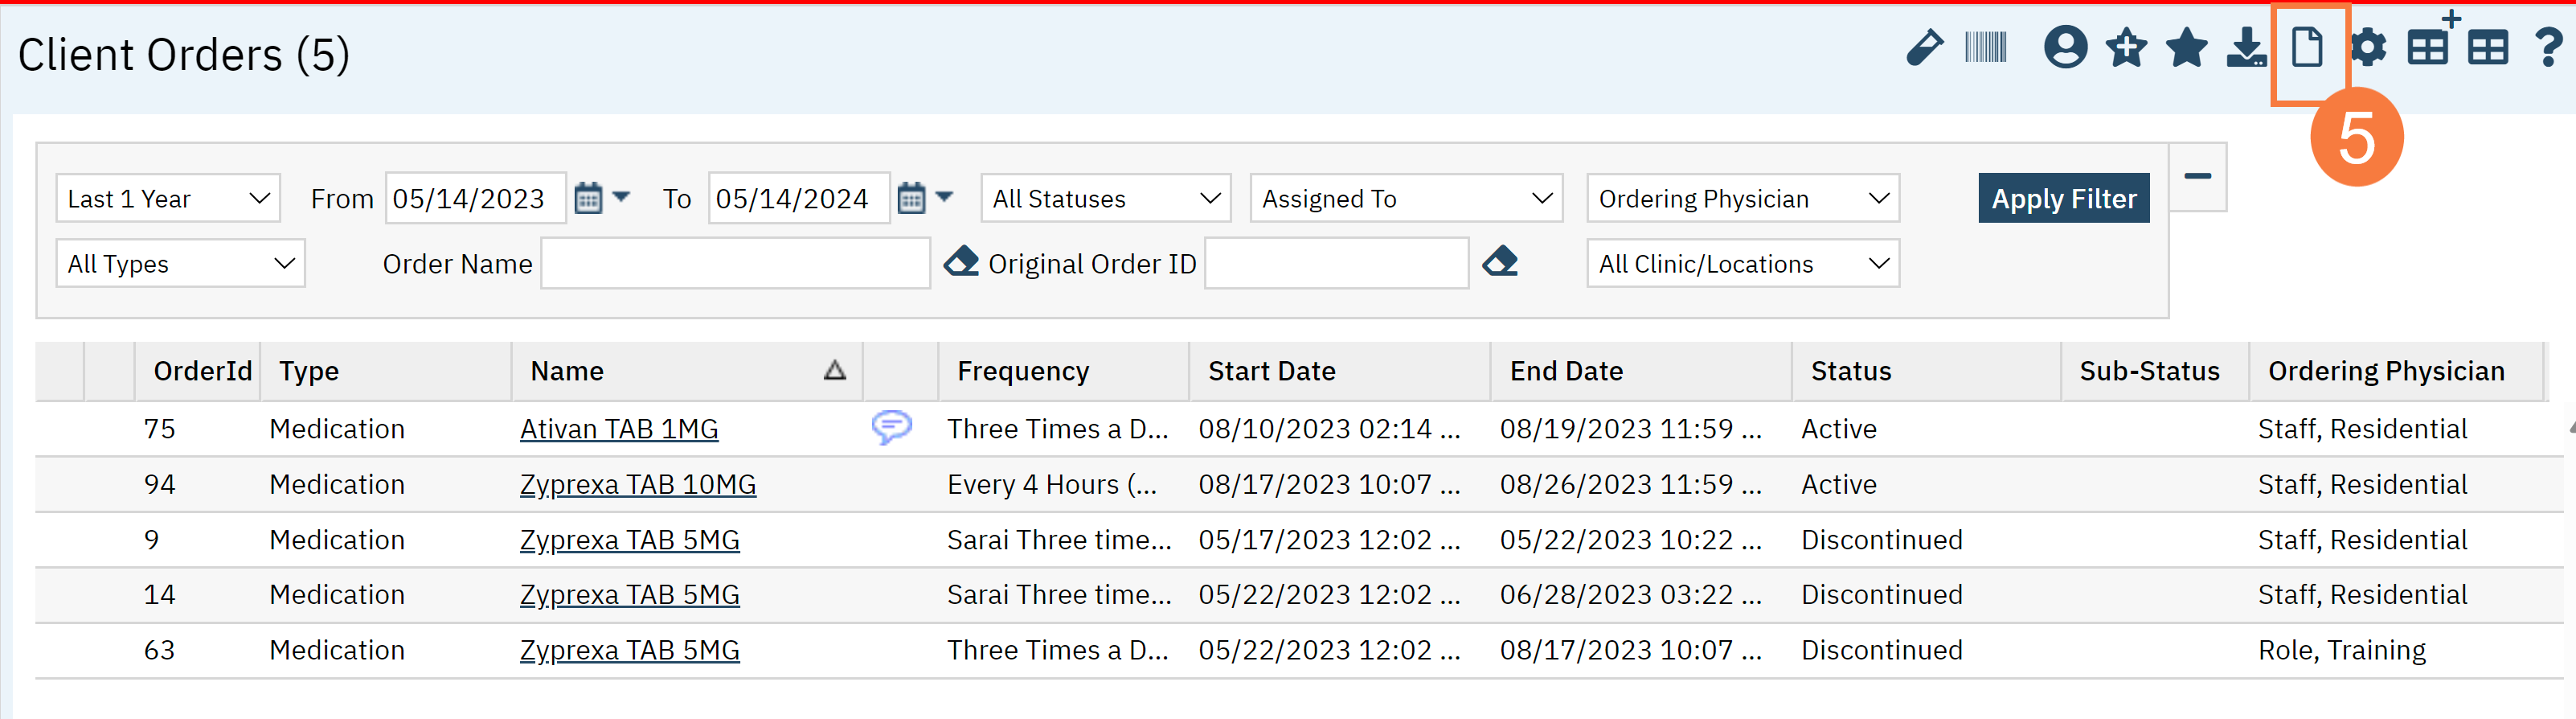
Click the New button in the top right.
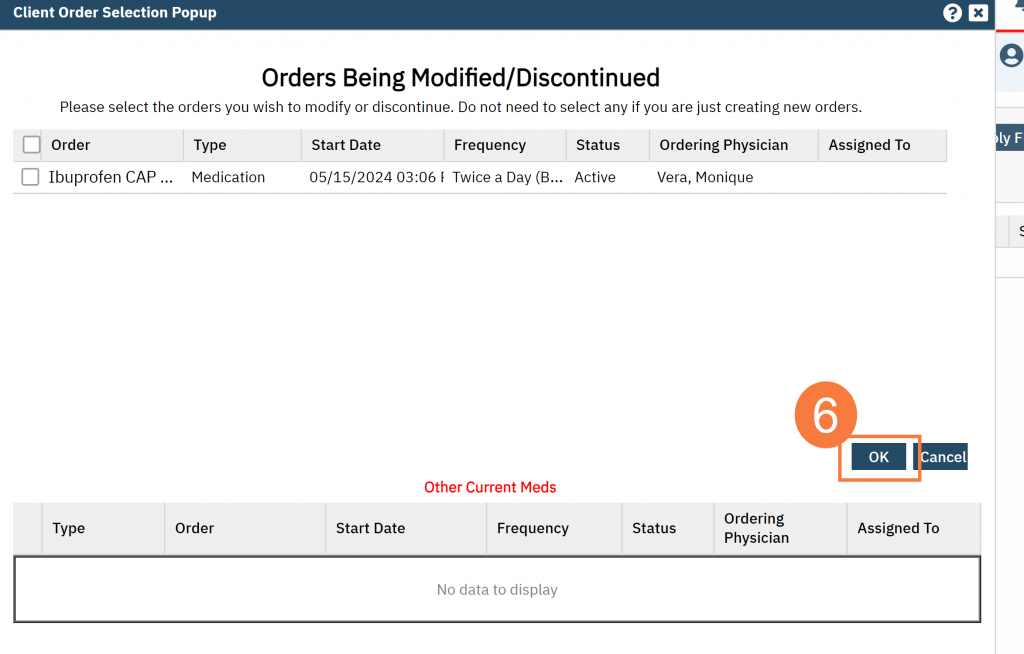
The Client Order Selection window will pop up. Click OK.
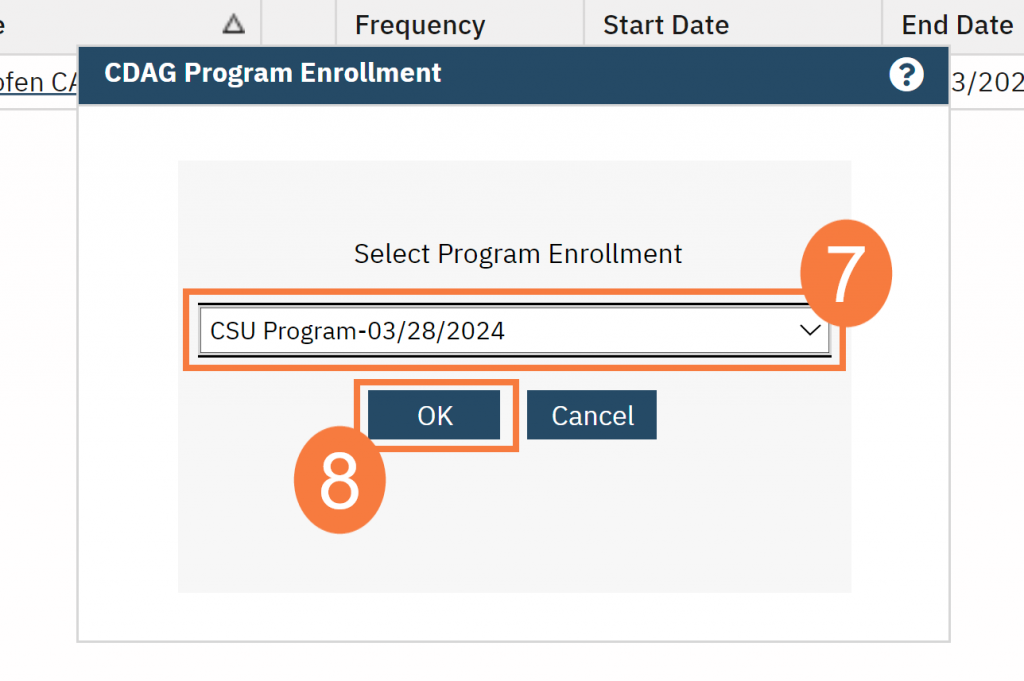
The CDAG Program Enrollment window will pop up. Select the correct Program Enrollment from the available options.
Click OK.
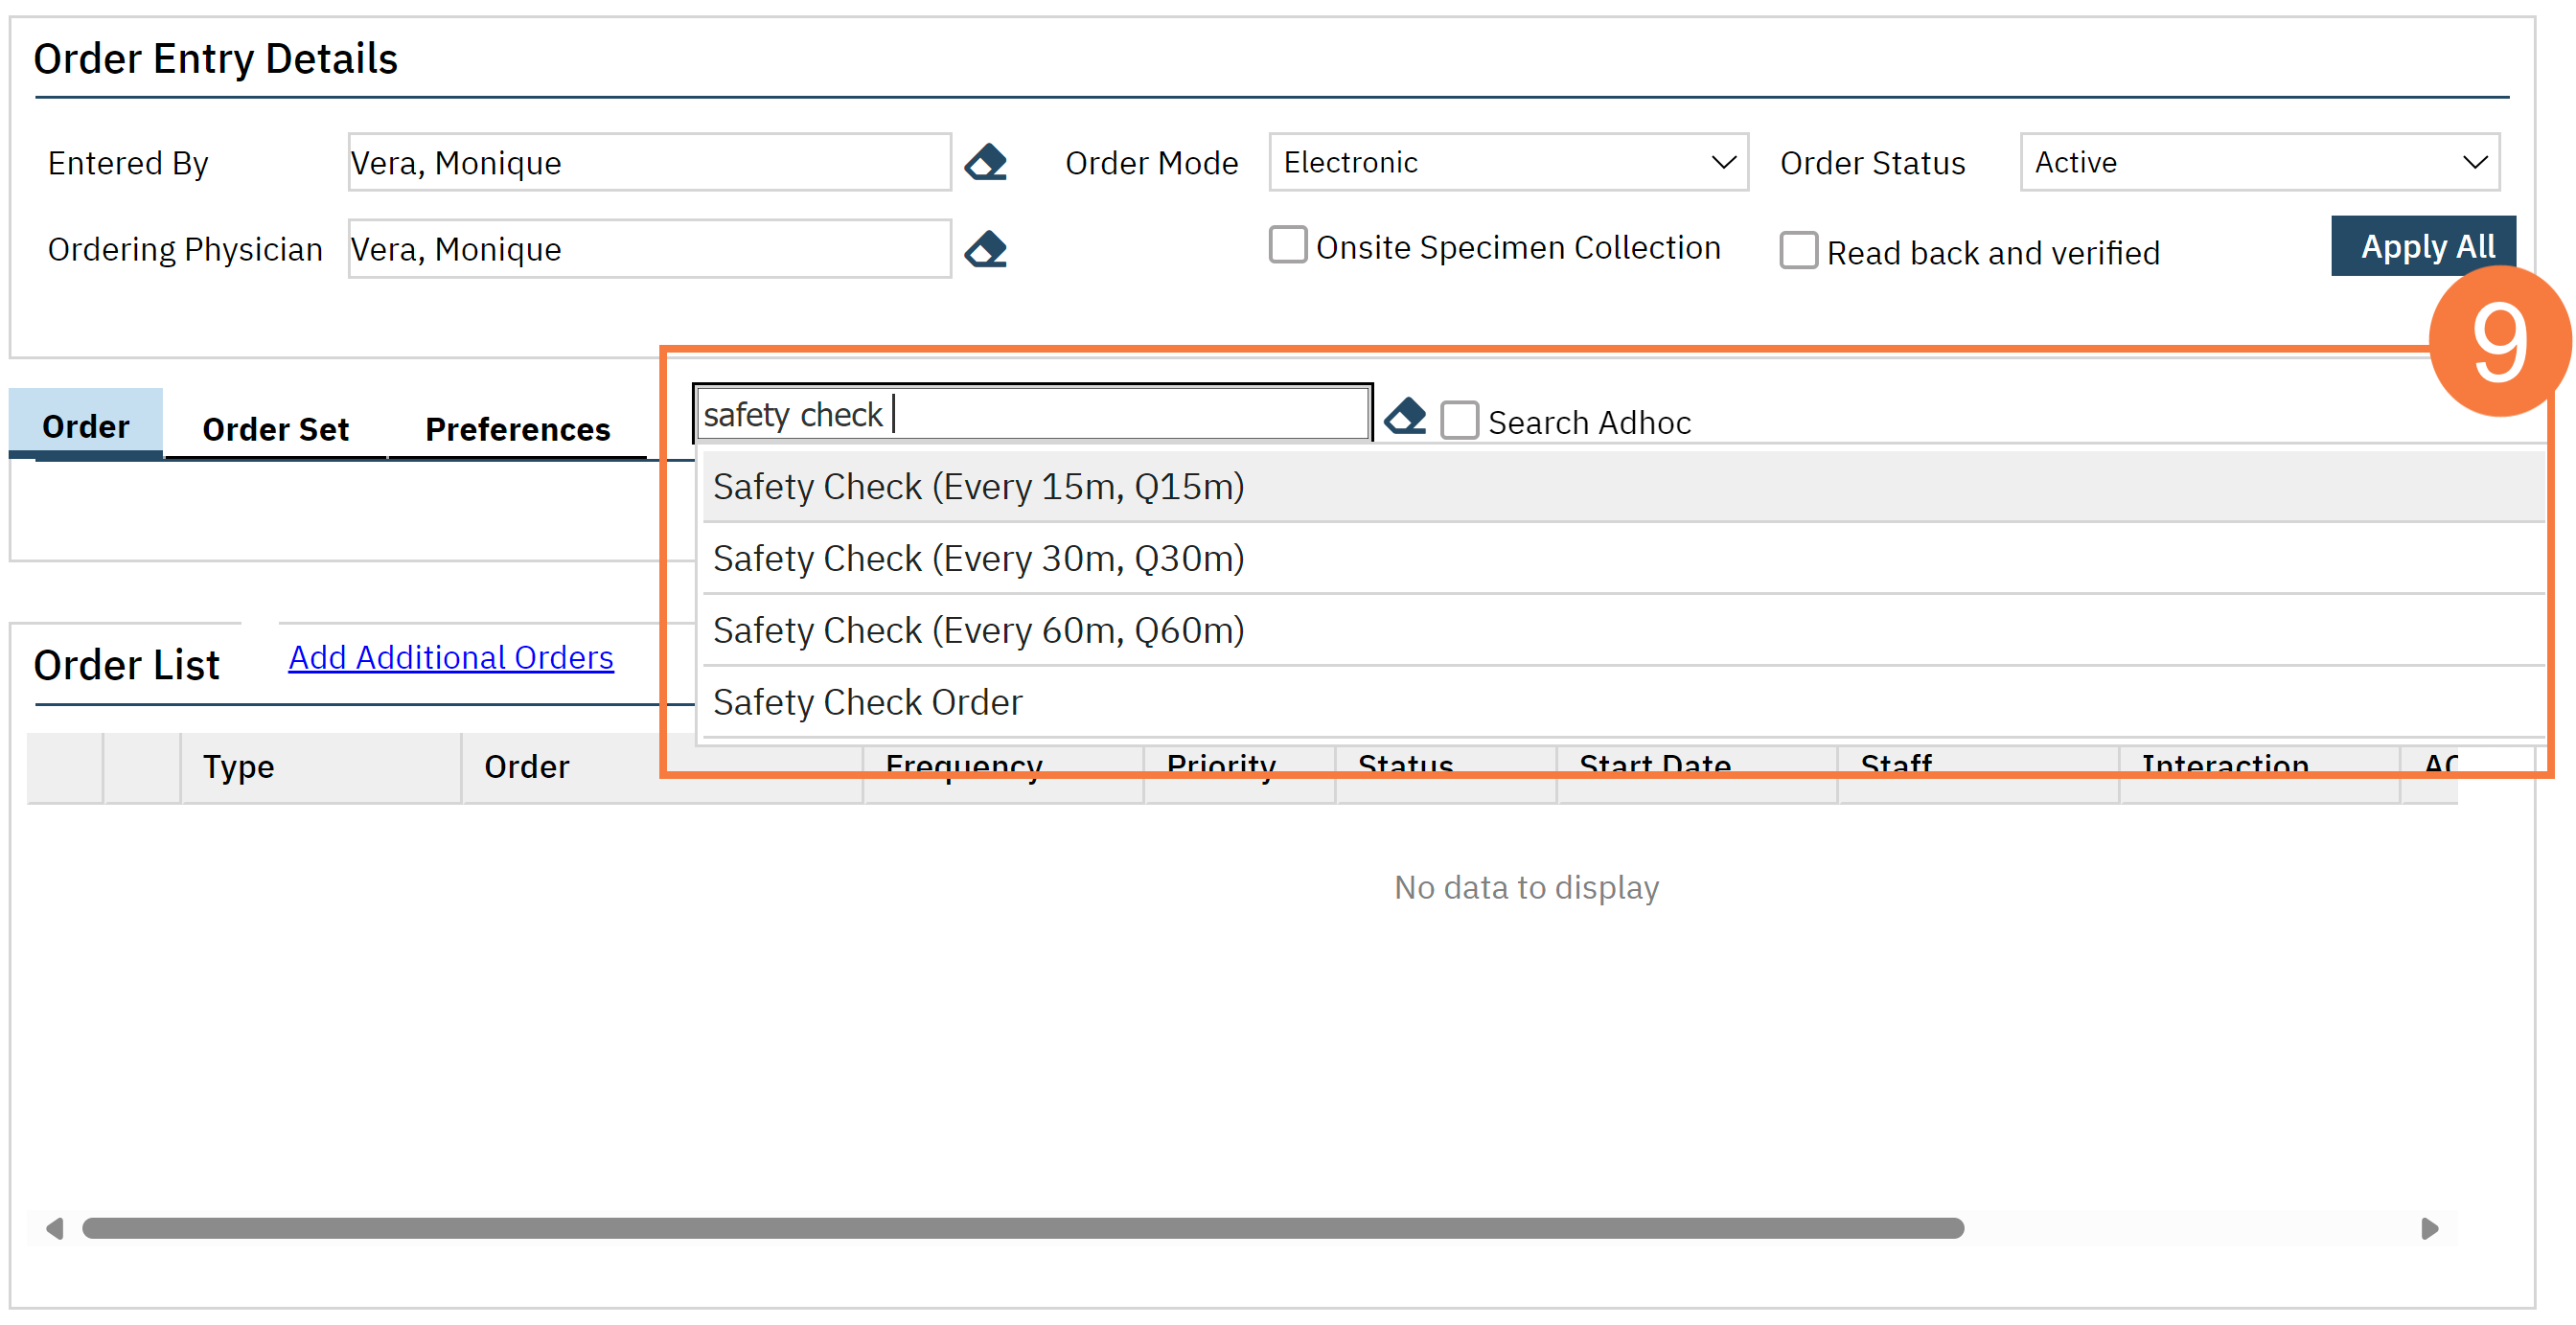
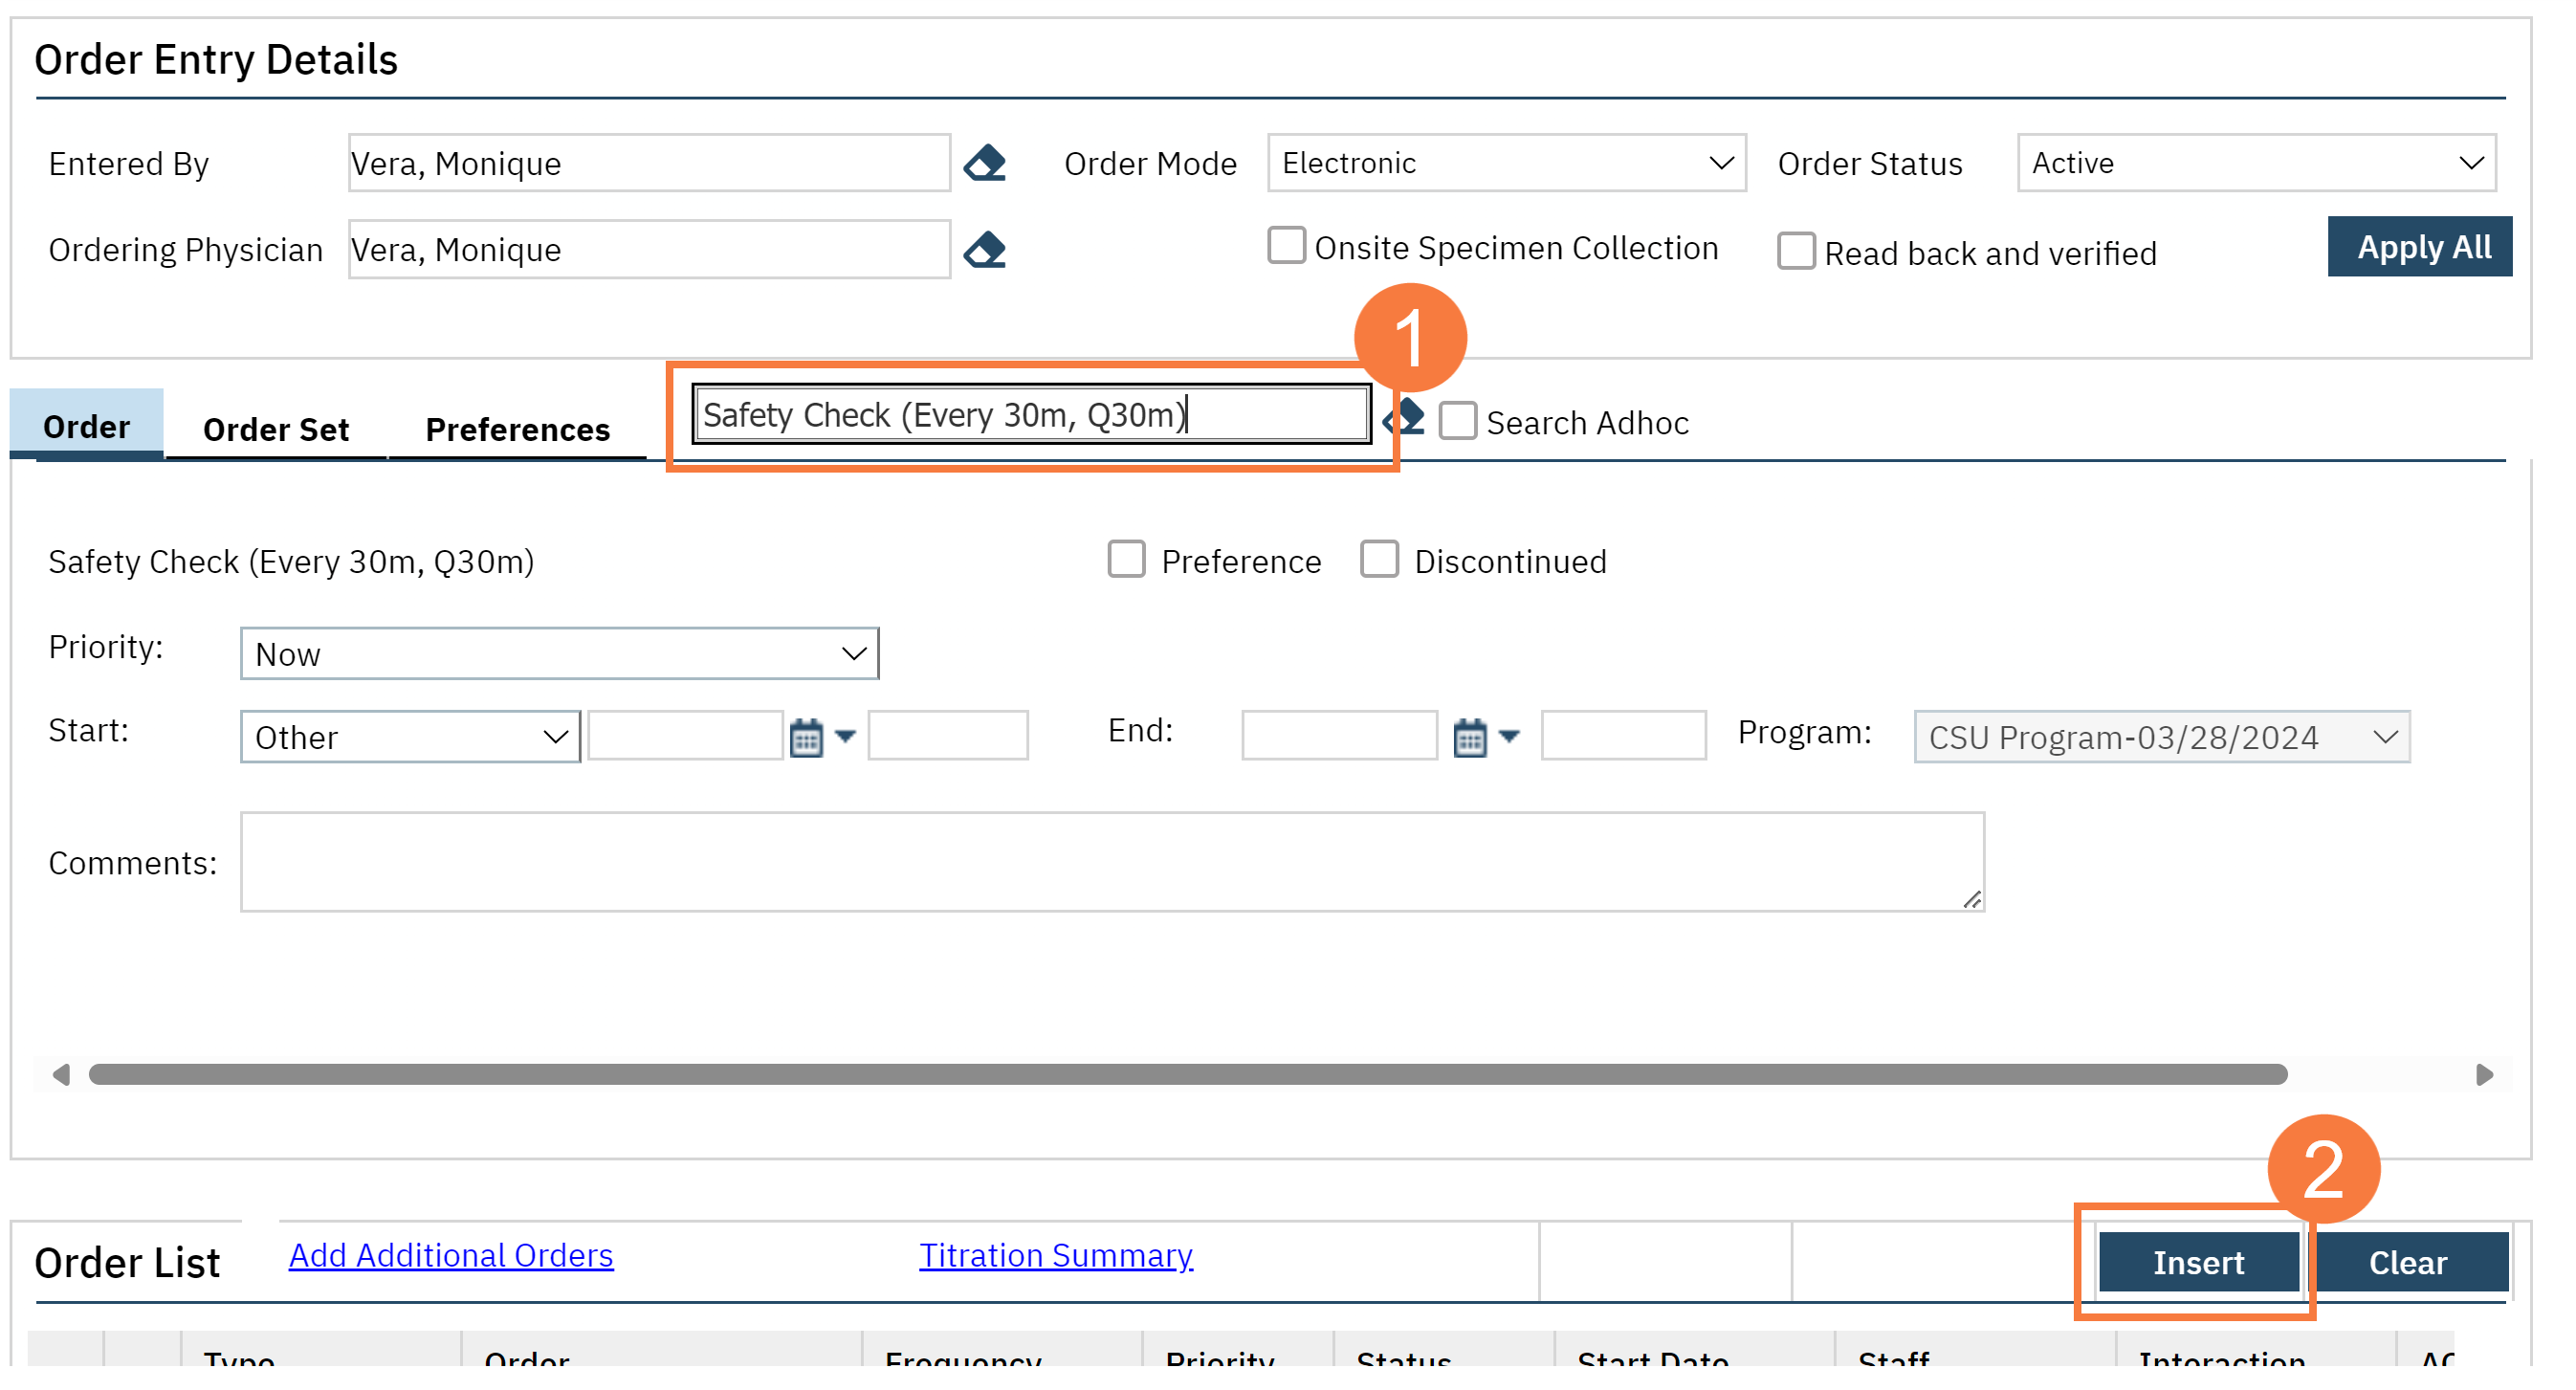
In the search box, search for Safety Check and choose the length of time between checks that is most appropriate. There are 4 options.
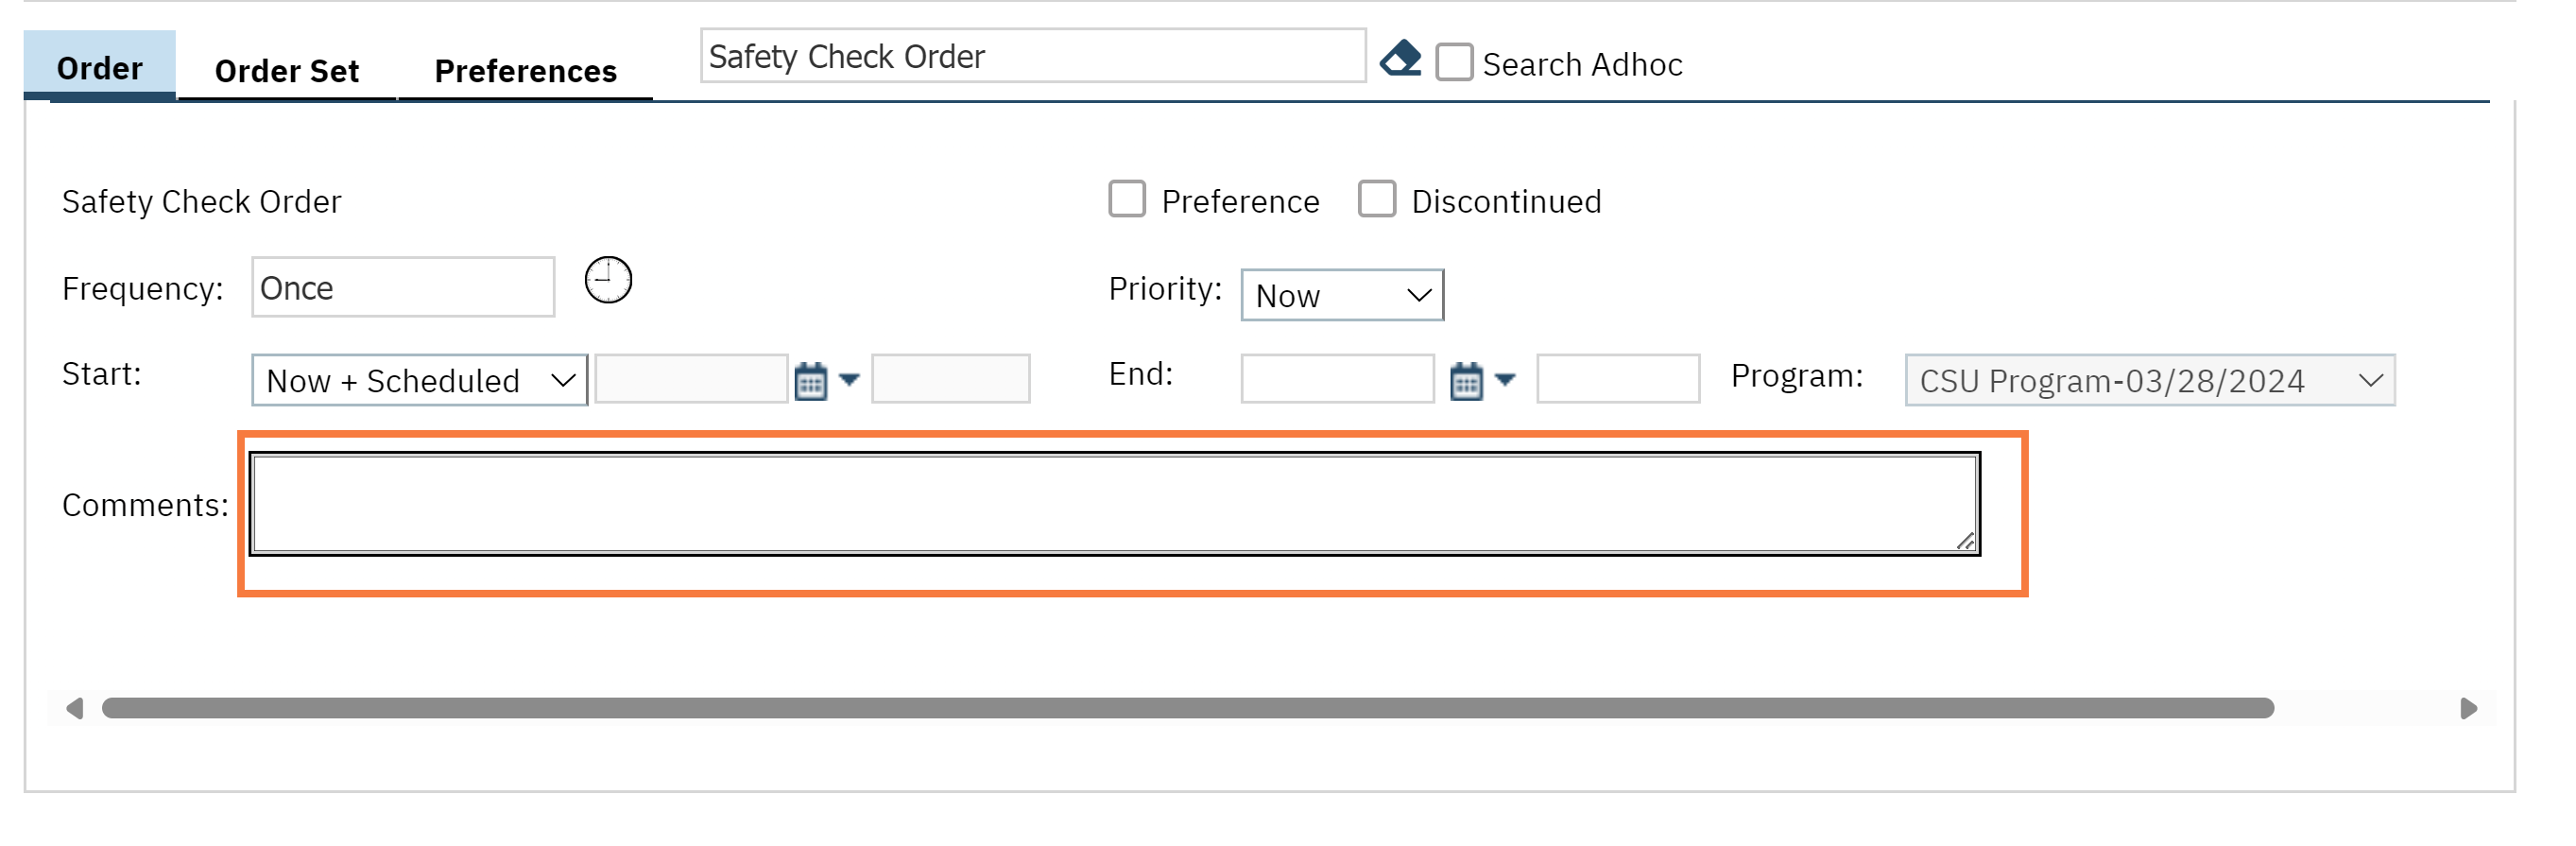
Note: The safety check order will allow for capture of any comments about why the check is needed (optional). This will also show up on the whiteboard for any client that may require safety checks because if their high-risk behavior or needs. It will allow for other users to see that this client has this active order.
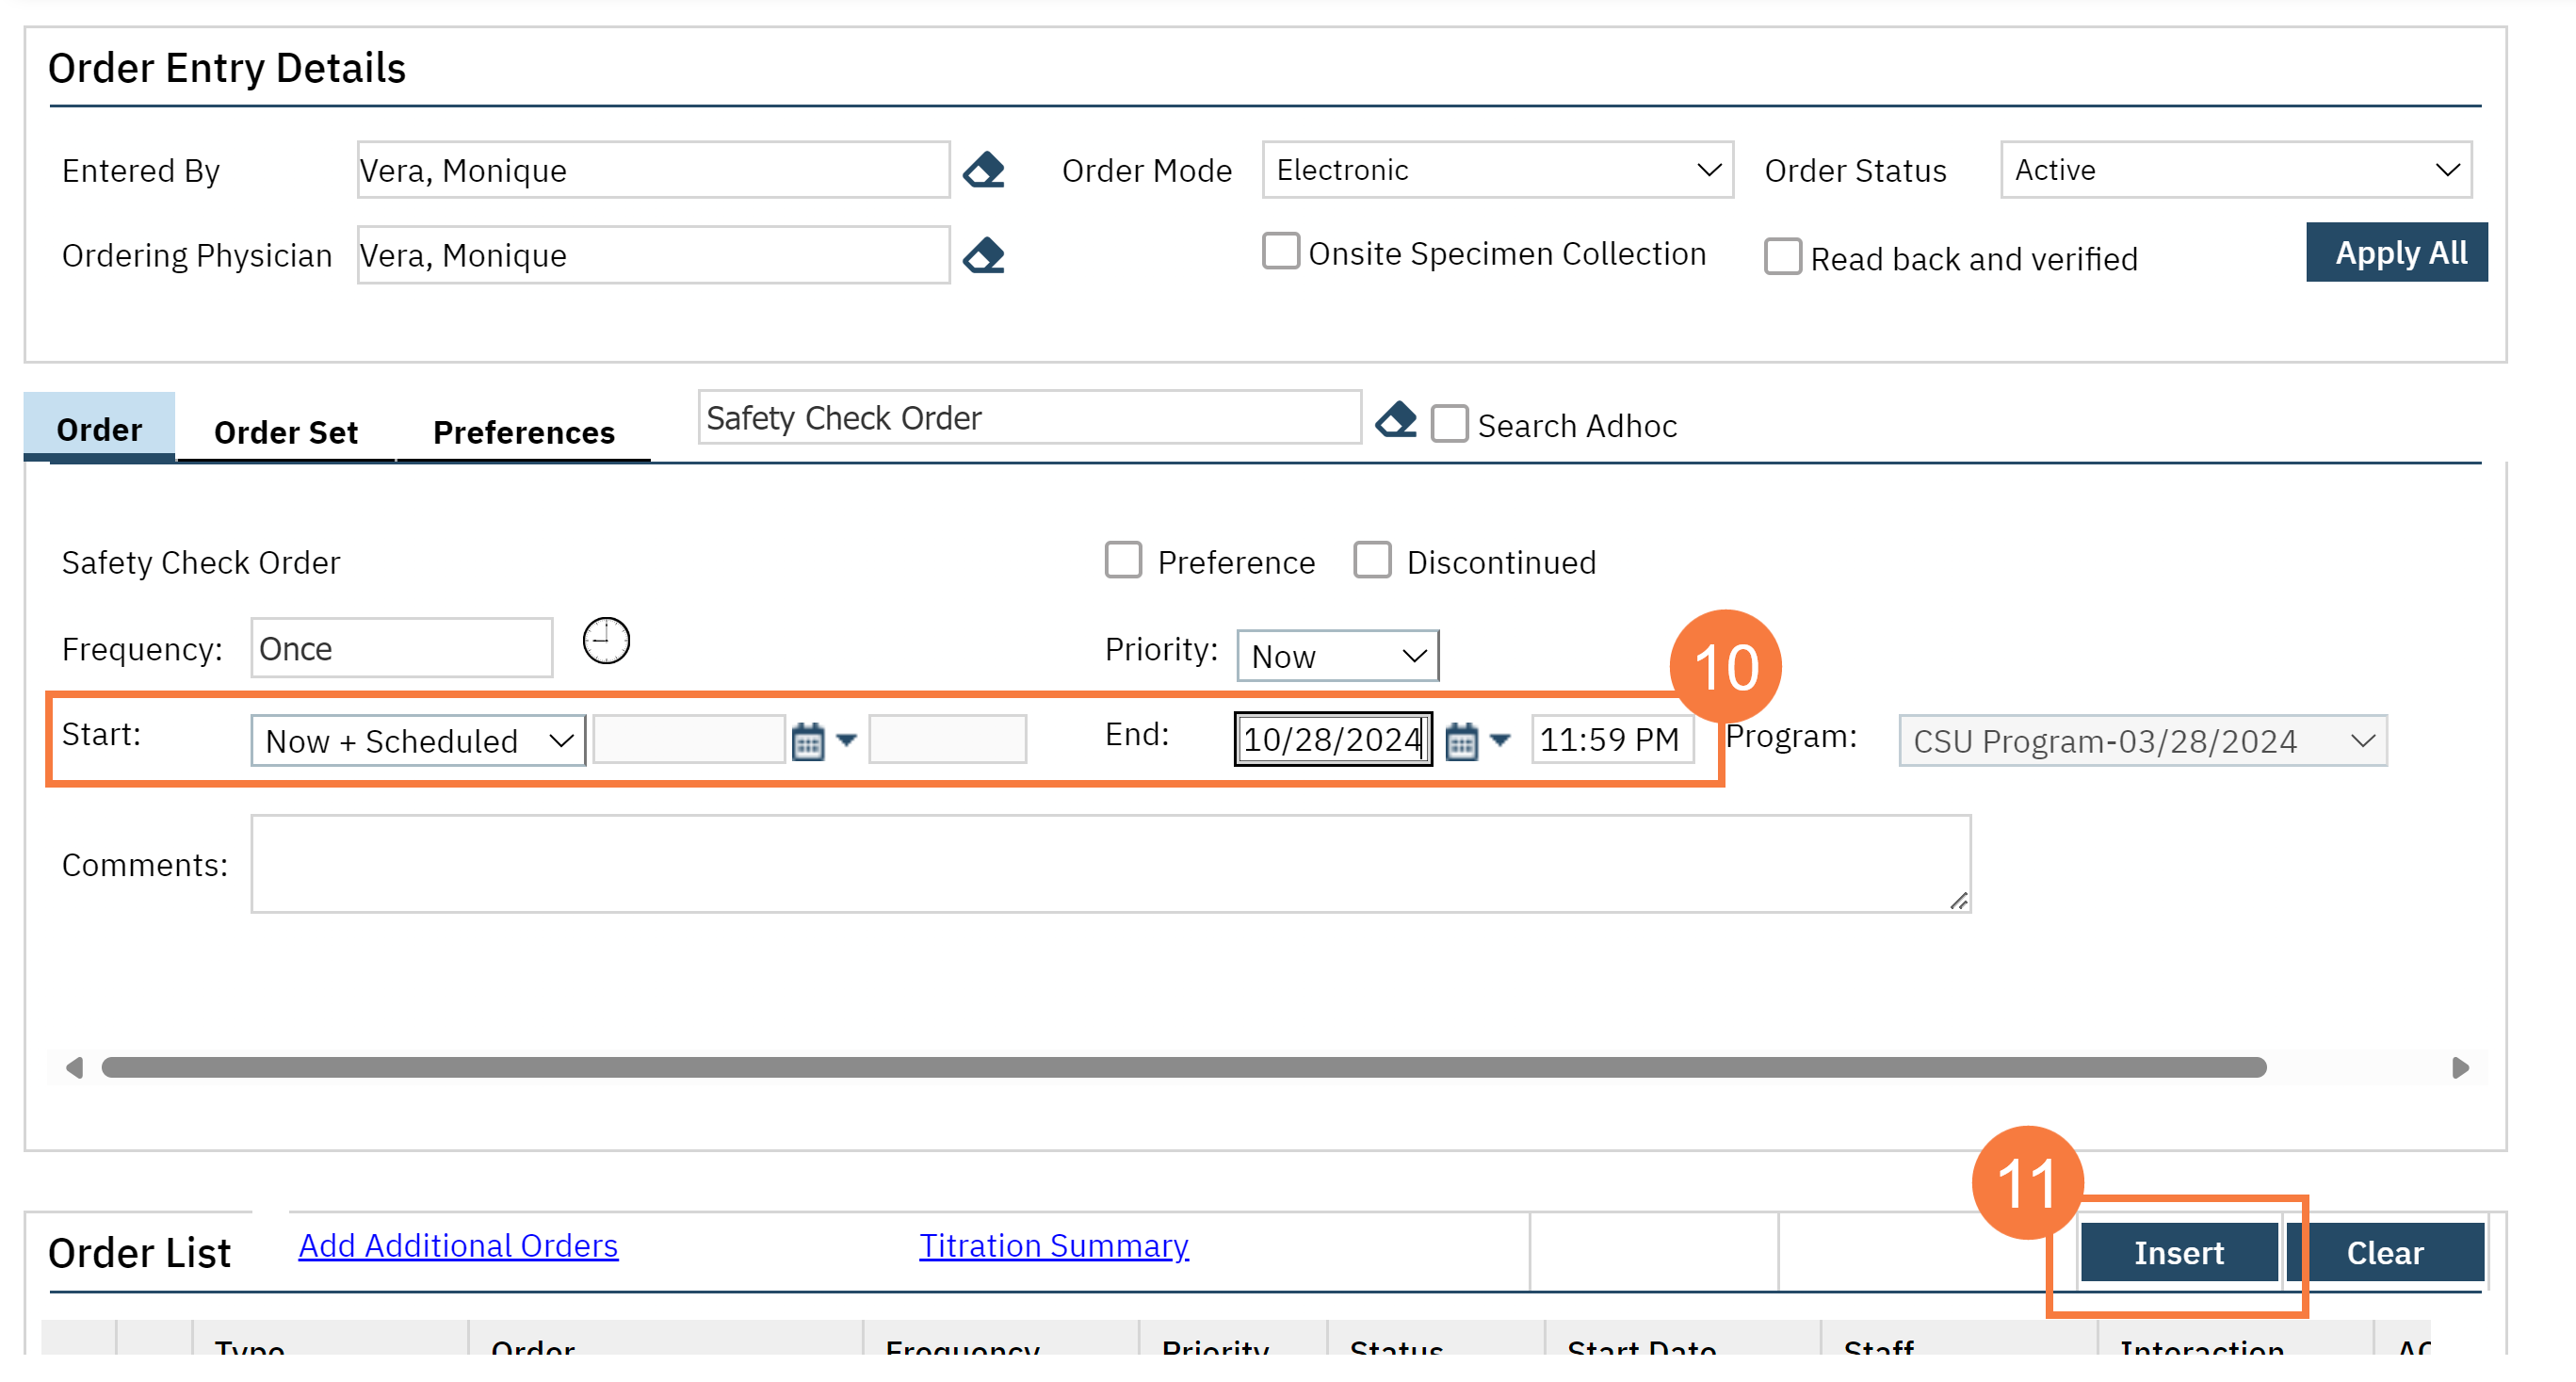
Fill out the Start and End Date Time.
Click Insert.
Safety Check Orders +Time Length
There are three safety checks with different times available based on how often you want the safety check by the staff to occur.
Search for Safety Check and select the appropriate length time between each check.
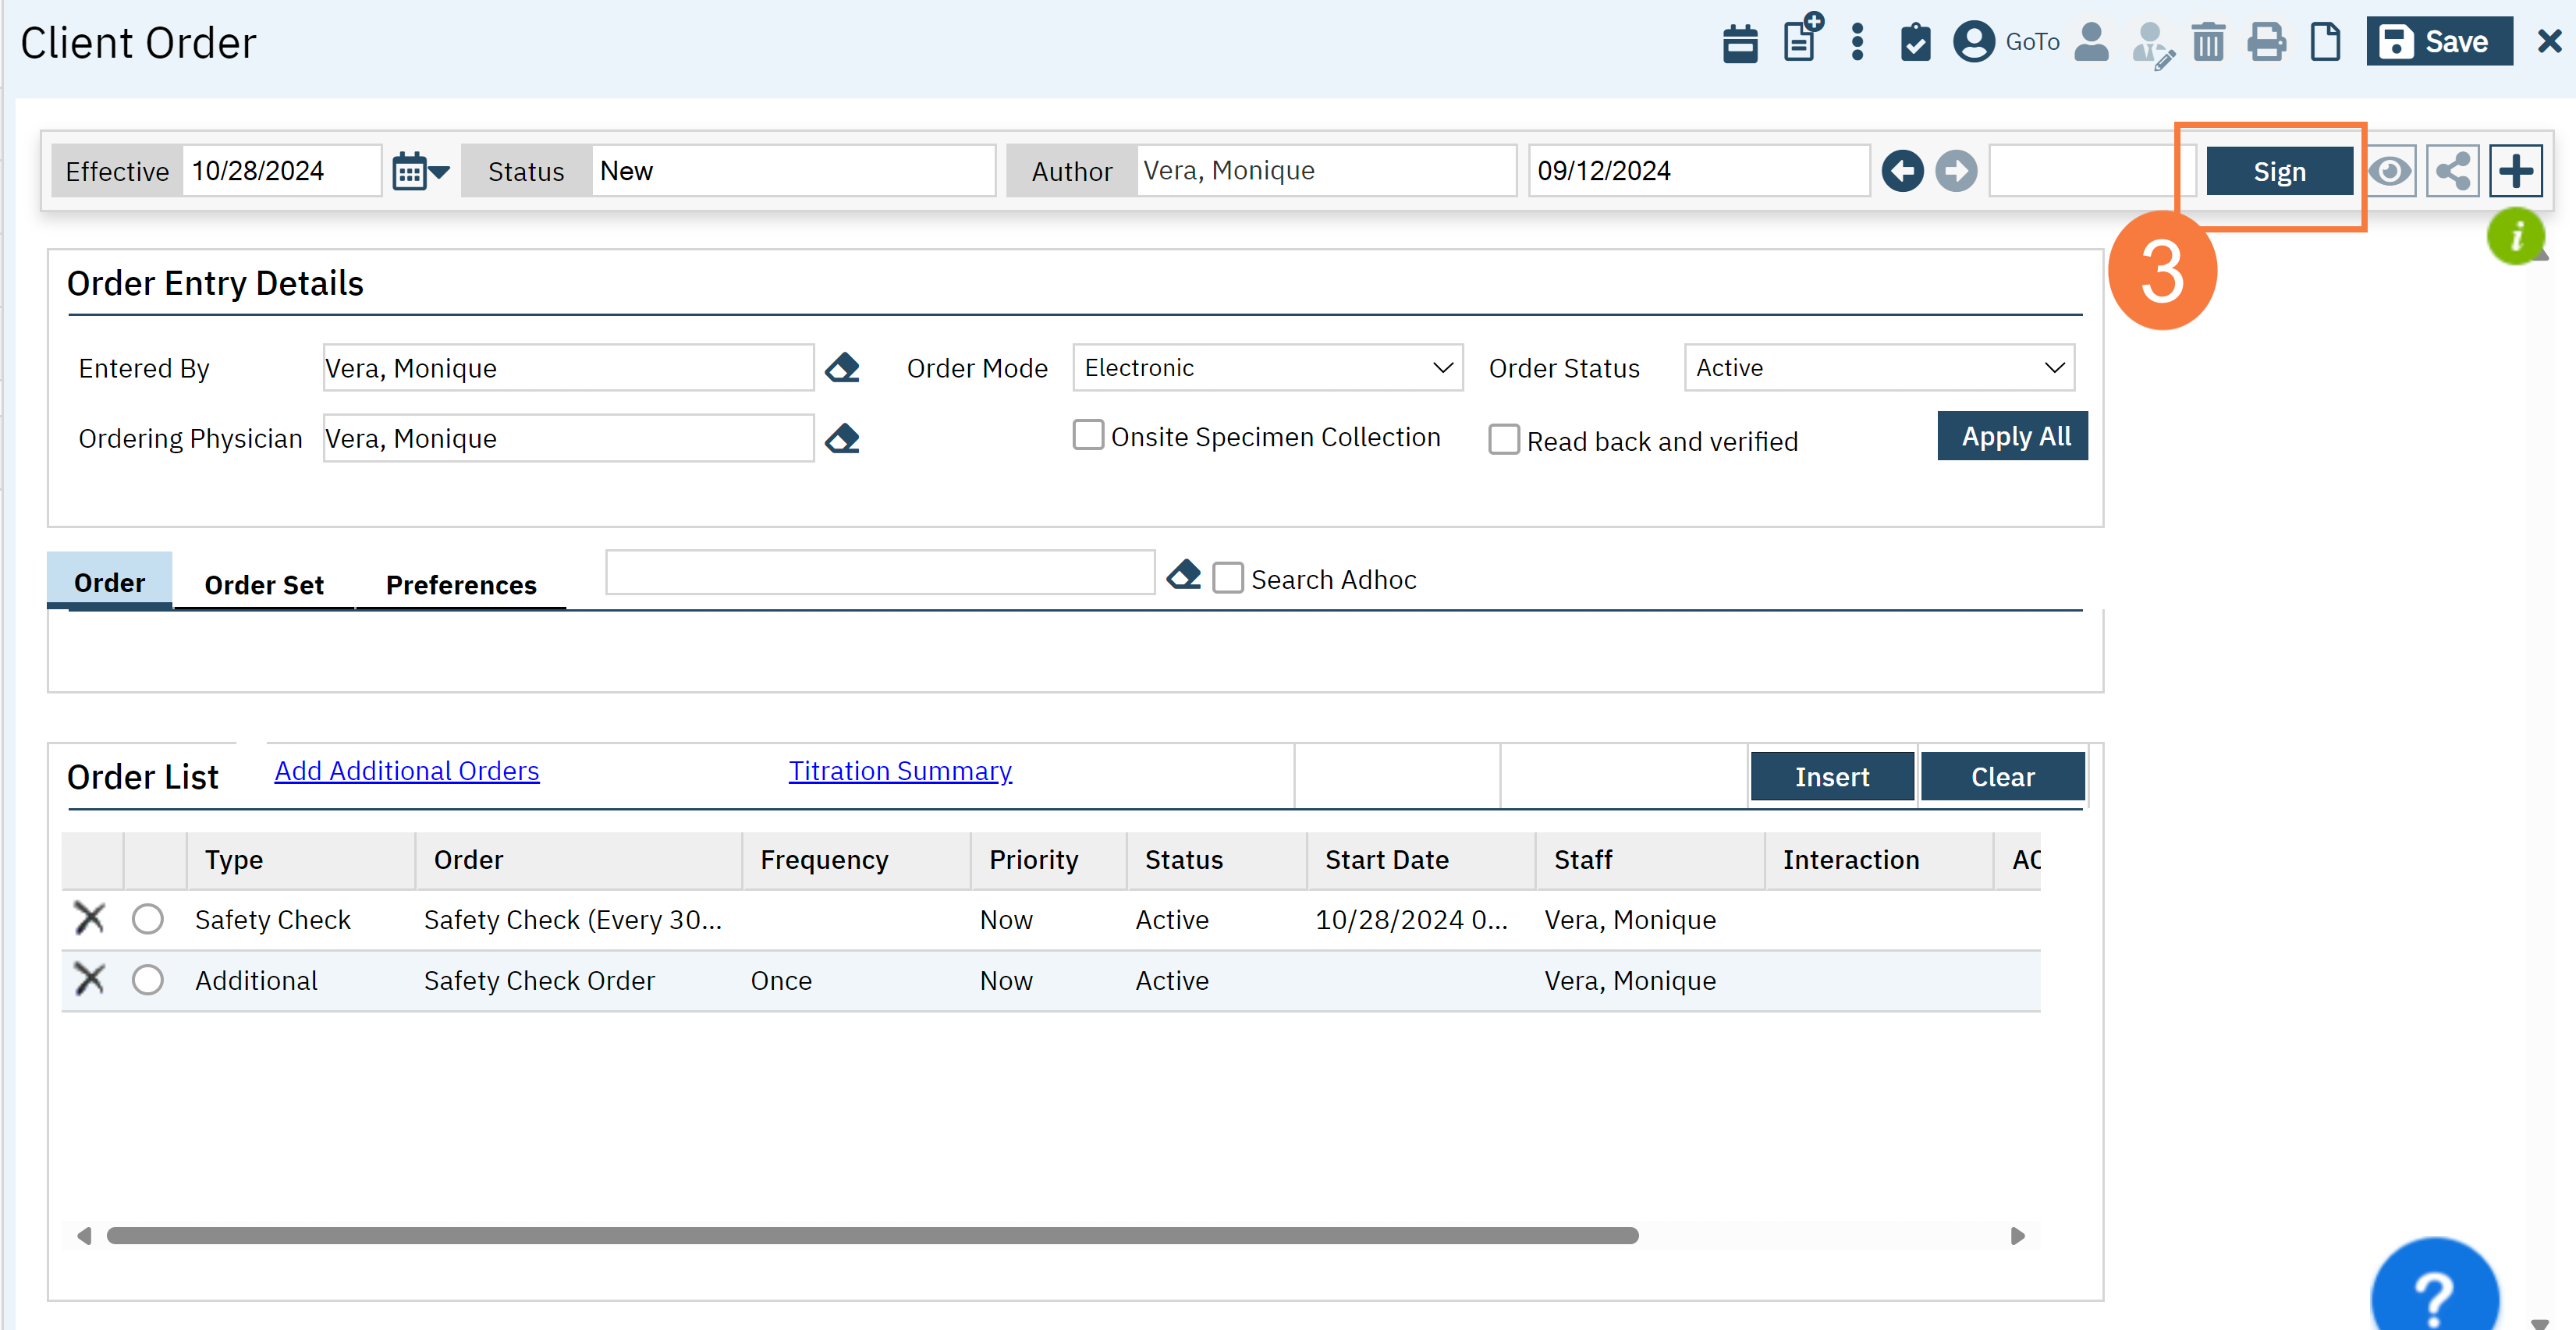
Click Insert.
When all orders are completed, click Sign.
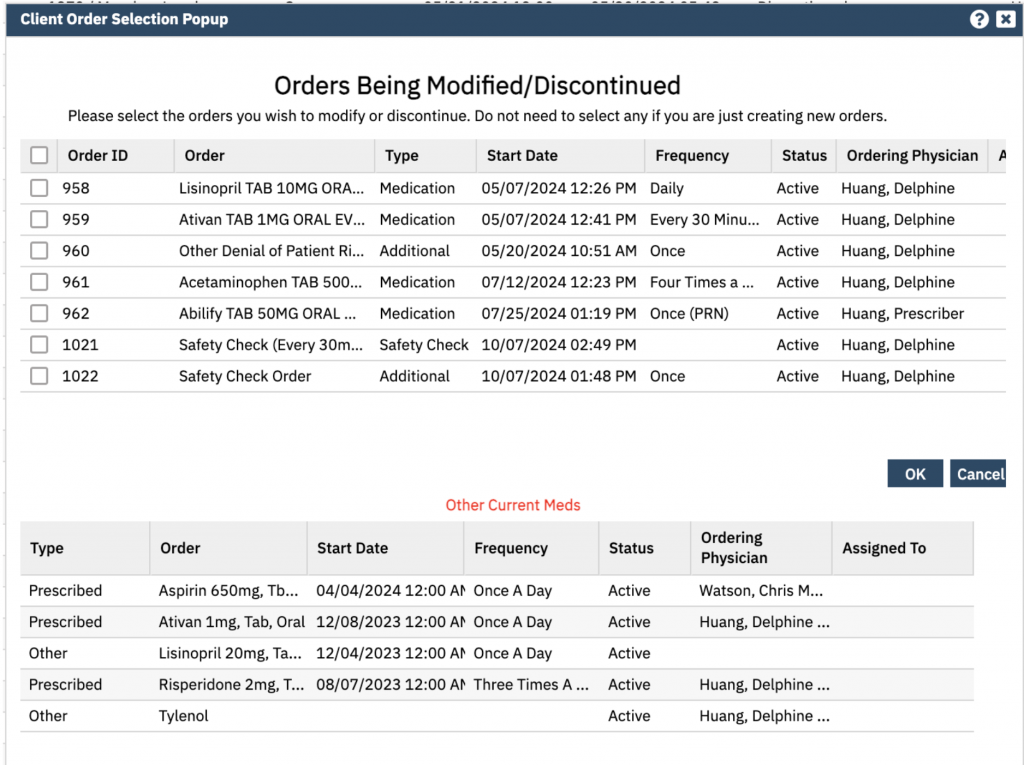
Note: You can always modify an order by returning to the client order selection pop-up window and select the orders you need to modify or discontinue.
The Safety Check will now show up on the whiteboard under “Next Check” for the staff to directly connect to the Flowsheet