For all Order Types except “Activity” it may be required that you select a reason as to why the order is being placed (typically a diagnosis or problem). To be able to set an Order Rationale the setting “Order Rationale” must be enabled by a System Administrator.
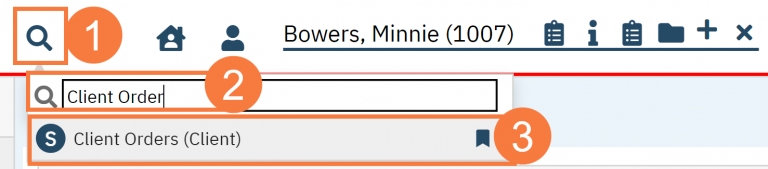
Click on the Search icon with the client open.
Type Client Orders in the search bar.
Select Client Orders (Client) from the search results.
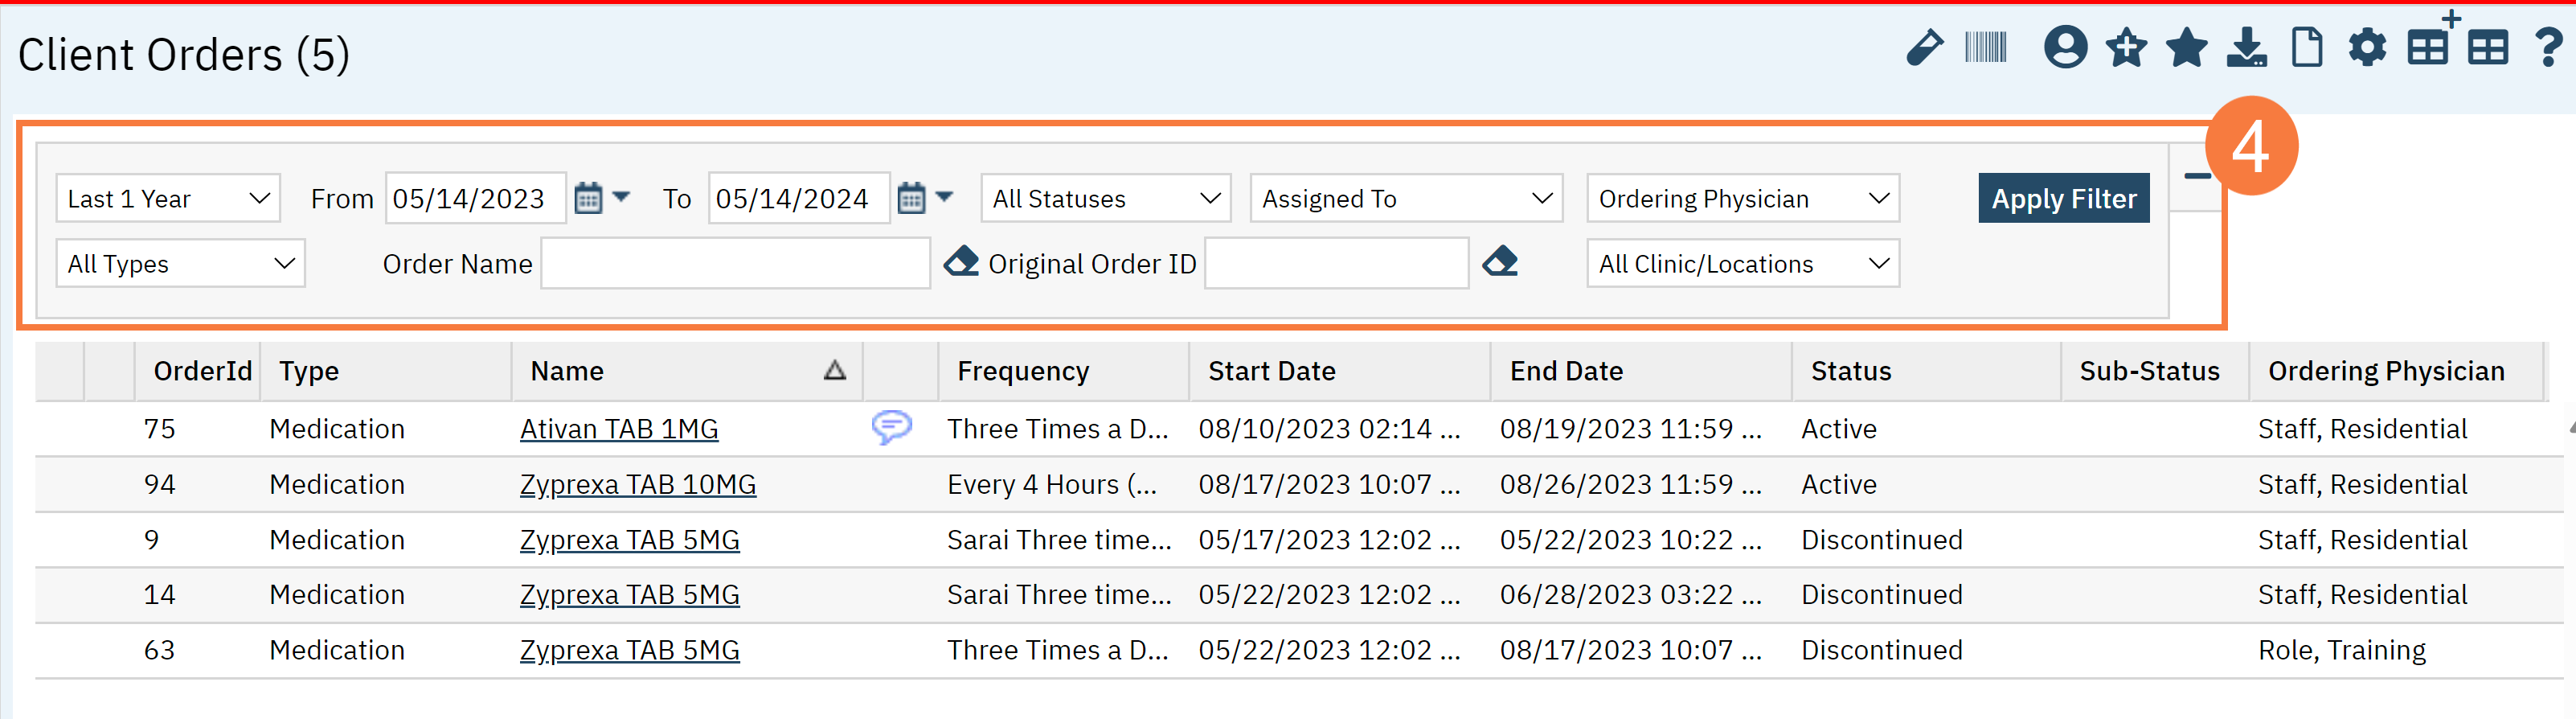
This will bring up the Client Orders (Client) list page. Use the filters as needed.
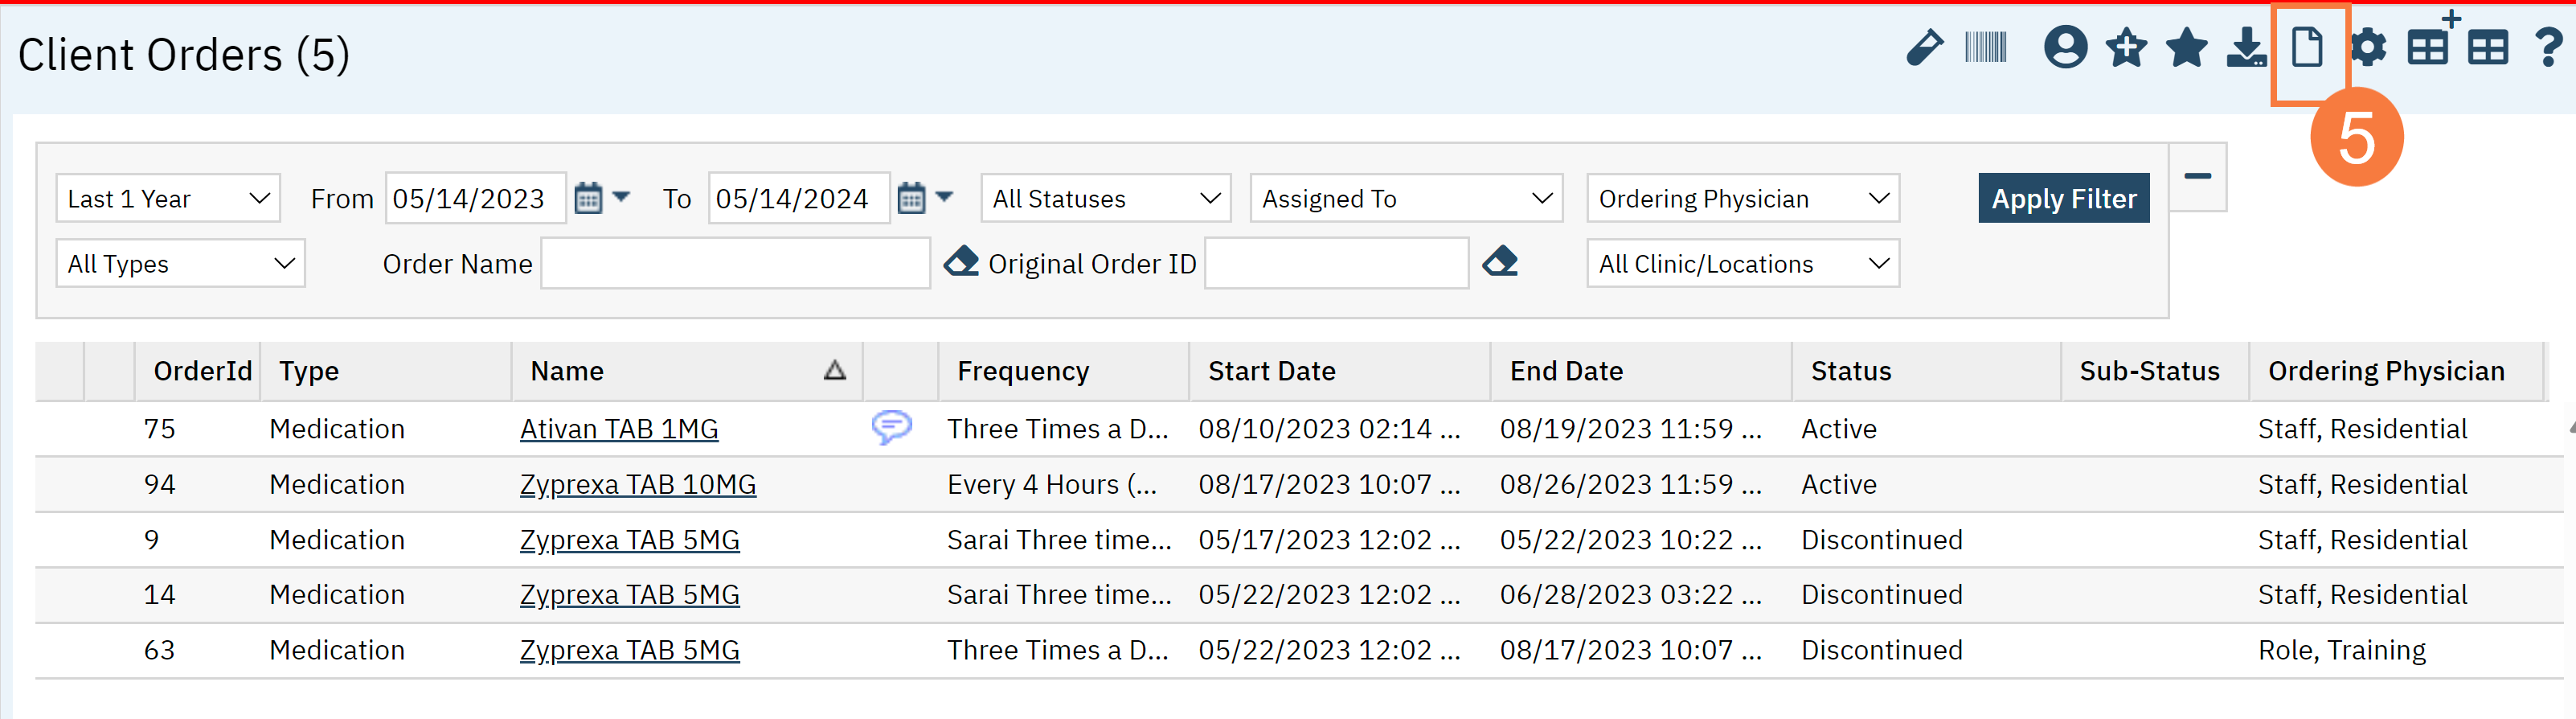
Click the New button in the top right.
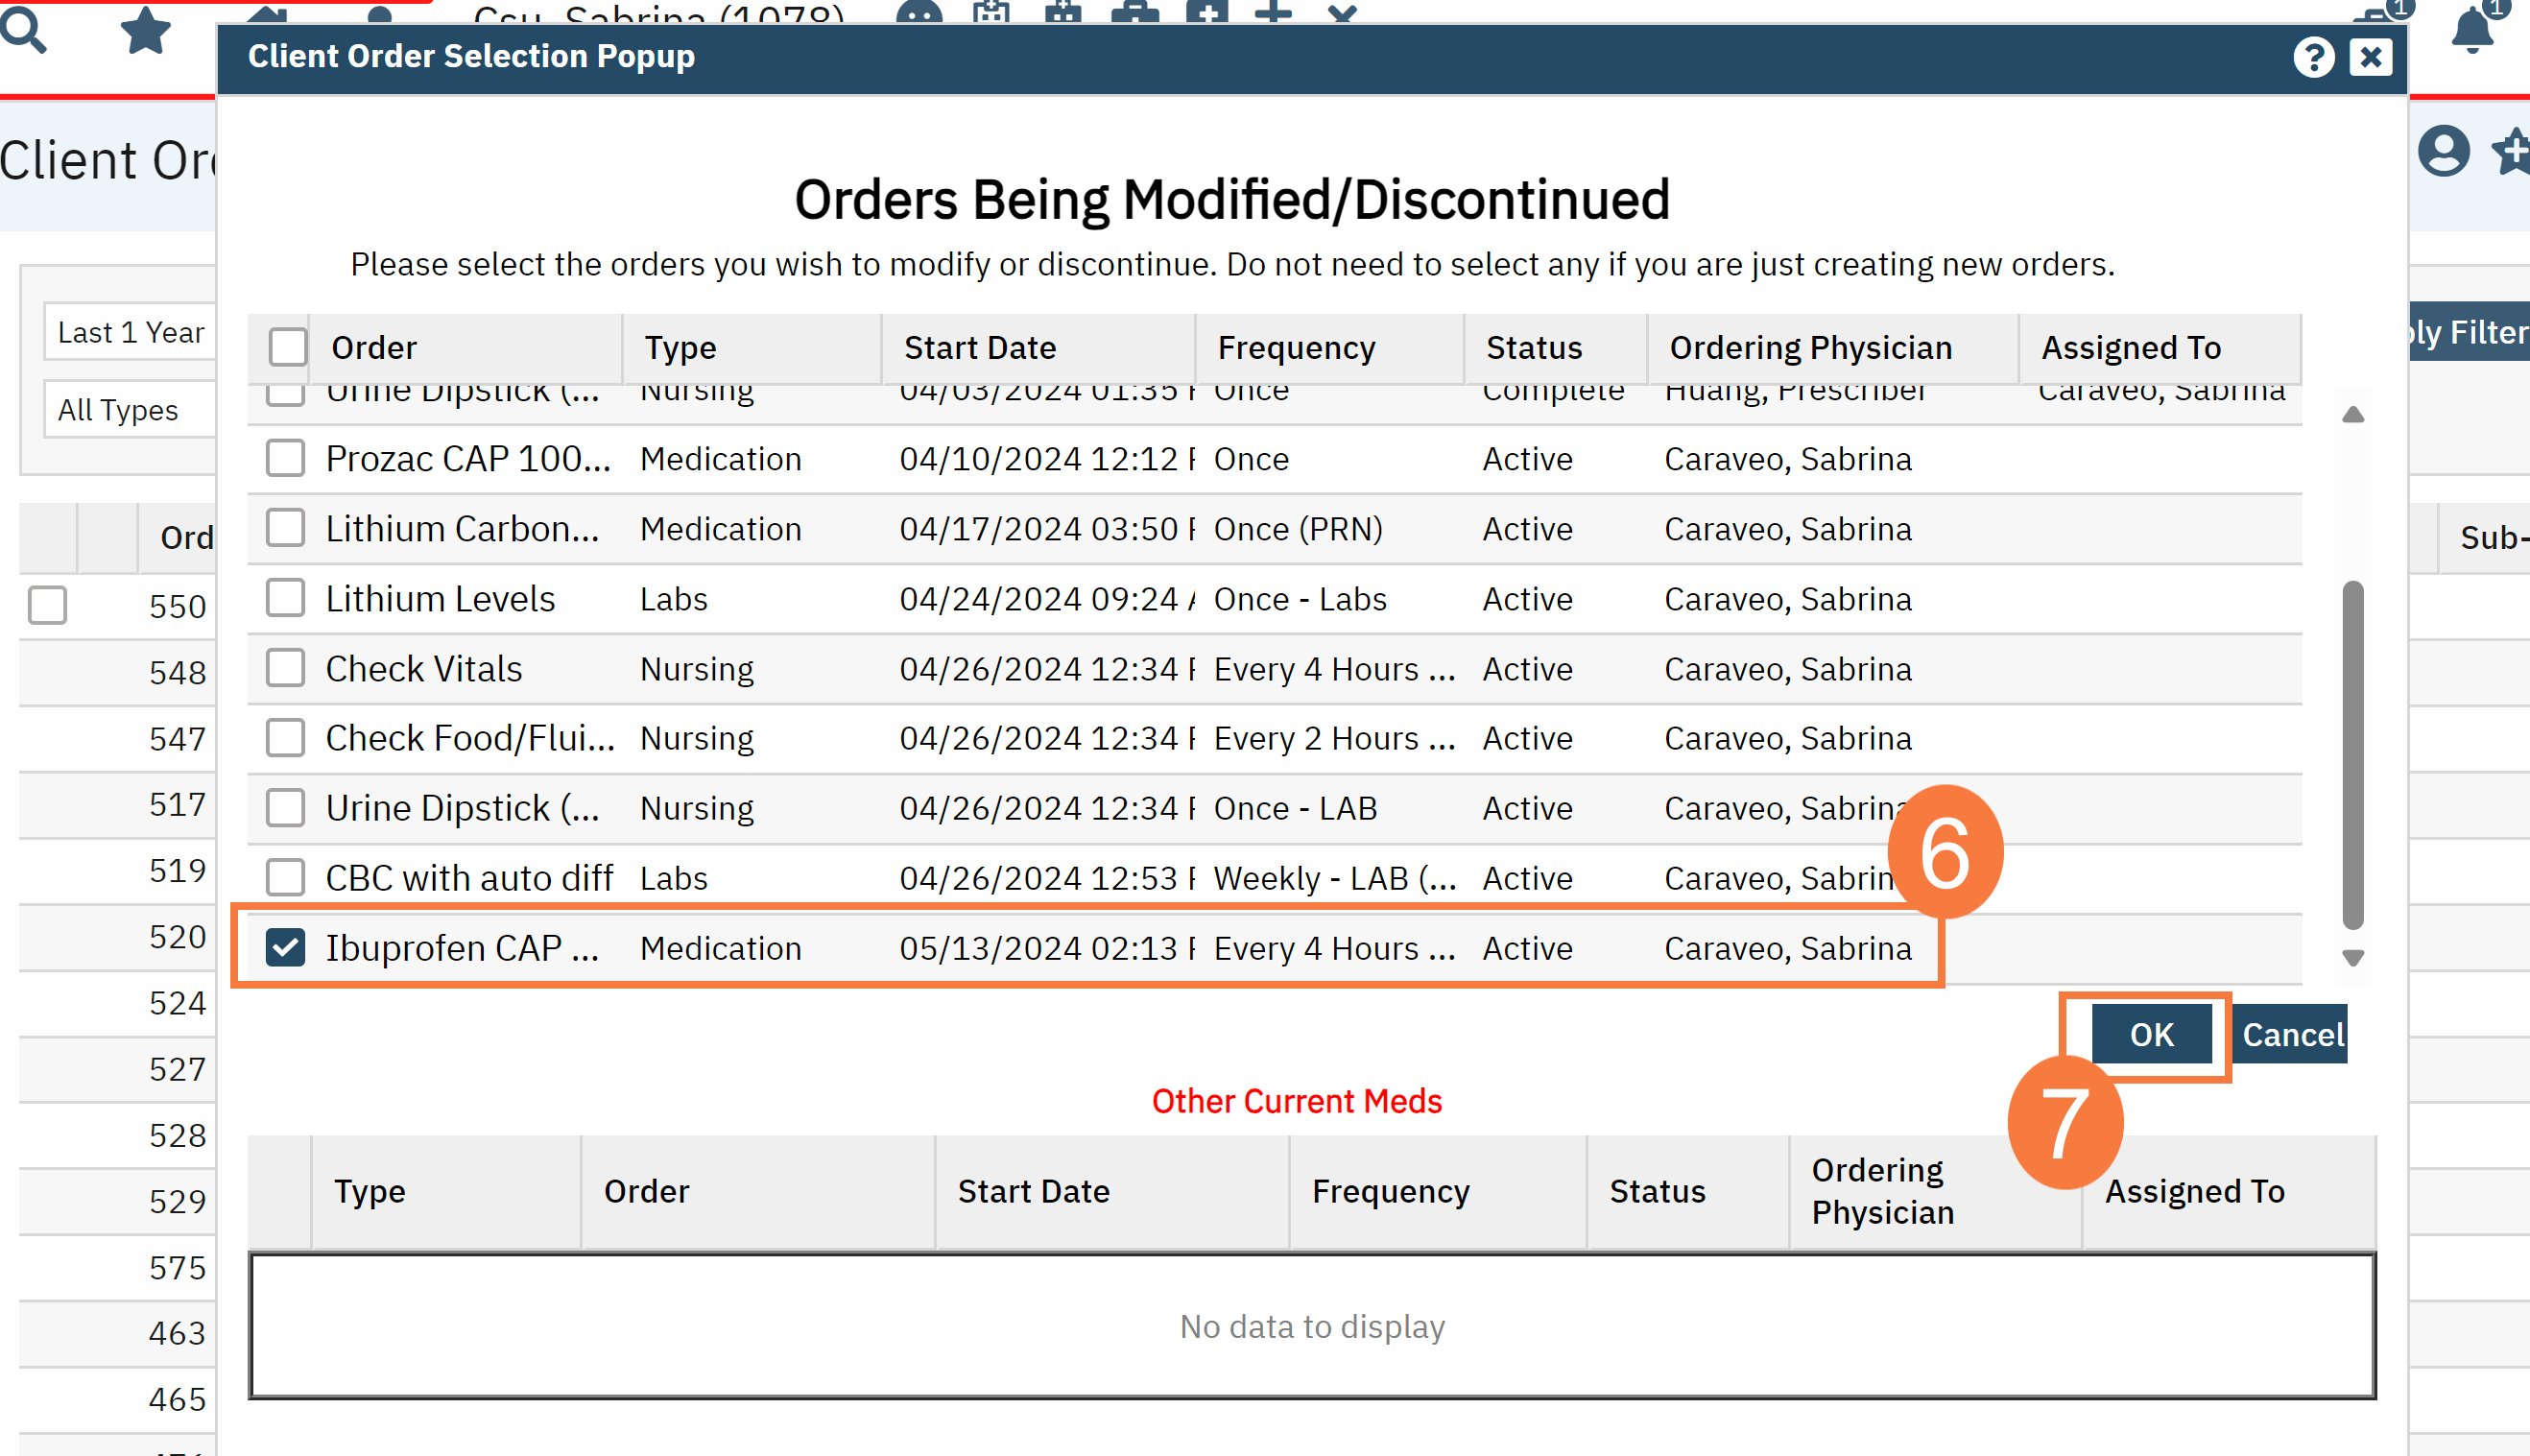
The Client Order Selection window will pop up. Check the box for the order you are attempting to modify.
Click OK.
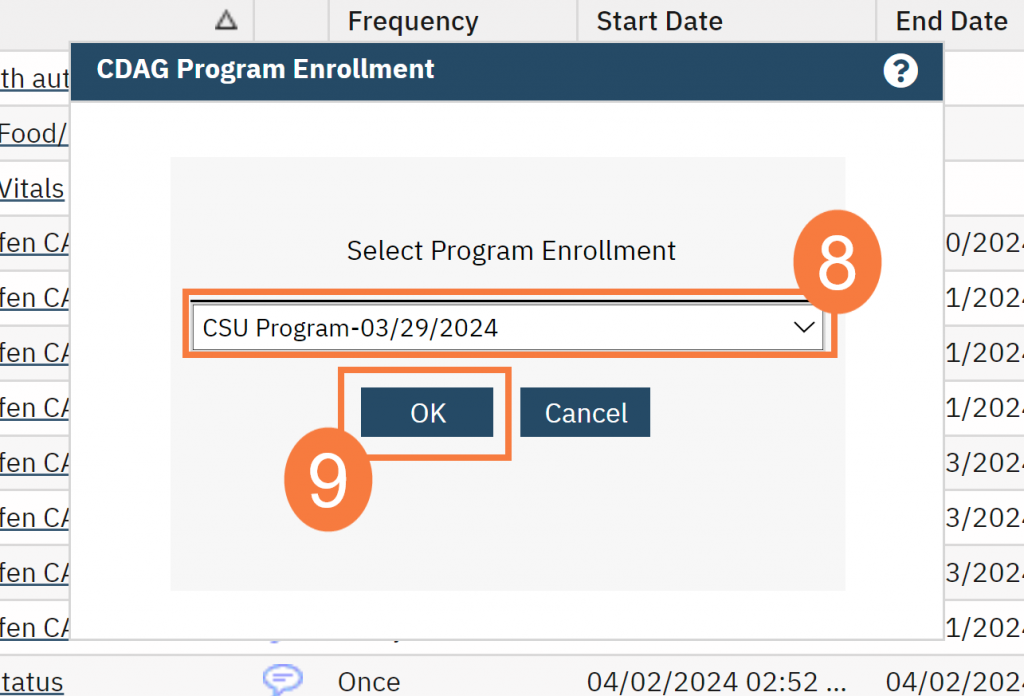
The CDAG Program Enrollment window will pop up. Select the correct Program Enrollment from the available options.
Click OK.
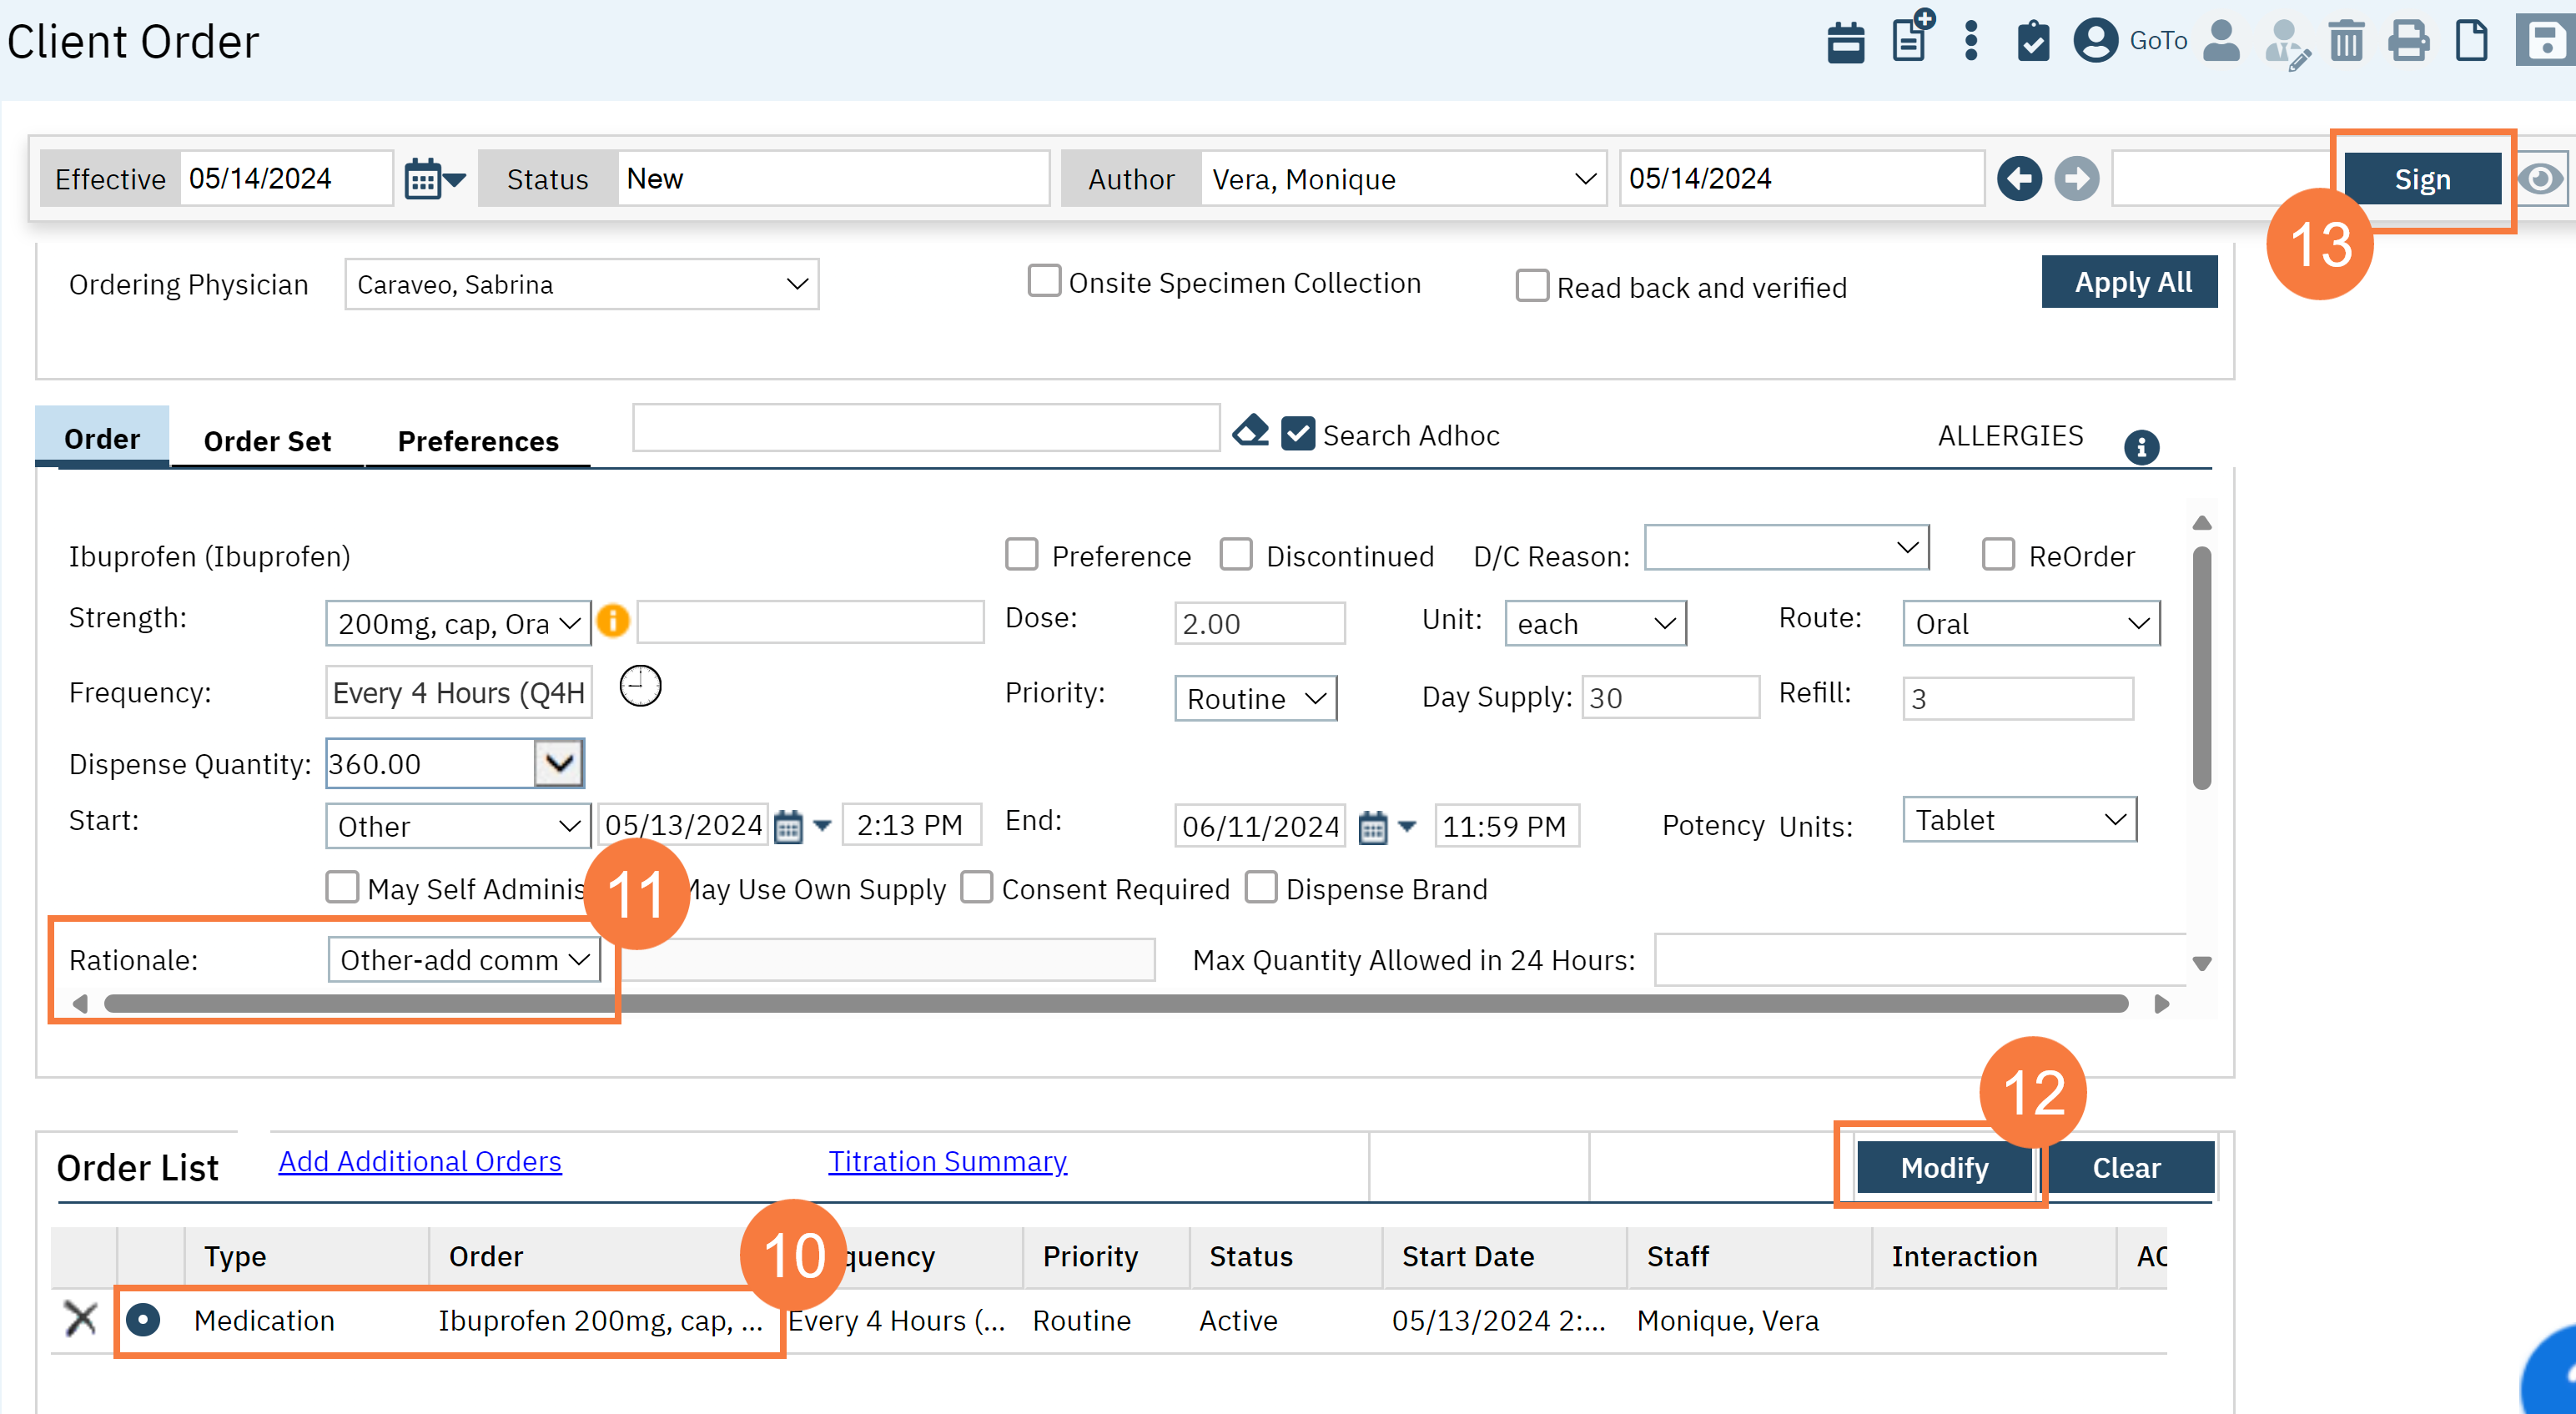
Click the radio button for the order you are updating in the Order List section.
In the Rational field, click the drop-down menu and select the appropriate updated rationale.
You can also choose Other-add comment and specify it in the Comments field.