Billing and Financial end users typically use the Service Detail (Client) screen to enter services.
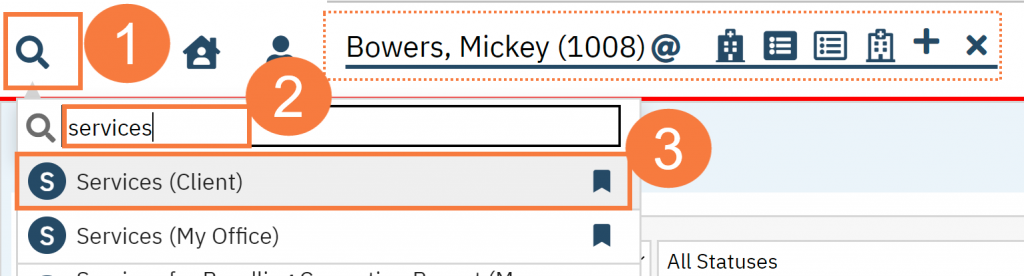
With a client open, click the Search icon.
Type Services into the search bar.
Select Services (client).
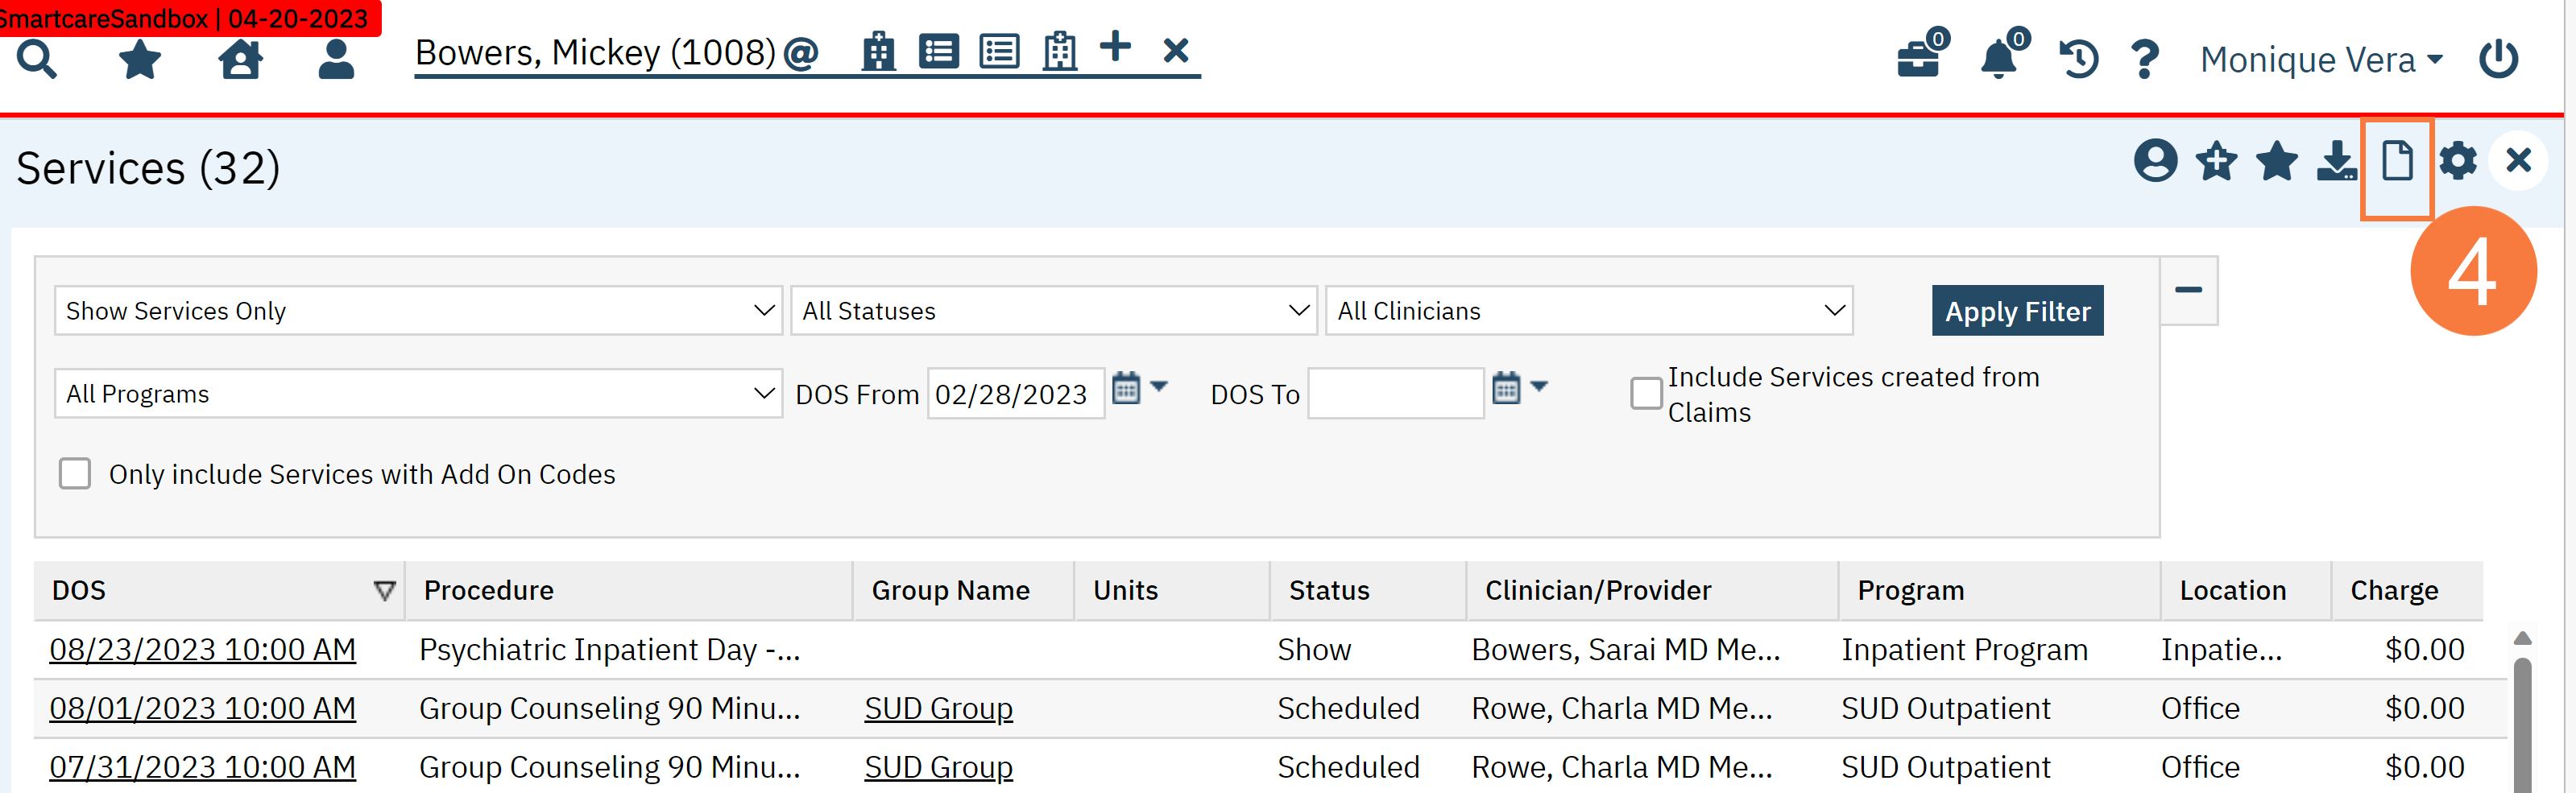
Click the New icon. The Service Detail screen opens.
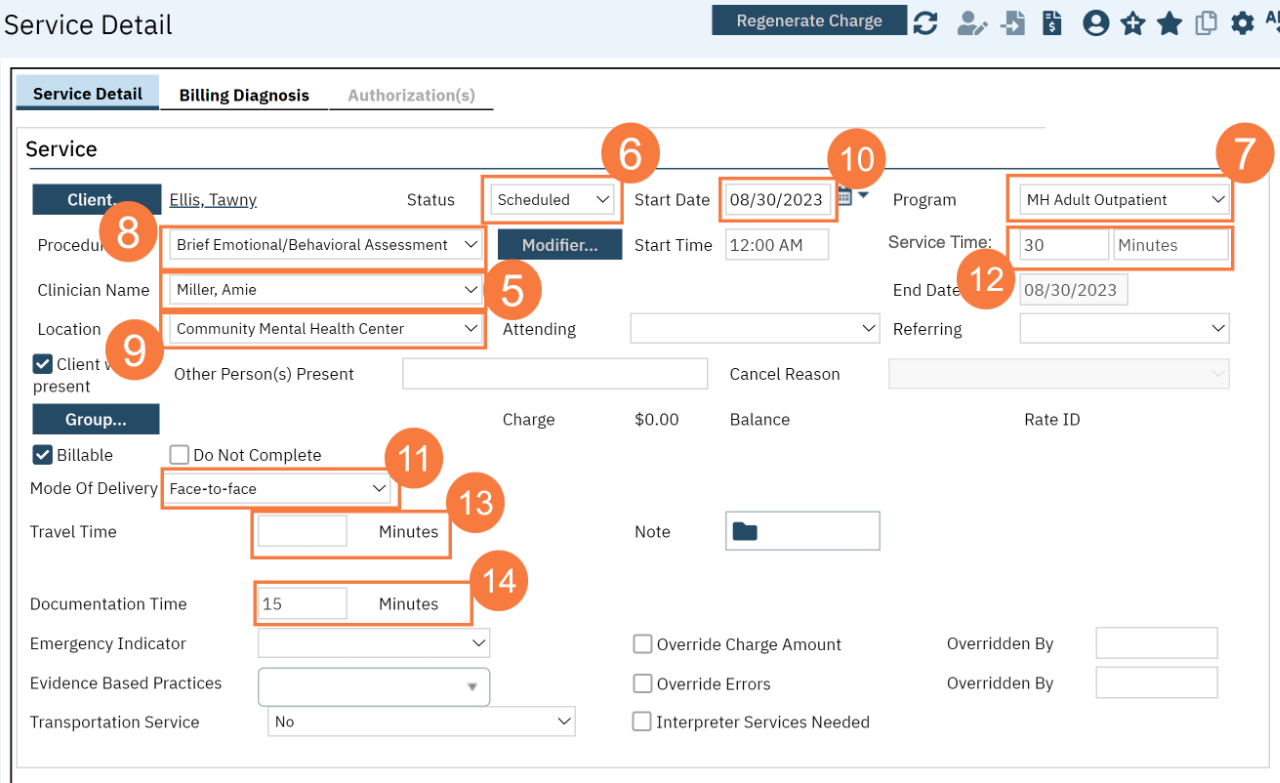
Complete the Service Detail tab with the required information:
Click the Clinician Name field and select the appropriate clinician. Note: this drives the program field and procedure field so it must be selected first.
Click the Status field and select the appropriate status.
Click the Program field and select the appropriate option.
Click the Procedure field and select the appropriate option.
Click the Location field and select the appropriate option.
Select the Start Date, it will default to today’s date.
Click the Mode of Delivery field and select the appropriate option.
Enter a Service Time.
Enter Travel Time.
Enter Documentation Time.
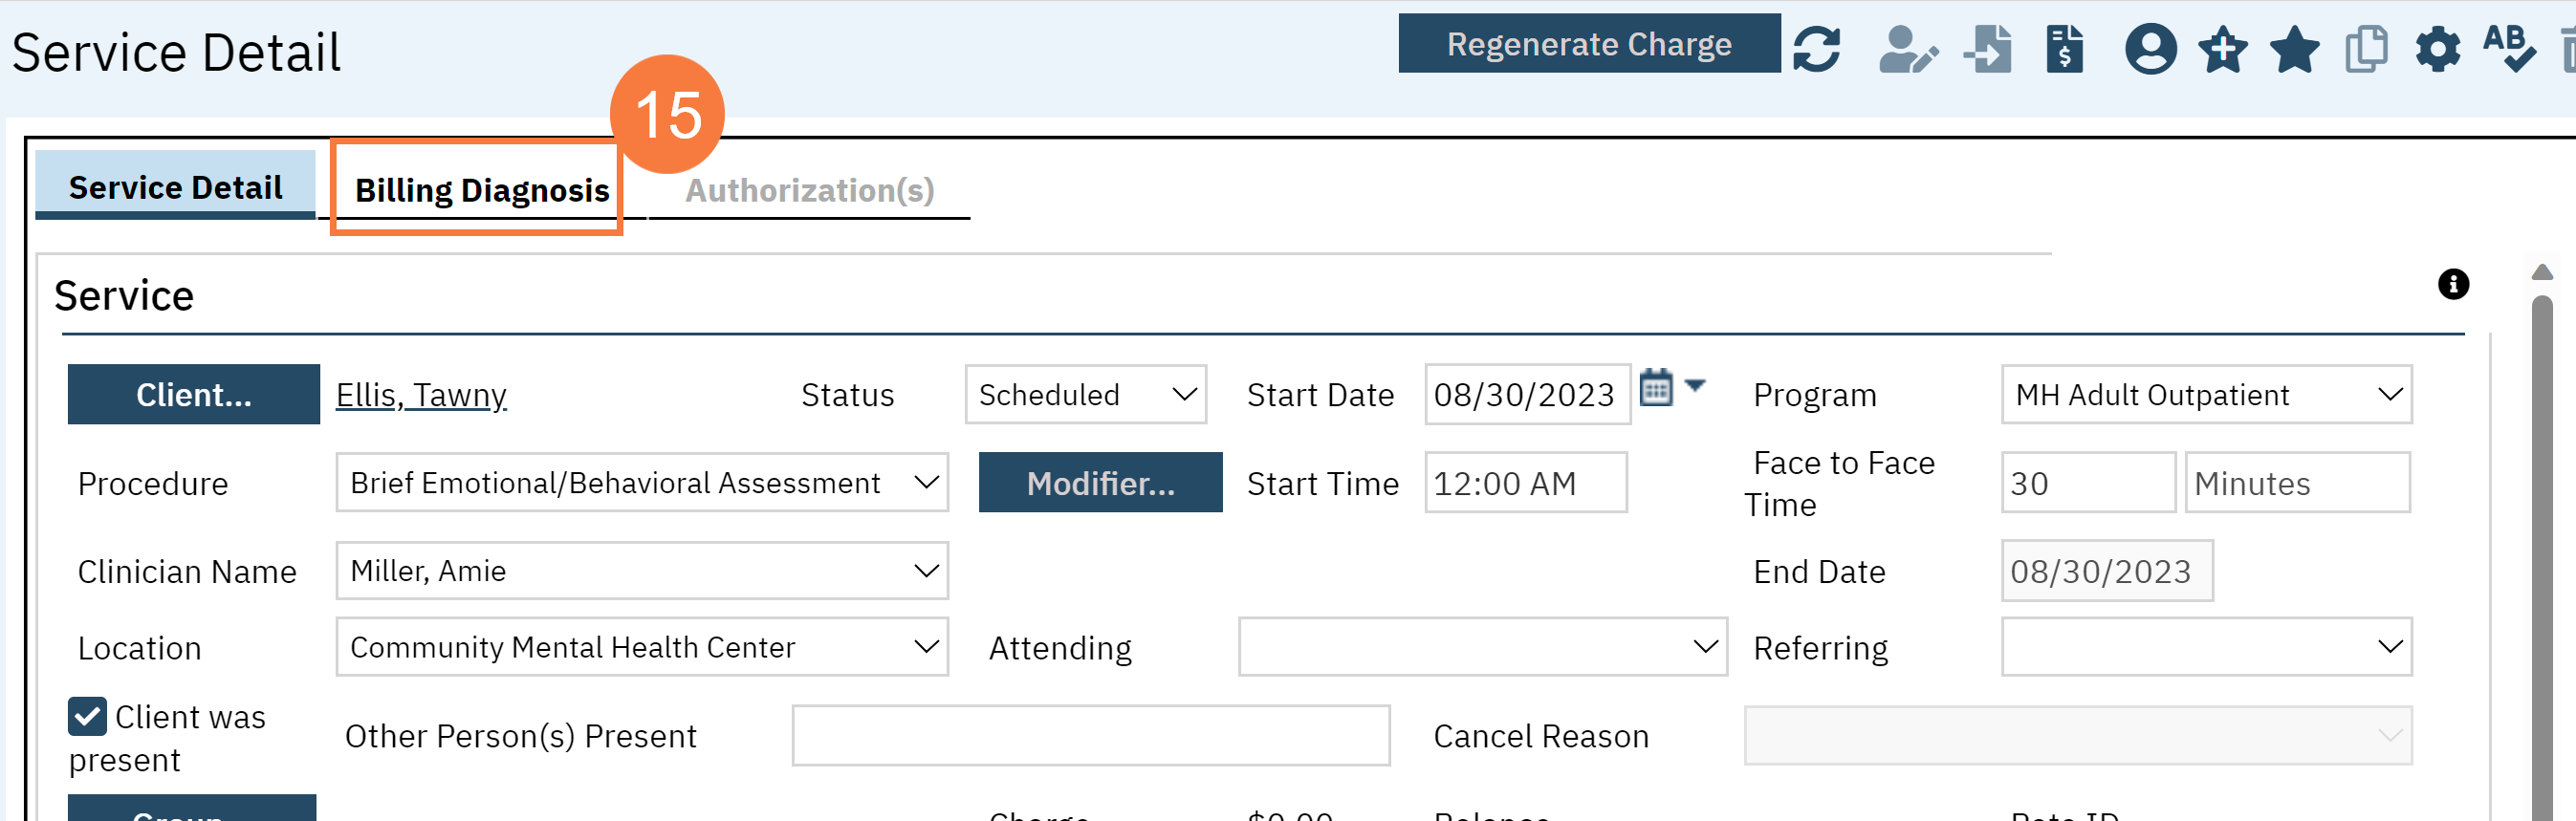
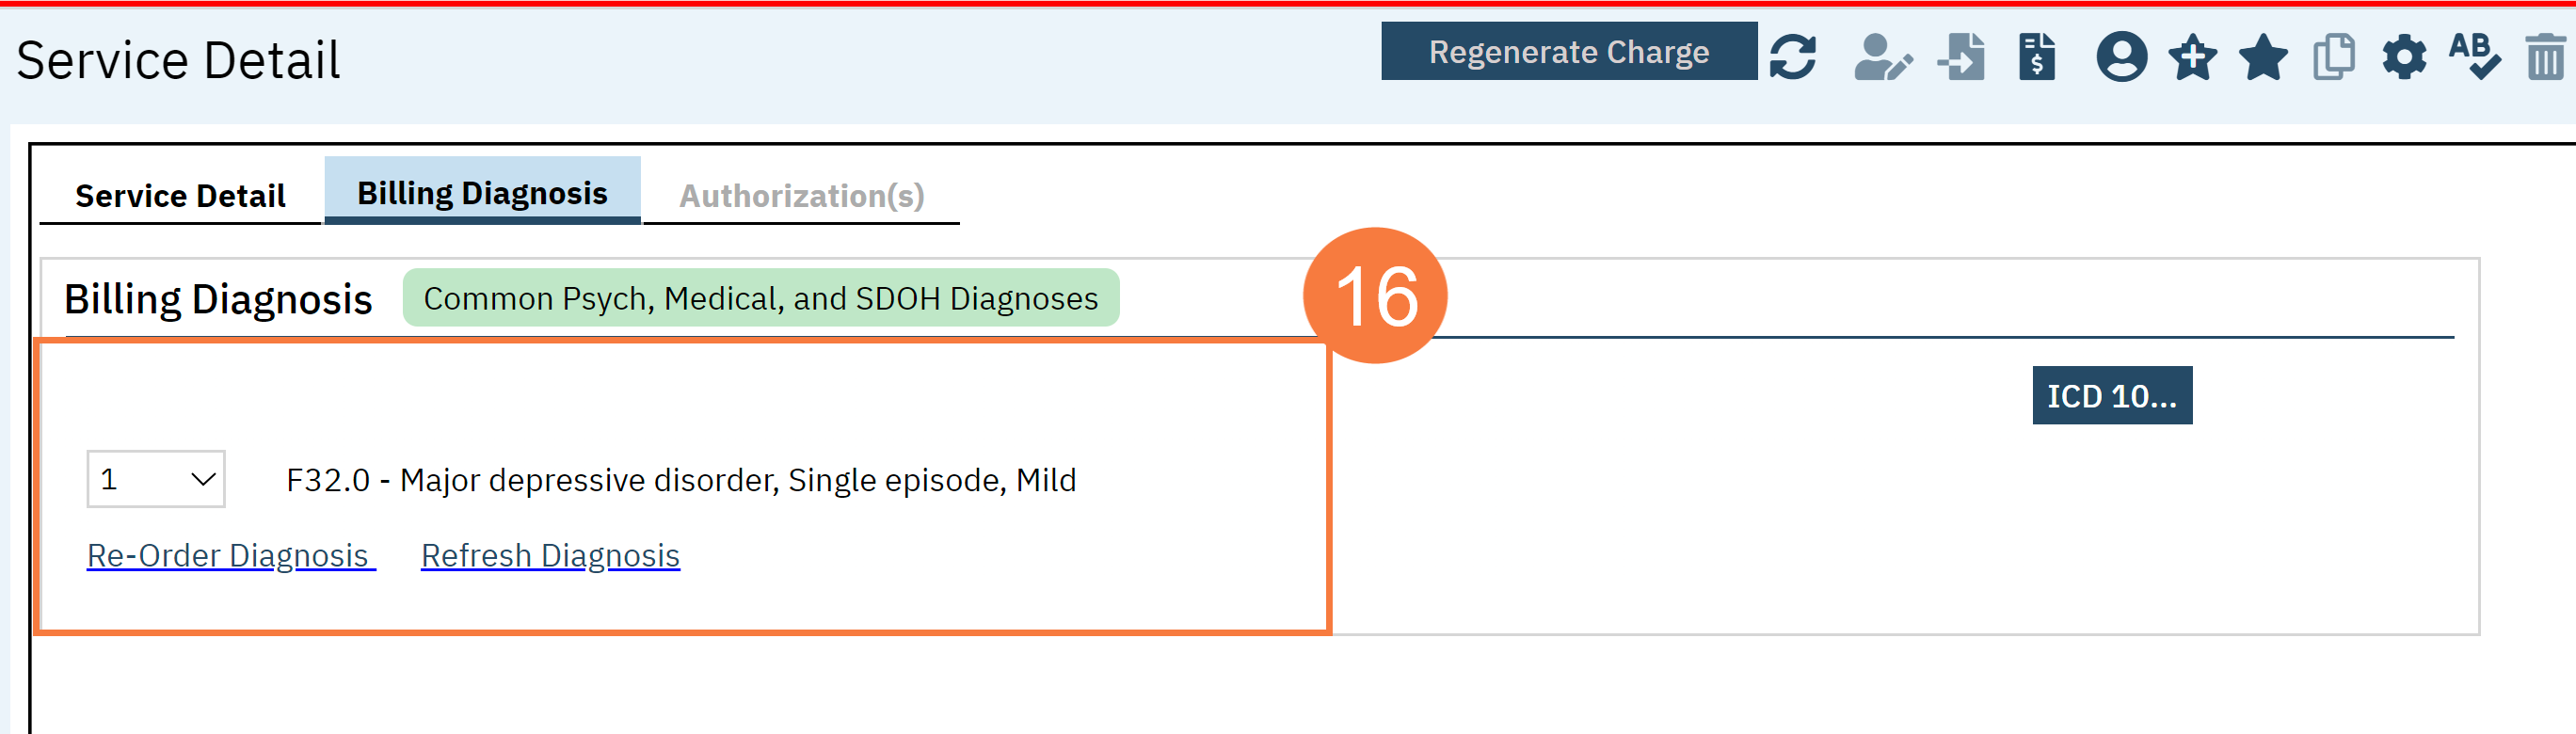
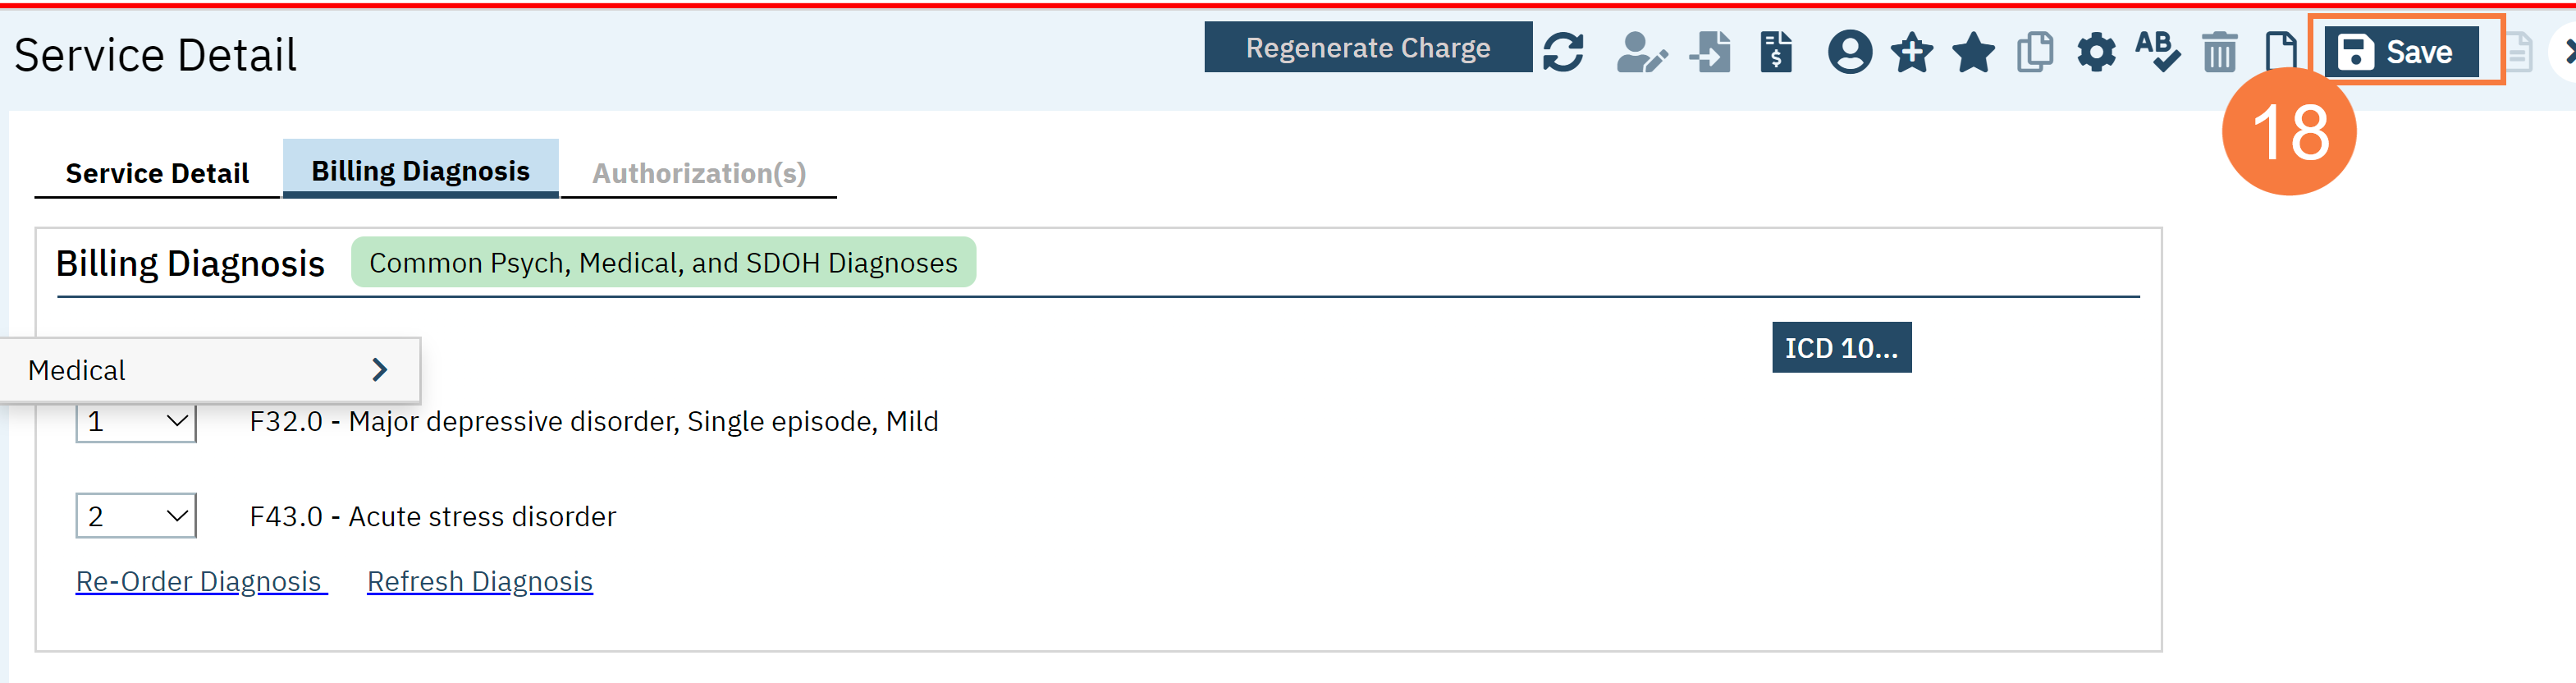
Click the Billing Diagnosis Tab.
If the client already has current Diagnosis Document on file, it will already be selected in the Billing Diagnosis section.
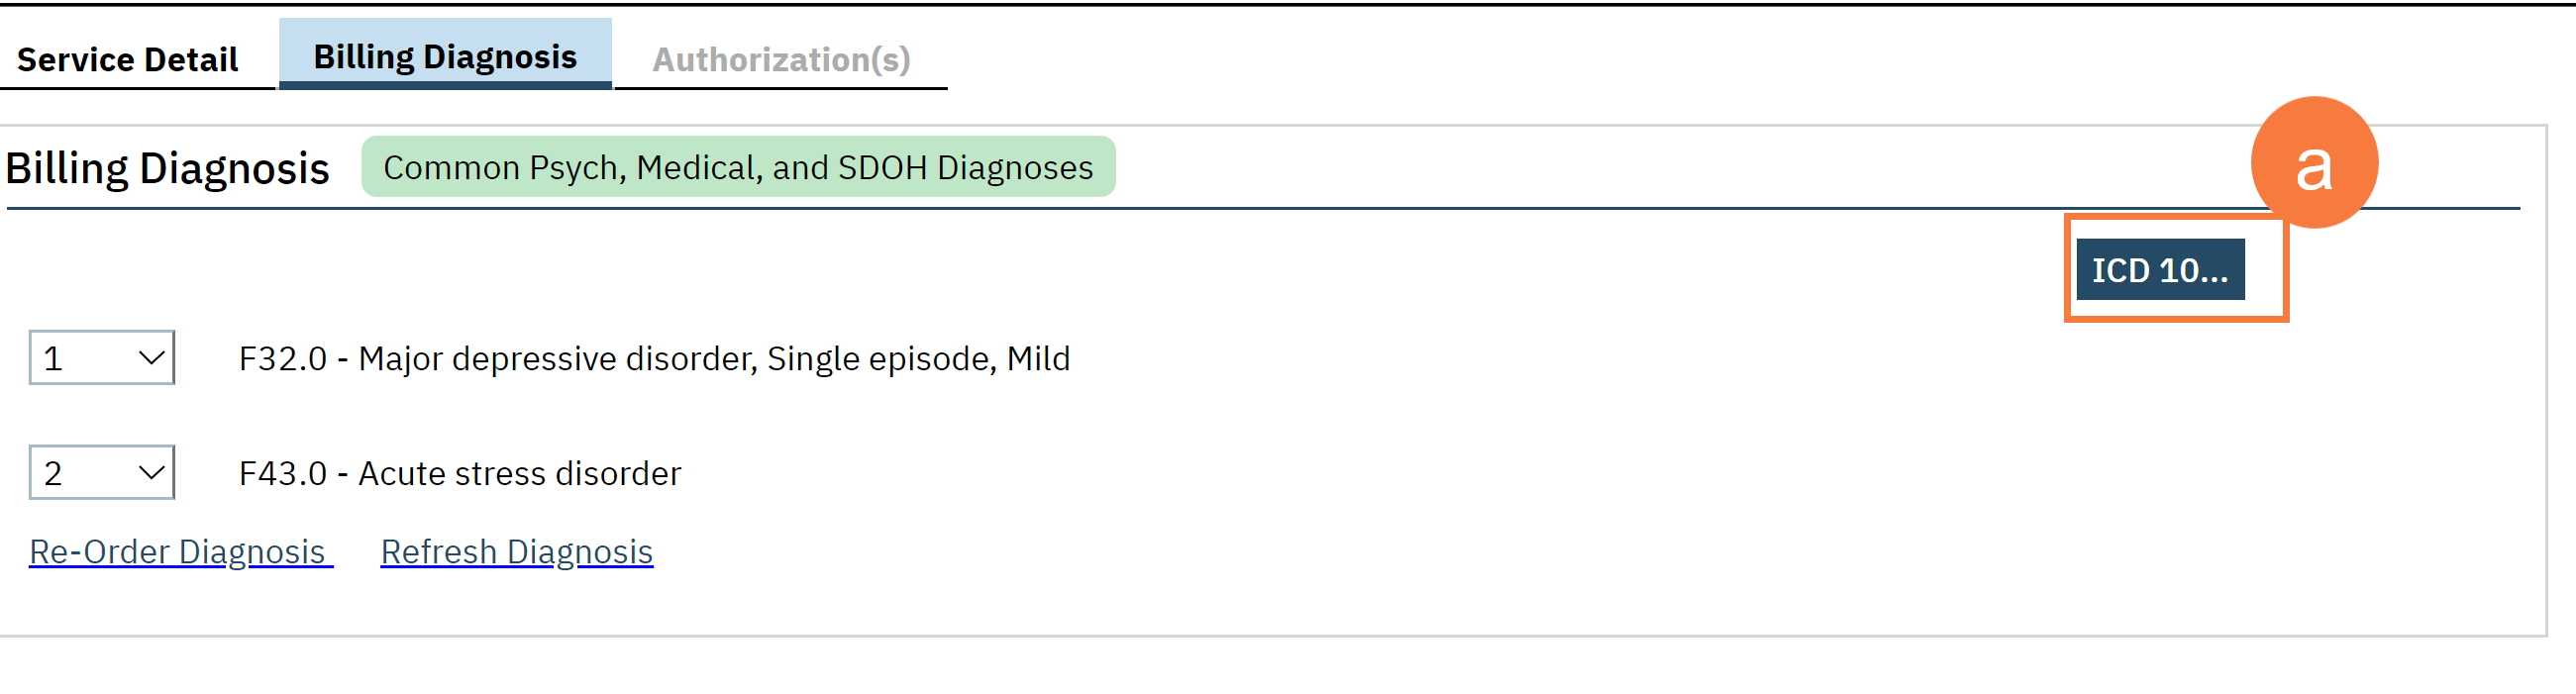
If you need to add a diagnosis, click the blue ICD 10 button.
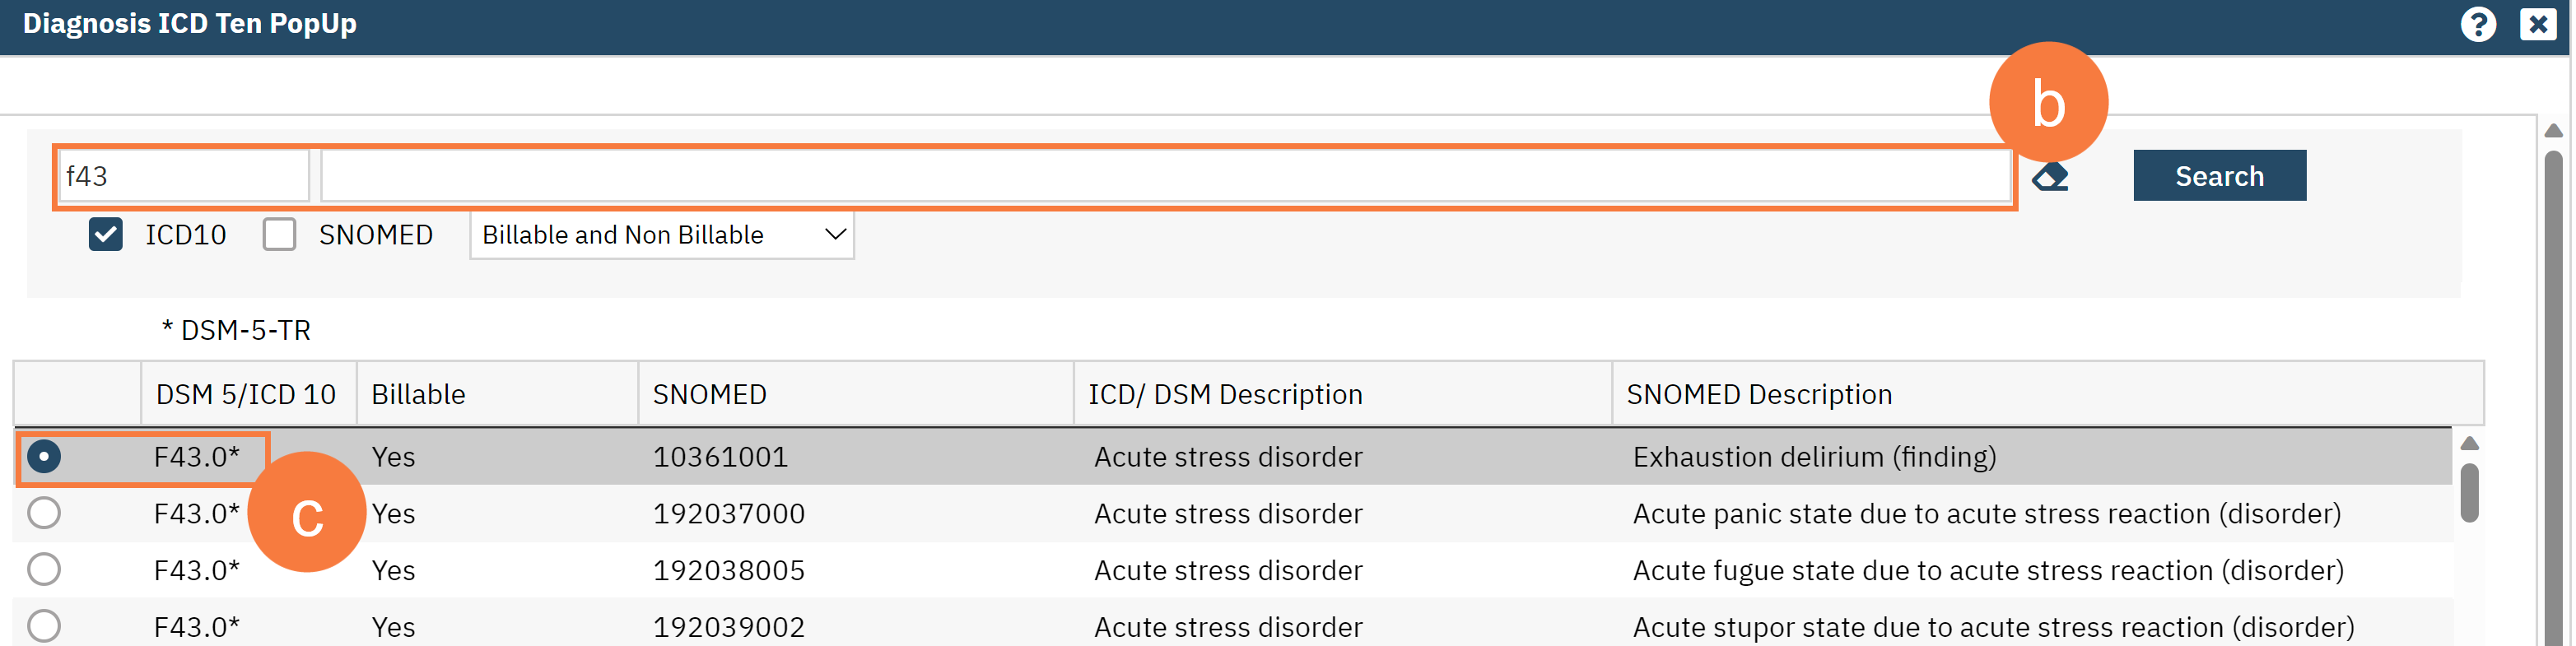
In the pop-up window, enter the ICD code in the appropriate field or enter the description.
Click the appropriate radio button to select the diagnosis.
Click OK.
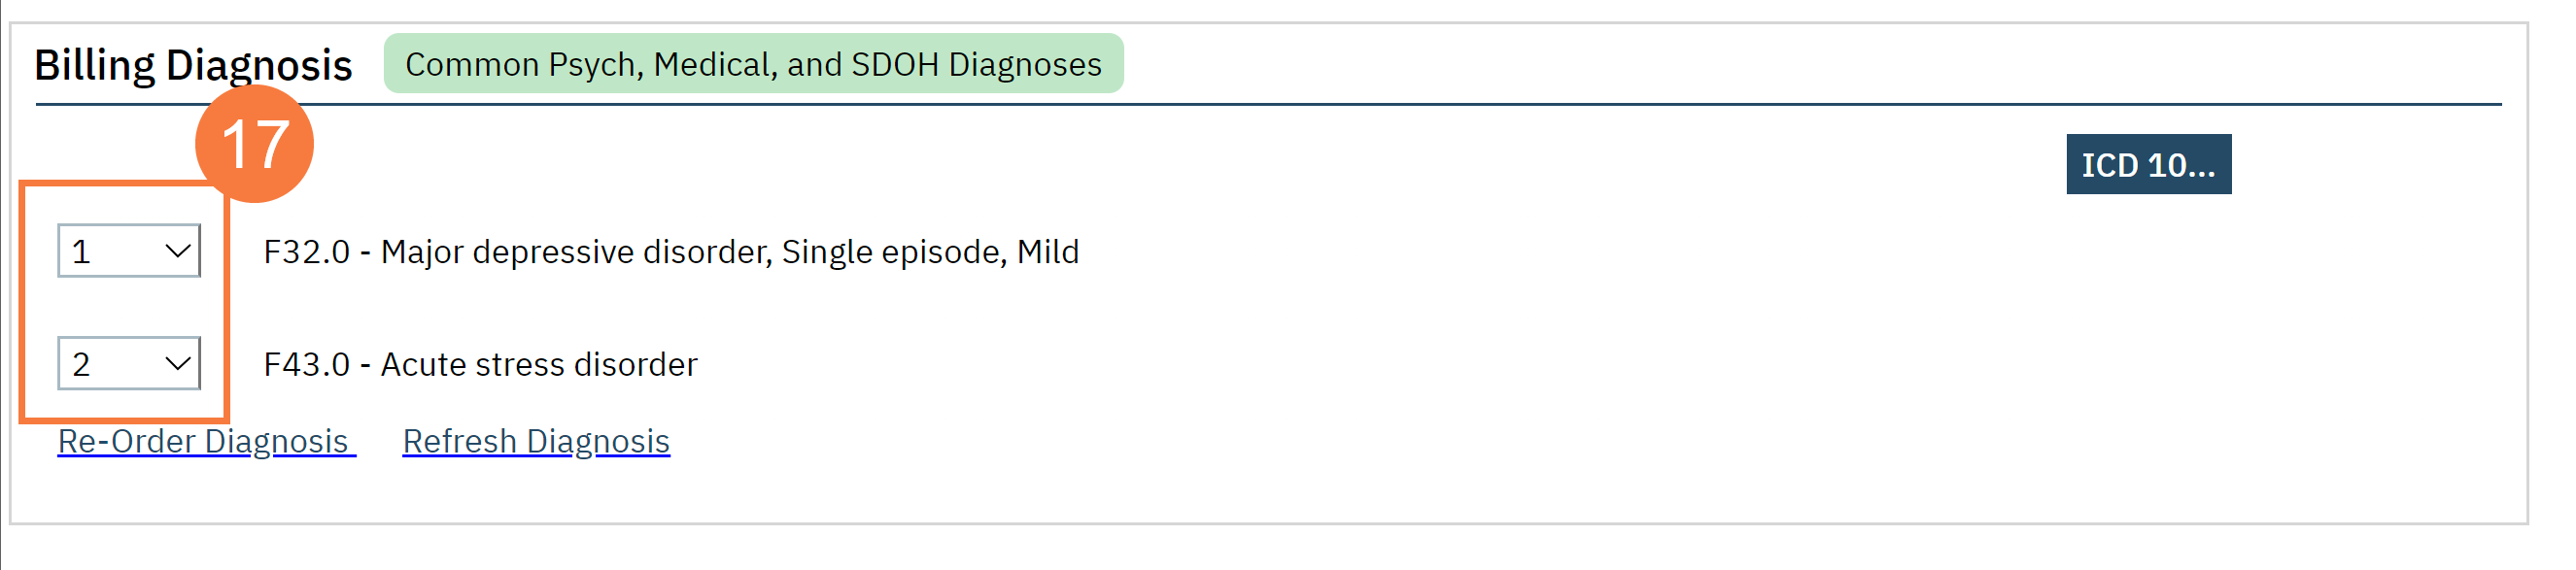
If needed, click the drop down to re-order the diagnoses.