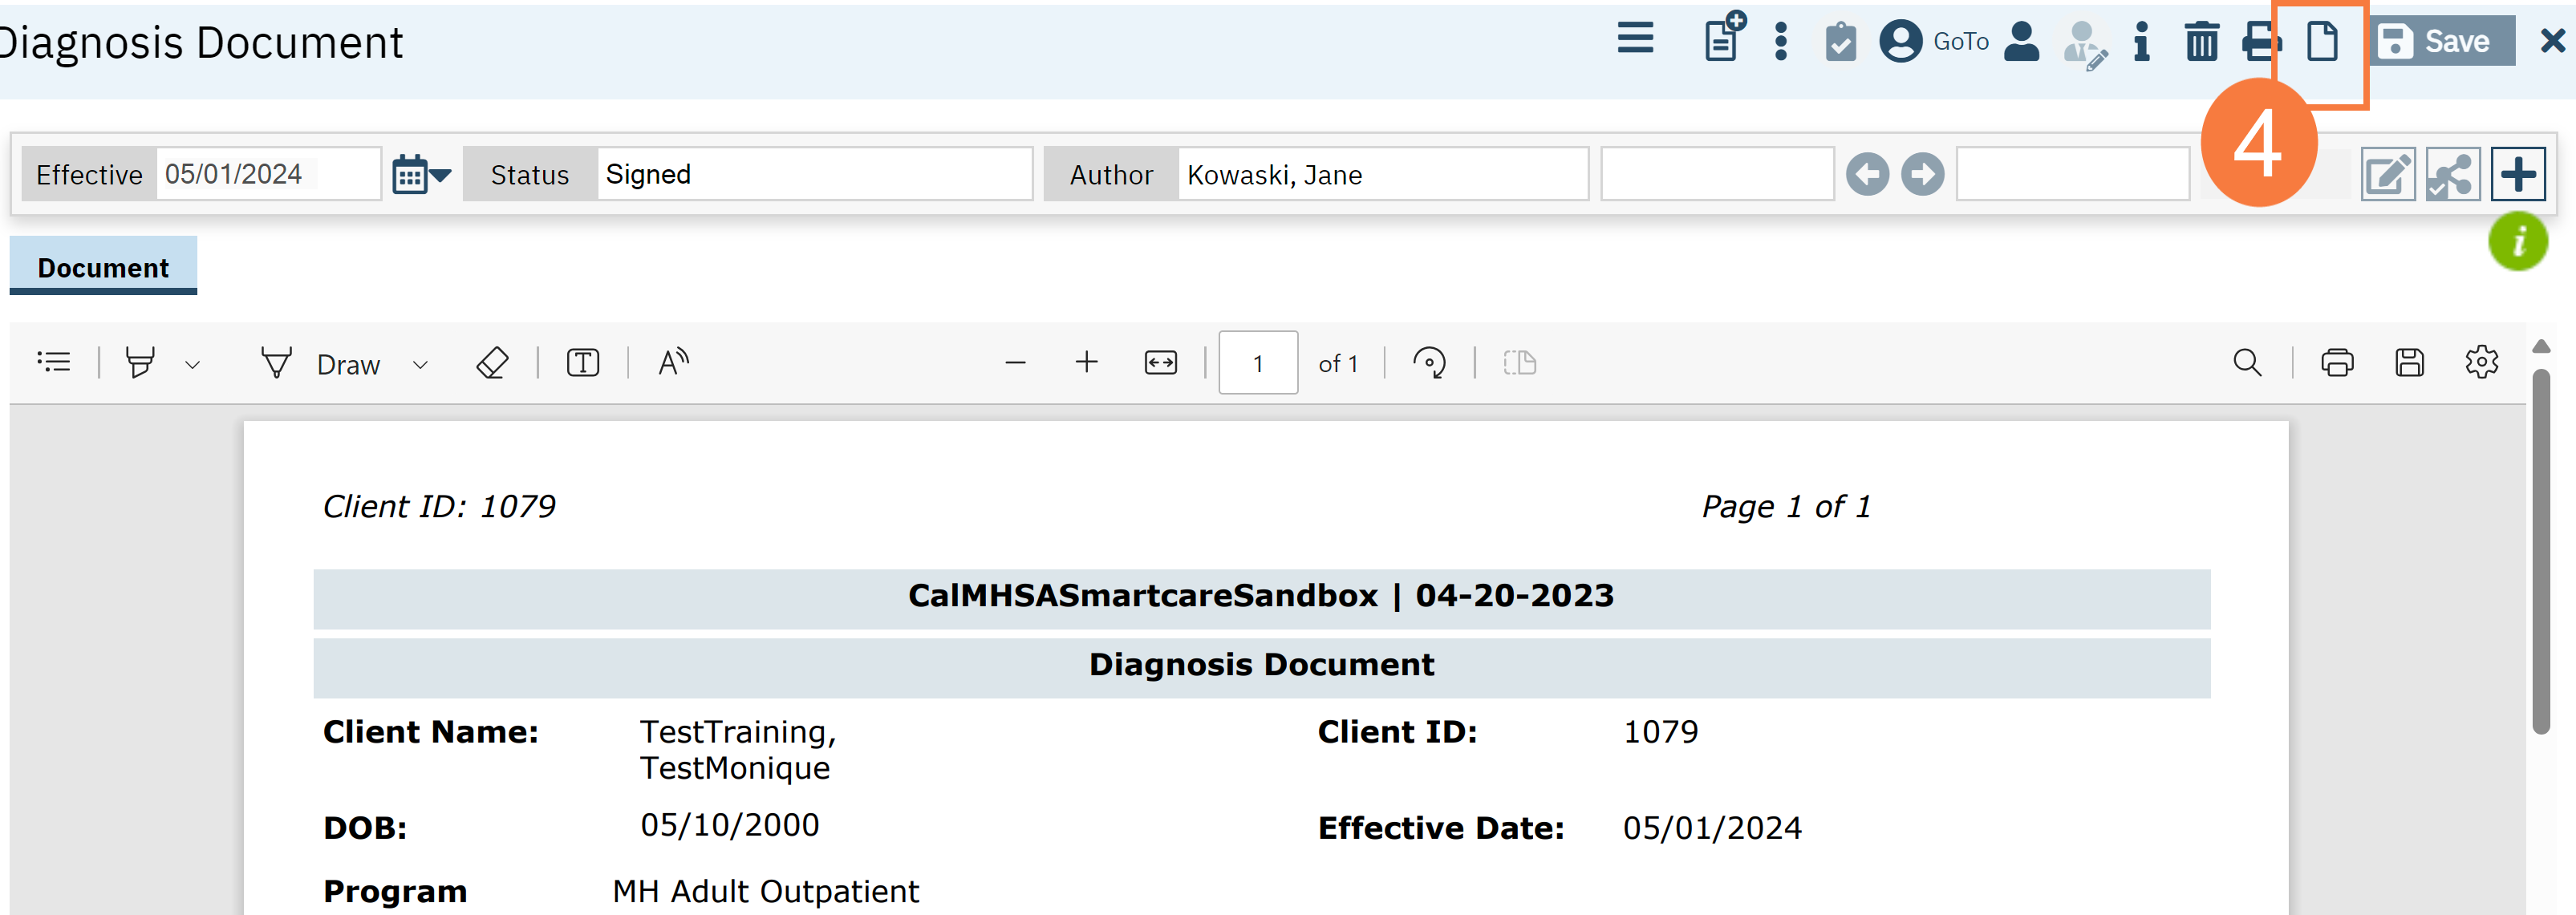
Select the New icon. A new Diagnosis Document will open, which will post-date the Admission Diagnosis.
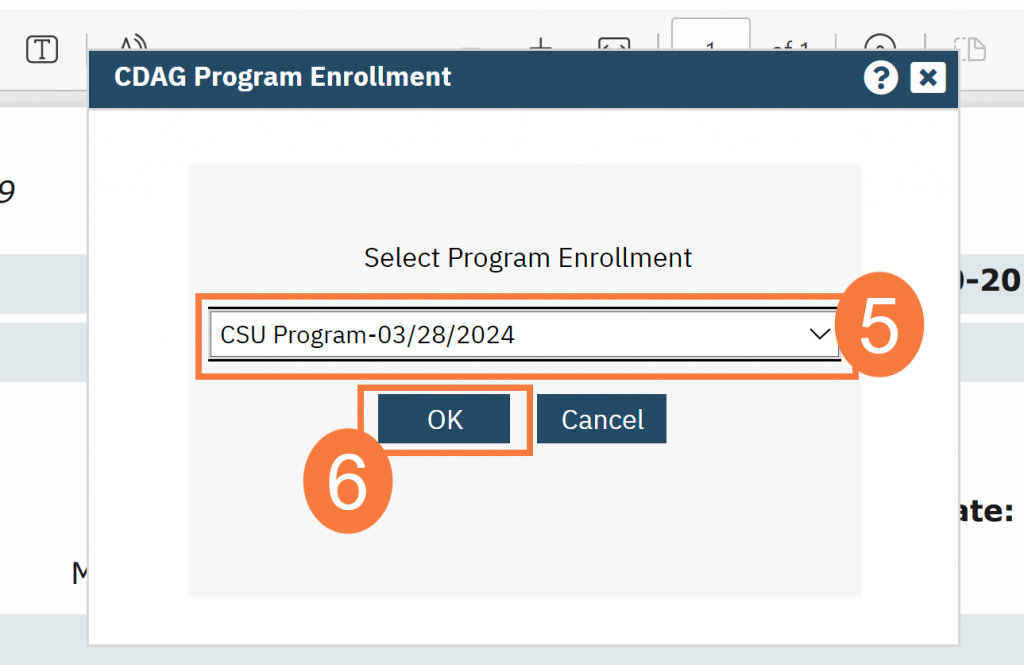
The CDAG Program Enrollment window will open. Click the drop-down menu and select the appropriate program.
Click OK.
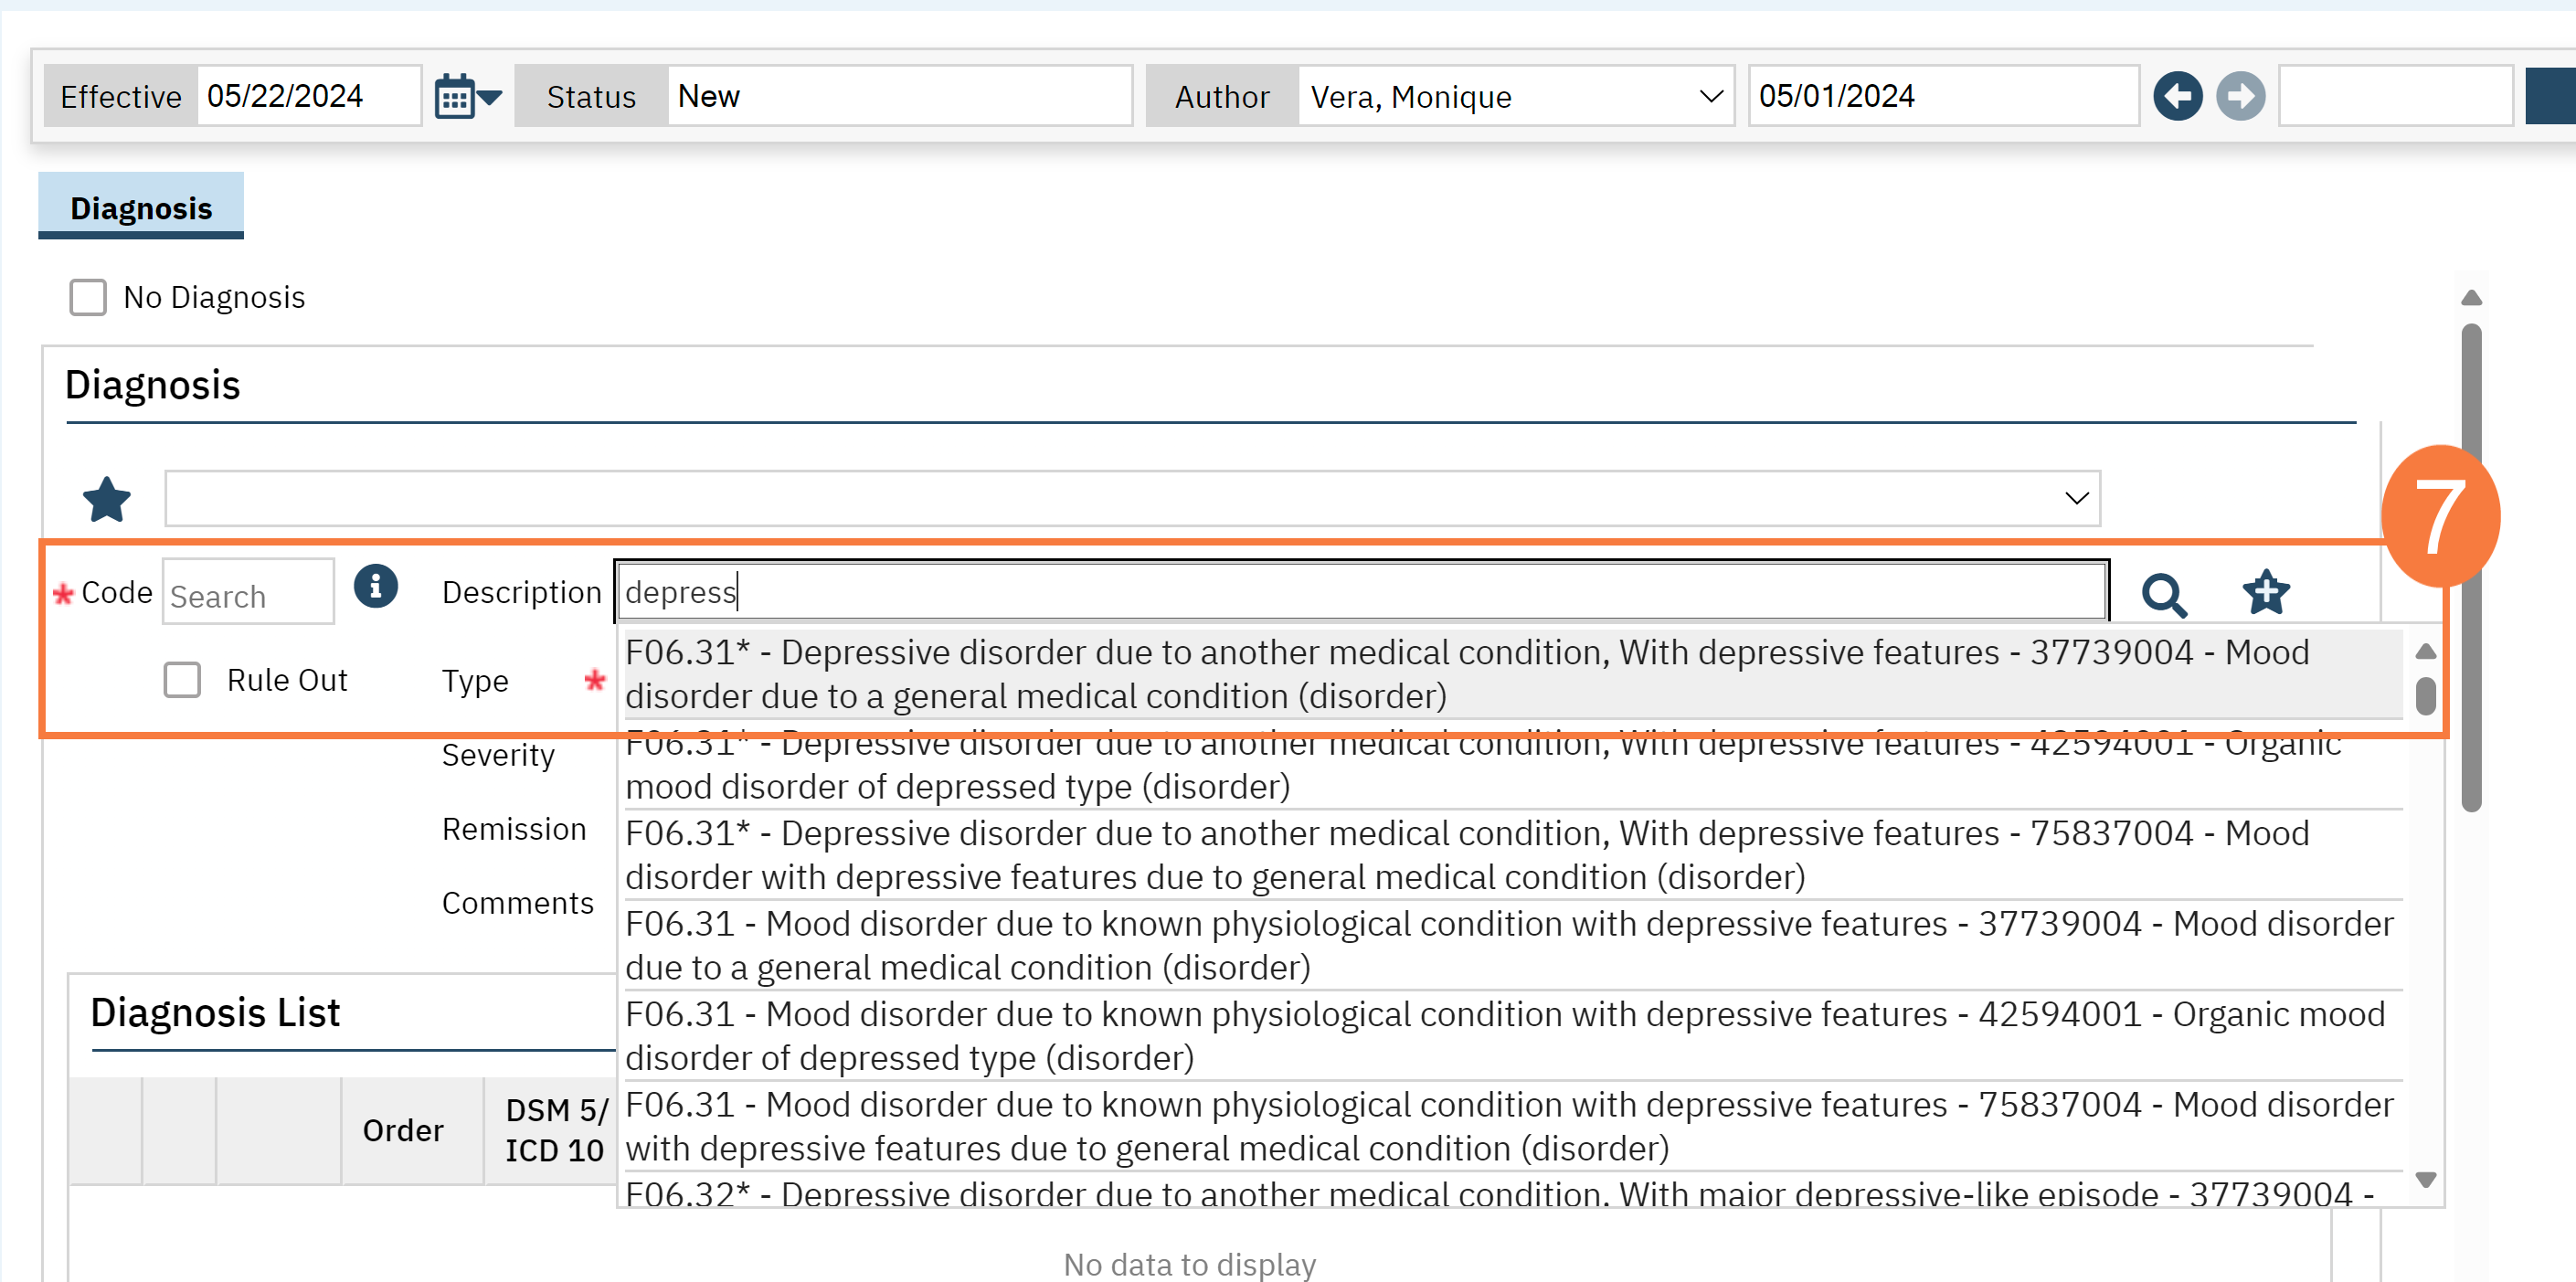
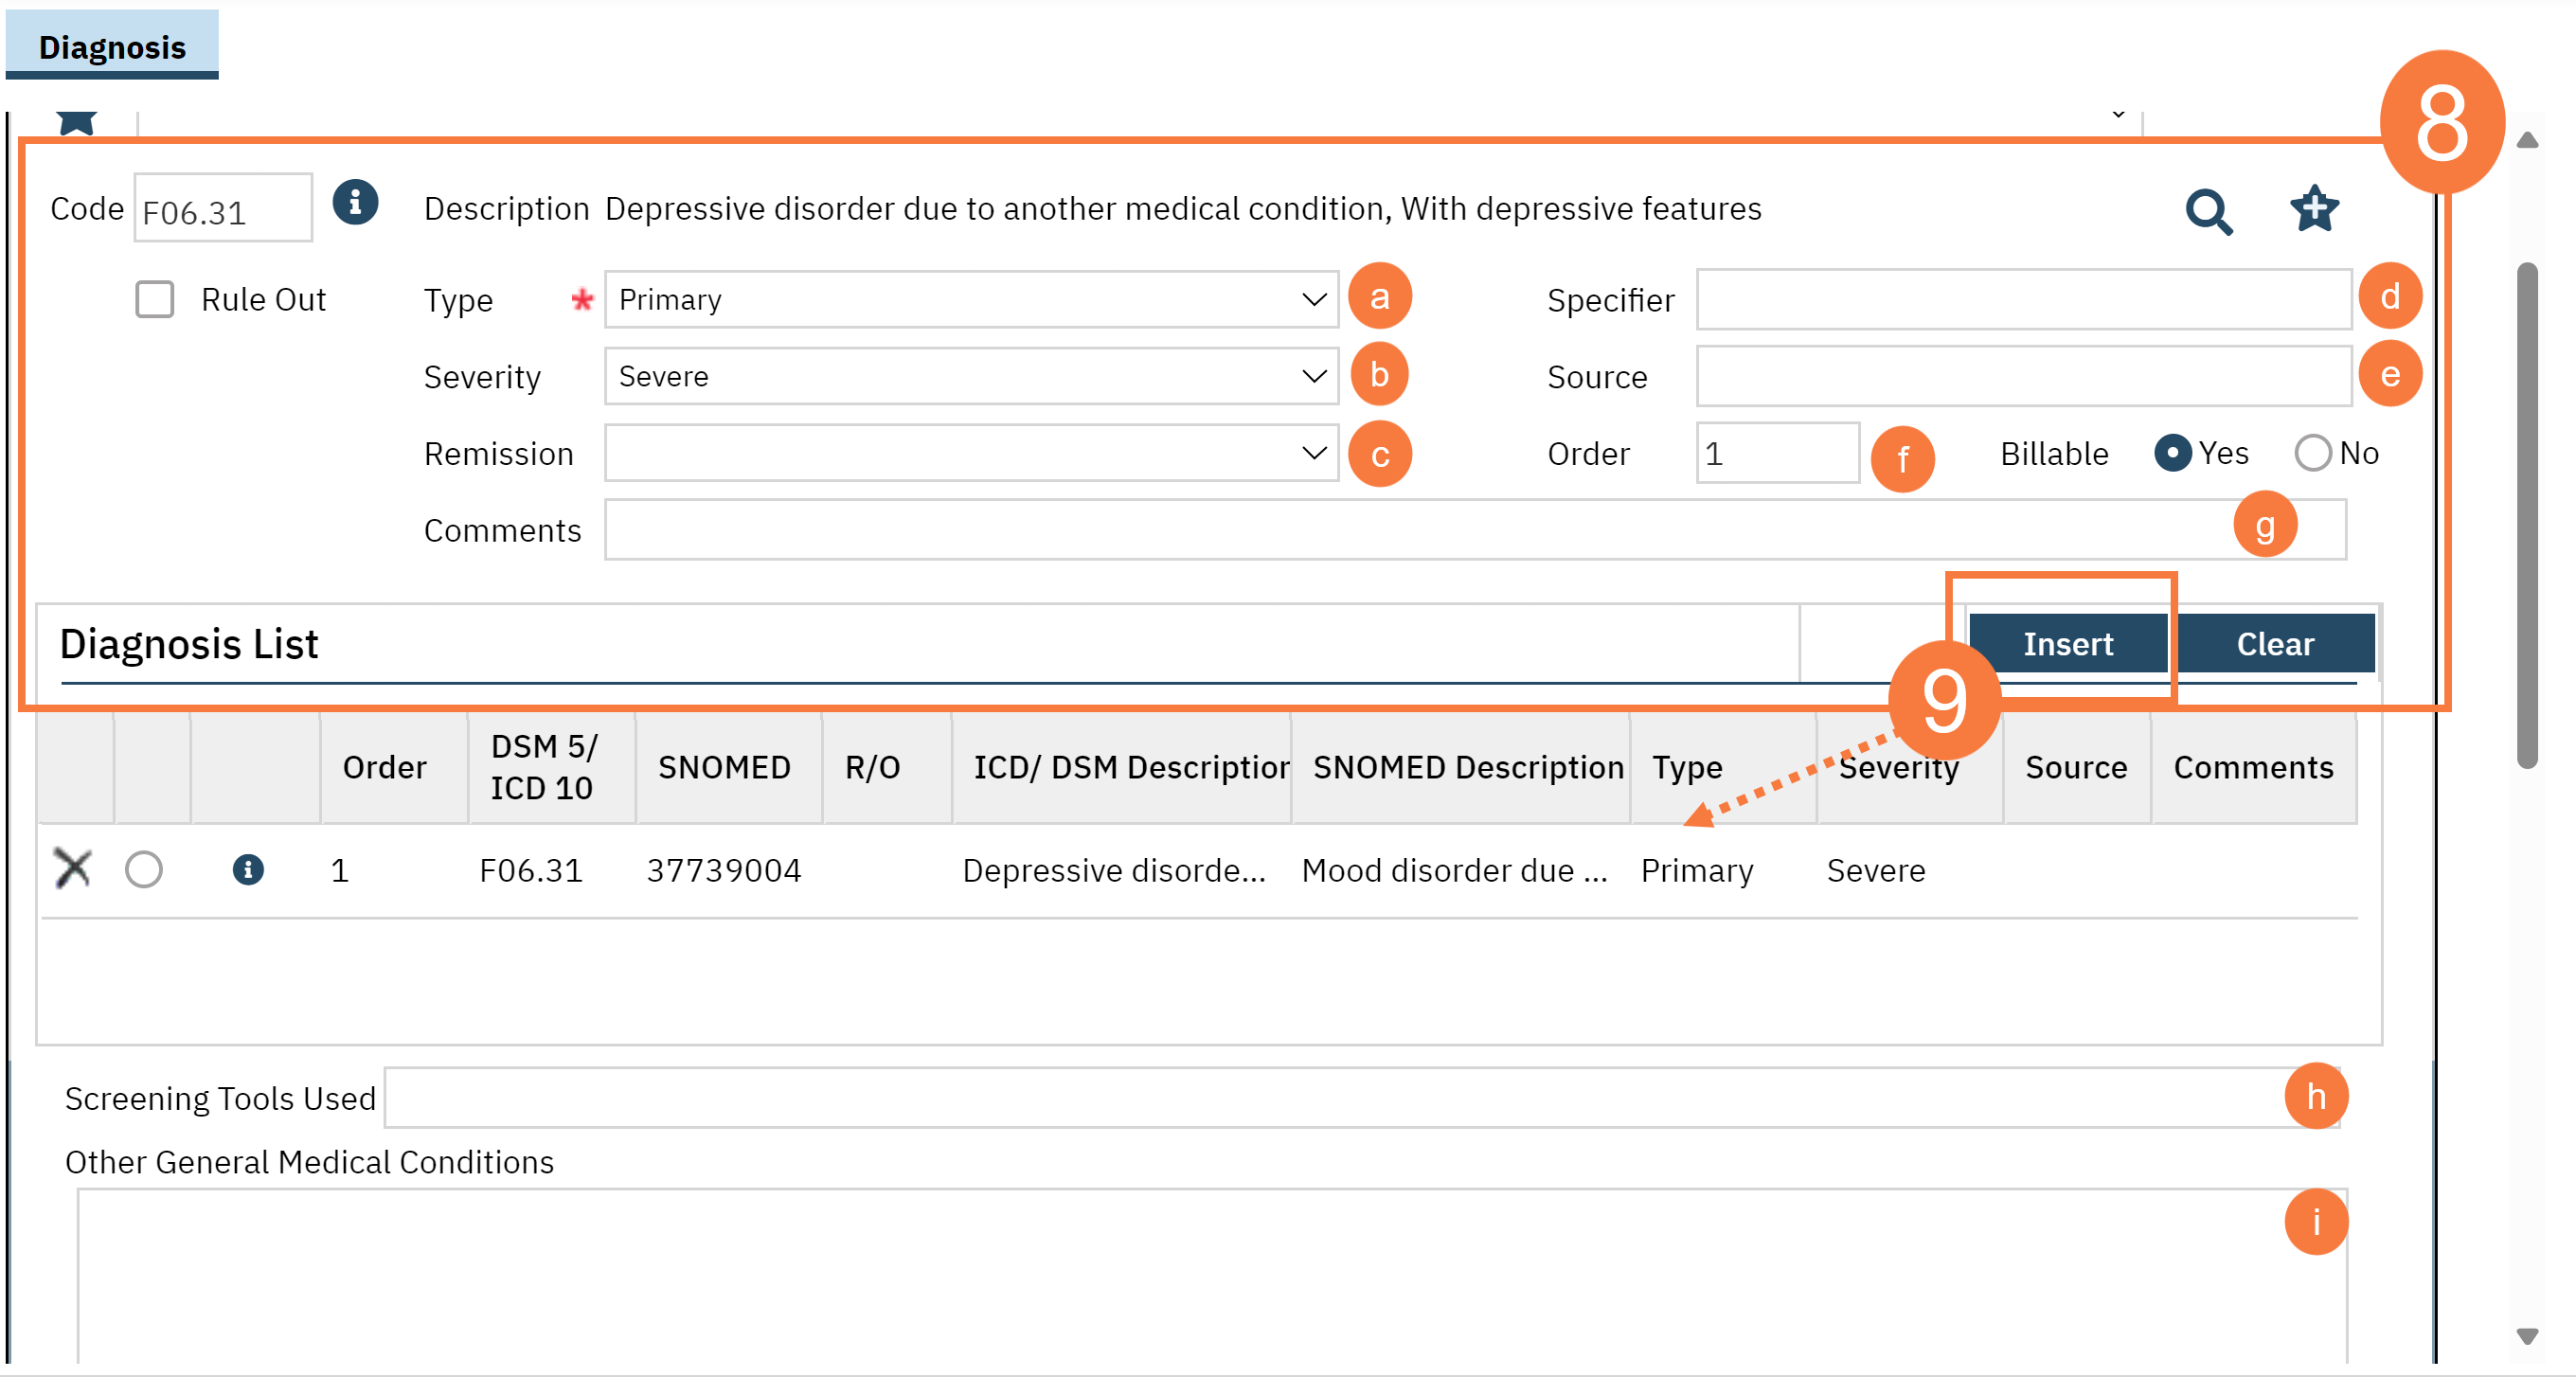
Search for a diagnosis code or description in the corresponding fields and select the chosen diagnosis from the dropdown that appears when you begin entering text. If no diagnosis was determined, select the No Diagnosis checkbox and skip to Step 11.
Complete the remaining fields as applicable.
Click the Type drop-down arrow and select the diagnosis type.
Click the Severity drop-down arrow and select the appropriate response.
Click the Remission drop-down arrow and select the appropriate response.
Enter a Specifier if needed.
Enter Source if needed. The Source should be the Prescriber on whose behalf the document is completed.
If desired, click in the Order field and update the number.
If the diagnosis is non-billable, click the No radio button.
If a screening tool was used, enter it in the corresponding field.
If other medication general medical conditions exist, enter it/them in the corresponding field.
Click the Insert button. The diagnosis will be added to the Diagnosis List
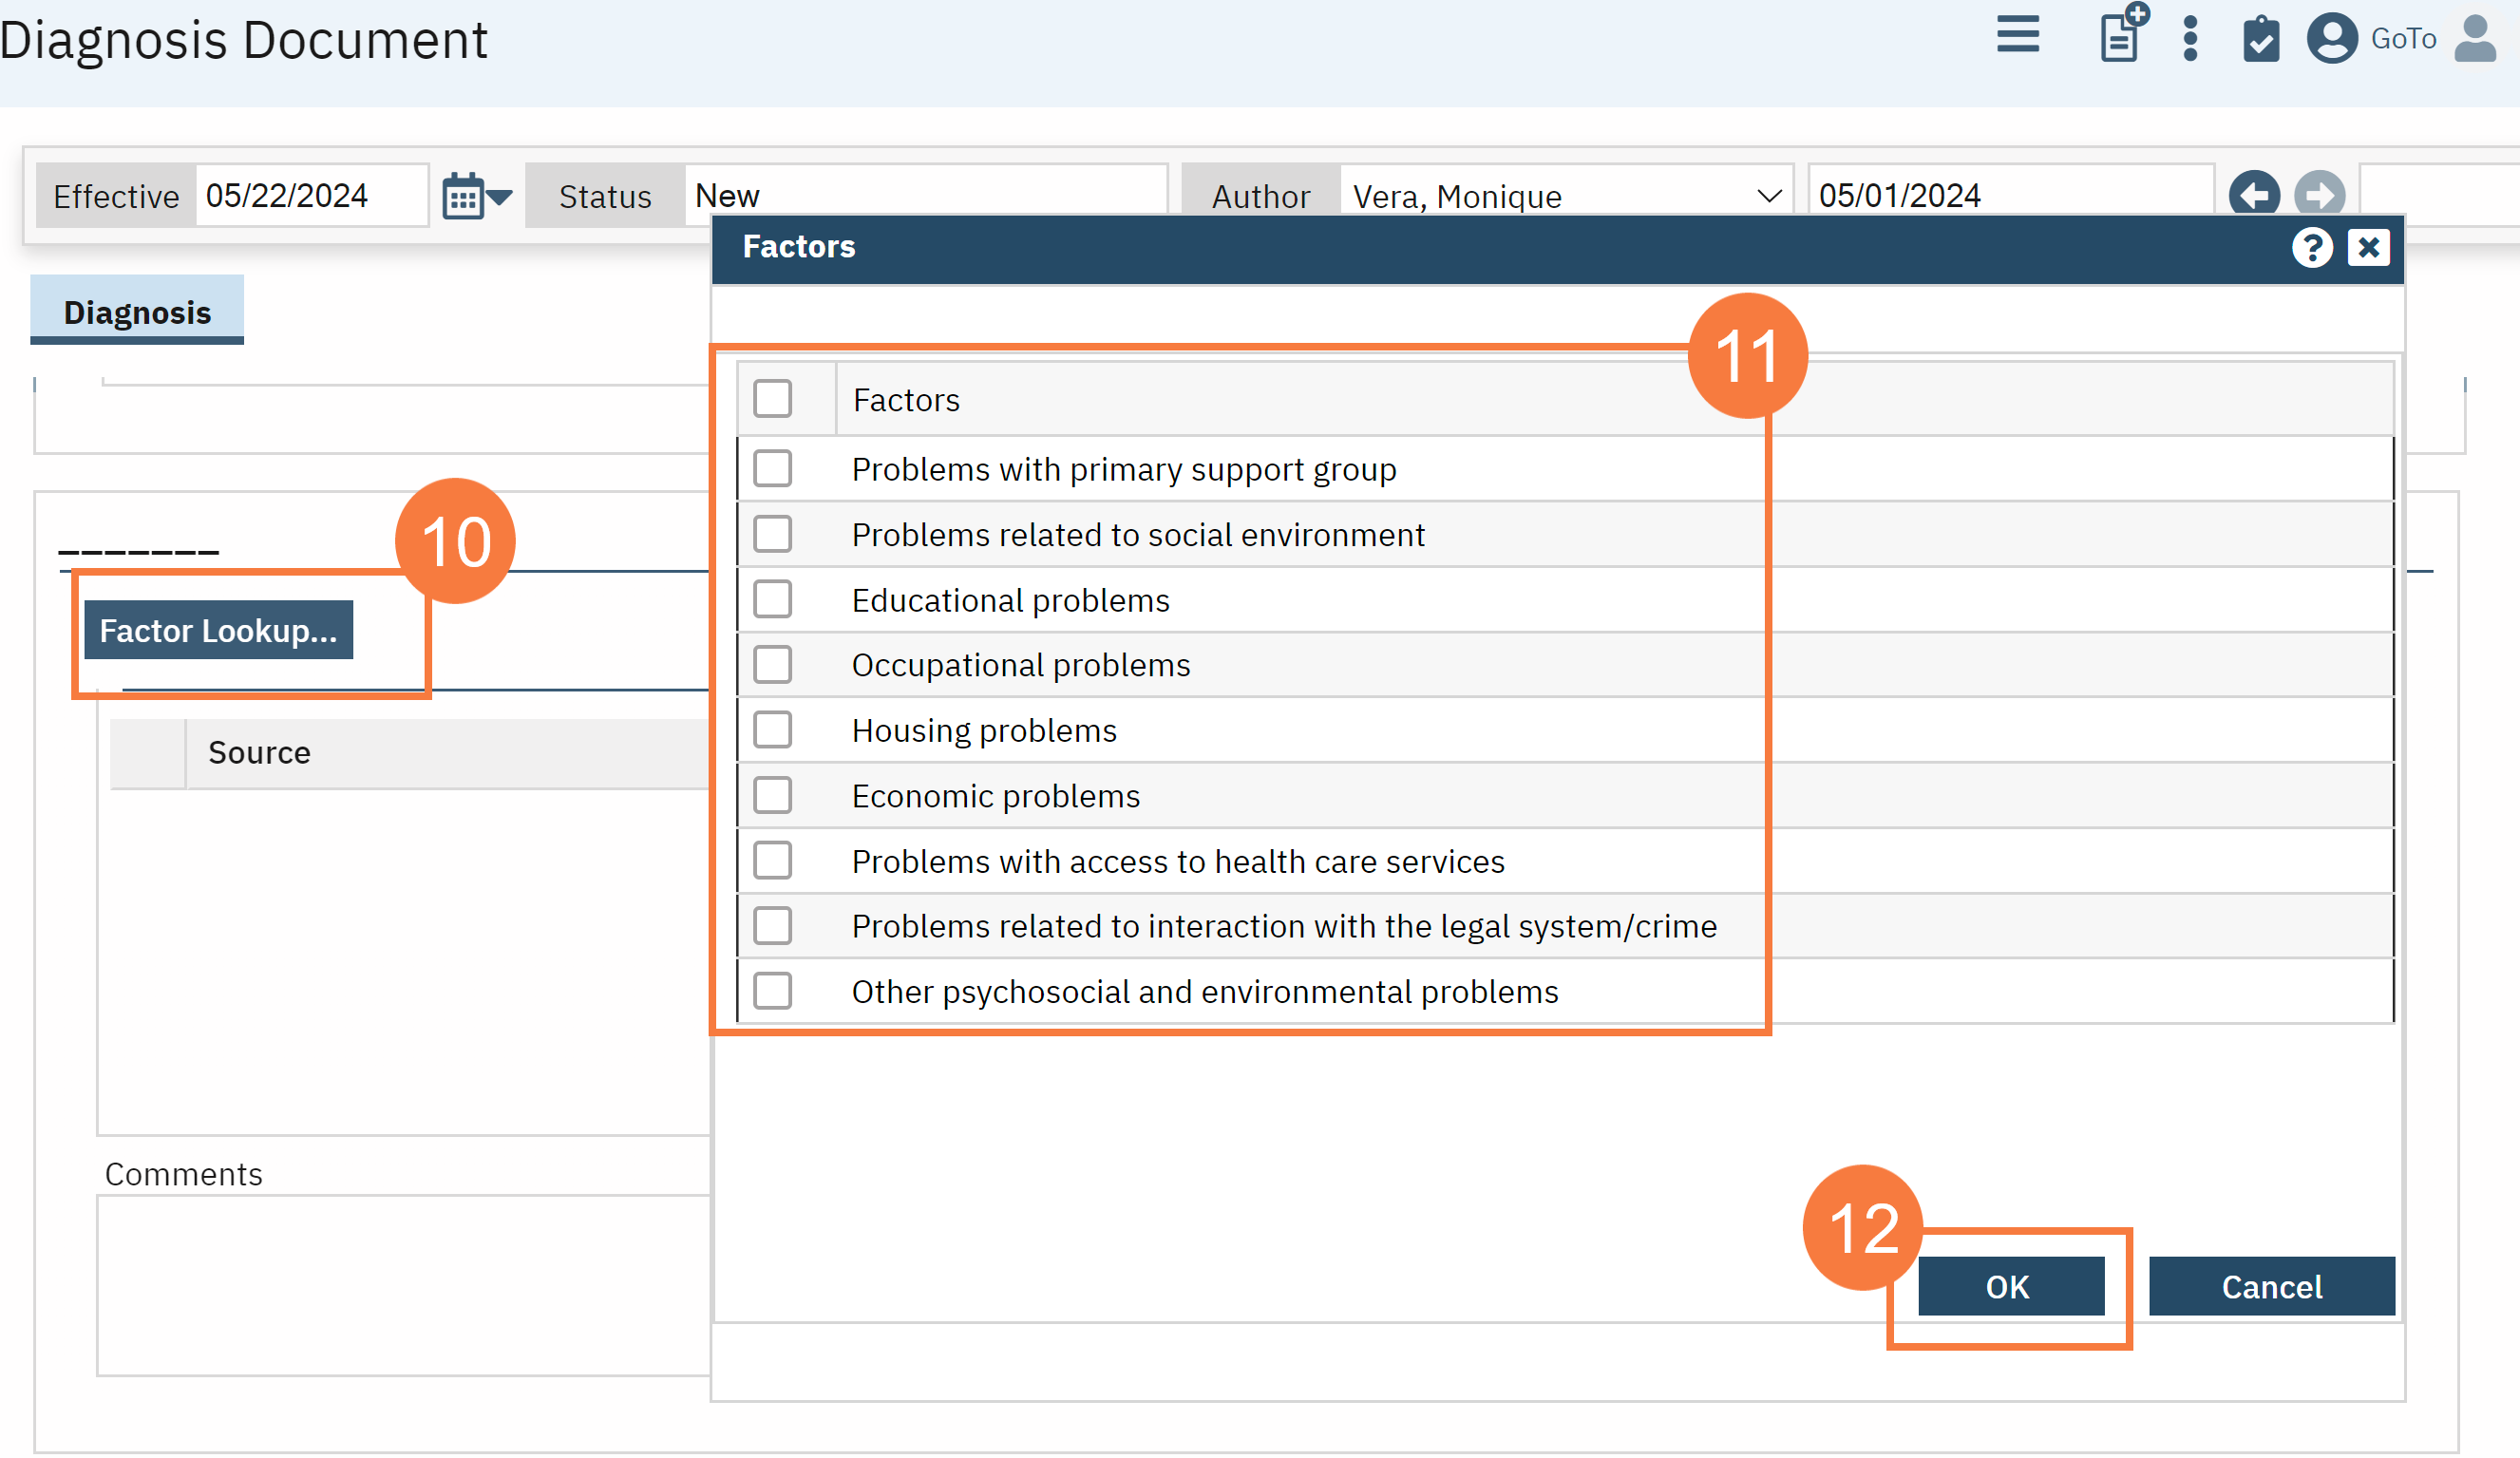
In the Psychosocial, Environmental, and Other Factors section, click the Factor Lookup button. A pop-up will appear.
Click to select any or all of the checkboxes that apply.
Click OK.
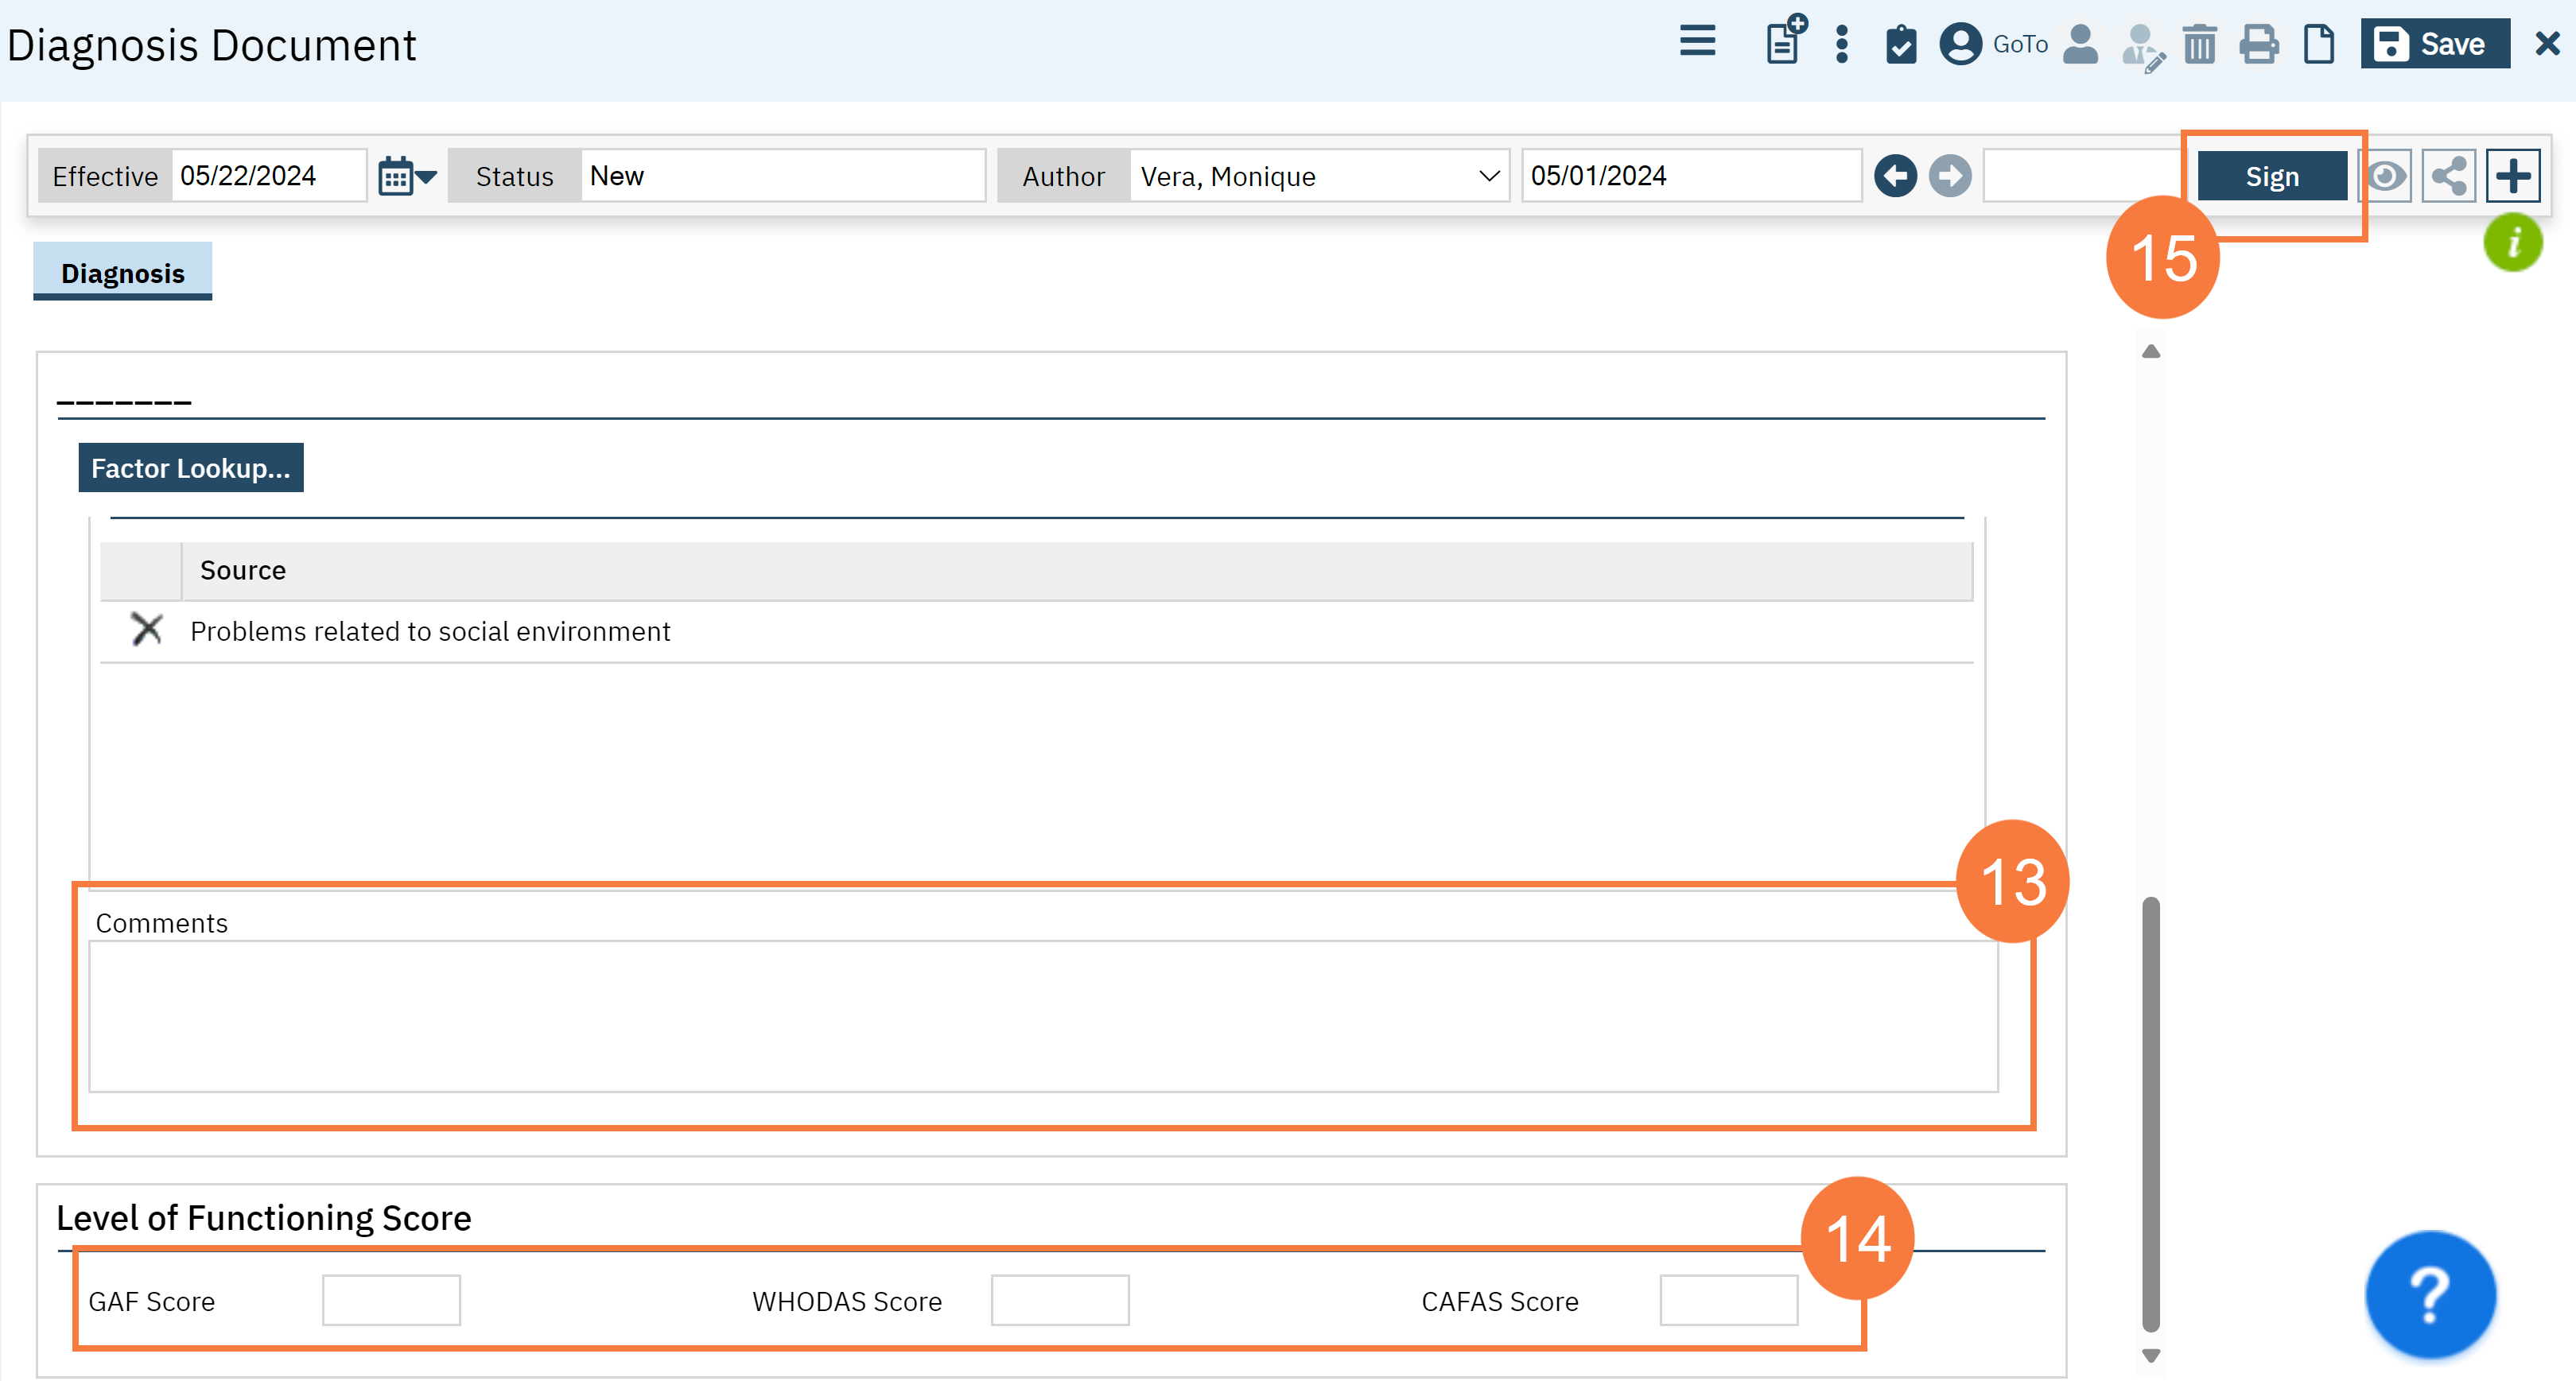
Enter Comments in the text field.
If applicable, enter GAF, WHODAS, or CAFAS scores.
Click Sign and complete signature of the document.