Once transportation is selected in the transportation drop down menu and the service is saved, the system creates a corresponding transportation entry. To access the list page, follow the steps below:
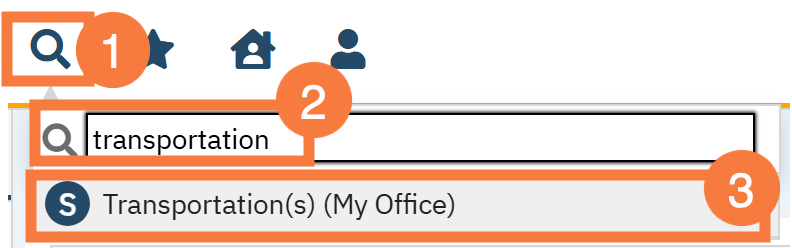
Click the Search icon.
Type Transportation into the search bar.
Click to select Transportation (My Office) from the search results.
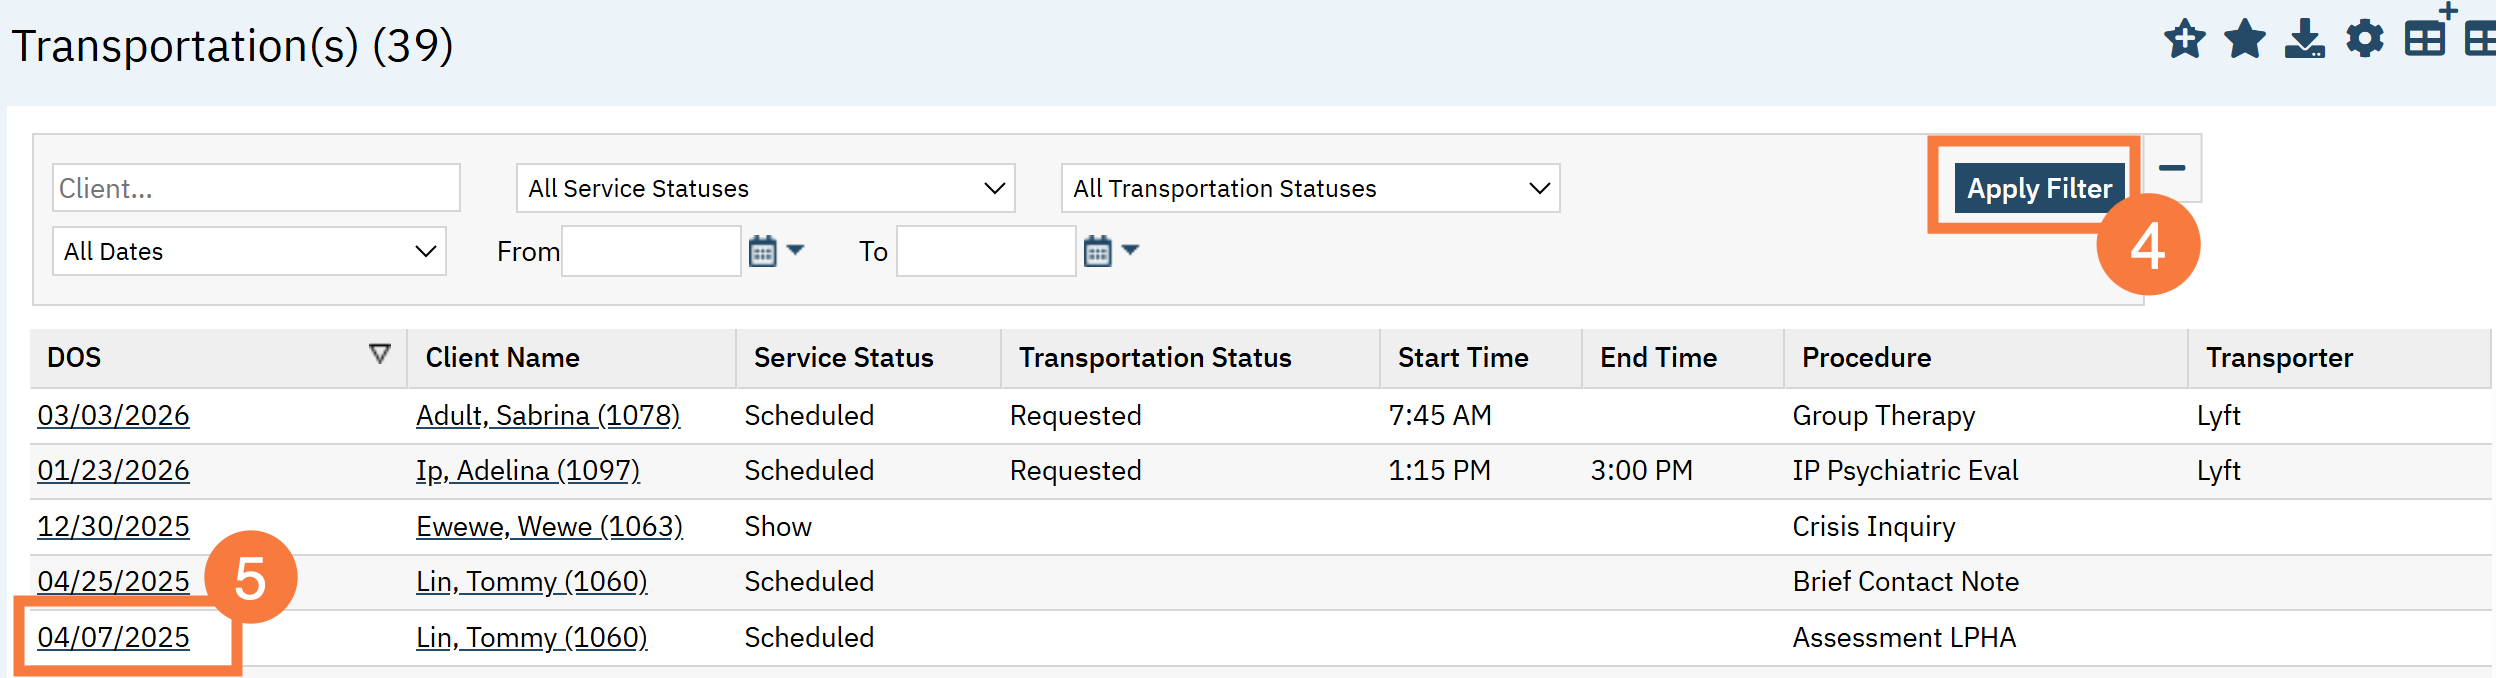
This will open the Transportation(s) (My Office) List Page. If needed you use the filters to narrow down the list page. Click Apply Filter.
Click the hyperlink for the Date of Service the transportation services need to be documented for.
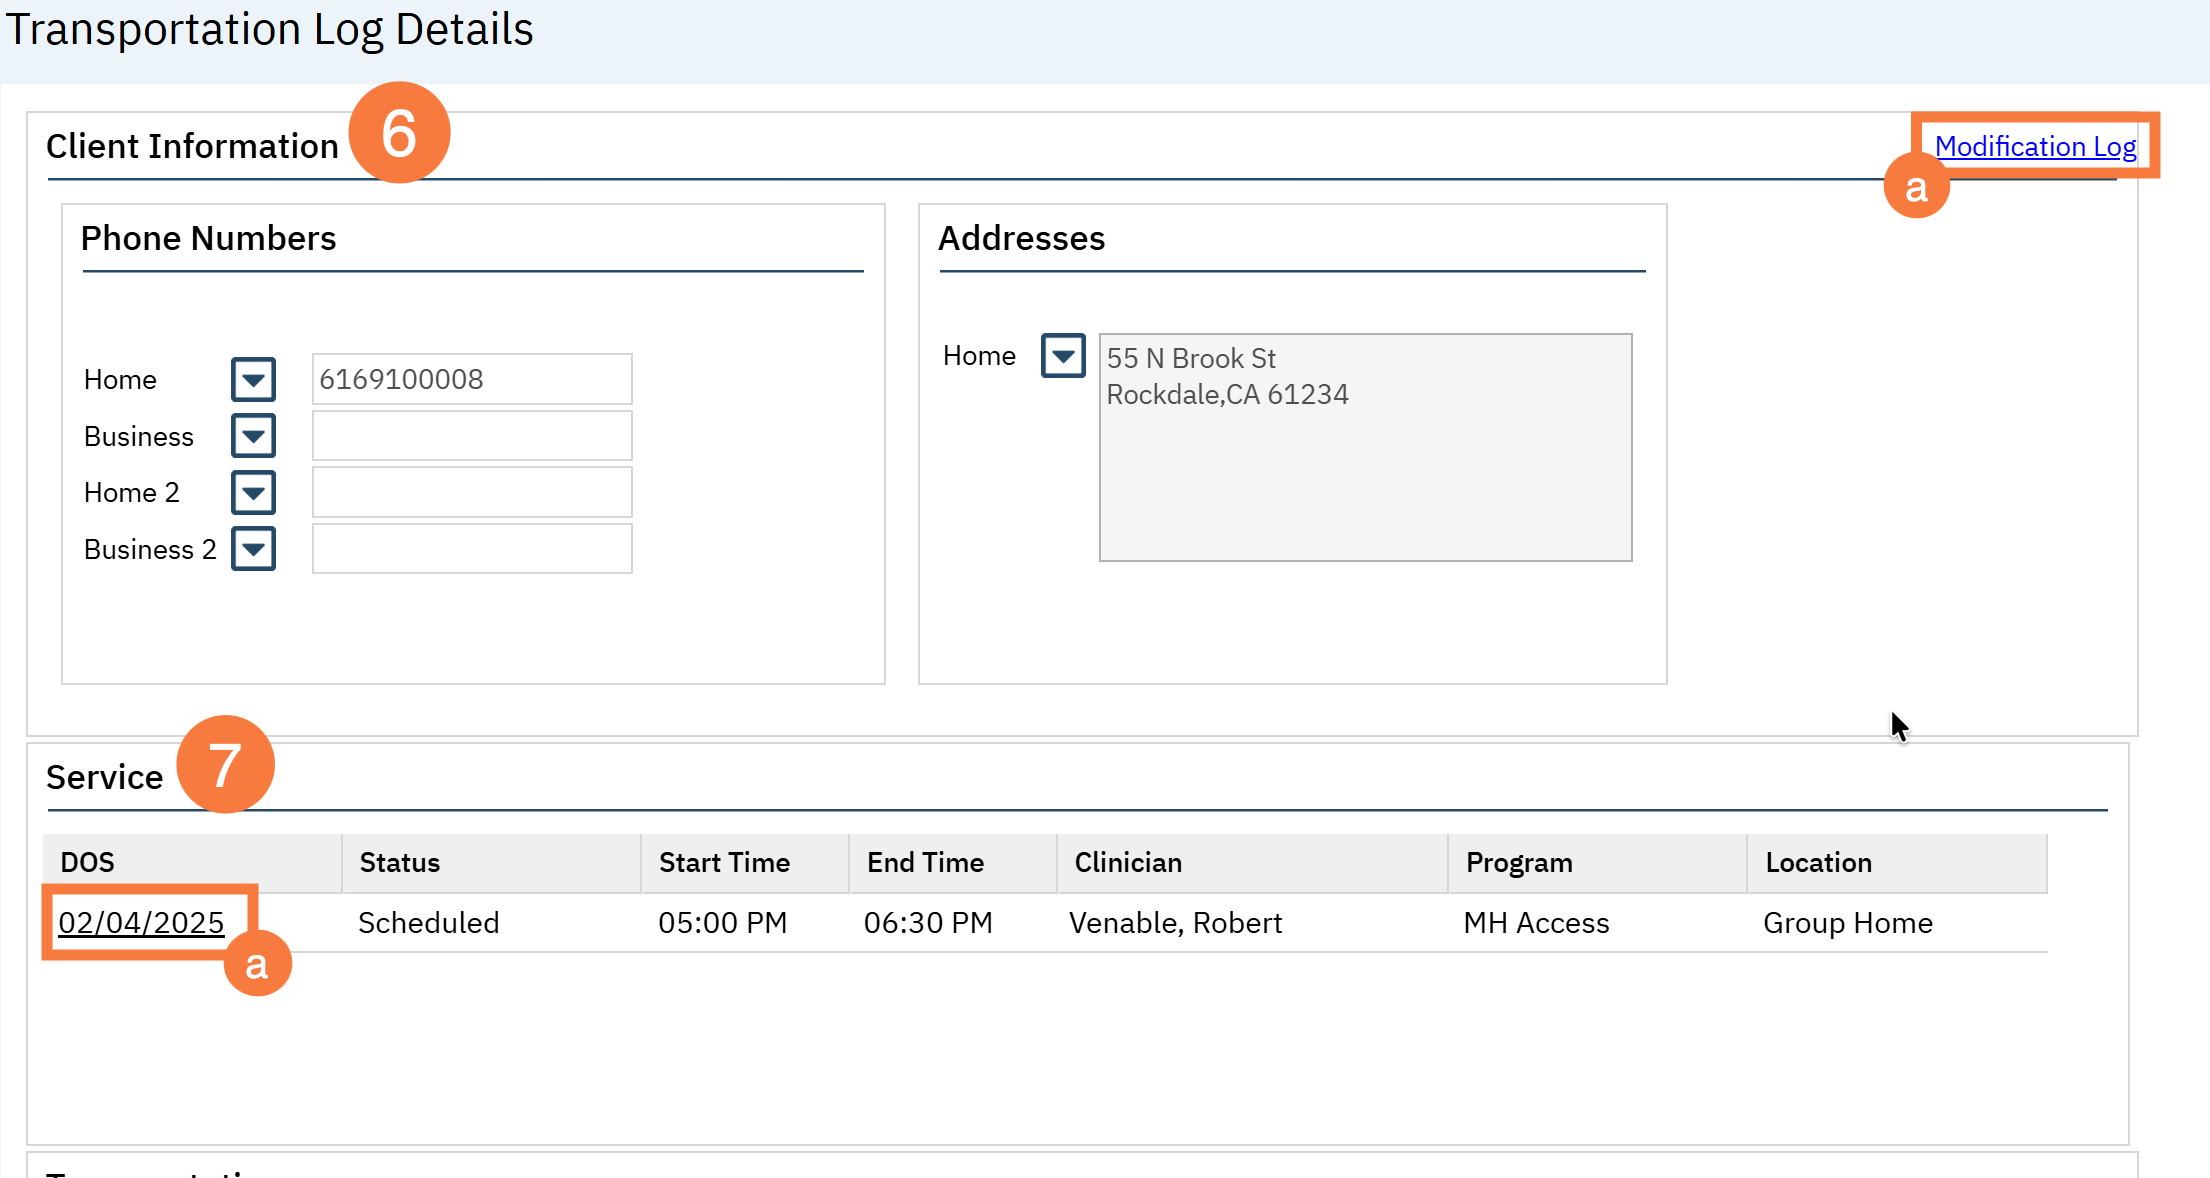
This will bring you to the Transportation Log Detail Screen. Confirm the Client Information section has the correct information.
To view the last time the transportation log has been updated, click the Modification Log hyperlink.
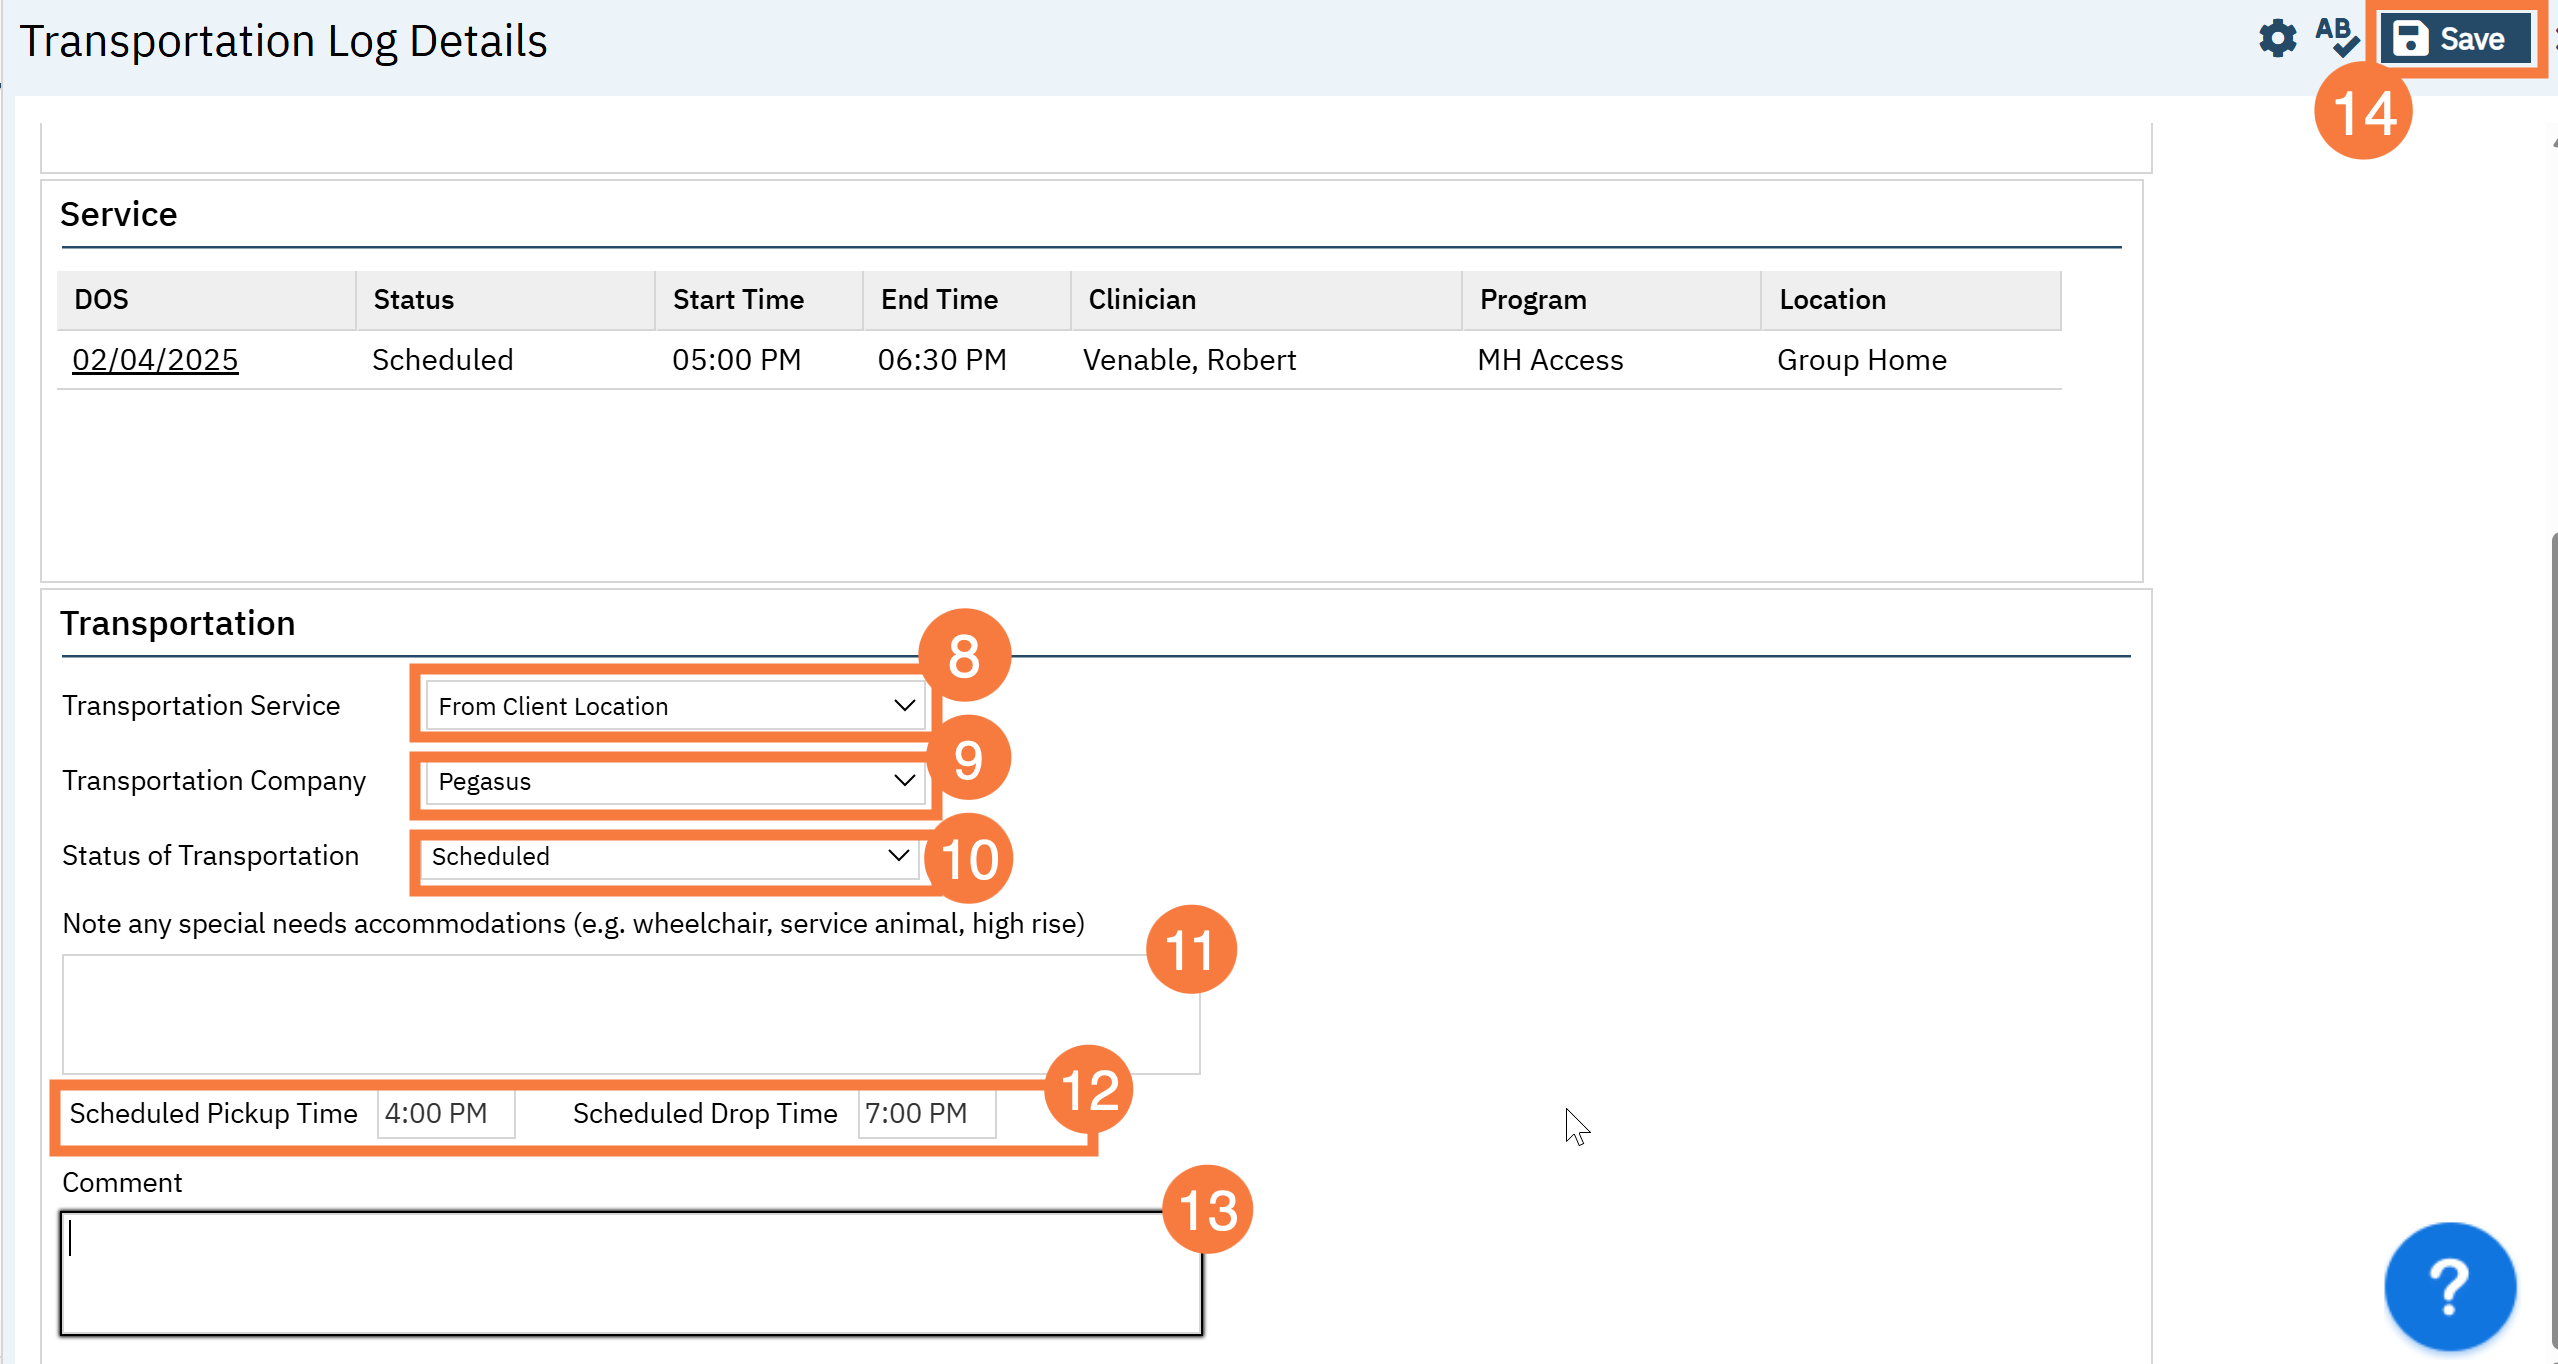
The Service section will show the Service this transportation is tied to.
Click the hyperlink to view the Service Details screen.
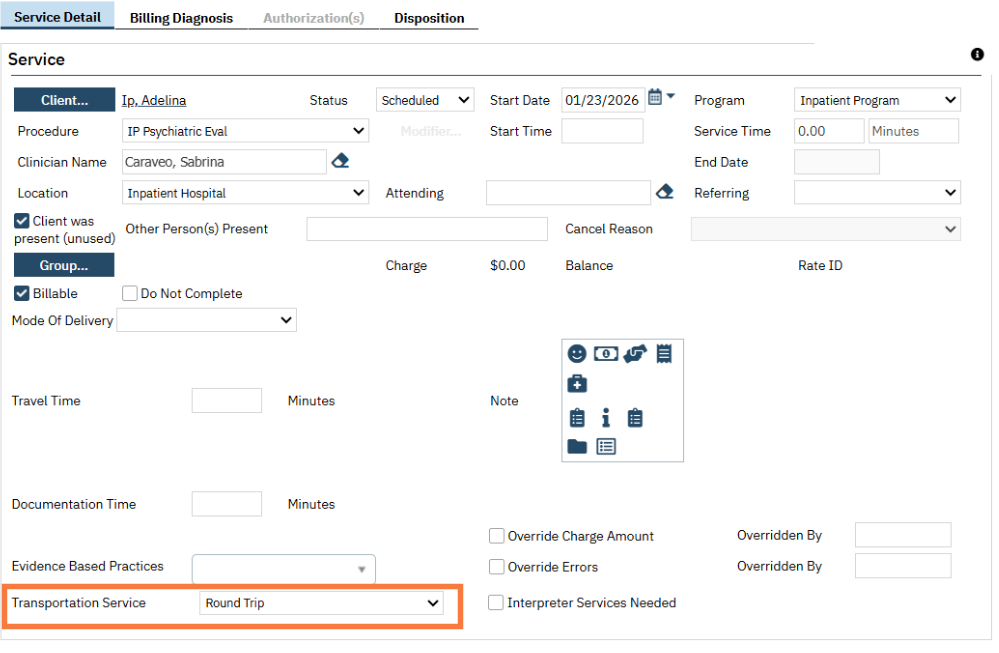
Click the Transportation Service drop-down menu and select the appropriate option. (e.g., One Way, Round Trip)
Click the Transportation Company drop-down menu and select the correct company.
Click the Transportation status drop-down menu and select the appropriate status. (e.g., Requested, Scheduled, Cancelled)
Enter any Special accommodation notes (e.g., wheelchair access)