Paper referrals, meaning referrals that are received via a form, fax, paper, etc. are documented on the Inquiry screen.
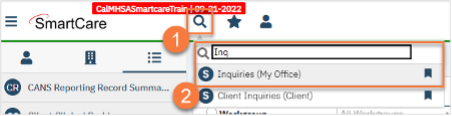
- Search for the Inquiry screen using the search icon.
- Select “Inquiries (My Office)”
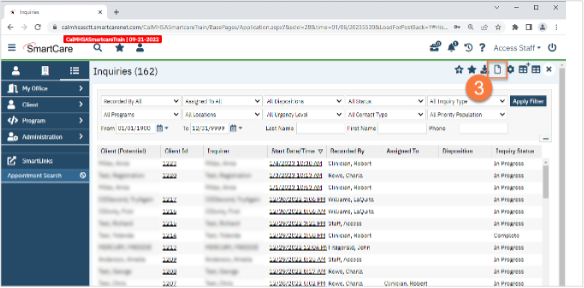
- This will bring you to the Inquiries list page. Create a new inquiry by using the new icon.
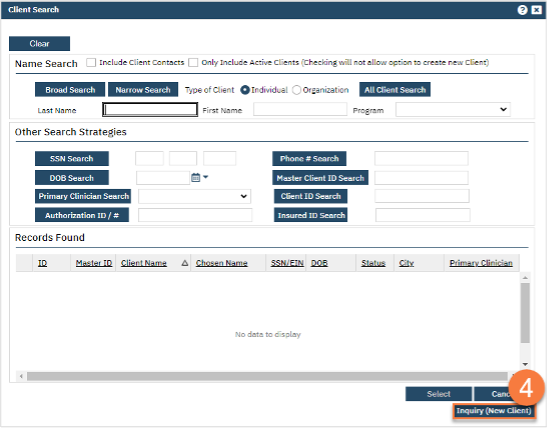
- This will bring up the client search window. You may search to determine if the person is a current client. If person is a new client, or you cannot find them in the system, click “Inquiry (New Client)”.
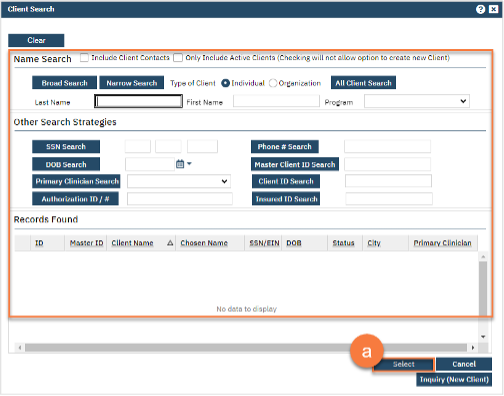
- To search for a client, enter their name and click “Broad Search.” You can also search by SSN by entering their social security number and clicking “SSN Search.” You can do the same with date of birth (DOB), phone number, etc. If you find the person in the system, meaning they show in the Records Found section, click “Select” to bring their information into the Inquiry screen.
- To search for a client, enter their name and click “Broad Search.” You can also search by SSN by entering their social security number and clicking “SSN Search.” You can do the same with date of birth (DOB), phone number, etc. If you find the person in the system, meaning they show in the Records Found section, click “Select” to bring their information into the Inquiry screen.
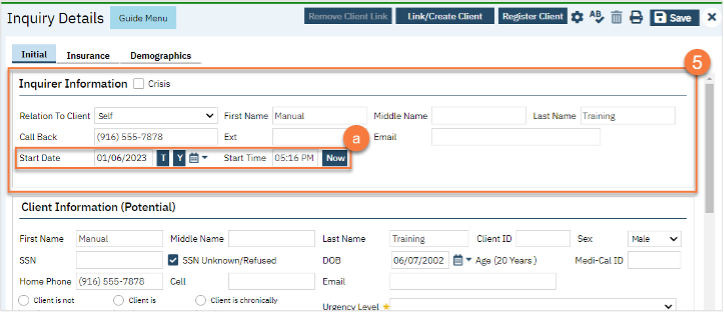
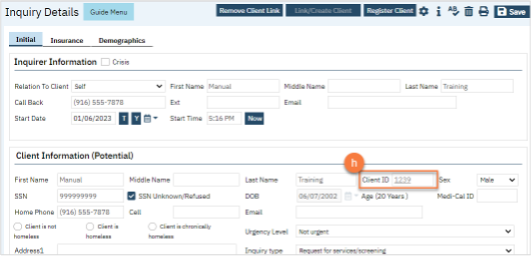
- This brings you to the Inquiry Details screen. Complete the information about the person requesting services, or “Inquirer”.
- If the client is requesting services for themselves, select “Self” under “Relation to Client.” This way, as you enter the caller’s information, it will push this information automatically into the “Client Information” section.
- Make sure to input the date and time you received the referral in Start Date and Start Time. There are buttons for “T” (today) and “Now” to help make this quick and easy.
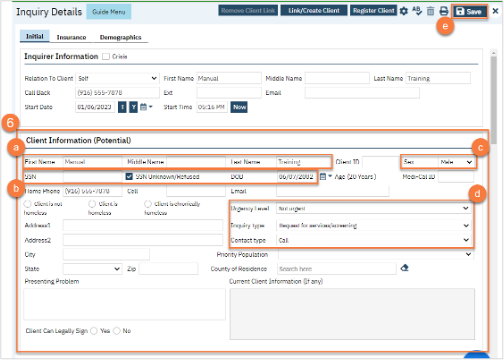
- Complete the information about the potential client.
- Complete the First Name and Last Name fields. Middle Name is not required but can be added as necessary.
- Complete the SSN and DOB fields. This is for the client’s social security number (SSN) and date of birth (DOB), respectively. If the client refuses to share, or doesn’t know, you can simply check the box “SSN Unknown/Refused.” Once saved, this will fill in the SSN with “999999999”, which is SmartCare’s version of “no SSN”.
- Complete the Sex field.
- Complete the Urgency Level, Inquiry type, and Contact type fields. The options for each field are listed in the tables below. This includes a description of when to use each option.
- Click Save.
| Urgency Level | Description/Use Case | Timelines |
| Emergent | Use if the referral is an emergency | Addressed immediately |
| Not Urgent | Use if the referral is a routine request for services | Appointment within 10 business days |
| Urgent | Use if the referral is an urgent request for services | Appointment within 72 hours |
| Inquiry Type | Description/Use Case |
| Requests for services/screening | Use when the referral is a request for new services |
| Crisis | Use when the referral is for crisis services |
| Information | Use when the referral is for information |
| Discharge/Transition Coordination | Use when the referral is for another provider to coordinate transition of care to/from your agency |
| Jail Diversion | Use when the referral is related to Jail Diversion programs |
| Consultation | Use when the referral is for an outside provider seeking a consultation |
| Other | Use when the referral is not addressed by any of the above |
| Contact Type | Description/Use Case |
| Call | Use when the inquiry was complete via telephone |
| Face to Face | Use when the inquiry was completed via in-person, such as a walk-in |
| Form | Use when the inquiry was completed via form, such as a referral that was sent to the county |
| Teleconference | Use when the inquiry was complete via teleconference, such as Zoom, FaceTime, Webex, or other video-audio conferencing software |
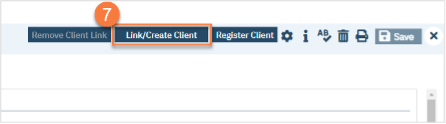
- Select the “Link/Create Client” button. This will bring up the client search window, with a few extra buttons at the bottom.
- You must search by name by clicking on either “Broad Search” or “Narrow Search”.
- You must also search by SSN and DOB by clicking on those respective buttons.
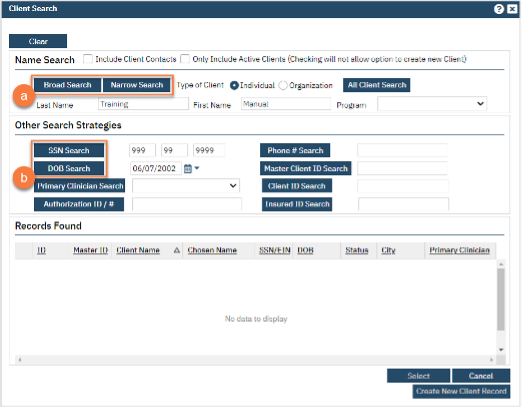
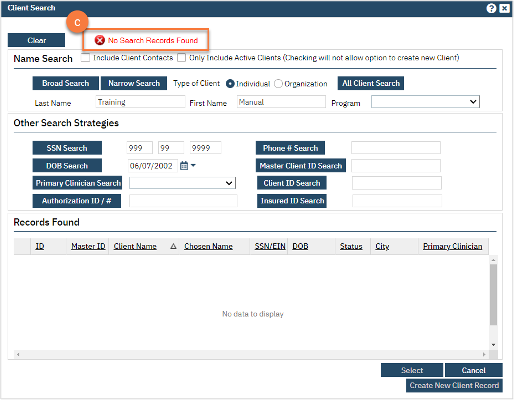
- If no records are found based on the search you do, an alert will show at the top of the window.
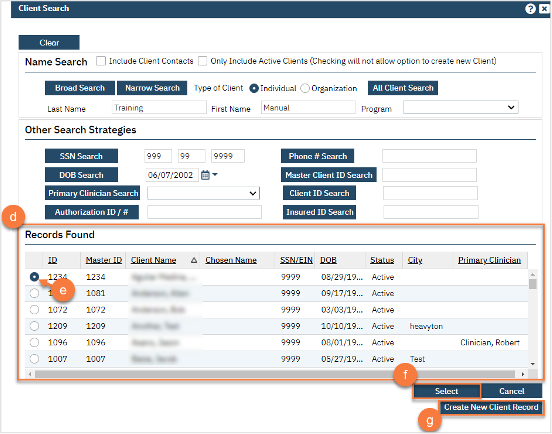
- Any search results will show in the “Records Found” area. Review the Records Found to determine if the person is already in the system as a client.
- If the person is already a client in the system, select the button next to the appropriate record.
- Click “Select” to link the Inquiry to the selected client.
- If the person is not a client, meaning no records were found matching the client’s information, click “Create New Client Record.”
- This will take you back to the Inquiry screen but now a client ID number will be added.
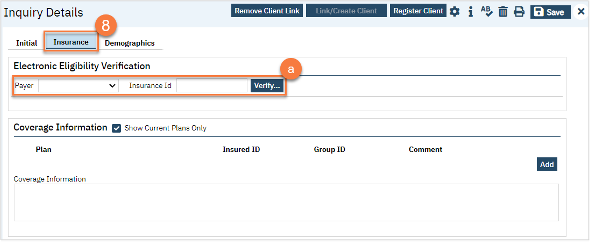
- Click on the “Insurance” tab.
- Select “Medi-Cal” from the “Payer” drop-down and enter the client’s Medi-Cal number (CIN) in the “Insurance ID” field. Click “Verify” to verify the client’s Medi-Cal insurance.
- Select “Medi-Cal” from the “Payer” drop-down and enter the client’s Medi-Cal number (CIN) in the “Insurance ID” field. Click “Verify” to verify the client’s Medi-Cal insurance.
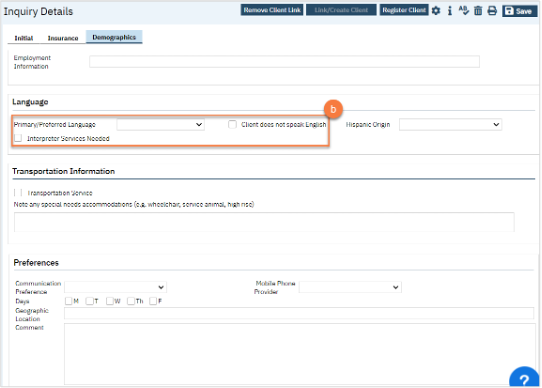
- Click on the “Demographics” tab.
- We recommend completing the “Gender Identity” and “Pronoun” fields to ensure the person is not misgendered as additional staff engage with the client.

- Complete the “Primary/Preferred Language” field. If the client does not speak English or requires an interpreter, make sure to check the appropriate checkbox.
- We recommend completing the “Gender Identity” and “Pronoun” fields to ensure the person is not misgendered as additional staff engage with the client.
- You may enter any additional information in any of the tabs, but none are required. Once complete, enter the end date and time of the Inquiry and change the status to “Complete”. Once again, there are “T” (today) and “Now” buttons to make this easier. Leave the status as “In Progress”.
- Click Save. You may now close the Inquiry. Your Access Team will likely have procedures to monitor the Inquiries list page to address any that are in progress. If your county does not have these procedures, we recommend that you notify the appropriate person per your county’s procedures.
